The oven broke on a Tuesday. Not the dramatic kind of break with smoke or sparks—just a sad little click when I turned the knob, and then nothing. I had a block of cream cheese softening on the counter, a can of pumpkin in the pantry, and a serious craving for something that tasted like fall. My family was coming over that weekend, and I had promised dessert. Classic me, overpromising and under-planning.
So I stood there, staring at the dead oven like it might suddenly feel bad for me and resurrect itself. It didn’t. And that’s how this Easy No-Bake Pumpkin Pie with Cream Cheese Layer was born—out of pure stubbornness and a refrigerator that happened to have a pre-made graham cracker crust hiding in the back. I honestly didn’t expect much. No-bake pumpkin pie? Without the warm, toasty smell filling the kitchen? It felt like a compromise.
But then I took a bite. Actually, I took three bites before I even put the spoon down. The cream cheese layer was tangy and smooth, the pumpkin layer was spiced just right, and the whole thing set up beautifully in the fridge without any fuss. It was better than any baked pumpkin pie I’d made in years. And honestly? It was easier. Sometimes the best recipes come from things not going according to plan.
Why You’ll Love This Recipe
Let’s be real—pumpkin pie is already pretty great. But this version? It’s a game-changer, and I say that as someone who has tested more pumpkin pie recipes than I care to count. Here’s why this one sticks.
- No Oven Required : Your oven can be broken, occupied with a casserole, or just too hot to turn on. This pie doesn’t care. It sets up perfectly in the fridge.
- Two Layers, Maximum Flavor : The tangy cream cheese layer cuts through the sweet, spiced pumpkin in a way that feels fancy but takes almost zero extra effort.
- Make-Ahead Dream : You can whip this up the day before and forget about it. It actually tastes better after chilling overnight.
- Crowd-Pleaser Guaranteed : I’ve brought this to Friendsgiving, potlucks, and casual dinners. Every single time, someone asks for the recipe.
- Stress-Free Holiday Dessert : Thanksgiving is chaotic enough. This pie lets you actually enjoy the meal instead of hovering by the oven.
This isn’t just another pumpkin pie recipe. The cream cheese layer gives it a richness that feels indulgent, while the no-bake method keeps things light and creamy instead of dense. It’s the kind of dessert that makes people close their eyes after the first bite and go quiet for a second. You know the one.
What Ingredients You Will Need
This recipe relies on simple, pantry-friendly ingredients that come together to create something surprisingly elegant. No fancy extracts or hard-to-find spices here—just honest, good-quality staples.
For the Cream Cheese Layer:
- 8 oz cream cheese, softened to room temperature (I recommend Philadelphia for the smoothest texture—trust me on this one)
- 1/4 cup granulated sugar
- 1 teaspoon vanilla extract (use pure vanilla if you have it, but imitation works fine too)
- 1/2 cup heavy whipping cream, cold
For the Pumpkin Layer:
- 1 can (15 oz) pure pumpkin purée (not pumpkin pie filling—make sure you grab the plain stuff)
- 3/4 cup packed light brown sugar
- 1 teaspoon ground cinnamon
- 1/2 teaspoon ground ginger
- 1/4 teaspoon ground nutmeg (freshly grated if you’re feeling fancy)
- 1/4 teaspoon ground cloves
- 1/4 teaspoon salt
- 1 cup heavy whipping cream, cold
- 1 teaspoon vanilla extract
For the Crust:
- 1 pre-made graham cracker crust (9-inch) OR 1 1/2 cups graham cracker crumbs mixed with 1/3 cup melted butter and 2 tablespoons sugar (if you want to make your own)
A quick note on the cream cheese: let it sit out for at least 30 minutes before you start. Cold cream cheese makes lumpy filling, and nobody wants that. Same goes for the heavy cream—keep it cold until you’re ready to whip it. Temperature matters more than you’d think with no-bake desserts.
If you’re looking for a lighter option, you can swap the heavy cream in the pumpkin layer for full-fat coconut cream. The texture will be slightly different, but it works surprisingly well. I’ve done it when I ran out of heavy cream mid-recipe (classic move), and it turned out great.
Equipment Needed
This is one of those rare recipes that doesn’t require much. Here’s what you’ll need:
- Electric hand mixer or stand mixer — You could technically whisk by hand, but your arm will hate you. Use the mixer.
- Two medium mixing bowls — One for each layer.
- Rubber spatula — For scraping every last bit of cream cheese goodness.
- Measuring cups and spoons — Precision helps, especially with the spices.
- 9-inch pie dish — If you’re using a pre-made crust, you’re already set. If making your own crust, a standard pie dish works perfectly.
- Plastic wrap — For covering the pie while it chills.
I’ve made this pie with a $15 hand mixer from the grocery store and it turned out just as good as when I use my fancy KitchenAid. Don’t overthink the equipment. If you have a bowl and something to mix with, you’re golden.
Preparation Method
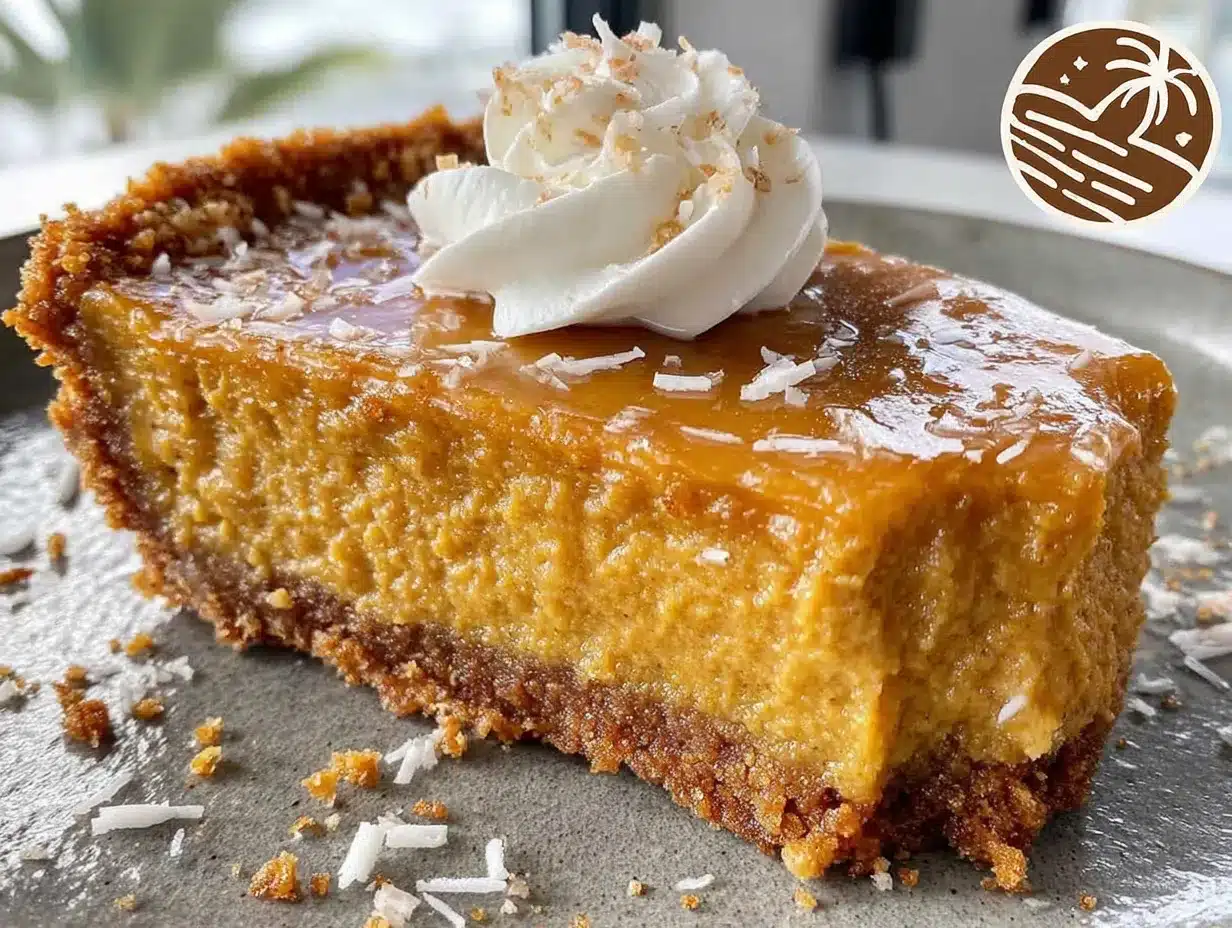
Let’s get into it. This is straightforward, but I’ll walk you through every step so you don’t end up with a soupy mess (speaking from experience).
-
Make the cream cheese layer. In a medium bowl, beat the softened cream cheese with an electric mixer until it’s smooth and fluffy—about 2 minutes. Add the granulated sugar and vanilla extract, then beat for another minute until everything is well combined. In a separate small bowl, whip the cold heavy cream until stiff peaks form (about 3-4 minutes with a hand mixer). Gently fold the whipped cream into the cream cheese mixture using a rubber spatula. Be gentle here—you want it light and airy, not deflated.
-
Spread the cream cheese layer. Spoon the cream cheese mixture into your graham cracker crust and spread it evenly. Pop it in the fridge while you make the pumpkin layer. This gives it a head start on setting.
-
Make the pumpkin layer. In a clean medium bowl, whisk together the pumpkin purée, brown sugar, cinnamon, ginger, nutmeg, cloves, and salt until smooth. Set aside. In another bowl, whip the heavy cream and vanilla extract until soft peaks form—about 3 minutes. You don’t want it too stiff here, just fluffy and billowy.
-
Combine the pumpkin mixture. Fold the whipped cream into the pumpkin-spice mixture. Stir gently until no white streaks remain. The color should be uniform—a beautiful warm orange-brown.
-
Layer it on top. Take the crust with the cream cheese layer out of the fridge. Spoon the pumpkin mixture over the cream cheese layer and spread it evenly. Don’t worry if it mixes slightly at the edges—that’s part of the charm.
-
Chill. Cover the pie loosely with plastic wrap and refrigerate for at least 6 hours, but overnight is best. I know it’s hard to wait, but the texture really needs that time to set properly.
-
Serve. Slice, serve cold, and watch people go quiet after the first bite. Top with whipped cream and a sprinkle of cinnamon if you’re feeling extra.
A few things I’ve learned the hard way: Don’t rush the chilling time. I once tried to serve this after only 3 hours and it was more like pumpkin soup than pie. Also, make sure your cream cheese is truly softened—microwaving it for 10 seconds is fine, but don’t melt it. Melted cream cheese won’t whip properly and your layer will be dense.
Cooking Tips & Techniques
I’ve made this Easy No-Bake Pumpkin Pie with Cream Cheese Layer about a dozen times now, and I’ve picked up a few tricks along the way. Here’s what I wish someone had told me.
Whip the cream separately. I know it’s an extra bowl, but whipping the cream separately and folding it in gives you a much lighter texture than just mixing everything together. The first time I made this, I just dumped everything in one bowl and it came out dense and heavy. Learn from my mistakes.
Use cold cream for whipping. Pop your bowl and beaters in the fridge for 10 minutes before you start. Cold cream whips faster and holds its shape better. This is one of those small things that makes a big difference.
Taste as you go. Before you add the pumpkin mixture to the crust, taste it. Adjust the spices if needed. I tend to go heavy on the ginger because I love the warmth it adds, but you do you.
Don’t overmix the pumpkin layer. Once you fold in the whipped cream, stop as soon as it’s combined. Overmixing will deflate all that air you just whipped in, and your pie will be flat instead of fluffy.
Let it set overnight. I know I said this already, but it’s worth repeating. The texture is noticeably better after a full night in the fridge. The flavors meld together, the layers firm up, and everything just tastes more cohesive.
I once forgot to add the sugar to the cream cheese layer. Caught it before I put it in the crust, but barely. Always double-check your ingredients before you start mixing—it’s easy to get distracted when you’re multitasking.
Variations & Adaptations
One of the best things about this recipe is how flexible it is. Here are some variations I’ve tried and loved.
Gluten-Free Version: Simply use a gluten-free graham cracker crust or make your own with gluten-free cookies. Everything else in the recipe is naturally gluten-free.
Dairy-Free Adaptation: Swap the cream cheese for a high-quality dairy-free version (I like Kite Hill or Miyoko’s) and use coconut cream instead of heavy cream. The texture will be slightly different, but still delicious.
Pumpkin Spice Latte Twist: Add 1 teaspoon of instant espresso powder to the pumpkin layer for a subtle coffee kick. It pairs beautifully with the spices and makes this feel extra cozy.
Chocolate Crust Version: Swap the graham cracker crust for a chocolate cookie crust (Oreo or chocolate wafer cookies work great). The chocolate and pumpkin combination is surprisingly good.
Mini Pie Version: Make individual servings in small jars or ramekins. Layer the cream cheese mixture and pumpkin mixture in each one, then chill. Perfect for parties or portion control.
I tried a version with a sourdough pumpkin spice pop tarts inspired crust once—it was a little unconventional but honestly, the tangy flavor worked beautifully with the sweet filling. Sometimes the best variations come from just experimenting.
Serving & Storage Suggestions
This pie is meant to be served cold, straight from the fridge. The texture is at its best when it’s firm but still creamy—like a cheesecake but lighter.
Serving: Slice with a sharp knife dipped in hot water (wipe it dry between cuts) for clean, beautiful slices. Top with a dollop of whipped cream, a drizzle of caramel sauce, or a sprinkle of cinnamon. A few candied pecans on top add a lovely crunch.
Pairing: This pie pairs beautifully with a warm cup of coffee or a cozy pumpkin spice cold brew. If you’re serving it after a meal, it goes great with a light, crisp white wine or even a dessert wine like Moscato.
Storage: Cover the pie tightly with plastic wrap or transfer slices to an airtight container. It will keep in the refrigerator for up to 4 days. The flavors actually deepen after the first day, so leftovers are never a bad thing.
Freezing: You can freeze this pie for up to 2 months. Wrap it tightly in plastic wrap and then foil. Thaw overnight in the refrigerator before serving. The texture will be slightly softer after freezing, but it’s still delicious.
One thing I’ve noticed: the cream cheese layer firms up more as it sits, so if you’re serving it on day two or three, the layers will be more distinct. That’s actually a good thing in my book.
Nutritional Information & Benefits
Here’s an approximate nutritional breakdown per slice (based on 8 servings):
- Calories: 380
- Fat: 26g
- Carbohydrates: 34g
- Protein: 5g
- Fiber: 2g
- Sugar: 24g
Pumpkin is packed with vitamin A, fiber, and antioxidants, so this pie isn’t just delicious—it’s also got some nutritional perks. The cream cheese adds calcium and protein, while the heavy cream gives you a good dose of healthy fats that help keep you full.
If you’re watching your sugar intake, you can reduce the brown sugar in the pumpkin layer to 1/2 cup without sacrificing too much sweetness. The pie will be slightly less sweet but still plenty flavorful.
For a lower-calorie option, use reduced-fat cream cheese and swap half the heavy cream for Greek yogurt. The texture will be a bit tangier, but it’s still really good.
This recipe is naturally vegetarian and can be made gluten-free and dairy-free with the substitutions I mentioned earlier. It does contain dairy and gluten in its standard form, so keep that in mind for guests with allergies.
Conclusion
This Easy No-Bake Pumpkin Pie with Cream Cheese Layer has become my go-to fall dessert for a reason. It’s forgiving, it’s delicious, and it doesn’t require any oven time—which, let’s be honest, is a huge win during the busy holiday season. Whether you’re dealing with a broken oven like I was, or you just want a dessert that doesn’t add stress to your day, this pie delivers.
I love how the tangy cream cheese layer balances the sweet, spiced pumpkin. I love that I can make it the night before and forget about it. And I really love watching people’s faces when they take that first bite and realize it’s no-bake. It always gets the same reaction: “Wait, really?”
So go ahead and give it a try. Customize it however you like—add extra ginger, swap the crust, make it dairy-free. The recipe is sturdy enough to handle your twists. And when you make it, I’d love to hear how it turned out. Drop a comment below, share your adaptations, or just tell me if your oven broke too. Misery loves company, after all.
Frequently Asked Questions
Can I use homemade pumpkin purée instead of canned?
Absolutely! Just make sure you strain it well. Homemade pumpkin purée tends to be more watery than canned, so let it sit in a fine-mesh strainer for about 30 minutes before using. Otherwise, your pie might end up too soft.
How long does this pie need to chill?
At least 6 hours, but overnight is best. The longer it chills, the cleaner your slices will be. I’ve made the mistake of rushing it, and let me tell you, a slice that won’t hold its shape is sad.
Can I use light cream cheese?
You can, but the texture won’t be as rich and creamy. The filling might also be slightly softer. If you’re watching calories, go for it—just know the results won’t be exactly the same.
Why did my cream cheese layer turn out lumpy?
Your cream cheese was probably too cold. Make sure it’s fully softened to room temperature before you start mixing. If you’re in a hurry, cut it into small cubes and let it sit for 15 minutes.
Can I make this pie ahead of time for Thanksgiving?
Yes, and I actually recommend it. Make it 1-2 days ahead and keep it covered in the fridge. The flavors meld together beautifully, and it’s one less thing to worry about on the big day.
Pin This Recipe!
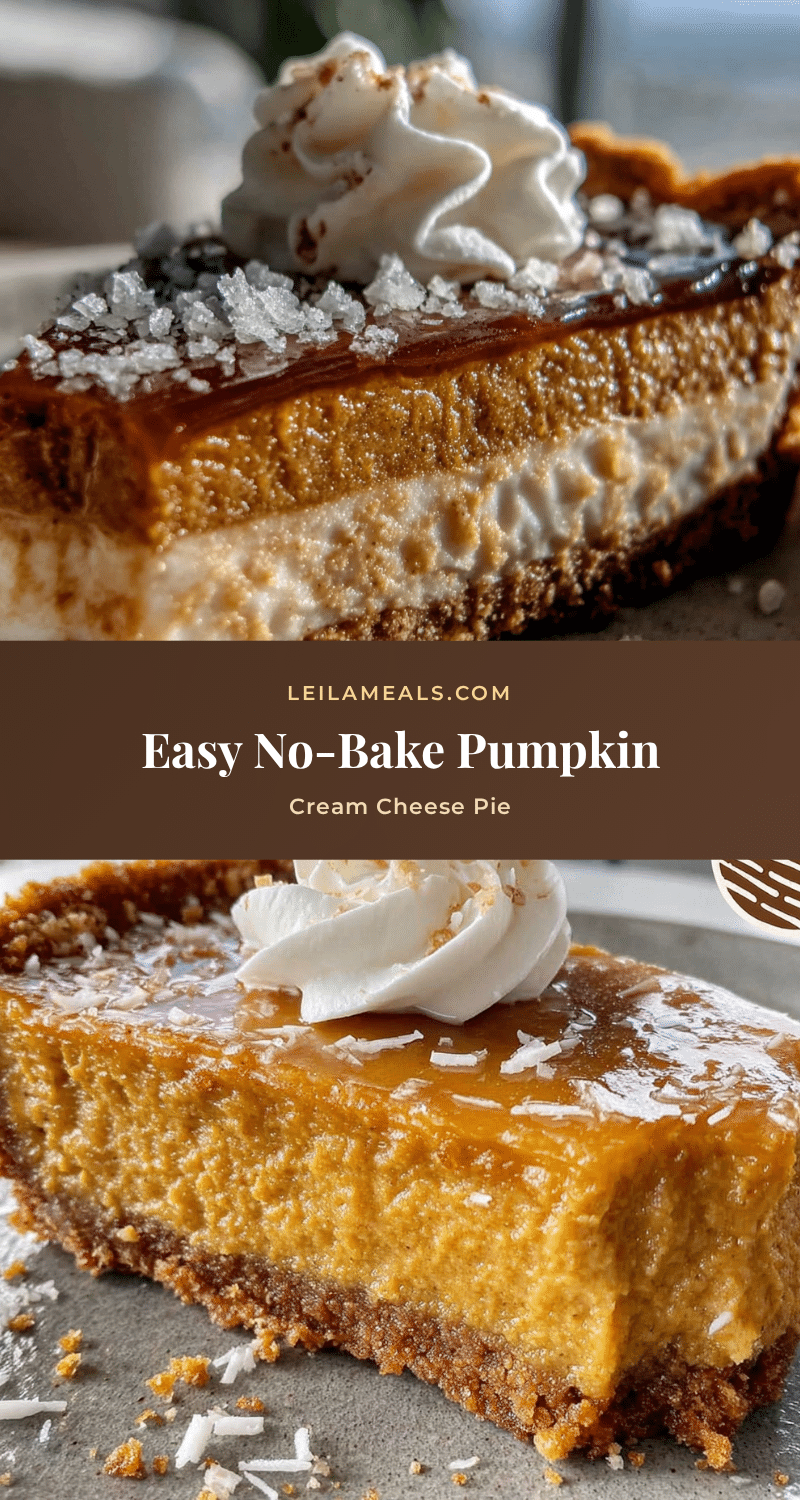
Easy No-Bake Pumpkin Pie with Cream Cheese Layer

A creamy, no-bake pumpkin pie with a tangy cream cheese layer that sets perfectly in the fridge. Made with simple ingredients, this stress-free dessert is perfect for holidays or any fall gathering.
- Prep Time: 20 minutes
- Cook Time: 0 minutes
- Total Time: 6 hours 20 minutes (includes chilling time)
- Yield: 8 servings 1x
- Category: Dessert
- Cuisine: American
Ingredients
- 8 oz cream cheese, softened to room temperature
- 1/4 cup granulated sugar
- 1 teaspoon vanilla extract
- 1/2 cup heavy whipping cream, cold
- 1 can (15 oz) pure pumpkin purée
- 3/4 cup packed light brown sugar
- 1 teaspoon ground cinnamon
- 1/2 teaspoon ground ginger
- 1/4 teaspoon ground nutmeg
- 1/4 teaspoon ground cloves
- 1/4 teaspoon salt
- 1 cup heavy whipping cream, cold
- 1 teaspoon vanilla extract
- 1 pre-made graham cracker crust (9-inch)
Instructions
- Make the cream cheese layer: In a medium bowl, beat the softened cream cheese with an electric mixer until smooth and fluffy, about 2 minutes. Add the granulated sugar and vanilla extract, then beat for another minute until well combined. In a separate small bowl, whip the cold heavy cream until stiff peaks form, about 3-4 minutes. Gently fold the whipped cream into the cream cheese mixture using a rubber spatula.
- Spread the cream cheese layer: Spoon the cream cheese mixture into the graham cracker crust and spread evenly. Refrigerate while making the pumpkin layer.
- Make the pumpkin layer: In a clean medium bowl, whisk together the pumpkin purée, brown sugar, cinnamon, ginger, nutmeg, cloves, and salt until smooth. Set aside. In another bowl, whip the heavy cream and vanilla extract until soft peaks form, about 3 minutes.
- Combine the pumpkin mixture: Fold the whipped cream into the pumpkin-spice mixture until no white streaks remain and the color is uniform.
- Layer it on top: Remove the crust with the cream cheese layer from the fridge. Spoon the pumpkin mixture over the cream cheese layer and spread evenly.
- Chill: Cover the pie loosely with plastic wrap and refrigerate for at least 6 hours, but overnight is best.
- Serve: Slice, serve cold, and top with whipped cream and a sprinkle of cinnamon if desired.
Notes
Make sure cream cheese is fully softened to room temperature to avoid lumps. Chill the pie overnight for best texture and flavor. For a gluten-free version, use a gluten-free graham cracker crust. For a dairy-free version, use dairy-free cream cheese and coconut cream.
Nutrition
- Serving Size: 1 slice
- Calories: 380
- Sugar: 24
- Fat: 26
- Carbohydrates: 34
- Fiber: 2
- Protein: 5
Keywords: no-bake pumpkin pie, cream cheese pumpkin pie, easy pumpkin pie, no-bake dessert, fall dessert, Thanksgiving pie