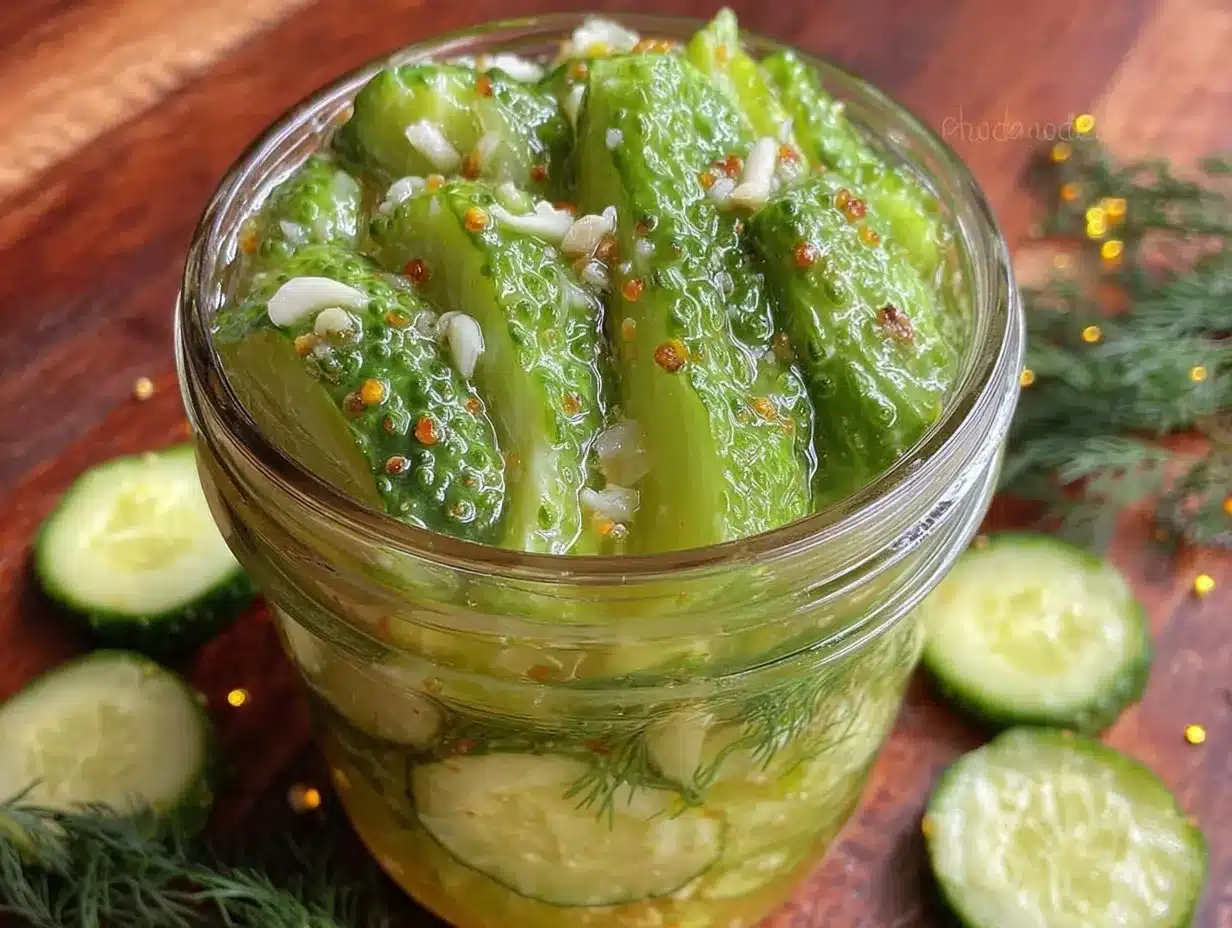
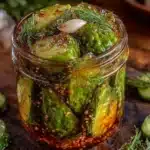
Crunchy, puckered, and glistening with just the right amount of brine, and that’s the whole point. The snap of a perfectly pickled cucumber is what I made these Easy Crunchy Refrigerator Dill Pickles with Garlic for — everything else is secondary. You know that satisfying bite when you sink your teeth into a pickle that’s firm yet juicy? That tension between crispness and a little give is oddly mesmerizing. I remember one afternoon, fiddling with a jar in the fridge, nudging it just so to let the flavors marry, all the while itching to hear the unmistakable crack when I bit in. Honestly, the texture here is the kind that keeps you coming back, long before the garlic and dill hit your palate.
These pickles don’t rely on fancy canning or hours of fuss; they’re about the immediate, tactile joy you get from a quick soak and a few days’ chill. The garlic cloves nestled inside add a rustic punch without overwhelming the bright, fresh snap of the cucumbers. Plus, the dill sprigs — fresh and fragrant — weave their way through each slice, making every crunch a little herbal celebration.
Making this recipe felt like rediscovering a simple pleasure. It sticks with you because it’s approachable, honest, and deeply textured — like the kind of snack you’d reach for when you want something real, crunchy, and just a little tangy. It’s not about being fancy; it’s about that perfect bite that makes you pause and appreciate the simple craftsmanship of homemade pickles. And that’s why these refrigerator dill pickles have a permanent spot in my fridge (and heart).
Why You’ll Love This Recipe
This Easy Crunchy Refrigerator Dill Pickles with Garlic recipe has been tested and tweaked for maximum crunch and flavor, so you’re not left with soggy or bland pickles. It’s a straightforward method that anyone can pull off, whether you’re a kitchen newbie or a pickle pro.
- Quick & Easy: Ready to enjoy in as little as 48 hours — perfect for impatient pickle lovers and busy schedules.
- Simple Ingredients: Uses everyday pantry staples plus fresh garlic and dill — no obscure spices or special trips needed.
- Perfect for Snacking & Parties: Crunchy pickles make an ideal side for barbecues, sandwiches, or casual snacking sessions.
- Crowd-Pleaser: Kids and adults alike love the garlicky kick paired with that satisfying crunch.
- Unbelievably Delicious: The brine balances tartness and garlic flavor without overpowering the natural cucumber crispness.
- What Sets This Apart: The secret is in the layering of fresh garlic cloves and dill sprigs that infuse the pickles gently but thoroughly without bitterness.
This recipe isn’t just another pickle jar on the shelf — it’s the one I trust when I want crunchy satisfaction without fuss. It’s the kind of snack that makes you slow down, savor the texture, and maybe even close your eyes for a moment. Plus, if you’re into making summer salads or sides, these pickles pair wonderfully with dishes like the savory brown butter corn salad that I love whipping up alongside.
What Ingredients You Will Need
This recipe uses simple, wholesome ingredients to deliver bold flavor and satisfying texture without the fuss. Most of these are pantry staples, and the fresh garlic and dill bring everything to life.
- Fresh cucumbers (about 4 cups sliced or spears): Look for firm, thin-skinned pickling cucumbers for best crunch.
- Fresh dill sprigs (4-5 sprigs): Fresh dill is key — the feathery fronds add bright, herbal notes.
- Garlic cloves (4-5, peeled and lightly crushed): They add that punchy, aromatic depth without being too sharp.
- White vinegar (1 ½ cups / 360 ml): The acid base that gives pickles their characteristic tang.
- Water (1 ½ cups / 360 ml): Dilutes the vinegar for balance.
- Pickling salt or kosher salt (2 tablespoons): Avoid iodized salt — it can cloud the brine and affect flavor.
- Granulated sugar (1 tablespoon): Balances acidity and rounds out the flavor.
- Black peppercorns (1 teaspoon): Adds a subtle warmth and complexity.
- Mustard seeds (1 teaspoon): Optional, but recommended for a slight tangy crunch.
- Red pepper flakes (½ teaspoon): Optional for a mild heat kick.
You can swap white vinegar for apple cider vinegar for a fruitier twist. And if you need to make these gluten-free, rest assured all ingredients here are naturally gluten-free. I like using Diamond Crystal kosher salt because it dissolves nicely and doesn’t overpower the brine.
Equipment Needed
- Quart-sized glass jar with lid: Perfect for holding the pickles and brine. Mason jars work great.
- Cutting board and sharp knife: For slicing cucumbers evenly — uniform slices pickle more consistently.
- Small saucepan: To heat and dissolve the brine ingredients.
- Measuring cups and spoons: For precise salt, vinegar, sugar, and spice measurements.
- Tongs or fork: Handy for packing cucumbers into the jar without bruising.
If you don’t have a mason jar, any clean, food-safe container with a tight lid will do. I keep a few inexpensive pint and quart jars around for quick pickling projects like this. For maintenance, glass jars are easy to sterilize in boiling water or the dishwasher, which helps keep your pickles crisp and fresh.
Preparation Method
- Prepare the cucumbers (10 minutes): Wash and slice your cucumbers into spears or ¼-inch thick rounds. I prefer spears for snacking, but rounds work well for sandwiches. The key is uniformity — uneven pieces pickle inconsistently.
- Sterilize the jar (5 minutes): Rinse your quart jar with hot water or run it through the dishwasher to ensure it’s clean and ready for the brine.
- Make the brine (5 minutes): In a small saucepan, combine 1 ½ cups (360 ml) white vinegar, 1 ½ cups (360 ml) water, 2 tablespoons pickling salt, and 1 tablespoon sugar. Heat gently, stirring until salt and sugar dissolve completely. Remove from heat and let cool slightly (about 5 minutes).
- Layer the jar (5 minutes): Place 4-5 fresh dill sprigs, 4-5 lightly crushed garlic cloves, 1 teaspoon black peppercorns, and 1 teaspoon mustard seeds at the bottom of the jar. Add optional ½ teaspoon red pepper flakes if you like a little heat.
- Pack the cucumbers (5 minutes): Tightly but gently pack the cucumber slices or spears into the jar. The goal is to minimize air pockets but avoid bruising the cucumbers.
- Pour the brine (2 minutes): Pour the warm brine over the cucumbers, making sure they are fully submerged. Use a small weight or extra clean dill sprig if needed to keep cucumbers below the liquid surface.
- Seal and chill (minimum 48 hours): Screw on the lid tightly and place the jar in the refrigerator. Let the pickles chill for at least 48 hours before tasting. They get crunchier and more flavorful the longer they sit, up to 2 weeks.
- Enjoy and store: Once ready, store in the refrigerator and consume within 3-4 weeks for peak freshness.
Pro tip: If your pickles turn out a bit soft, try using cucumbers picked earlier in the day or slightly reducing water in the brine next time. Also, I learned the hard way that crushing garlic cloves lightly (not mincing) gives a mellow garlic essence without overpowering the crisp bite.
Cooking Tips & Techniques
Pickling is as much science as art, and I’ve picked up a few pointers along the way. First, always use fresh cucumbers — older or bloated cukes tend to go mushy. I recommend rinsing off any wax coating if you buy from the store, as it can interfere with brine absorption.
When heating your brine, just warm enough to dissolve salt and sugar; boiling can dull the fresh flavors. Also, avoid iodized salt, which may cloud your brine and affect taste — kosher or pickling salt is your friend here.
One trick I swear by is lightly crushing the garlic cloves instead of slicing. This releases just enough flavor without turning the brine bitter or garlicky in a harsh way. And don’t skimp on fresh dill — dried just doesn’t compare for that bright, herby smell and taste.
Timing-wise, the magic happens after 48 hours in the fridge; the cucumbers soak up the brine but keep their crunch. If you want crunchier pickles, some cooks suggest adding a few grape leaves or a pinch of tannin-rich black tea leaves to the jar, but I’ve had great results without that extra step.
Lastly, keep your pickles refrigerated at all times. This recipe is not for canning or shelf storage, so the cold keeps them crisp and safe to eat.
Variations & Adaptations
- Spicy Garlic Dill Pickles: Add extra red pepper flakes and a few slices of fresh jalapeño for a fiery crunch.
- Low-Sodium Version: Reduce salt to 1 tablespoon and add a teaspoon of garlic powder to maintain flavor without overwhelming saltiness.
- Herbal Twist: Swap fresh dill for fresh tarragon or add fresh thyme sprigs for a different herbal profile.
- Vinegar Swap: Use apple cider vinegar for a sweeter, fruitier brine — especially nice paired with the fresh cucumber watermelon salad I love in summer.
- Garlic-Free Option: If you’re not a garlic fan, replace cloves with sliced shallots or green onions for a milder oniony note.
One variation I tried recently included adding a teaspoon of coriander seeds along with the mustard seeds — it gave the pickles a subtle citrusy, nutty undertone that was surprisingly addictive.
Serving & Storage Suggestions
These pickles shine best chilled straight from the fridge. Serve them as a crunchy snack on their own or alongside sandwiches, burgers, or grilled meats. They’re particularly good paired with the creamy tang of a loaded potato salad like my creamy loaded potato salad with bacon and cheddar.
Store leftover pickles in the original jar or transfer to a clean airtight container. Keep refrigerated and consume within 3-4 weeks. Over time, the pickles will soften slightly but develop deeper flavors — I like to let a jar sit for a full week before really digging in.
To re-crisp slightly softened pickles, you can soak them briefly in ice water before serving, which helps firm them back up a bit. Just don’t leave them in water too long or they’ll lose flavor.
Nutritional Information & Benefits
These Easy Crunchy Refrigerator Dill Pickles with Garlic are low in calories and fat, making them a guilt-free snack option. A half-cup serving contains roughly 10-15 calories, mostly from cucumbers and a trace of sugar.
Pickles provide a good source of hydration due to their high water content and offer small amounts of vitamin K from the dill, which supports bone health. The garlic cloves add antioxidants and potential immune benefits.
This recipe is naturally gluten-free, low-carb, and suitable for vegan diets. Just watch your sodium intake if you’re on a salt-restricted diet, as pickles can be high in sodium.
Conclusion
There’s something wonderfully satisfying about the snap of these Easy Crunchy Refrigerator Dill Pickles with Garlic that keeps me reaching for another bite. They’re straightforward, quick to make, and deliver that perfect combination of crunch and garlicky dill flavor that’s hard to find in store-bought versions. Whether you’re new to pickling or a seasoned fan, this recipe invites you to customize and make your own version.
Personally, I love that these pickles bring a little zest and brightness to simple meals — they’ve even rescued me from boring snacks on more than one occasion. If you try them, I’d love to hear how you put your own spin on the recipe or what dishes you pair them with.
Happy pickling, and here’s to crunchy, garlicky bites that never disappoint!
Frequently Asked Questions
How long do refrigerator dill pickles last?
Stored properly in the fridge, these pickles stay fresh and crunchy for about 3-4 weeks. After that, they may soften and lose some flavor.
Can I use regular cucumbers instead of pickling cucumbers?
Yes, but pickling cucumbers are firmer and thinner-skinned, which helps keep the crunch. Regular cucumbers can work but may get softer faster.
Do I have to cook the brine?
Heating the brine helps dissolve salt and sugar, but you don’t need to boil it. Just warm enough to fully dissolve the ingredients, then cool slightly before pouring over cucumbers.
Can I make these pickles spicy?
Absolutely! Add red pepper flakes or fresh jalapeño slices to the jar for a spicy kick.
Are these pickles fermented?
No, these are quick refrigerator pickles soaked in a vinegar brine, not naturally fermented. They’re ready to eat faster but have a different flavor profile than fermented pickles.
Pin This Recipe!
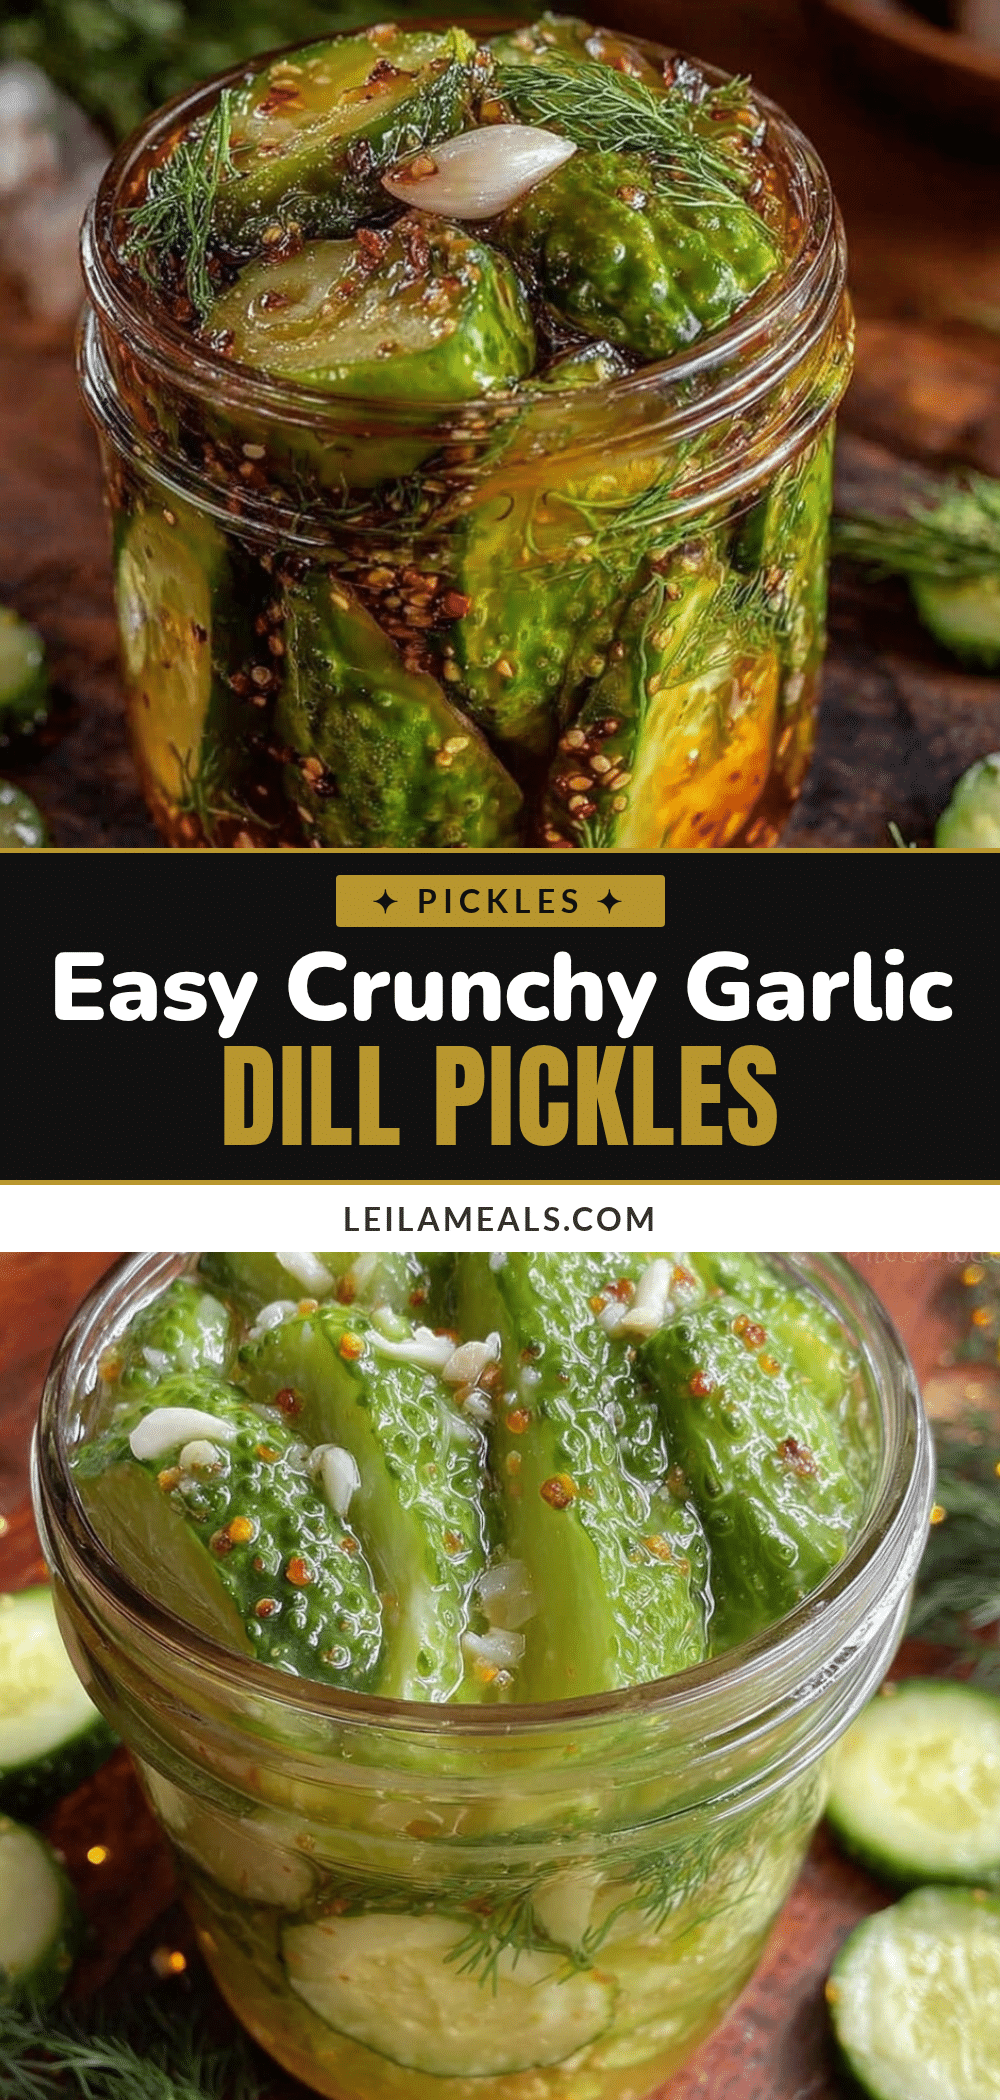
Easy Crunchy Refrigerator Dill Pickles with Garlic
These crunchy, garlicky dill pickles are quick to make and perfect for snacking, offering a satisfying crisp bite with a bright, herbal flavor. Ready to enjoy in as little as 48 hours, they require no canning and use simple pantry ingredients.
- Prep Time: 15 minutes
- Cook Time: 5 minutes
- Total Time: 48 hours 20 minutes
- Yield: 4 servings 1x
- Category: Snack
- Cuisine: American
Ingredients
- 4 cups fresh cucumbers, sliced or spears
- 4–5 fresh dill sprigs
- 4–5 garlic cloves, peeled and lightly crushed
- 1 ½ cups white vinegar (360 ml)
- 1 ½ cups water (360 ml)
- 2 tablespoons pickling salt or kosher salt
- 1 tablespoon granulated sugar
- 1 teaspoon black peppercorns
- 1 teaspoon mustard seeds (optional)
- ½ teaspoon red pepper flakes (optional)
Instructions
- Wash and slice cucumbers into spears or ¼-inch thick rounds, ensuring uniform pieces.
- Sterilize a quart-sized glass jar by rinsing with hot water or running through the dishwasher.
- In a small saucepan, combine white vinegar, water, pickling salt, and sugar. Heat gently, stirring until salt and sugar dissolve. Remove from heat and let cool slightly (about 5 minutes).
- Place fresh dill sprigs, lightly crushed garlic cloves, black peppercorns, mustard seeds, and optional red pepper flakes at the bottom of the jar.
- Tightly but gently pack the cucumber slices or spears into the jar, minimizing air pockets without bruising.
- Pour the warm brine over the cucumbers, ensuring they are fully submerged. Use a small weight or extra dill sprig to keep cucumbers below the liquid surface if needed.
- Seal the jar tightly and refrigerate for a minimum of 48 hours before tasting. Pickles get crunchier and more flavorful up to 2 weeks.
- Store pickles in the refrigerator and consume within 3-4 weeks for peak freshness.
Notes
Use fresh, firm, thin-skinned pickling cucumbers for best crunch. Lightly crush garlic cloves instead of mincing to avoid overpowering bitterness. Avoid iodized salt to prevent cloudy brine. Keep pickles refrigerated at all times. For softer pickles, reduce water in brine or use cucumbers picked earlier in the day. To re-crisp softened pickles, soak briefly in ice water before serving.
Nutrition
- Serving Size: ½ cup
- Calories: 12
- Sugar: 1
- Sodium: 900
- Carbohydrates: 3
- Fiber: 0.5
- Protein: 0.3
Keywords: refrigerator pickles, dill pickles, crunchy pickles, garlic pickles, quick pickles, easy pickles, homemade pickles, snack, vegan, gluten-free