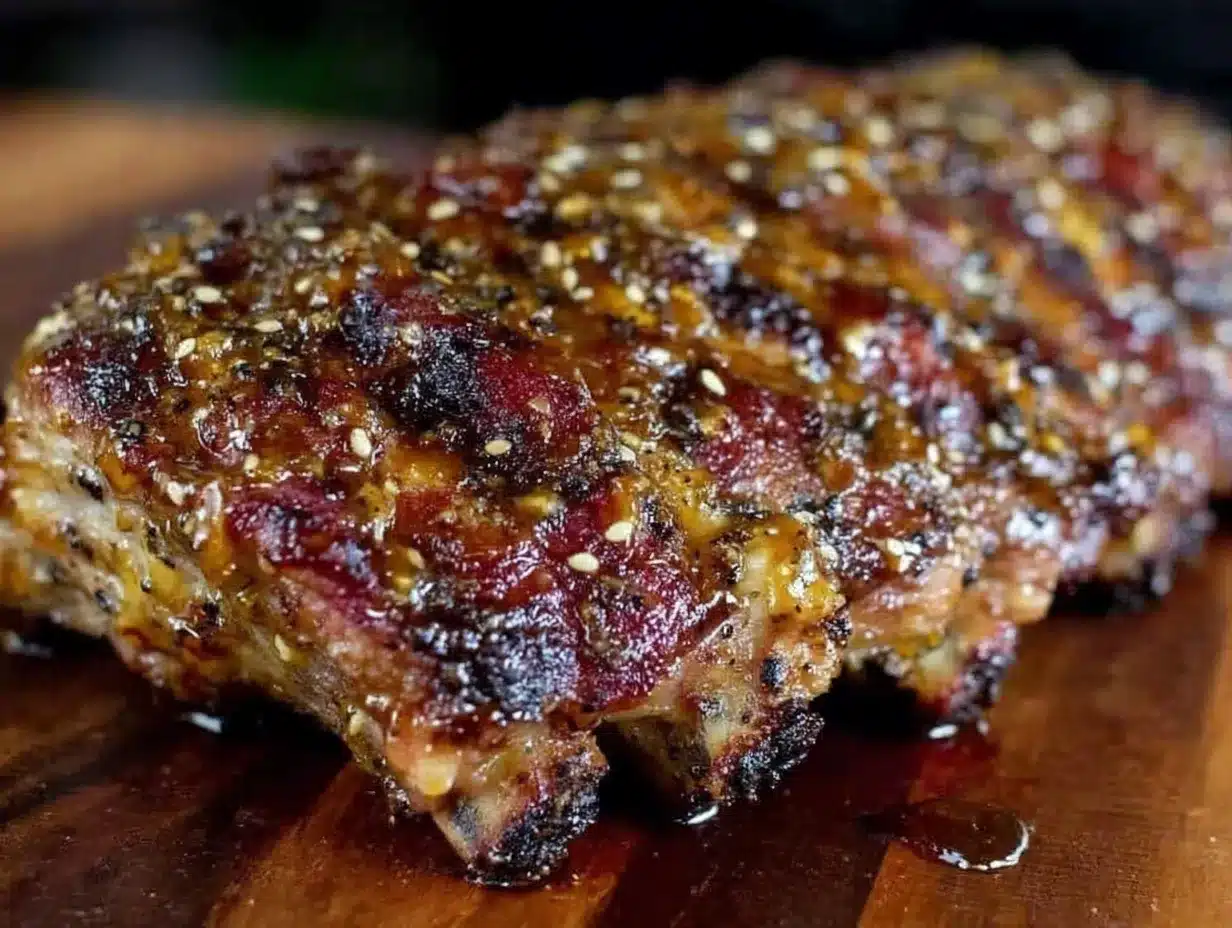
I want sticky, sweet, fall-apart ribs right now, and I have everything except the patience to stand over a grill for three hours. That’s the honest truth of how this recipe came together in my kitchen on a random Tuesday, when the craving hit so hard I could practically taste that glossy, caramelized glaze before I even opened the fridge. These Sticky Honey Garlic Glazed BBQ Ribs are the result of a cook who wanted restaurant-quality flavor without the all-day commitment.
You know those meals where you take the first bite and just stop talking? That’s these ribs. The honey garlic glaze does this thing where it clings to every single rib, creating a sticky-sweet coating that caramelizes into something almost candied. And the best part? You don’t need a smoker, a grill master certification, or any fancy equipment. Just an oven, some foil, and a craving for something deeply satisfying.
Let me back up. I tested this recipe four times before I got it right. The first batch was too dry. The second had the glaze sliding right off like it was afraid to commit. The third? Perfect balance of sticky, savory, and sweet. The secret, I learned, is layering the flavor — a dry rub that actually sticks, a slow braise that makes the meat surrender, and then that glorious honey garlic glaze that gets broiled until it bubbles and sets. It’s the kind of recipe that makes you look like a hero with surprisingly little effort.
So if you’ve been intimidated by making ribs at home, let this be your sign. These ribs are forgiving, flexible, and honestly, they might ruin takeout for you forever.
Why You’ll Love This Recipe
After making ribs every which way for years, I can tell you this version hits different. It’s not just another barbecue recipe — it’s the one I bring to every potluck, every game day gathering, and every quiet Sunday when I want something that feels special without spending the whole day cooking.
- Oven-Baked, No Grill Required : These ribs cook low and slow in the oven, which means you get tender, fall-off-the-bone meat without babysitting a grill. Perfect for when the weather isn’t cooperating or you just don’t own one.
- Simple Pantry Ingredients : The dry rub uses spices you probably already have. The glaze is just honey, garlic, soy sauce, and a few staples. No weird ingredients or specialty store runs.
- Perfect for Feeding a Crowd : Whether it’s game day, a backyard barbecue, or a holiday gathering, these ribs disappear fast. I’ve made them for Super Bowl parties and summer cookouts, and they always steal the show.
- That Unforgettable Glaze : The honey garlic glaze is the star here. It’s sticky without being cloying, savory with a hint of garlic that cuts through the sweetness, and it caramelizes under the broiler into this beautiful, lacquered finish.
- Foolproof Method : Even if you’ve never made ribs before, this recipe walks you through every step. The low-and-slow method is forgiving, and I’ve included all the little tricks I learned from my failed batches so you skip straight to success.
This isn’t just another rib recipe. It’s the one where the meat pulls clean off the bone, the glaze sticks to your fingers (in the best way), and everyone asks for the recipe before they’ve finished their first rack. It’s comfort food that feels like a hug, but with a sticky-sweet edge that keeps you coming back for more.
What Ingredients You Will Need
This recipe uses simple, accessible ingredients that work together to build layers of flavor. Most of these are pantry staples, and the few fresh items are easy to find at any grocery store. Here’s what you need and why each ingredient matters.
For the Dry Rub
- 2 racks baby back ribs (about 4-5 pounds total) — Look for racks with even thickness and good meat coverage. I prefer baby backs for their tenderness, but spare ribs work too (just add 30 minutes to the cooking time).
- 2 tablespoons brown sugar (packed) — Adds sweetness that helps the rub stick and promotes caramelization. Dark brown sugar gives deeper flavor, but light works fine.
- 1 tablespoon smoked paprika — This is non-negotiable for that smoky depth. Regular paprika won’t give you the same barbecue character.
- 1 teaspoon garlic powder — Not the same as fresh garlic here; the powder distributes evenly and doesn’t burn during the long cook.
- 1 teaspoon onion powder — Adds savory backbone without overwhelming.
- 1 teaspoon salt — I use kosher salt for its clean flavor and easy distribution.
- 1/2 teaspoon black pepper — Freshly ground if you have it.
- 1/2 teaspoon cayenne pepper (optional) — Adds a subtle heat that balances the sweetness. Leave it out if you’re sensitive to spice.
For the Honey Garlic Glaze
- 1/2 cup honey — Use a good-quality honey here; the flavor really comes through. Local honey adds a nice floral note.
- 4 cloves garlic (minced) — Fresh garlic is crucial. Don’t substitute with jarred or powder; the fresh punch makes the glaze sing.
- 1/4 cup soy sauce — Adds savory umami that balances the honey’s sweetness. I use low-sodium so I can control the salt.
- 2 tablespoons apple cider vinegar — Cuts through the richness and adds brightness. Rice vinegar works in a pinch.
- 2 tablespoons ketchup — Gives the glaze body and a touch of tomato sweetness. I recommend Heinz for consistency.
- 1 tablespoon sriracha (optional) — Adds a gentle kick. Leave it out for a milder glaze, or double it if you like heat.
- 1 tablespoon unsalted butter — Adds richness and helps the glaze get that glossy, lacquered finish.
Ingredient Tips from My Kitchen : For the ribs, I’ve had the best luck with St. Louis-style spare ribs when baby backs aren’t available. They have more fat, which means more flavor, but they need that extra 30 minutes in the oven. And about the honey — I once used a cheap honey that had a weird aftertaste, and it ruined the whole glaze. Spend the extra dollar on something you’d actually eat with a spoon.
If you’re feeding a crowd or want leftovers for game day, this recipe pairs beautifully with our Loaded Queso Fundido with Spicy Chorizo for the ultimate spread. The creamy, cheesy dip balances the sticky ribs perfectly.
Equipment Needed
You don’t need a professional kitchen to make these ribs. Here’s what you’ll actually use:
- Large baking sheet or roasting pan — Big enough to hold both racks of ribs without overlapping. A half-sheet pan works perfectly.
- Aluminum foil — Heavy-duty foil is worth it here. You’ll be wrapping the ribs tightly to trap steam, and thin foil can tear.
- Small saucepan — For making the glaze. Any small pot works.
- Pastry brush or silicone basting brush — For applying the glaze evenly. A silicone brush is easier to clean and won’t shed bristles.
- Sharp knife — For trimming the membrane off the ribs. A paring knife or small chef’s knife works.
- Paper towels — For patting the ribs dry before applying the rub. This step matters more than you think.
- Mixing bowls — One small bowl for the dry rub, one for the glaze ingredients.
- Tongs — For handling the hot ribs. I prefer metal tongs with silicone grips.
Budget-Friendly Tip : If you don’t have a roasting pan, a rimmed baking sheet lined with foil works just fine. Just make sure the edges are high enough to catch any drips. I’ve used a $10 baking sheet for years and it’s never let me down.
Preparation Method
Let me walk you through this step by step. I’ve included all the little details that make the difference between good ribs and unforgettable ones.
Step 1: Prep the Ribs (10 minutes)
Start by removing the thin membrane from the back of each rack. Slide a butter knife under the membrane at one end, then grab it with a paper towel and pull it off in one piece. This step is crucial — that membrane turns chewy and tough if left on, and it blocks the rub from penetrating the meat. If it tears, just grab another piece and keep pulling. I’ve had racks where it comes off in one satisfying sheet and others where I’m picking at it for five minutes. Either way, get it off.
Pat the ribs dry with paper towels. This helps the rub stick and promotes better browning later. Don’t skip this — wet ribs won’t take the rub well.
Step 2: Make the Dry Rub (5 minutes)
In a small bowl, combine the brown sugar, smoked paprika, garlic powder, onion powder, salt, black pepper, and cayenne if using. Mix with a fork until everything is evenly distributed. Give it a sniff — it should smell smoky, sweet, and a little spicy.
Step 3: Apply the Rub (5 minutes)
Sprinkle the rub generously over both sides of the ribs, using about 2 tablespoons per side. Pat it in gently so it adheres. Don’t rub too hard or you’ll just push it off. You want a nice even coating that looks like a crust. Place the ribs on your baking sheet, cover loosely with plastic wrap, and let them rest at room temperature for 30 minutes. This gives the salt time to start working into the meat.
Personal Note : I once rushed this step and the rub just slid right off during cooking. That 30-minute rest is non-negotiable now. Use that time to preheat your oven and make the glaze.
Step 4: Preheat and Wrap (10 minutes)
Preheat your oven to 275°F (135°C). While it heats, tear off two large sheets of heavy-duty foil, each long enough to wrap one rack completely. Place each rack in the center of its foil sheet. If you want extra moisture, add 2 tablespoons of apple juice or water to the foil before sealing — this creates steam that keeps the meat tender.
Fold the foil over the ribs and crimp the edges tightly to create a sealed packet. Make sure there are no gaps where steam can escape. Place both foil packets on your baking sheet.
Step 5: Slow Bake (2.5 to 3 hours)
Place the baking sheet in the oven and bake for 2.5 to 3 hours. The ribs are done when the meat is tender and pulls back from the bone ends by about 1/4 inch. You can test by inserting a toothpick into the meat between the bones — it should go in with little resistance.
At the 2-hour mark, start checking. Every oven runs differently, and you don’t want to overcook them to the point where the meat falls completely off the bone (unless that’s your preference). I like them tender but still holding together enough to pick up.
Step 6: Make the Honey Garlic Glaze (10 minutes)
While the ribs bake, combine the honey, minced garlic, soy sauce, apple cider vinegar, ketchup, and sriracha in a small saucepan. Bring to a simmer over medium heat, then reduce to low and let it bubble gently for 5-7 minutes, stirring occasionally. The glaze will thicken slightly. Remove from heat and stir in the butter until melted and glossy. Taste it — you should get sweet first, then savory, then a tiny kick at the end. Adjust the honey or sriracha to your preference.
Step 7: Glaze and Broil (10 minutes)
Carefully open the foil packets (watch out for steam — it’s hot!). Transfer the ribs to a clean baking sheet lined with foil or parchment. Brush a generous layer of glaze on all sides. Don’t be shy — this is where the magic happens.
Turn your oven to broil and place the ribs on the top rack, about 6 inches from the heating element. Broil for 3-5 minutes, watching closely. The glaze will bubble and caramelize. When it looks sticky and slightly charred in spots, pull them out. Brush on another layer of glaze and broil for another 2-3 minutes.
Step 8: Rest and Serve (5 minutes)
Let the ribs rest for 5 minutes before cutting. This lets the glaze set and the juices redistribute. Slice between the bones and serve with any remaining glaze on the side for dipping.
Sensory Cue : When you pull the ribs from the broiler, the glaze should be bubbling gently and smell intensely of caramelized honey and garlic. The edges will look slightly darkened, almost like a good barbecue char. That’s exactly what you want.
Cooking Tips & Techniques
After making these ribs more times than I can count, here are the things I wish someone had told me from the start.
Don’t Skip the Membrane : I know it’s fiddly, but leaving that membrane on is the single biggest mistake people make with ribs. It creates a rubbery barrier that keeps the rub and smoke from reaching the meat. If you can’t get a good grip, try using a paper towel for traction — it works way better than your fingers.
Low and Slow Is Your Friend : 275°F is the sweet spot. Any higher and the meat can toughen up before the connective tissue breaks down. Any lower and you’re waiting forever. I’ve experimented with 250°F and 300°F, and 275°F consistently gives me the best texture in a reasonable time.
The Foil Packet Trick : Wrapping the ribs tightly in foil creates a mini steam oven that tenderizes the meat without drying it out. This is the same principle as braising, and it’s foolproof. Just make sure your foil is sealed tight — I learned this the hard way when steam escaped and my ribs came out dry on one end.
Watch the Broiler Like a Hawk : The glaze goes from perfectly caramelized to burnt in about 30 seconds. I’ve ruined a batch by walking away to answer my phone. Stay right there, watch the bubbles, and pull them the second they look glossy and slightly charred.
Let Them Rest : I know you want to dig in immediately, but those 5 minutes of resting make a real difference. The glaze sets into a sticky coating instead of sliding off, and the meat stays juicier when you cut into it.
Pro Tip for Extra Flavor : If you have time, apply the dry rub the night before and let the ribs sit in the fridge overnight. The salt penetrates deeper, and the flavors meld together. Just pull them out 30 minutes before baking to take the chill off.
For another crowd-pleasing dish that uses similar sweet-savory flavors, try our Brown Sugar Bourbon Baked Beans. The smoky sweetness pairs beautifully with these ribs.
Variations & Adaptations
One of the best things about this recipe is how flexible it is. Here are some ways to make it your own.
Spicy Honey Chipotle Ribs : Replace the sriracha in the glaze with 2 minced chipotle peppers in adobo sauce. You’ll get a smoky, earthy heat that’s completely different from the original. I made this version for a friend who loves spicy food, and she said it was the best thing I’ve ever cooked. High praise.
Grill Finish : Instead of broiling, finish the glazed ribs on a hot grill for 2-3 minutes per side. The open flame adds a subtle smokiness and those beautiful grill marks. Just watch them closely — the honey in the glaze can burn quickly over direct heat.
Instant Pot Shortcut : If you’re short on time, cook the ribs in an Instant Pot for 25 minutes on high pressure with 1 cup of apple juice, then finish them under the broiler with the glaze. The texture is slightly different — more like braised ribs — but the flavor is still incredible. I’ve done this for weeknight dinners when I didn’t have 3 hours to spare.
Gluten-Free Version : Swap the soy sauce for tamari or coconut aminos, and double-check that your ketchup is gluten-free. Most are, but some brands use malt vinegar. That’s it — everything else is naturally gluten-free.
Pork-Free Alternative : This glaze works beautifully on chicken thighs or drumsticks. Use bone-in, skin-on chicken and adjust the cooking time to about 45 minutes at 375°F, then glaze and broil the same way. I’ve also done it with beef short ribs, which need about 3 hours at 275°F.
If you love the sweet-savory combo, you’ll also enjoy our Honey Turkey and Cream Cheese Pinwheel Wraps for a lighter option with the same honey-forward flavor profile.
Serving & Storage Suggestions
These ribs are best served hot, straight from the broiler, when the glaze is still sticky and the meat is at its most tender. Here’s how to make the most of them.
Serving Temperature : Serve immediately after resting. If you’re making them ahead, reheat gently in a 300°F oven for 10-15 minutes, then brush with fresh glaze and broil for 2 minutes to refresh the sticky coating.
What to Serve Alongside : These ribs are rich, so you want sides that cut through the sweetness. A crisp coleslaw with a tangy vinaigrette works perfectly. Cornbread, baked beans, or a simple cucumber salad are also great choices. For something green, try grilled asparagus or a broccoli slaw.
Storage : Leftover ribs keep in an airtight container in the refrigerator for up to 4 days. The glaze will soften, but the flavor only gets better as it melds. To freeze, wrap individual portions tightly in plastic wrap and then foil, and store for up to 3 months. Thaw overnight in the fridge before reheating.
Reheating : The best way to reheat is in the oven at 300°F for 10-15 minutes. The microwave works in a pinch, but it makes the glaze watery and the meat can get tough. If you’re in a hurry, slice the ribs apart and reheat them in a hot skillet with a splash of water, covered, for 3-4 minutes.
How Flavors Develop : These ribs are actually better the next day. The glaze continues to penetrate the meat, and the flavors become more unified. I’ve been known to make them a day ahead on purpose, just so they’re even more flavorful when I serve them.
Nutritional Information & Benefits
While ribs aren’t exactly health food, this version is lighter than many barbecue recipes because it uses a honey-based glaze instead of heavy sugar-laden sauces.
| Nutrient | Amount per Serving (3-4 ribs) |
|---|---|
| Calories | 520 |
| Protein | 32g |
| Fat | 28g |
| Saturated Fat | 10g |
| Carbohydrates | 35g |
| Fiber | 1g |
| Sugar | 28g |
| Sodium | 780mg |
Health Benefits of Key Ingredients : Honey provides antioxidants and has antibacterial properties. Garlic is known for its immune-supporting compounds. Pork ribs are a good source of protein, B vitamins, and zinc. The smoked paprika adds vitamin A and anti-inflammatory compounds.
Dietary Considerations : This recipe is dairy-free (the butter is optional and can be omitted or replaced with vegan butter). It’s also nut-free and egg-free. For a lower-sodium version, use low-sodium soy sauce and reduce the salt in the dry rub to 1/2 teaspoon.
Potential Allergens : Soy (from soy sauce). If you have a soy allergy, use coconut aminos or a soy-free tamari alternative.
My Personal Take : I don’t make ribs every week, but when I do, I want them to be worth it. This recipe hits that sweet spot where you feel satisfied without that heavy, overstuffed feeling. The protein keeps you full, and the sweetness feels like a treat without being over-the-top.
For a lighter meal that balances out a heavy rib dinner, try our Fresh Grilled Peach Caprese Salad. The bright acidity and fresh flavors are a perfect counterpoint to the rich, sticky ribs.
Conclusion
These Sticky Honey Garlic Glazed BBQ Ribs are the kind of recipe that makes you look like you spent all day in the kitchen when really, the oven did most of the work. The honey garlic glaze is sticky, sweet, and savory in all the right ways, and the slow-baking method guarantees tender meat every single time.
I love this recipe because it’s forgiving enough for a beginner but impressive enough for a special occasion. Whether you’re feeding a crowd at a summer barbecue or just treating yourself on a quiet weekend, these ribs deliver. And honestly, that moment when you pull them from the broiler and the glaze is bubbling and glossy — it never gets old.
Now I want to hear from you. Have you tried making ribs at home before? What’s your favorite glaze combination? Drop a comment below and let me know how these turn out for you. And if you come up with your own variation, share it — I’m always looking for new ideas to test in my kitchen.
Go ahead, get your hands sticky. It’s worth it.
Frequently Asked Questions
Can I make these ribs in a slow cooker instead of the oven?
Absolutely. Place the rubbed ribs in a slow cooker with 1/2 cup of apple juice or water. Cook on low for 6-8 hours or on high for 3-4 hours. Then transfer to a baking sheet, glaze, and broil as directed. The texture will be more fall-apart tender, which some people prefer.
How do I know when the ribs are done?
The best test is the bend test. Pick up the rack with tongs from the middle — if it bends easily and the meat starts to crack on the surface, they’re done. You can also insert a toothpick between the bones; it should slide in with little resistance. The internal temperature should be around 190-203°F.
Can I use this glaze on other meats?
Definitely. This honey garlic glaze works beautifully on chicken wings, pork chops, salmon, or even roasted vegetables. Just adjust cooking times based on what you’re using. For chicken wings, bake at 400°F for 40 minutes, then glaze and broil.
Why did my glaze burn under the broiler?
Honey burns quickly because of its high sugar content. Keep the ribs on the middle rack rather than the top, and watch them constantly. You want the glaze to bubble and caramelize, not turn black. If your broiler runs hot, reduce the time to 2 minutes per side.
Can I prepare these ribs ahead of time for a party?
Yes, and I actually recommend it. Cook the ribs through the foil-wrapping stage up to 2 days ahead. Keep them wrapped in the fridge. When you’re ready to serve, unwrap, glaze, and broil. This saves you time on the day of your party and the flavors get even better as they rest.
Pin This Recipe!
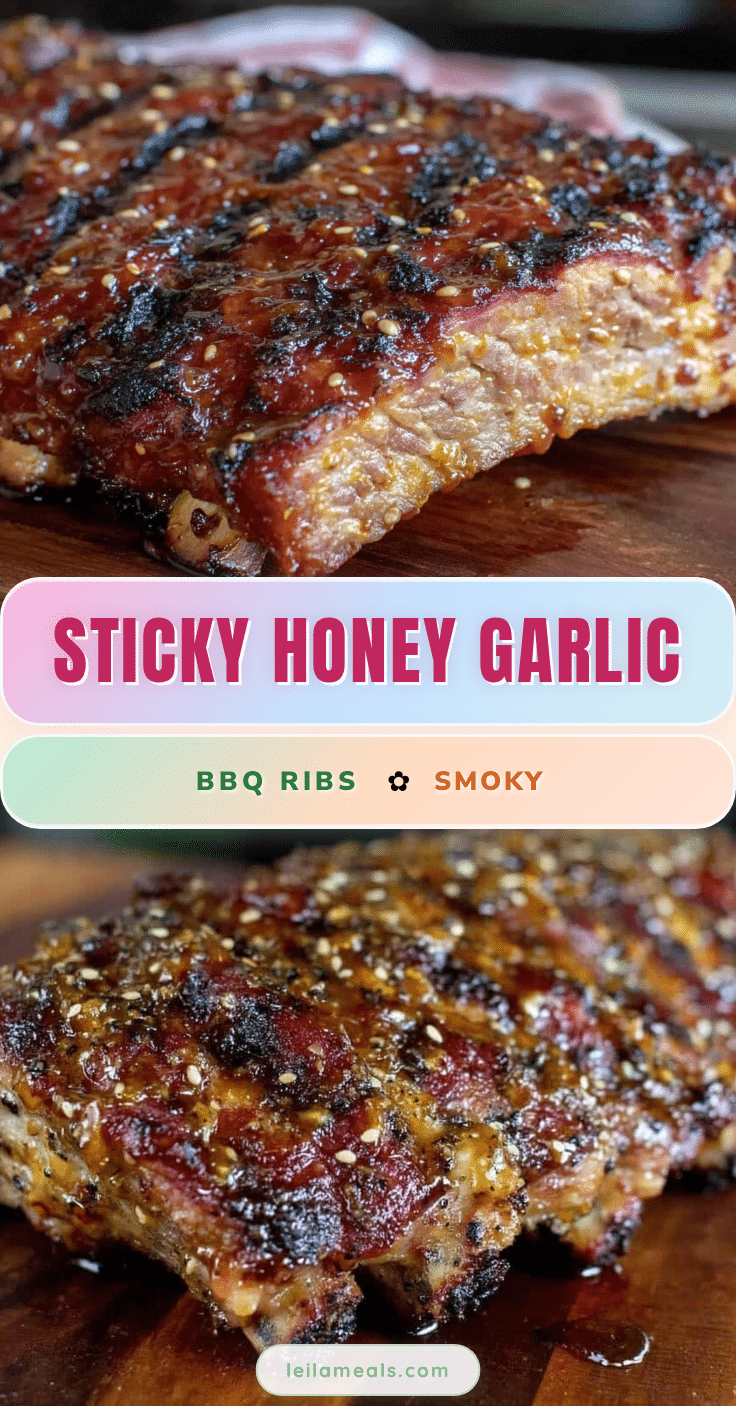
Best Sticky Honey Garlic Glazed BBQ Ribs (Easy Recipe)
These Sticky Honey Garlic Glazed BBQ Ribs are oven-baked to tender perfection, then glazed with a sweet and savory honey garlic sauce that caramelizes under the broiler. An easy, foolproof recipe that delivers restaurant-quality flavor without the all-day commitment.
- Prep Time: 15 minutes
- Cook Time: 3 hours
- Total Time: 3 hours 15 minutes
- Yield: 4 servings 1x
- Category: Main Course
- Cuisine: American
Ingredients
- 2 racks baby back ribs (about 4–5 pounds total)
- 2 tablespoons brown sugar (packed)
- 1 tablespoon smoked paprika
- 1 teaspoon garlic powder
- 1 teaspoon onion powder
- 1 teaspoon salt
- 1/2 teaspoon black pepper
- 1/2 teaspoon cayenne pepper (optional)
- 1/2 cup honey
- 4 cloves garlic (minced)
- 1/4 cup soy sauce
- 2 tablespoons apple cider vinegar
- 2 tablespoons ketchup
- 1 tablespoon sriracha (optional)
- 1 tablespoon unsalted butter
Instructions
- Prep the Ribs: Remove the thin membrane from the back of each rack. Pat the ribs dry with paper towels.
- Make the Dry Rub: In a small bowl, combine brown sugar, smoked paprika, garlic powder, onion powder, salt, black pepper, and cayenne (if using). Mix well.
- Apply the Rub: Sprinkle the rub generously over both sides of the ribs, patting gently to adhere. Let rest at room temperature for 30 minutes.
- Preheat and Wrap: Preheat oven to 275°F (135°C). Place each rack on a large sheet of heavy-duty foil. Optionally add 2 tablespoons of apple juice or water to each packet. Fold foil tightly to seal.
- Slow Bake: Place foil packets on a baking sheet and bake for 2.5 to 3 hours, until meat is tender and pulls back from the bone ends.
- Make the Glaze: In a small saucepan, combine honey, minced garlic, soy sauce, apple cider vinegar, ketchup, and sriracha. Simmer over medium heat for 5-7 minutes, then stir in butter until melted.
- Glaze and Broil: Carefully open foil packets and transfer ribs to a clean baking sheet. Brush generously with glaze. Broil on the top rack for 3-5 minutes, watching closely. Apply another layer of glaze and broil for 2-3 more minutes.
- Rest and Serve: Let ribs rest for 5 minutes before slicing between the bones. Serve with remaining glaze on the side.
Notes
For extra flavor, apply the dry rub the night before and refrigerate. Watch the broiler closely to prevent burning. Let ribs rest before cutting for best texture.
Nutrition
- Serving Size: 3-4 ribs
- Calories: 520
- Sugar: 28
- Sodium: 780
- Fat: 28
- Saturated Fat: 10
- Carbohydrates: 35
- Fiber: 1
- Protein: 32
Keywords: sticky honey garlic glazed bbq ribs, easy rib recipe, oven baked ribs, honey garlic ribs, fall off the bone ribs


