My neighbor showed up at a backyard cookout a few summers back carrying a dish that looked like a fancy bakery cake. I braced myself for something complicated, something that required a pastry bag and a lot of patience I didn’t have. Turned out, it was just graham crackers, chocolate pudding, and marshmallow fluff stacked in a dish. She called it an icebox cake, and I called it the best thing I’d eaten all summer. For a while, I just accepted that a dessert this good had to be high-maintenance. But honestly, it’s the opposite. This easy no-bake s’mores icebox cake for Labor Day is the dessert you can make without turning on the oven, without stressing over a recipe, and without missing a single minute of the party. It’s the kind of thing you throw together the night before, let the fridge do the work, and then pull out to impressed silence and requests for seconds. I’ve been making it every Labor Day since, and it’s never let me down.
Why You’ll Love This Recipe
This isn’t just another dessert. It’s a crowd-pleaser that solves the biggest problem of holiday cooking: how to serve something amazing without spending all day in the kitchen. Let me break it down for you.
- No-Bake Simplicity: The oven stays off. No heat, no fuss, no timing disasters. Perfect for those last hot days of summer when you want to be outside, not sweating over a stove.
- Make-Ahead Magic: This cake needs at least 6 hours to set, which means you make it the night before. Come party time, you just pull it out, slice it, and take all the credit.
- Simple Ingredients: You probably have most of this in your pantry right now. Graham crackers, chocolate pudding mix, marshmallow fluff, and butter. No fancy grocery runs required.
- Kid-Approved and Adult-Friendly: Kids go wild for the s’mores vibe. Adults appreciate the nostalgic flavor without the campfire mess. It’s a win-win.
- Perfect for Labor Day: This dessert screams summer’s last hurrah. It’s portable, feeds a crowd, and pairs beautifully with anything off the grill. I’ve brought it to potlucks and barbecues, and it always disappears first.
What makes this version different from the others I’ve tried? It’s the texture. The graham crackers soften just enough to create a cake-like layer, while the marshmallow fluff stays light and airy. It’s not too sweet, not too dense. It’s just right. For a complete Labor Day menu, try pairing this with my brown sugar bourbon baked beans for a sweet and savory combo that works every time.
What Ingredients You Will Need
This recipe uses simple, pantry-friendly ingredients to create something that tastes way more complicated than it is. Here’s what you’ll need and why each one matters.
- Graham crackers (1 full box, about 14-16 sheets): These form the cake layers. They soften as they sit, creating a tender, cake-like texture. I recommend using the classic honey flavor. The cinnamon ones work too, but they change the flavor profile slightly.
- Instant chocolate pudding mix (two 3.9-ounce boxes): This is your creamy filling. Use the instant kind, not cook-and-serve. The instant version sets up perfectly in the fridge without any extra work. I prefer Jell-O brand for consistency.
- Cold whole milk (3 cups): You need this to make the pudding. Whole milk gives the creamiest result, but 2% works in a pinch. Avoid skim milk—it makes the pudding too thin.
- Marshmallow fluff (one 7-ounce jar): This is your marshmallow layer. It adds that classic s’mores sweetness without needing to toast anything. Marshmallow fluff is stable and spreadable, unlike melted marshmallows which get messy.
- Unsalted butter (¼ cup, melted): Mixed with graham cracker crumbs for the base layer. It helps the crust hold together when you slice the cake.
- Semisweet chocolate chips (½ cup, for garnish): Optional but highly recommended. They add a little crunch and visual appeal. You can also use milk chocolate or dark chocolate depending on your preference.
- Mini marshmallows (½ cup, for garnish): Again, optional, but they make the cake look more like a s’more. Toast them under the broiler for 30 seconds if you want that campfire look.
Substitution Notes: If you’re gluten-free, use gluten-free graham crackers. They work the same way. For a dairy-free version, use your favorite plant-based milk and a dairy-free butter substitute. The texture might be slightly softer, but it still tastes great.
Equipment Needed
You don’t need much for this one. That’s the beauty of it.
- 9×13-inch baking dish: This is the standard size for this cake. You can use an 8×8-inch dish for a thicker cake, but you’ll need to adjust the layering.
- Large mixing bowl and whisk: For making the pudding. You can use an electric mixer if you want, but a whisk works just fine.
- Medium bowl: For the graham cracker crust mixture.
- Food processor or zip-top bag and rolling pin: You need to crush some graham crackers for the base. A food processor makes it quick, but a bag and a rolling pin work just as well. I’ve done it both ways, and honestly, the bag method is kind of satisfying.
- Spatula: For spreading the pudding and marshmallow layers evenly.
- Plastic wrap: To cover the dish while it sets in the fridge.
Budget-Friendly Tip: Don’t own a food processor? No problem. Place the graham crackers in a zip-top bag, seal it, and crush them with a rolling pin or even a heavy can. It takes two minutes and costs nothing.
Preparation Method
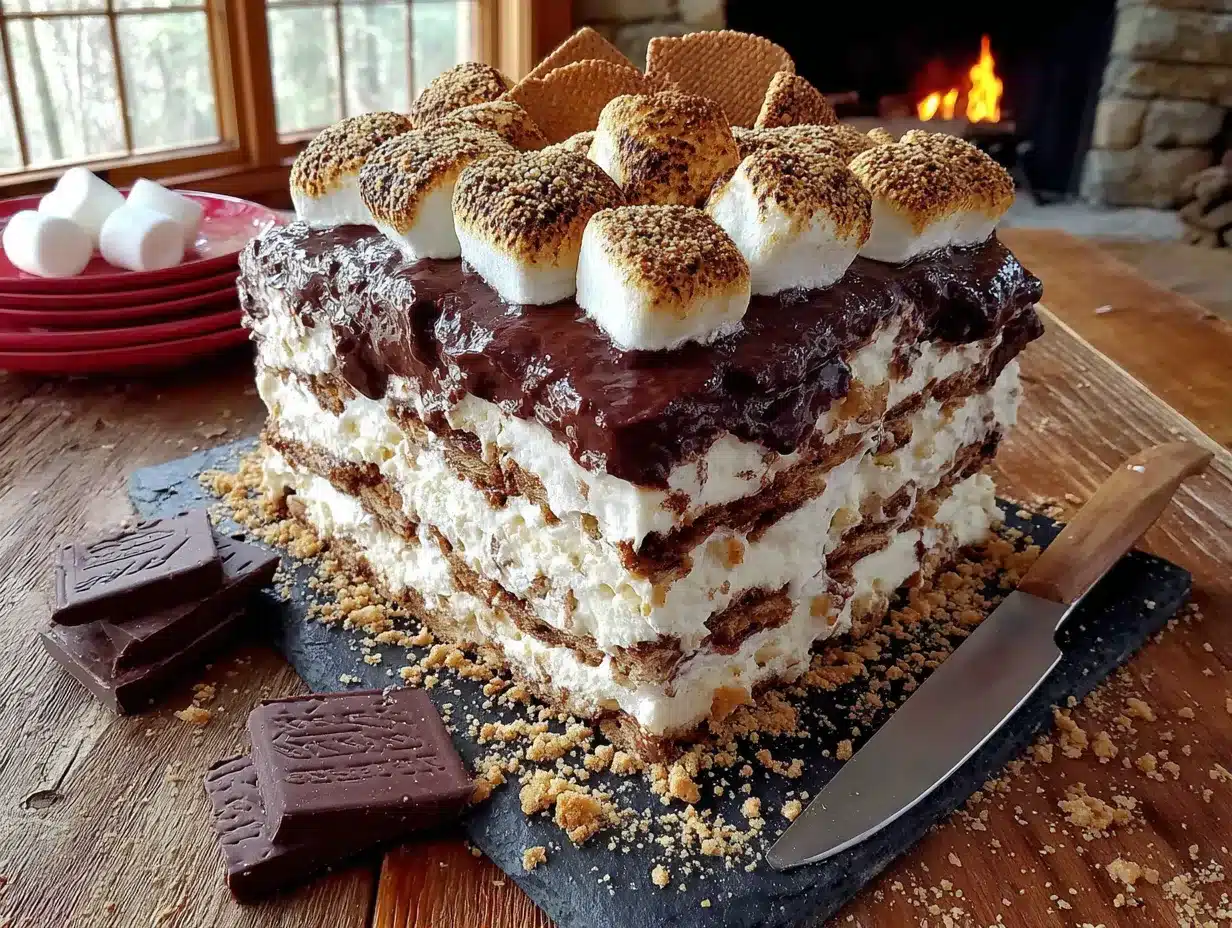
Let’s get to the good part. This recipe comes together in about 20 minutes of active time. The rest is just waiting.
- Make the crust: Crush 6 full graham cracker sheets into fine crumbs. You should have about 1½ cups of crumbs. Mix them with the melted butter until everything is evenly moistened. Press this mixture firmly into the bottom of your 9×13-inch dish. Use the bottom of a measuring cup to really pack it down. This creates your base layer.
- Prepare the pudding: In a large bowl, whisk together the two boxes of instant chocolate pudding mix and 3 cups of cold milk. Whisk for about 2 minutes until it starts to thicken. It will be fairly thin at first, but trust the process. Let it sit for 5 minutes to set up slightly.
- Layer the graham crackers: Arrange a single layer of whole graham cracker sheets over the crust. You’ll need to break some to fit the edges. Don’t leave gaps—the crackers are what give the cake its structure. I usually fit about 6 full sheets per layer.
- Add the first pudding layer: Spread half of the chocolate pudding evenly over the graham crackers. Use a spatula to get it into the corners. It doesn’t need to be perfect, just even.
- Add the marshmallow layer: Spoon the entire jar of marshmallow fluff over the pudding layer. This is the trickiest part because marshmallow fluff is sticky. Lightly wet your spatula with water, and it will spread much easier. Go slowly and try to get an even layer.
- Repeat the layers: Add another layer of graham crackers over the marshmallow fluff. Then spread the remaining half of the chocolate pudding on top. Finally, add one more layer of graham crackers.
- Finish with topping: Sprinkle the semisweet chocolate chips and mini marshmallows over the top layer of graham crackers. If you want toasted marshmallows, place the dish under the broiler for 30-45 seconds. Watch it closely—marshmallows burn fast.
- Chill: Cover the dish tightly with plastic wrap and refrigerate for at least 6 hours, but overnight is better. The graham crackers need time to soften and absorb the moisture from the pudding. This is what transforms them into a cake-like texture.
Sensory Cues: When you press the crust into the dish, it should feel like wet sand. The pudding should be thick enough to coat the back of a spoon after resting. When you pull the cake out of the fridge, the top should feel firm to the touch, and the graham crackers should offer no resistance when you press them gently.
Cooking Tips & Techniques
I’ve made this cake more times than I can count. Here’s what I’ve learned the hard way so you don’t have to.
Don’t rush the chilling time. I know it’s tempting to cut into it after a few hours, but the cake needs a full 6 hours minimum. The first time I made this, I only chilled it for 4 hours, and the layers slid apart when I tried to slice it. It still tasted good, but it looked like a mess. Overnight is truly the sweet spot.
Wet your spatula for the marshmallow fluff. This is a game-changer. Marshmallow fluff sticks to everything. Dip your spatula in water between spreads, and it glides right across. You’ll get a much smoother, more even layer.
Press the graham crackers gently. You want them to sit flat, but don’t push them into the pudding. Just lay them down and let the moisture do its work. If you press too hard, the layers mix together and you lose that distinct s’mores texture.
Use full-fat ingredients for the best result. I tried this with skim milk once, and the pudding never set properly. It was runny and the cake didn’t hold its shape. Whole milk and full-fat pudding make a difference. Trust me on this one.
Toast the marshmallows carefully. If you’re using the broiler, stay right there. Marshmallows go from golden to black in about 15 seconds. I learned this the hard way when I walked away to answer a text. The smoke alarm did not appreciate it.
Variations & Adaptations
This base recipe is great on its own, but it’s also a canvas for your creativity. Here are a few versions I’ve tried and loved.
- S’mores with a Twist: Use chocolate graham crackers instead of honey ones. It doubles down on the chocolate flavor and makes the cake even richer. I did this for a birthday party, and everyone asked for the recipe.
- Peanut Butter S’mores: Spread a thin layer of creamy peanut butter on each graham cracker before layering. The peanut butter adds a savory note that balances the sweetness. It’s like a s’mores and a Reese’s had a baby.
- Berry S’mores: Add a layer of fresh raspberries or sliced strawberries between the marshmallow fluff and the top pudding layer. The tartness cuts through the sweetness and adds a fresh element. This is my go-to for summer when berries are at their peak.
- Vegan Version: Use dairy-free graham crackers, a vegan chocolate pudding mix, and plant-based milk. For the marshmallow layer, use a vegan marshmallow fluff or coconut cream whipped with sugar. It’s not exactly the same, but it’s surprisingly close.
- Gluten-Free Version: Simply swap in gluten-free graham crackers. Everything else stays the same. I’ve tested this, and the texture is virtually identical.
If you’re looking for another no-bake option for summer gatherings, try my no-bake chocolate peanut butter granola bars. They’re perfect for snacking and travel well for picnics.
Serving & Storage Suggestions
This cake is best served cold, straight from the fridge. The texture is firm but tender, and the flavors are clean and refreshing.
Serving: Slice the cake into squares using a sharp knife. Wipe the knife clean between cuts for the neatest slices. Serve on a plate with a dollop of whipped cream if you’re feeling fancy. For a true Labor Day vibe, serve it alongside a cold glass of lemonade or iced tea. I also love pairing it with a pumpkin spice cold brew for a fall-forward twist.
Storage: Cover the dish tightly with plastic wrap or transfer leftovers to an airtight container. The cake keeps in the refrigerator for up to 5 days. The texture actually improves after day one as the flavors meld together. By day three, it’s at its peak.
Freezing: You can freeze this cake for up to 2 months. Wrap the entire dish in plastic wrap, then a layer of aluminum foil. Thaw overnight in the refrigerator before serving. The texture will be slightly softer after freezing, but it’s still delicious.
Reheating: If you toasted the marshmallows on top, they might lose their crunch after a day in the fridge. Just pop the dish under the broiler for 15-20 seconds to revive them. Watch closely.
Nutritional Information & Benefits
Let’s be real. This is a dessert, not a health food. But here’s what you need to know.
Per serving (1 square, based on 12 servings):
- Calories: 320
- Fat: 12g
- Carbohydrates: 52g
- Protein: 5g
- Fiber: 1g
- Sugar: 35g
Dietary Considerations: This recipe contains dairy, wheat, and soy (in the graham crackers). It can be made vegan and gluten-free with the substitutions listed above. It is not suitable for low-carb or keto diets due to the high carbohydrate content from the graham crackers and sugar.
Health Benefits: While this is an indulgent treat, there are a few bright spots. The milk in the pudding provides calcium and vitamin D. The chocolate contains antioxidants, though the amount is small. And honestly, there’s a mental health benefit to enjoying a dessert that makes you happy. I firmly believe that food should be enjoyed without guilt, and this cake is worth every bite.
Portion Control Tip: Cut the cake into 16 smaller squares instead of 12. You still get the satisfaction, just with a little less sugar.
Conclusion
This easy no-bake s’mores icebox cake for Labor Day has become a staple in my kitchen for a reason. It’s simple, it’s delicious, and it lets you spend more time with the people you care about instead of standing over a hot stove. The layers of creamy chocolate, sweet marshmallow, and tender graham cracker come together in a way that feels nostalgic and new at the same time.
I love this recipe because it reminds me that the best things don’t have to be complicated. Sometimes the most memorable dishes are the ones you throw together with pantry staples and a little patience. And when you pull this cake out at a party, no one believes you didn’t spend hours on it. That’s the magic of it.
I’d love to hear how yours turns out. Did you add any twists? Did you toast the marshmallows or leave them plain? Drop a comment below and let me know. And if you share it on Pinterest, tag me—I want to see your beautiful creation. Happy Labor Day, and happy eating!
Frequently Asked Questions
Can I make this s’mores icebox cake ahead of time?
Absolutely. In fact, I recommend it. This cake needs at least 6 hours to set, but making it the night before is ideal. The flavors meld together beautifully overnight, and it saves you stress on party day. Just keep it covered in the fridge until you’re ready to serve.
Why is my icebox cake runny?
This usually happens for one of two reasons. Either you used cook-and-serve pudding instead of instant, or you didn’t let it chill long enough. Instant pudding sets up in the fridge without heat. Cook-and-serve needs to be boiled first. Also, make sure you chill the cake for the full 6 hours minimum.
Can I use homemade pudding instead of boxed?
You can, but it changes the texture. Homemade pudding is thinner and doesn’t set as firmly. If you want to try it, use a recipe that includes cornstarch for thickening, and chill it completely before layering. The result will be softer and more custard-like, which isn’t bad, but it’s different.
How do I get clean slices?
Use a sharp knife and wipe it clean between each cut. You can also run the knife under hot water and dry it before slicing. The heat helps the knife glide through the layers without dragging. Chill the cake well before slicing—a warm cake will fall apart.
Can I double this recipe for a crowd?
Yes, but use two separate 9×13-inch dishes instead of one larger pan. The layering is easier to manage in standard sizes, and the texture stays consistent. You can also use a half-sheet pan for a thinner cake, but reduce the chilling time to 4 hours since it sets faster.
Pin This Recipe!
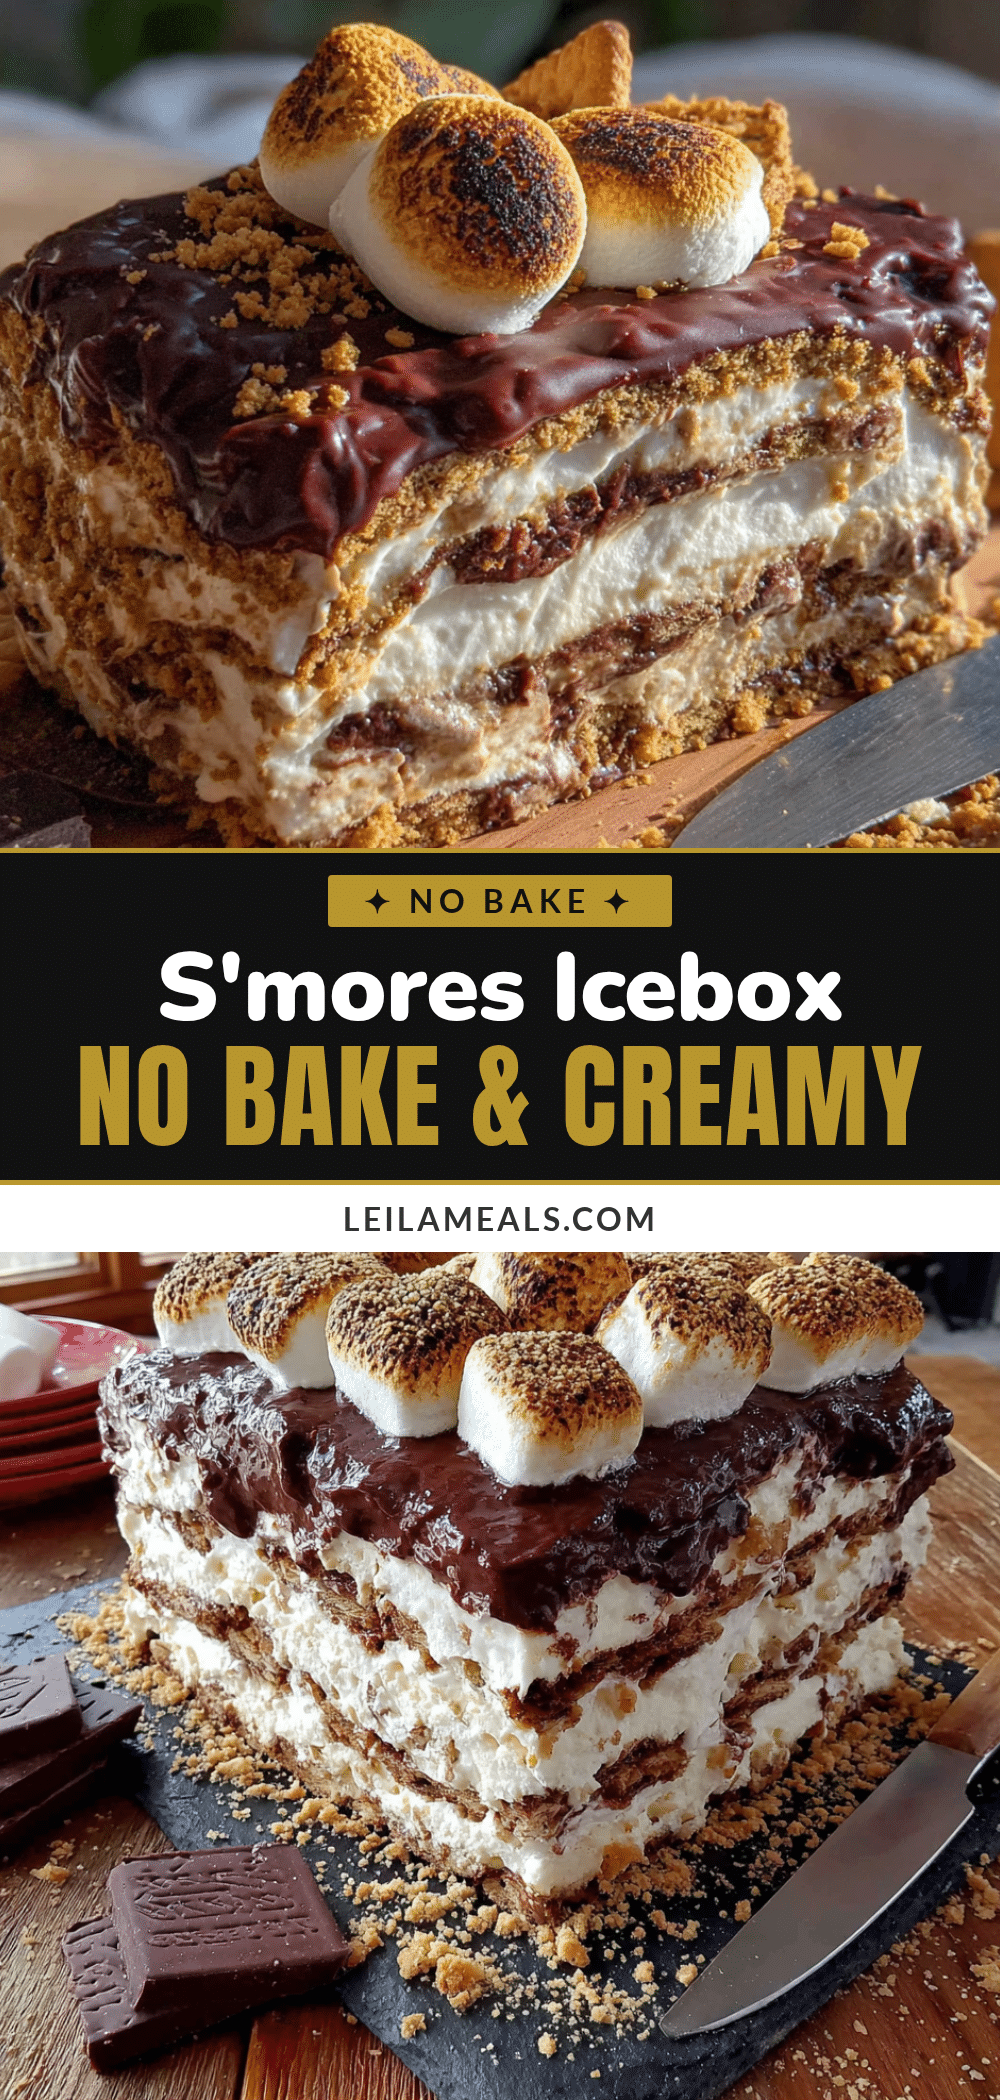
Easy No-Bake Smores Icebox Cake for Labor Day
This easy no-bake s’mores icebox cake for Labor Day is the dessert you can make without turning on the oven, without stressing over a recipe, and without missing a single minute of the party. It’s the kind of thing you throw together the night before, let the fridge do the work, and then pull out to impressed silence and requests for seconds.
- Prep Time: 20 minutes
- Cook Time: 0 minutes
- Total Time: 6 hours 20 minutes (includes chilling)
- Yield: 12 servings 1x
- Category: Dessert
- Cuisine: American
Ingredients
- 1 full box graham crackers (about 14–16 sheets)
- 2 boxes (3.9 ounces each) instant chocolate pudding mix
- 3 cups cold whole milk
- 1 jar (7 ounces) marshmallow fluff
- 1/4 cup unsalted butter, melted
- 1/2 cup semisweet chocolate chips (for garnish)
- 1/2 cup mini marshmallows (for garnish)
Instructions
- Make the crust: Crush 6 full graham cracker sheets into fine crumbs (about 1½ cups). Mix with melted butter until evenly moistened. Press firmly into the bottom of a 9×13-inch dish using the bottom of a measuring cup.
- Prepare the pudding: In a large bowl, whisk together the two boxes of instant chocolate pudding mix and 3 cups of cold milk for about 2 minutes until it starts to thicken. Let sit for 5 minutes to set up slightly.
- Layer the graham crackers: Arrange a single layer of whole graham cracker sheets over the crust, breaking some to fit edges. Use about 6 full sheets per layer.
- Add the first pudding layer: Spread half of the chocolate pudding evenly over the graham crackers.
- Add the marshmallow layer: Spoon the entire jar of marshmallow fluff over the pudding layer. Lightly wet a spatula with water to spread it evenly.
- Repeat the layers: Add another layer of graham crackers over the marshmallow fluff, then spread the remaining half of the chocolate pudding on top. Add one more layer of graham crackers.
- Finish with topping: Sprinkle semisweet chocolate chips and mini marshmallows over the top layer. If desired, place under the broiler for 30-45 seconds to toast marshmallows.
- Chill: Cover tightly with plastic wrap and refrigerate for at least 6 hours, preferably overnight.
Notes
Don’t rush the chilling time—a full 6 hours minimum is needed for the layers to set. Wet your spatula for spreading marshmallow fluff. Press graham crackers gently; don’t push them into the pudding. Use full-fat ingredients for best results. Toast marshmallows carefully under the broiler.
Nutrition
- Serving Size: 1 square
- Calories: 320
- Sugar: 35
- Sodium: 380
- Fat: 12
- Saturated Fat: 6
- Carbohydrates: 52
- Fiber: 1
- Protein: 5
Keywords: no-bake, s'mores, icebox cake, Labor Day, summer dessert, graham crackers, chocolate pudding, marshmallow fluff


