“Are you sure these nachos will cook in the foil?” my friend whispered, eyeing the glowing embers of the campfire skeptically. I shrugged, half-hopeful, half-expecting a mess. Honestly, the idea of tossing together a cheesy snack over open flames sounded like a gamble — especially with soggy, half-melted cheese and burnt chips looming in my imagination. But that night, after the flames settled and the foil packets steamed gently atop the coals, something unexpectedly delicious happened.
The crunchy, gooey, salty-sweet magic of the Easy Cheesy Campfire Nachos in Foil Packets was born from a moment of improvisation and necessity. We were camping out in the woods, no fancy gear, just a handful of ingredients and a fire pit. I’d forgotten half the meal plan, but luckily, the pantry held tortilla chips and cheese. Wrapping everything in foil, we let the fire do the work while the night sky took over our conversations.
That first bite was a quiet revelation — smoky, cheesy, perfectly melted, with just enough crisp from the chips. It wasn’t fancy, but it was exactly what we needed: comfort food at its simplest, savored under the stars. Since then, I’ve made these Easy Cheesy Campfire Nachos probably a dozen times on camping trips, backyard fire pits, or even just the grill on a lazy weekend. They’re a recipe that stuck because it’s easy, forgiving, and downright satisfying.
What I love most is how this recipe turns a few pantry staples into a shared moment of warmth and flavor — no fuss, no mess, just that perfect foil packet snack. Honestly, it’s a little thing that makes any outdoor meal feel like a treat, and that’s why it’s become such a staple in my cookout routine.
Why You’ll Love This Recipe
This Easy Cheesy Campfire Nachos recipe has become my go-to for quick, crowd-pleasing snacks that deliver big flavor without big effort. Trust me, after testing this on too many camping trips and late-night fireside hangs, I can vouch for its simplicity and tastiness.
- Quick & Easy: Ready in under 15 minutes, perfect for when hunger strikes and the fire’s still crackling.
- Simple Ingredients: You probably have the main players—tortilla chips, cheese, and some extras—in your pantry already.
- Perfect for Outdoor Gatherings: Whether it’s a camping weekend, backyard fire pit hangout, or tailgate party, these nachos fit right in.
- Crowd-Pleaser: Kids, adults, picky eaters—it’s hard not to love melted cheese and crunchy chips together.
- Unbelievably Delicious: The foil packet method locks in moisture while letting the cheese melt beautifully, with just a hint of smoky campfire flavor.
What sets this recipe apart is the no-mess foil packet technique. You don’t have to babysit a pan or worry about dirty dishes piling up. Also, layering the cheese and chips ensures every bite has that perfect cheesy stretch mixed with crispy crunch. Plus, I often toss in some jalapeños or black beans to amp up the flavor and texture.
If you’re looking for comfort food that feels a little adventurous—and not just another skillet nachos recipe—this one is it. It’s the kind of treat that makes you pause, savor, and maybe even close your eyes after that first bite. For a twist, I’ve even paired these foil packet nachos with some smoky crispy air fryer coconut shrimp recently, and wow, talk about an unexpected but delightful combo.
What Ingredients You Will Need
This recipe uses simple, wholesome ingredients to deliver bold flavor and satisfying texture without the fuss. Most of these are pantry staples, but feel free to customize with what you love or have on hand.
- Tortilla chips: About 4 cups (100g), sturdy ones that won’t get soggy too fast. Thick, restaurant-style chips work best.
- Shredded cheese blend: 2 cups (200g) of cheddar and Monterey Jack mix for melty, gooey goodness. I like using Kraft or Tillamook for the best melt.
- Black beans: 1 cup (165g), drained and rinsed, adds protein and texture (optional but highly recommended).
- Jalapeños: 1-2 sliced thin, fresh or pickled, for that spicy kick.
- Green onions: 2 stalks, finely chopped, for freshness and color.
- Cherry tomatoes: 1 cup halved, adds juicy bursts that contrast the cheesy chips.
- Olive oil: 1 tablespoon, just to lightly drizzle and help everything meld.
- Seasonings: 1 teaspoon smoked paprika, ½ teaspoon garlic powder, and a pinch of salt and pepper to bring it all together.
- Sour cream or guacamole: For serving (optional but delicious).
Feel free to swap black beans with pinto beans or even cooked ground beef if you want a meatier option. For a dairy-free version, use a vegan cheese alternative and skip the sour cream or replace it with dairy-free yogurt. When in season, fresh jalapeños and tomatoes add the best crunch and brightness, but pickled jalapeños are a handy standby.
Equipment Needed
- Heavy-duty aluminum foil: Essential for creating sturdy packets that hold heat and prevent leaks.
- Campfire or grill with hot coals: The gentle, even heat is what makes these nachos sing.
- Tongs: For safely flipping and moving foil packets while cooking.
- Mixing bowl: To toss chips, beans, and seasoning comfortably before assembling.
- Knife and cutting board: For slicing jalapeños, green onions, and tomatoes.
Don’t have a campfire? No worries! These foil packets work beautifully on a charcoal or gas grill, or even in a hot oven at 375°F (190°C). For backyard cooks without fire pits, that oven method gives you the same melty, crispy results without smoke. I’ve also tried using a cast iron skillet covered with foil for indoor cooking when camping isn’t an option.
Preparation Method

- Prep your ingredients (10 minutes): Rinse and drain the black beans, slice jalapeños and green onions, and halve the cherry tomatoes. Shred the cheese if not pre-shredded.
- Mix the base: In a large mixing bowl, combine tortilla chips, black beans, jalapeños, green onions, and cherry tomatoes. Drizzle olive oil over the mix and sprinkle smoked paprika, garlic powder, salt, and pepper. Toss gently to coat everything evenly.
- Assemble the foil packets: Tear off two large sheets of heavy-duty foil (about 12×12 inches each). Place one sheet on your work surface and pile half the chip mixture in the center. Sprinkle one cup of shredded cheese over the chips. Add the remaining chip mixture on top, then finish with the rest of the cheese. Fold the foil edges up and crimp to seal the packet tightly.
- Cook over campfire coals (10-15 minutes): Place packets on hot embers or grill grate. Flip carefully halfway through cooking with tongs. The cheese should be melted and bubbling, and the chips warm and slightly crisped. Avoid placing directly in flames to prevent burning.
- Check and serve: Carefully open the foil away from your face to avoid steam burns. Serve immediately with sour cream or guacamole on the side.
If the cheese isn’t melted after 15 minutes, simply reseal and leave the packet a bit longer, watching closely to avoid burning. The key is gentle, steady heat, so patience pays off.
Cooking Tips & Techniques
For the best Easy Cheesy Campfire Nachos, a few learned tricks have saved me from soggy or burnt results more than once. First, avoid stacking the chips too thickly; layers of cheese in between help keep the chips from getting mushy. Tossing the chips with oil and spices before layering adds flavor and a touch of moisture that helps the cheese melt evenly.
When working with campfires, timing is tricky. I learned to wait until the coals are glowing red with minimal flames before placing the packets. Flames can scorch the foil and char the chips, which is a quick way to ruin snack time. Using tongs to flip the packets carefully ensures even cooking on both sides.
If you want extra melty cheese, pre-shredding your blend and using a mix of high-fat cheeses like cheddar and Monterey Jack really pays off. Avoid pre-packaged shredded cheese with anti-caking agents for a smoother melt—freshly shredded is the way to go.
For a little smoky flavor boost, add a small pinch of chipotle powder to your seasoning mix or toss in a few smoked paprika flakes. And multitasking tip: prep your toppings while the fire settles, so assembly is a breeze once the coals are ready.
Variations & Adaptations
Easy Cheesy Campfire Nachos are wonderfully flexible, so you can tailor them to different tastes or dietary needs.
- Vegetarian boost: Add grilled corn kernels, diced bell peppers, or sautéed mushrooms to the mix for extra veggies and texture.
- Meat lover’s version: Toss in cooked, crumbled chorizo or shredded rotisserie chicken for a heartier snack.
- Gluten-free option: Use certified gluten-free tortilla chips and double-check all seasoning blends.
- Dairy-free adaptation: Swap shredded cheese with vegan cheese shreds and use coconut yogurt or guacamole as a topping.
- Seasonal twist: In cooler months, add a spoonful of warm chili or baked beans inside the packet before sealing for a filling treat.
One of my favorite tweaks was adding a drizzle of homemade salsa verde inside the foil before closing—totally changed the flavor profile and made it zingy and fresh. If you’re looking for a creamy pasta to pair alongside, the Tuscan garlic chicken pasta is a great match for a campfire feast.
Serving & Storage Suggestions
Serve your Easy Cheesy Campfire Nachos hot and fresh right out of the foil packets for the best melty-cheesy experience. A dollop of sour cream or creamy guacamole adds a cool contrast, and a squeeze of fresh lime brightens every bite.
For presentation, open the packets at the table and let everyone dig in family-style—there’s something fun and casual about tearing into these cheesy packets together. These nachos also pair nicely with a crisp beer or a tangy margarita if you’re in that kind of mood.
If you have leftovers (which is rare), you can refrigerate them in an airtight container for up to 2 days. To reheat, transfer to a baking sheet and warm in a 350°F (175°C) oven for about 10 minutes to re-crisp the chips and melt the cheese again. Microwave reheating works but might sacrifice some crispness.
Over time, the flavors meld even more, especially if you add toppings like salsa or beans ahead of time. That said, they’re best enjoyed fresh off the fire, when the cheese is still gooey and the chips have that just-right crunch.
Nutritional Information & Benefits
Per serving (serves 4): Approximately 350 calories, 18g fat, 30g carbohydrates, 10g protein.
This recipe offers a decent balance of macronutrients, especially with the addition of black beans, which provide fiber and plant-based protein. Cheese delivers calcium and vitamin B12, contributing to bone health and energy metabolism.
Using olive oil adds heart-healthy fats, and the fresh veggies contribute antioxidants and vitamins. For those mindful of gluten or dairy, the recipe adapts easily to gluten-free chips and dairy-free cheese, making it accessible to many diets.
While indulgent, this snack can fit into a balanced eating plan when enjoyed in moderation, especially alongside some fresh veggies or a light salad. I find it’s a fun, social treat that reminds me food is about moments as much as nutrients.
Conclusion
The Easy Cheesy Campfire Nachos in Foil Packets have earned a permanent spot in my recipe rotation because they’re simple, satisfying, and endlessly adaptable. Whether you’re camping under the stars or just craving a no-fuss snack by the backyard fire pit, this recipe delivers comfort and flavor with minimal effort.
Feel free to tweak ingredients and toppings to match your mood or pantry, and don’t be shy about experimenting with spice levels or add-ins—nachos are all about personal flavor adventure. I keep coming back to this recipe because it’s just right: cheesy, crunchy, and perfectly melty every single time.
Let me know how your foil packet nachos turn out, or what creative twists you’ve tried—you know I love hearing about your kitchen wins and experiments. Here’s to many cozy nights sharing simple, delicious food!
FAQs about Easy Cheesy Campfire Nachos in Foil Packets
Can I make these nachos without a campfire?
Absolutely! You can cook these foil packets on a grill or in your oven at 375°F (190°C) for 12-15 minutes until the cheese melts and chips crisp up.
What type of cheese works best for campfire nachos?
A blend of cheddar and Monterey Jack is ideal for meltability and flavor. Avoid pre-shredded cheese with anti-caking agents, as it doesn’t melt as smoothly.
Can I prepare these packets ahead of time?
Yes, you can assemble the foil packets in advance and keep them refrigerated for a few hours. Just add a couple extra minutes to cooking time if cooking cold packets.
How do I keep the chips from getting soggy?
Make sure to layer cheese between chips and avoid adding too many wet ingredients. Drizzling olive oil helps keep the chips crisp, and cooking over embers rather than flames prevents burning.
Are these nachos suitable for vegetarians?
Definitely! Simply omit any meat and load up on beans, veggies, and cheese. You can also try adding grilled corn or bell peppers for extra flavor and texture.
Pin This Recipe!
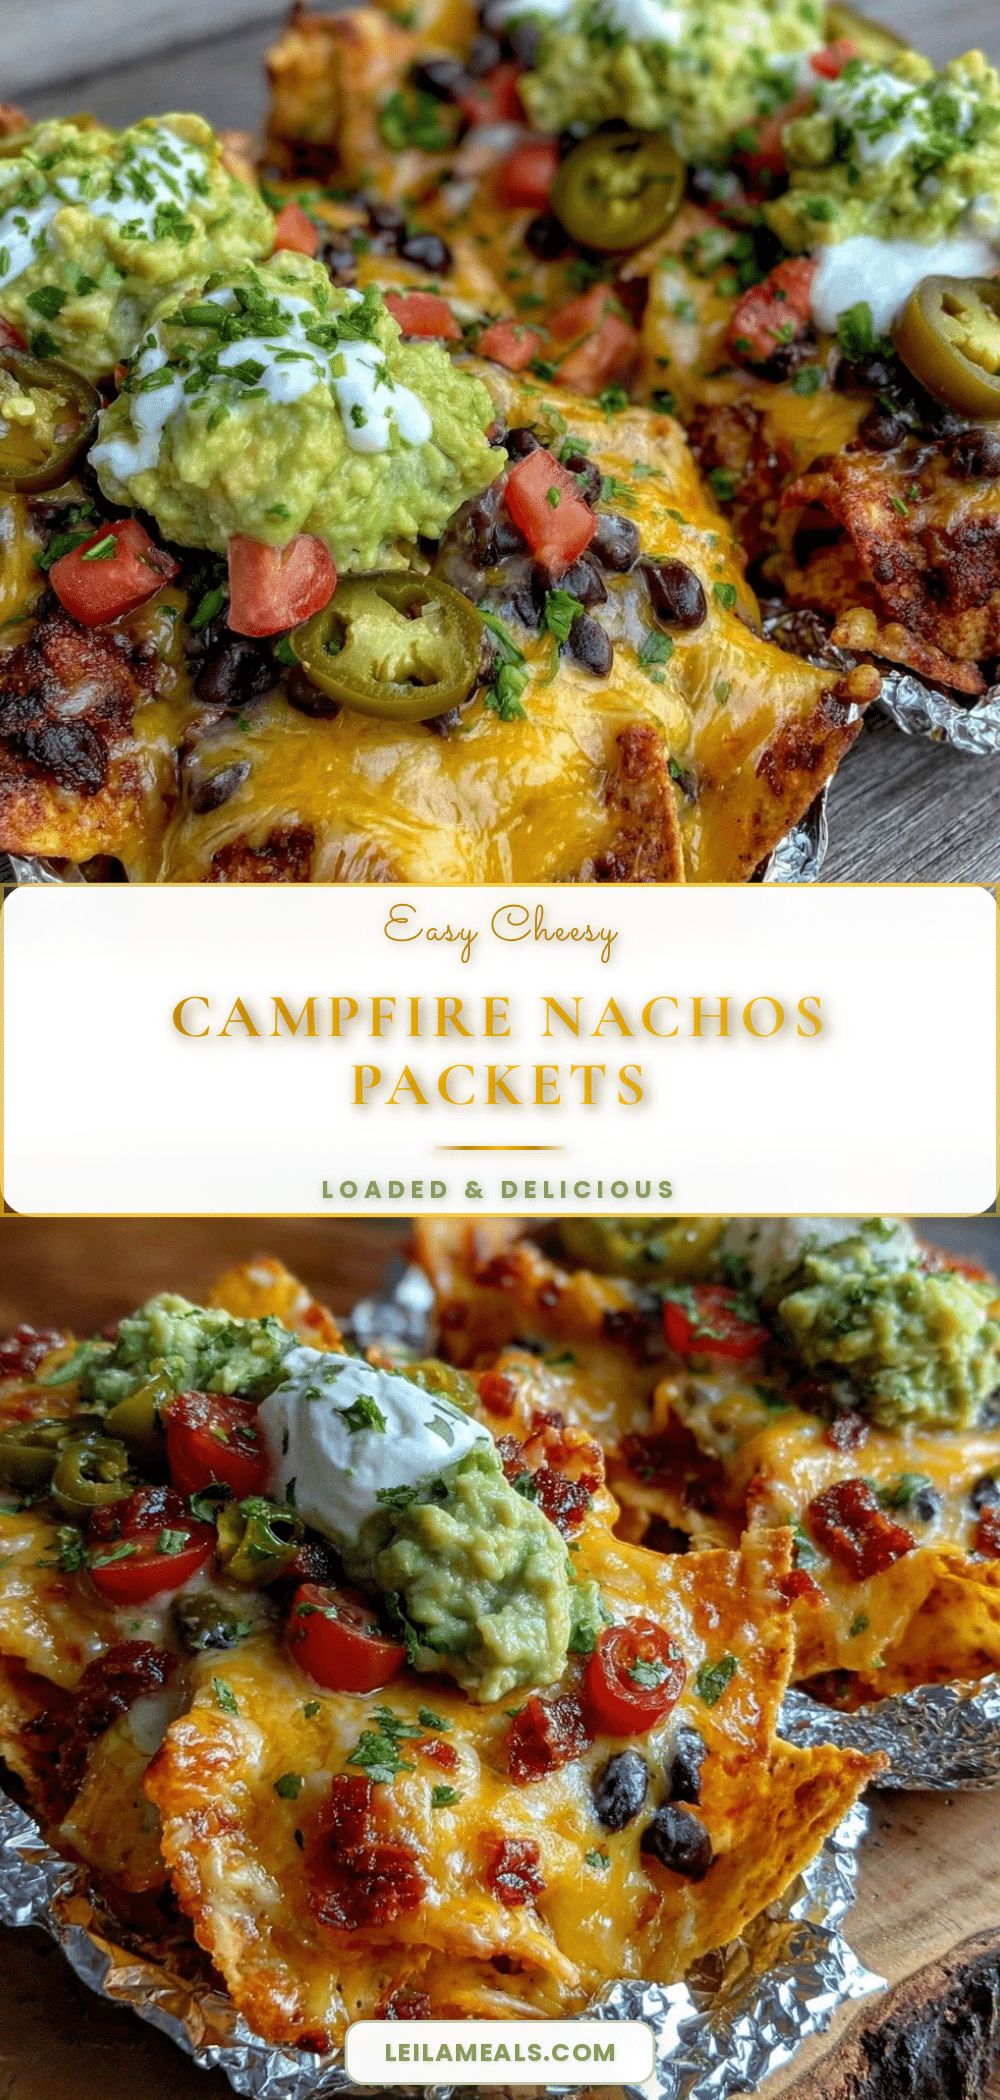
Easy Cheesy Campfire Nachos Recipe for Perfect Foil Packet Snacks

A simple, crowd-pleasing recipe for cheesy nachos cooked in foil packets over a campfire or grill, delivering melty cheese and crispy chips with minimal effort.
- Prep Time: 10 minutes
- Cook Time: 10-15 minutes
- Total Time: 20-25 minutes
- Yield: 4 servings 1x
- Category: Snack
- Cuisine: American
Ingredients
- 4 cups (100g) sturdy tortilla chips
- 2 cups (200g) shredded cheddar and Monterey Jack cheese blend
- 1 cup (165g) black beans, drained and rinsed (optional but recommended)
- 1–2 jalapeños, sliced thin, fresh or pickled
- 2 stalks green onions, finely chopped
- 1 cup cherry tomatoes, halved
- 1 tablespoon olive oil
- 1 teaspoon smoked paprika
- ½ teaspoon garlic powder
- Pinch of salt and pepper
- Sour cream or guacamole for serving (optional)
Instructions
- Prep your ingredients (10 minutes): Rinse and drain the black beans, slice jalapeños and green onions, and halve the cherry tomatoes. Shred the cheese if not pre-shredded.
- Mix the base: In a large mixing bowl, combine tortilla chips, black beans, jalapeños, green onions, and cherry tomatoes. Drizzle olive oil over the mix and sprinkle smoked paprika, garlic powder, salt, and pepper. Toss gently to coat everything evenly.
- Assemble the foil packets: Tear off two large sheets of heavy-duty foil (about 12×12 inches each). Place one sheet on your work surface and pile half the chip mixture in the center. Sprinkle one cup of shredded cheese over the chips. Add the remaining chip mixture on top, then finish with the rest of the cheese. Fold the foil edges up and crimp to seal the packet tightly.
- Cook over campfire coals (10-15 minutes): Place packets on hot embers or grill grate. Flip carefully halfway through cooking with tongs. The cheese should be melted and bubbling, and the chips warm and slightly crisped. Avoid placing directly in flames to prevent burning.
- Check and serve: Carefully open the foil away from your face to avoid steam burns. Serve immediately with sour cream or guacamole on the side.
Notes
Avoid stacking chips too thickly and layer cheese between chips to prevent sogginess. Use freshly shredded cheese for best melt. Cook over glowing embers, not direct flames, and flip packets halfway through cooking. Can be cooked in oven at 375°F for 12-15 minutes if no campfire is available. Leftovers can be refrigerated up to 2 days and reheated in oven for best crispness.
Nutrition
- Serving Size: Approximately 1/4 of
- Calories: 350
- Fat: 18
- Carbohydrates: 30
- Protein: 10
Keywords: campfire nachos, foil packet snacks, cheesy nachos, camping food, easy snacks, outdoor cooking, foil packet recipes