I had been looking for a summer dessert that actually delivered on flavor without requiring a trip to three different stores for specialty ingredients. For a while, I just accepted that quick fruit desserts meant sacrificing either texture or taste. The crumble would turn soggy, or the filling would be too runny, or—worst of all—you’d bite into something that tasted more like sugar than actual fruit.
It was a Tuesday afternoon in late July. The peaches on my counter were so ripe they were practically begging to be used. I had butter in the fridge and a box of yellow cake mix in the pantry (leftover from a last-minute birthday situation). And I thought—honestly, why not try it? Three ingredients. No rolling pin. No complicated steps.
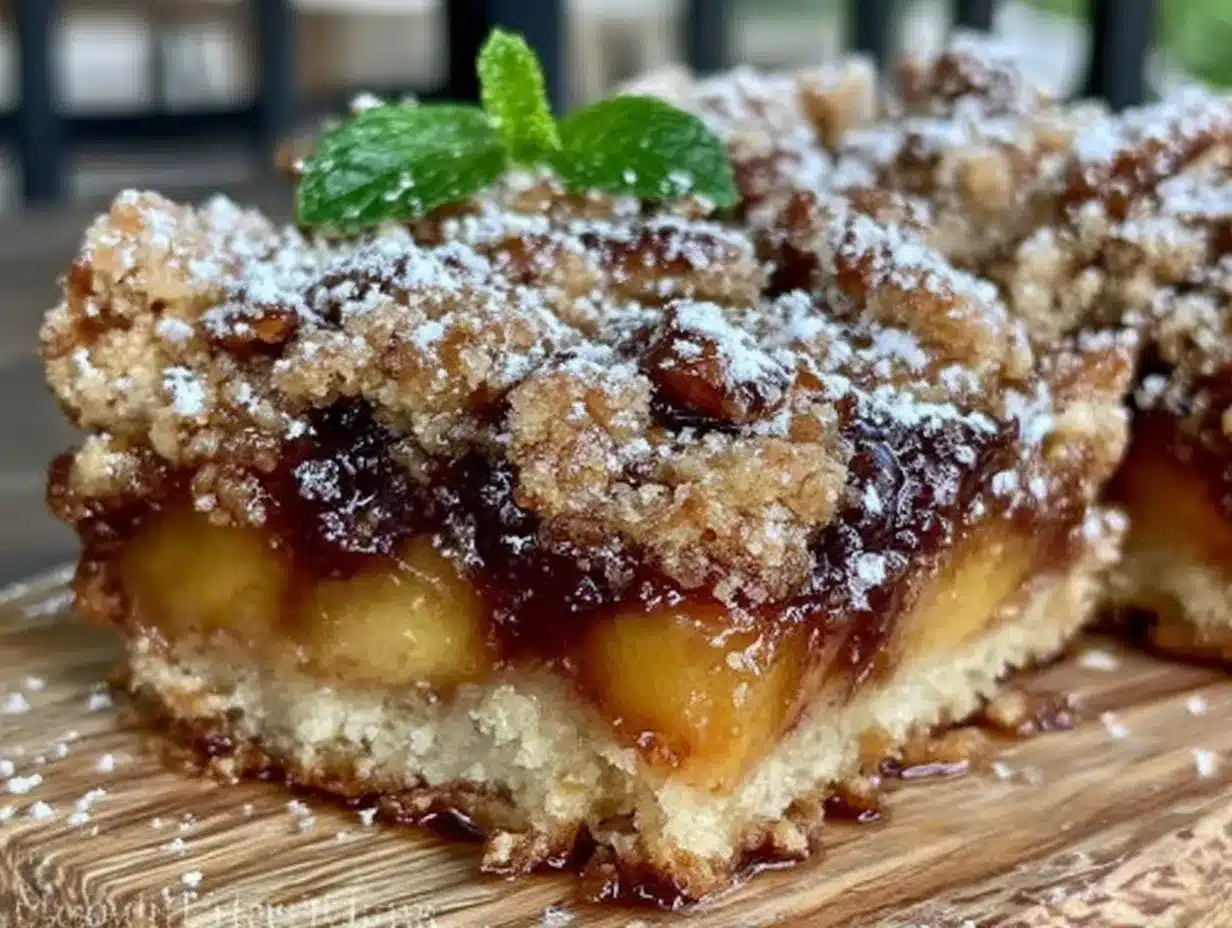
The first batch came out of the oven looking like something you’d see in a bakery display case. The top was golden and slightly crackled, the peach filling bubbled up around the edges, and the smell—sweet, buttery, and fruity all at once—filled the whole kitchen. I let them cool for exactly as long as my patience allowed, which was about ten minutes.
That first bite was the moment I knew these Easy 3-Ingredient Peach Crumble Bars were going to become a permanent fixture in my summer rotation. The crust was crisp, the filling was jammy without being overly sweet, and the whole thing came together in less time than it takes to preheat the oven. It just worked.
Why You’ll Love This Recipe
These peach crumble bars have a way of making you look like you spent hours in the kitchen when you really didn’t. That’s the kind of energy I can get behind.
- Only Three Ingredients: Cake mix, butter, and peaches. That’s it. No eggs, no heavy cream, no obscure extracts. You probably have all of them right now.
- No Fancy Equipment: You don’t need a mixer, a pastry cutter, or anything you wouldn’t already have in a basic kitchen. A bowl and a baking dish will do the trick.
- Perfect for Summer Gatherings: These bars travel well, don’t need refrigeration immediately, and taste fantastic at room temperature. They’re ideal for picnics, potlucks, or lazy backyard afternoons.
- Naturally Crowd-Pleasing: I’ve brought these to three different events this summer, and every single time someone asked for the recipe. Kids love them. Adults love them. They just disappear.
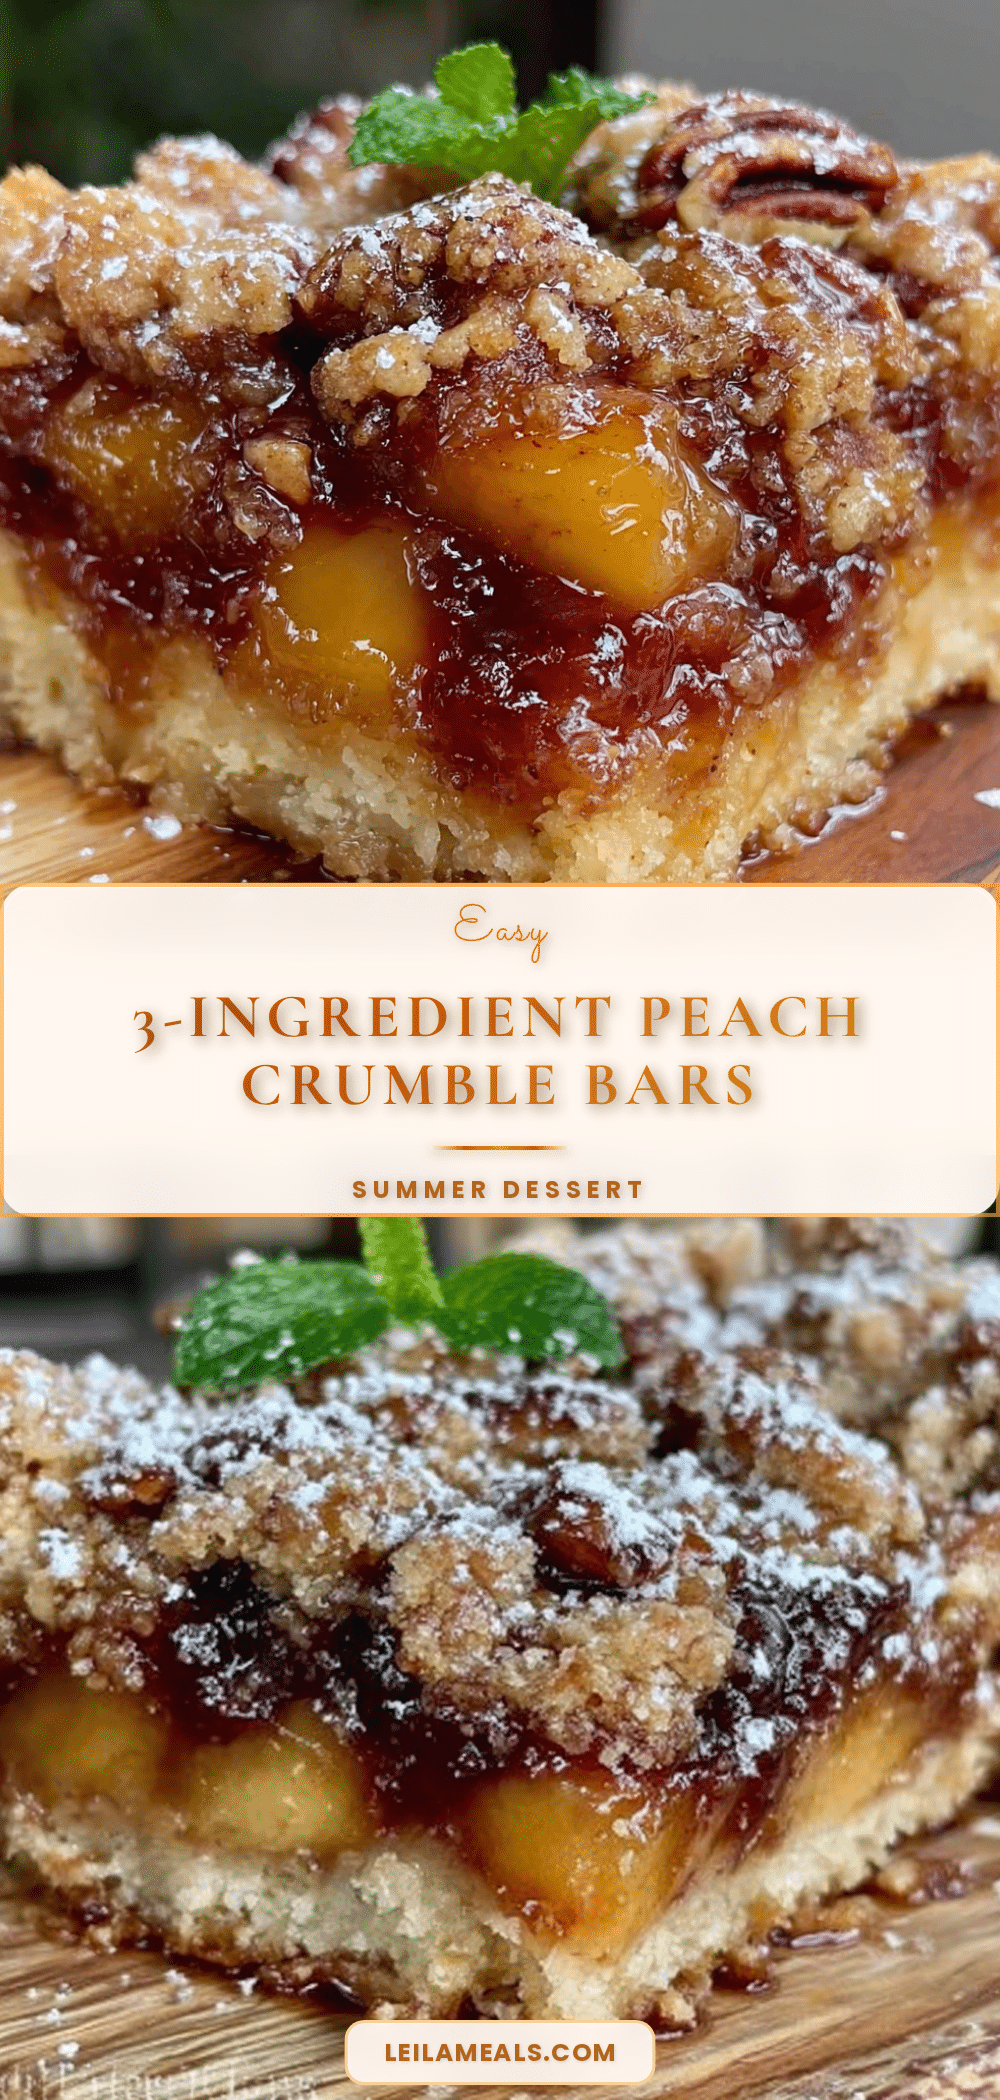
- Unbelievably Delicious Texture: The top gets this beautiful, buttery crumble that’s almost like a shortbread, while the bottom stays firm enough to hold everything together. The peaches soften into this concentrated, jammy layer that’s pure summer in every bite.
What makes these bars different from other fruit desserts is how straightforward they are. There’s no pre-cooking the filling, no chilling the dough, no worrying about whether your crust will stick. You mix, you layer, you bake. And somehow, three simple ingredients transform into something that tastes far more complex than it has any right to be.
This is the kind of dessert that makes you close your eyes after the first bite. It’s comfort food simplified—faster, easier, but with the same soul-soothing satisfaction. Perfect for impressing guests without the stress, or turning a simple Tuesday into something memorable.
What Ingredients You Will Need
This recipe uses simple, everyday ingredients to deliver bold flavor and satisfying texture without the fuss. Here’s what you need:
For the Bars
- 1 box (15.25 oz) yellow cake mix – This is the backbone of the recipe. The cake mix provides both structure and sweetness. I prefer Betty Crocker or Duncan Hines for consistent results, but any standard brand works. The dry mix creates that crumbly, buttery texture when combined with the butter.
- 1/2 cup (1 stick) unsalted butter, melted – Butter is what makes the crust and topping rich and golden. Use unsalted so you can control the salt level. If you only have salted butter, just reduce any extra salt you might add. Melt it gently in the microwave or on the stovetop—you want it liquid but not hot.
- 3-4 medium ripe peaches, peeled and sliced (about 2 cups) – Fresh, ripe peaches are the star here. Look for peaches that give slightly when you press them gently—that’s the sweet spot. If your peaches are on the firmer side, let them sit on the counter for a day or two. You can peel them or leave the skin on if you prefer a bit of texture. I usually peel mine for a smoother filling, but it’s not essential.
Optional Add-Ins
- 1 tablespoon granulated sugar – Only if your peaches are a bit tart. Taste them first—if they’re already sweet, skip this.
- 1/2 teaspoon cinnamon – Adds warmth and depth. I love this combination, but it’s entirely optional.
- Pinch of salt – A tiny sprinkle on top before baking balances the sweetness nicely.
Ingredient Selection Tips: For the best texture, use a standard yellow cake mix—not the “butter recipe” or “extra moist” varieties, which can change the consistency. If you only have a gluten-free cake mix, that works too, but the texture will be slightly more delicate. For the peaches, avoid overly soft or bruised fruit; they’ll release too much liquid and make the bars soggy.
Substitution Guidance: You can swap the peaches for nectarines, plums, or even apricots if you want to experiment. Frozen peaches work in a pinch—just thaw and drain them well first, and pat them dry with paper towels to remove excess moisture. For a dairy-free version, use a plant-based butter alternative, though the texture may be slightly less crisp.
Equipment Needed
You don’t need much for this recipe, which is part of the beauty.
- 8×8-inch baking dish – A square pan works perfectly for these bars. If you only have a 9×9, that’s fine too—the bars will just be slightly thinner and may bake a few minutes faster.
- Mixing bowl – Any medium-sized bowl will do.
- Spatula or wooden spoon – For stirring the crust mixture together.
- Parchment paper – Optional but highly recommended. Lining the pan makes lifting the bars out so much easier, and cleanup is a breeze.
- Knife and cutting board – For slicing the peaches.
- Measuring cups and spoons – For the butter and any optional add-ins.
Budget-Friendly Alternatives: If you don’t have parchment paper, you can grease the pan thoroughly with butter or non-stick spray. Just be sure to get the corners. A glass or ceramic baking dish works just as well as metal—just keep an eye on the baking time, as glass tends to hold heat a bit longer.
I’ve made these bars in a disposable aluminum pan before (for a camping trip, actually), and they turned out just fine. The edges were a bit crisper, but nobody complained.
Preparation Method
This recipe comes together in about 10 minutes of active work. The oven does the rest.
- Preheat your oven to 350°F (175°C). While it’s heating, line your 8×8-inch baking dish with parchment paper, leaving some overhang on two opposite sides. This makes lifting the bars out later incredibly easy. If you don’t have parchment, grease the pan well with butter.
- Prepare the crust mixture. In a medium mixing bowl, combine the entire box of yellow cake mix with the melted butter. Stir with a spatula or wooden spoon until the mixture comes together into a crumbly, sandy texture. It should look like wet sand—some clumps are totally fine. Resist the urge to add more butter; the mixture should be crumbly, not doughy.
- Press the bottom layer. Reserve about 1 cup of the crust mixture for the topping. Transfer the remaining mixture into your prepared baking dish. Press it down firmly and evenly into the bottom. I use the back of a measuring cup or my fingers—just make sure it’s compact and level. This creates a solid base that will hold the peach filling.
- Prepare the peaches. If you’re peeling them, bring a small pot of water to a boil, drop the peaches in for 30 seconds, then transfer them to an ice bath. The skins should slip right off. Slice the peaches into thin wedges, about 1/4-inch thick. If your peaches are very juicy, give them a gentle pat with a paper towel.
- Layer the peaches. Arrange the peach slices evenly over the pressed crust. Spread them out so they cover the entire surface. If you’re adding sugar or cinnamon, sprinkle it over the peaches now. Don’t worry if the peaches overlap slightly—they’ll shrink as they bake.
- Add the crumble topping. Sprinkle the reserved crust mixture evenly over the peaches. Don’t press it down—you want it to stay loose and crumbly so it bakes into that beautiful golden topping. Some peaches will peek through, and that’s exactly what you want.
- Bake for 35-40 minutes. Place the dish on the middle rack of your preheated oven. Bake until the top is golden brown and the peach filling is bubbly around the edges. The kitchen should smell incredible at this point. If the top is browning too quickly but the center isn’t done, tent loosely with foil for the last 5-10 minutes.
- Cool completely before slicing. This is the hardest part, I know. Let the bars cool in the pan on a wire rack for at least 1 hour. The filling needs time to set, or your bars will fall apart when you cut them. For cleaner slices, refrigerate for 30 minutes after cooling.
- Lift and slice. Use the parchment overhang to lift the entire block of bars out of the pan. Place on a cutting board and slice into 9 or 16 squares, depending on how big you want them. A sharp knife works best—wipe it clean between cuts for neat edges.
Sensory Cues: When the crust mixture is ready, it should feel like damp sand in your hands—crumbly but holds together when squeezed. The peaches should look glossy and slightly translucent after baking. The topping should be a deep golden brown, and you should see little bubbles of peach juice around the edges of the pan.
Cooking Tips & Techniques
I’ve made these bars more times than I can count, and I’ve learned a few things along the way.
Don’t overmix the crust. Stir just until the cake mix and butter come together. Overmixing can make the crust tough instead of tender. A few dry spots are fine—they’ll get incorporated when you press the mixture into the pan.
Press the bottom layer firmly. This is key for a stable bar. If the bottom crust is too loose, it won’t hold together when you slice. Use the flat bottom of a glass or measuring cup to really compact it.
Watch the baking time. Every oven runs a little differently. Start checking at 35 minutes. The bars are done when the top is golden and the filling is bubbling. If you see the edges getting too dark before the center is set, cover with foil and continue baking.
Let them cool completely. I cannot stress this enough. I once cut into a warm pan of bars because I couldn’t wait, and I ended up with a delicious but very messy crumble situation. Patience pays off here. The bars firm up significantly as they cool, and the flavors meld together beautifully.
Use room temperature butter if possible. While melted butter works perfectly, letting it cool slightly before mixing helps the crust hold together better. If your butter is too hot, it can make the mixture greasy.
Peach prep matters. If your peaches are super juicy, give them a gentle pat with a paper towel after slicing. Too much liquid can make the bars soggy. And if you’re using frozen peaches, thaw them completely and drain off any excess liquid before using.
Variations & Adaptations
One of the best things about this recipe is how easy it is to adapt. Here are some variations I’ve tried and loved:
- Berry Peach Crumble Bars: Swap half the peaches for fresh or frozen blueberries, raspberries, or blackberries. The combination of sweet peaches and tart berries is incredible. Just reduce the sugar slightly if your berries are very sweet.
- Gluten-Free Version: Use a gluten-free yellow cake mix. I’ve tried this with both King Arthur and Bob’s Red Mill brands, and both worked well. The texture is slightly more delicate, so let them cool completely before slicing.
- Spiced Peach Crumble Bars: Add 1/2 teaspoon of cinnamon, 1/4 teaspoon of nutmeg, and a pinch of cloves to the crust mixture. It gives the bars a warm, cozy flavor that’s perfect for fall.
- Vegan Adaptation: Use a vegan cake mix (most are accidentally vegan) and a plant-based butter alternative. Miyoko’s or Earth Balance work best for texture. The bars will be slightly less crisp but still delicious.
- Nectarine or Apricot Version: These fruits work exactly the same way as peaches. Nectarines don’t need to be peeled, which saves a step. Apricots are smaller, so you might need 5-6 instead of 3-4 peaches.
I once made a batch with half peaches and half plums from a neighbor’s tree, and the tangy-sweet combination was so good I made it twice more that month. Don’t be afraid to experiment with whatever fruit looks good at the market.
Serving & Storage Suggestions
These bars are incredibly versatile when it comes to serving. Here’s how I like to enjoy them:
Serving Temperature: They’re fantastic at room temperature, but I also love them slightly warm with a scoop of vanilla ice cream or a dollop of whipped cream. The contrast between the warm, jammy peaches and the cold, creamy ice cream is next-level. If you’re serving them at a party, arrange them on a platter with fresh mint leaves for a pop of color.
Complementary Dishes: These bars pair beautifully with a cup of coffee or iced tea. For a summer brunch, serve them alongside a healthy Greek chicken bowl for a sweet-savory balance. Or, if you’re hosting a backyard barbecue, they’re the perfect finish after something like lemon garlic salmon.
Storage Instructions: Store leftover bars in an airtight container at room temperature for up to 3 days. If your kitchen is very warm, you can refrigerate them, but let them come to room temperature before serving for the best texture. For longer storage, wrap individual bars in plastic wrap and place them in a freezer-safe bag. They’ll keep in the freezer for up to 3 months.
Reheating Tips: To reheat, pop a bar in a 300°F oven for 5-7 minutes, or microwave for 15-20 seconds. The oven method gives you a crisper topping, while the microwave is quicker. If you’re reheating from frozen, let the bar thaw at room temperature for about 30 minutes first.
Flavor Development: These bars actually taste even better the next day. The flavors have time to meld, and the texture becomes more cohesive. So don’t hesitate to make them a day ahead—they’ll be just as good, if not better.
Nutritional Information & Benefits
While these bars are definitely a treat, they do offer some nutritional benefits thanks to the peaches.
Estimated Nutritional Values (per bar, based on 9 servings):
- Calories: 280
- Fat: 11g
- Carbohydrates: 44g
- Fiber: 2g
- Sugar: 24g
- Protein: 3g
Health Benefits of Peaches: Peaches are a good source of vitamins A and C, which support immune function and skin health. They also contain fiber, which aids digestion, and antioxidants that help reduce inflammation. So while these bars are indulgent, they’re not completely without merit.
Dietary Considerations: This recipe is vegetarian and can be made vegan with simple substitutions. It’s not gluten-free unless you use a gluten-free cake mix. If you’re watching your sugar intake, you can reduce the sugar in the peach layer or use a sugar-free cake mix, though the texture will be slightly different.
Potential Allergens: This recipe contains wheat (gluten) and dairy (butter). Check your cake mix label for any other potential allergens, as some brands may contain soy or other ingredients.
I personally love that these bars feel like a special treat without requiring a full day in the kitchen. They’re the kind of dessert that makes you feel like you’re treating yourself, even on a busy weeknight.
Conclusion
These Easy 3-Ingredient Peach Crumble Bars are proof that you don’t need a long ingredient list or complicated techniques to make something truly delicious. They’re the summer dessert I turn to again and again, whether I’m hosting a backyard barbecue or just craving something sweet on a quiet evening.
The beauty of this recipe is how adaptable it is. Swap the peaches for whatever fruit is in season. Add spices or extracts to match your mood. Serve them warm with ice cream or pack them for a picnic. They work every time, and they never fail to impress.
I’d love to hear how these turn out for you. Did you try a different fruit? Add a twist? Share your version in the comments below—I’m always looking for new ideas to try. And if you enjoyed this recipe, don’t forget to pin it for later or share it with a friend who loves easy desserts.
Happy baking, and here’s to summer days made sweeter with simple, honest food.
Frequently Asked Questions
Can I use canned peaches instead of fresh?
Yes, you can use canned peaches, but drain them well and pat them dry with paper towels. Canned peaches are packed in syrup or juice, so they have more moisture than fresh. Reduce any added sugar since they’re already sweetened. Frozen peaches also work—just thaw, drain, and pat dry before using.
Why did my bars turn out soggy?
Soggy bars usually happen when the peaches are too juicy or the crust wasn’t pressed firmly enough. Make sure to pat your peach slices dry before layering them, and press the bottom crust down really well. If your peaches are very ripe and juicy, you can toss them with a tablespoon of cornstarch before adding them to the pan to help absorb excess liquid.
Can I make these bars ahead of time?
Absolutely. These bars actually taste even better the next day after the flavors have had time to meld. Bake them, let them cool completely, and store them in an airtight container at room temperature for up to 3 days. You can also freeze them for up to 3 months—just wrap individual bars in plastic wrap and place them in a freezer bag.
What other cake mix flavors can I use?
Yellow cake mix gives the most classic, buttery flavor, but you can experiment with others. White cake mix works well for a lighter taste. French vanilla adds a subtle vanilla note. For a fun twist, try spice cake mix with fall fruits like apples or pears. Just avoid chocolate cake mix—it doesn’t pair as well with peaches.
How do I get clean slices without the bars falling apart?
Patience is key here. Let the bars cool completely—at least 1 hour at room temperature, or 30 minutes in the refrigerator. Use a sharp knife and wipe it clean between each cut. For the neatest slices, lift the entire block out of the pan using the parchment overhang before cutting. If they’re still a bit crumbly, don’t worry—they’ll taste just as good.
Pin This Recipe!
Easy 3-Ingredient Peach Crumble Bars Best Summer Dessert
These Easy 3-Ingredient Peach Crumble Bars are the perfect summer dessert, made with just cake mix, butter, and fresh peaches. They come together in minutes and deliver a buttery, jammy, crowd-pleasing treat that tastes like you spent hours in the kitchen.
- Prep Time: 15 minutes
- Cook Time: 35-40 minutes
- Total Time: 1 hour 50 minutes (including cooling)
- Yield: 9 servings 1x
- Category: Dessert
- Cuisine: American
Ingredients
- 1 box (15.25 oz) yellow cake mix
- 1/2 cup (1 stick) unsalted butter, melted
- 3–4 medium ripe peaches, peeled and sliced (about 2 cups)
- 1 tablespoon granulated sugar (optional, if peaches are tart)
- 1/2 teaspoon cinnamon (optional)
- Pinch of salt (optional)
Instructions
- Preheat your oven to 350°F (175°C). Line an 8×8-inch baking dish with parchment paper, leaving overhang on two opposite sides. Grease the pan if not using parchment.
- In a medium mixing bowl, combine the entire box of yellow cake mix with the melted butter. Stir until the mixture is crumbly and resembles wet sand.
- Reserve about 1 cup of the crust mixture for the topping. Press the remaining mixture firmly and evenly into the bottom of the prepared baking dish.
- If peeling peaches, blanch them in boiling water for 30 seconds, then transfer to an ice bath. Slip off the skins. Slice peaches into thin wedges (about 1/4-inch thick). Pat dry if very juicy.
- Arrange the peach slices evenly over the pressed crust. Sprinkle with sugar and cinnamon if using.
- Sprinkle the reserved crust mixture evenly over the peaches. Do not press down.
- Bake for 35-40 minutes, until the top is golden brown and the filling is bubbly around the edges. Tent with foil if browning too quickly.
- Cool completely in the pan on a wire rack for at least 1 hour (or refrigerate for 30 minutes for cleaner slices).
- Use the parchment overhang to lift the bars out of the pan. Slice into 9 or 16 squares with a sharp knife, wiping clean between cuts.
Notes
For best results, use a standard yellow cake mix (not ‘butter recipe’ or ‘extra moist’). Press the bottom crust firmly to prevent sogginess. Pat peaches dry if very juicy. Cool completely before slicing for clean bars. Bars taste even better the next day.
Nutrition
- Serving Size: 1 bar (based on 9 se
- Calories: 280
- Sugar: 24
- Sodium: 320
- Fat: 11
- Saturated Fat: 6
- Carbohydrates: 44
- Fiber: 2
- Protein: 3
Keywords: peach crumble bars, 3-ingredient dessert, easy peach dessert, summer dessert, peach bars, crumble bars