“So, you actually made that syrup again?” My neighbor, Karen, peered over my fence, holding her mug of coffee like she was about to deliver a verdict. “I need a bottle. The kids brought home something from school, and I refuse to get sick again.”
I laughed and handed her a jar through the slats. That was the moment I realized this wasn’t just a hobby anymore. This Wholesome Golden Spiced Elderberry Immune Syrup had become a neighborhood staple. It started as a little experiment on my stovetop one rainy afternoon—I was tired of the sugary, artificial-tasting stuff from the store. I wanted something that actually tasted good, something warm and comforting, not like cough medicine.
This isn’t your typical dark, berry-heavy syrup. The “golden” part comes from a generous dose of turmeric and fresh ginger, which gives it this beautiful, sunny hue and a gentle, warming spice. It feels less like taking medicine and more like sipping a cozy tea. The honey smooths out the edge, and the whole spices—cinnamon, clove, a whisper of black pepper—make it complex. It’s the kind of thing you make when you want to feel proactive about your health, but you also want to enjoy the process. Honestly, I look forward to cold season now just so I have an excuse to brew a batch.
The first time I made it, I was skeptical. Elderberries can be tart, and turmeric has that earthy punch. But the combination works. It’s not a magic cure, but it is a delicious, wholesome ritual. And when Karen texted me a week later saying her family skated through the season without a sniffle, I knew this recipe was a keeper. So, let me show you how to make your own.
Why You’ll Love This Recipe
I’ve tested this syrup more times than I can count, tweaking the spice ratios and the steeping time until it was just right. It isn’t just another wellness recipe; it’s the one I trust for my own family.
- Simple, Whole Ingredients: No weird additives or preservatives. You can pronounce everything in this jar.
- Actually Tastes Good: Let’s be real—most immune syrups are a chore to swallow. This one is warm, spiced, and slightly sweet. You’ll actually want to take it.
- Budget-Friendly: Dried elderberries and spices are cheap, especially compared to the fancy bottles at the health food store. One batch saves you a ton of money.
- Customizable: You can dial up the ginger for more heat or add extra honey for sweetness. It’s your kitchen, your rules.
- Family-Approved: My kids call it “warm hug juice.” They ask for it by name. That alone makes it a winner in my book.
What sets this apart from other recipes is the “golden” twist. Most elderberry syrups are just berries and honey. By adding turmeric, ginger, and a pinch of black pepper (which helps your body absorb the turmeric), you’re getting a broader spectrum of immune support. It’s not just fighting off bugs; it’s supporting your whole system. And it tastes like a chai latte’s healthier cousin.
This recipe is perfect for busy mornings when you feel a tickle in your throat, for cozy evenings by the fire, or for packing into little jars to share with friends who need a little support. It’s comfort food for your immune system.
What Ingredients You Will Need
This recipe uses simple, pantry-friendly ingredients to deliver a powerful, flavorful syrup. Most of these items you might already have in your spice cabinet, which makes this an easy project to start on a whim.
- Dried Elderberries (½ cup): The star of the show. Look for dried, organic elderberries from a reputable source like Starwest Botanicals or Frontier Co-op. They should be dark purple and smell faintly sweet. Don’t use fresh elderberries—they need to be cooked to be safe.
- Fresh Ginger (2-inch piece, sliced): Adds a sharp, warming kick. I leave the skin on because it’s full of flavor and nutrients, just give it a good scrub. You can use 1 teaspoon of dried ginger in a pinch, but fresh is so much better.
- Fresh Turmeric (2-inch piece, sliced): This is what gives the syrup its gorgeous golden color and earthy depth. It stains everything (including your fingers!), so wear gloves if you care about that sort of thing. If you can’t find fresh, use 1 tablespoon of dried turmeric powder.
- Cinnamon Sticks (2): They add a sweet, woody warmth that balances the turmeric. I prefer Ceylon cinnamon for its delicate flavor, but Cassia works perfectly too.
- Whole Cloves (1 teaspoon): A little goes a long way. They add that classic, spicy, almost medicinal note that makes this taste like a real remedy.
- Black Peppercorns (½ teaspoon): This isn’t just for flavor. Piperine in black pepper dramatically increases the absorption of curcumin (the active compound in turmeric). Don’t skip it.
- Filtered Water (4 cups): Use filtered water to avoid any off-flavors from tap water. It makes a difference in the final taste.
- Raw Honey (½ to 1 cup): Wait to add this until the syrup has cooled completely. Raw honey contains beneficial enzymes and probiotics that are destroyed by heat. Use a good-quality local honey for the best flavor and local allergy benefits.
You can also add a star anise pod for a subtle licorice note, or a slice of dried orange peel for a citrusy lift. I’ve done both, and they’re lovely variations.
Equipment Needed
You don’t need a fancy kitchen to make this syrup. I’ve made it in a tiny apartment and a full kitchen, and it works the same.
- Medium Saucepan (3-4 quart): A heavy-bottomed pot works best for even simmering. My old enameled cast iron pot is perfect for this.
- Fine-Mesh Strainer or Cheesecloth: You need to strain out all the solids. A nut milk bag works great too. Don’t use a regular colander—the seeds will slip through.
- Glass Jar or Bottle (16-20 oz): A swing-top bottle is ideal, but a regular mason jar works perfectly. Make sure it’s sterilized (run it through the dishwasher or boil it for 10 minutes).
- Measuring Cups and Spoons: Basic kitchen tools. Nothing fancy needed.
- Wooden Spoon or Silicone Spatula: For stirring. Avoid metal if you’re using a non-stick pot.
If you don’t have a fine-mesh strainer, you can line a regular colander with a clean kitchen towel or a couple layers of cheesecloth. It’s a little messier, but it works just as well.
Preparation Method
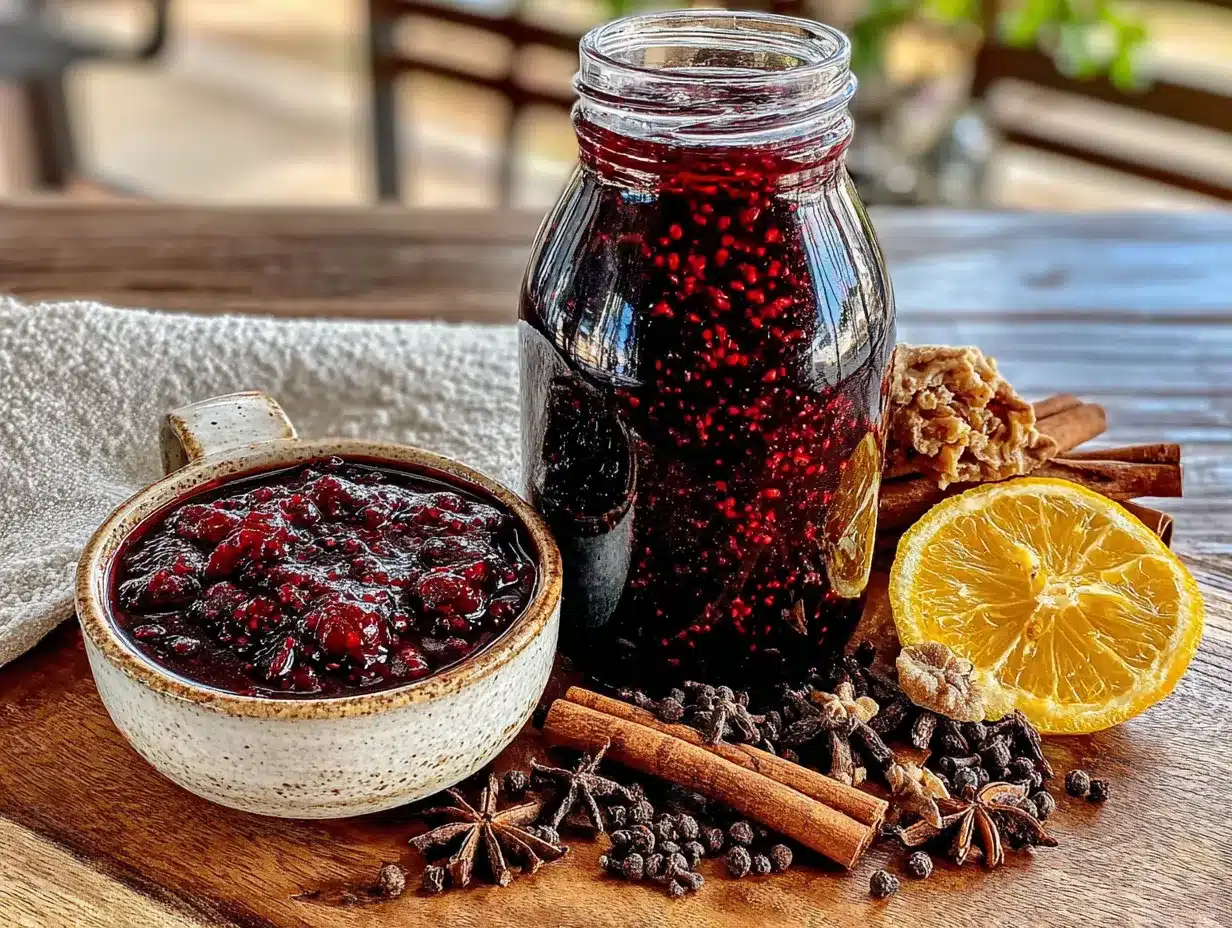
This process is more like brewing a strong tea than cooking. The goal is to gently extract all the goodness from the berries and spices without boiling the life out of them. It takes about an hour, but most of that is hands-off simmering time.
- Combine the Ingredients: In your medium saucepan, add the ½ cup dried elderberries, the sliced ginger, sliced turmeric, 2 cinnamon sticks, 1 teaspoon whole cloves, and ½ teaspoon black peppercorns. Pour in the 4 cups of filtered water. Give it a quick stir to make sure everything is submerged.
- Bring to a Gentle Boil: Set the pot over medium-high heat. Watch it closely—you want to bring it to a boil, but not a rolling, violent one. As soon as you see bubbles breaking the surface, reduce the heat to low. This usually takes about 5-7 minutes.
- Simmer, Don’t Boil: This is the most important step. Cover the pot with a lid, leaving it slightly ajar so steam can escape. Let it simmer gently for 45 minutes. The liquid will reduce by about half, and your kitchen will smell incredible—like a spiced forest. Don’t rush this. A longer, gentler simmer extracts more of the beneficial compounds from the elderberries and spices.
- Mash and Steep: After 45 minutes, turn off the heat. Using the back of your wooden spoon, gently mash the elderberries against the side of the pot. This releases even more of their deep, purple goodness. Let the mixture sit, covered, for another 15-20 minutes to steep and cool slightly. It should be warm, not hot, when you strain it.
- Strain Thoroughly: Place your fine-mesh strainer over a large bowl or a glass measuring cup. Carefully pour the liquid through the strainer. Use your spoon to press down on the solids to extract every last drop of syrup. You should end up with about 1.5 to 2 cups of a dark, richly colored liquid. Discard the solids (they’ve given you everything they have).
- Cool to Room Temperature: Let the strained liquid cool completely. This is critical. If you add honey to hot liquid, you’ll destroy its beneficial enzymes. I usually let it sit on the counter for about an hour. You can speed this up by placing the bowl in a cold water bath.
- Add the Honey: Once the liquid is completely cool (test it with your finger—it should feel neutral, not warm), stir in the raw honey. Start with ½ cup, taste it, and add more if you want it sweeter. I usually use about ¾ cup for a balanced sweetness. Stir until the honey is fully dissolved. The syrup will look a little cloudy at first, then clear up as it sits.
- Bottle and Store: Pour the finished syrup into your sterilized glass jar or bottle using a funnel if you have one. Seal it tightly. That’s it—you’ve just made a batch of pure, golden goodness.
The whole process feels very grounding. There’s something meditative about watching the water turn a deep, inky purple and smelling the spices bloom. It’s a little bit of kitchen alchemy.
Cooking Tips & Techniques
I’ve made this syrup at least twenty times, and I’ve learned a few things the hard way. Here are my best tips to make sure your first batch is perfect.
- Don’t Over-Boil: The biggest mistake is letting it boil hard. High heat can make the syrup bitter and destroy some of the delicate compounds in the elderberries. A gentle simmer is all you need. Think of it like making a delicate tea, not a stew.
- Taste as You Go: Before you add the honey, dip a spoon into the warm liquid. It should be pleasantly spicy and a little tart. If it tastes weak, let it simmer for another 10 minutes. If it’s too strong, you can add a splash of water to dilute it slightly.
- Straining is Key: I once tried to rush the straining process and ended up with a gritty syrup full of tiny seeds. It wasn’t pleasant. Take your time pressing the liquid through the strainer. Patience pays off here.
- Sterilize Your Jar: This syrup doesn’t have preservatives, so a clean jar is essential to prevent mold. I usually just run my jar through the dishwasher on the sanitize cycle, or I boil it in a pot of water for 10 minutes.
- Honey Quality Matters: The flavor of your syrup is directly tied to the honey you use. A dark, robust honey like buckwheat honey will give you a very different result than a light, floral clover honey. I prefer a mild wildflower honey that doesn’t overpower the spices.
I once forgot to add the black pepper entirely, and the syrup just felt… flat. The turmeric was there, but it didn’t have that same warming, deep feeling. That tiny pinch of pepper really does make a difference. Trust the process.
Variations & Adaptations
This recipe is a fantastic base for experimentation. Don’t be afraid to make it your own. Here are a few ways I’ve adapted it over the years.
- Vegan Version: Swap the raw honey for maple syrup or agave nectar. Maple syrup adds a lovely, smoky sweetness that pairs beautifully with the spices. Just note that the final syrup will be a little thinner in consistency.
- Extra Spicy “Fire Cider” Style: Add a few slices of fresh jalapeño or a pinch of cayenne pepper along with the ginger for a serious metabolic kick. This version is great if you feel a cold coming on and want something that really clears your sinuses.
- Soothing Sleepy Time Version: Add a tablespoon of dried chamomile flowers and a sprig of fresh lavender to the pot during the last 10 minutes of simmering. The floral notes make this a wonderful evening tonic. I call this my “goodnight syrup.”
- Gut Health Boost: After the syrup has cooled and you’ve added the honey, stir in a tablespoon of raw apple cider vinegar (with the mother). It adds a tangy complexity and supports digestion.
My personal favorite variation is to add a vanilla bean (split and scraped) to the simmer. The vanilla rounds out the spices and makes it taste almost dessert-like. It’s dangerously delicious.
Serving & Storage Suggestions
This syrup is incredibly versatile. You don’t have to just take it by the spoonful (though that works great).
How to Take It: For adults, the standard dose is 1 tablespoon per day for maintenance, or 1 tablespoon every 3-4 hours if you’re feeling under the weather. For kids (over 1 year old), give 1 teaspoon per day. Shake the bottle well before each use as the spices can settle.
Ways to Enjoy It:
- Hot Immune Tea: Stir 1 tablespoon into a mug of hot water. It’s like a spicy, comforting tea. Add a squeeze of lemon for extra vitamin C.
- Over Pancakes or Oatmeal: Drizzle it over your morning oatmeal or pancakes instead of regular syrup. The spiced flavor is incredible with apple cinnamon muffin tops for a cozy breakfast.
- In Smoothies: Add a tablespoon to your morning smoothie for an immune boost that doesn’t taste medicinal.
- As a Cocktail Mixer: Honestly, a splash of this syrup in some sparkling water with a shot of bourbon is a fantastic winter cocktail.
Storage: Store the syrup in a tightly sealed glass jar in the refrigerator. It will keep for up to 3 months. The flavors will actually meld and deepen over the first week, so it gets even better after a few days. If you see any mold or off-smells, throw it out and make a fresh batch.
You can also freeze the syrup in ice cube trays. Once frozen, pop the cubes into a freezer bag. They’ll keep for up to 6 months. Just thaw a cube or two as needed for a quick dose.
Nutritional Information & Benefits
This syrup is more than just a tasty treat—it’s a powerhouse of immune-supporting ingredients. Here’s a quick look at what you’re getting in a 1-tablespoon serving (based on using ¾ cup of honey).
| Nutrient | Amount per Serving |
|---|---|
| Calories | 45 |
| Total Carbohydrates | 12g |
| Sugars | 11g (from honey) |
| Vitamin C | 4% DV |
| Iron | 2% DV |
Health Highlights:
- Elderberries: Rich in antioxidants and flavonoids that help support a healthy immune response. They’re traditionally used to help reduce the duration of cold symptoms.
- Turmeric & Black Pepper: The curcumin in turmeric is a powerful anti-inflammatory compound. The piperine in black pepper boosts its absorption by up to 2000%.
- Ginger: Known for its anti-nausea and anti-inflammatory properties. It also adds a warming quality that feels soothing.
- Raw Honey: Contains natural enzymes, probiotics, and antioxidants. It’s also a natural cough suppressant.
Dietary Notes: This recipe is naturally gluten-free, dairy-free, and soy-free. It is not suitable for infants under 1 year old due to the honey content. If you are managing blood sugar, be mindful of the honey content, though the portion size is small.
Conclusion
Making your own Wholesome Golden Spiced Elderberry Immune Syrup is one of those kitchen projects that feels deeply satisfying. It’s not just about the end product—though that is delicious—it’s about the act of caring for yourself and your family in a tangible way. You know exactly what went into that jar, and that peace of mind is priceless.
I love that this recipe is forgiving. You can tweak the spices, adjust the sweetness, and make it truly your own. It’s become a fall ritual in my house, right up there with making pumpkin cinnamon rolls and brewing the first pot of chili of the season. It signals a shift into a slower, cozier rhythm.
I would love to hear how your batch turns out! Did you add any special spices? Do you take it hot or cold? Drop a comment below and share your experience. And if you found this helpful, please share it with a friend who needs a little immune support this season. Happy brewing, friends—stay warm and well!
Frequently Asked Questions
Can I use fresh elderberries instead of dried?
No, you should never use fresh elderberries for this recipe. Fresh elderberries contain a compound that can cause nausea and digestive upset when eaten raw. They must be cooked thoroughly to be safe. Dried elderberries are the standard for syrup making because they are safe and concentrated.
How long does this syrup last in the fridge?
Stored in a sterilized, airtight glass jar in the refrigerator, this syrup will stay fresh for up to 3 months. The honey acts as a natural preservative. Always use a clean, dry spoon to scoop it out to prevent introducing bacteria.
Can I give this syrup to my kids?
Yes, for children over 1 year old. The standard dose is 1 teaspoon per day for maintenance. For kids under 1, the honey poses a risk of infant botulism, so this recipe is not suitable for babies. Always check with your pediatrician before introducing new supplements to your child’s routine.
Can I make this without honey?
Absolutely. You can substitute the honey with maple syrup, agave nectar, or even a sugar-free option like monk fruit syrup. Just know that the final texture and flavor will change slightly. Maple syrup is my favorite alternative because it adds a lovely, deep flavor that complements the spices.
Why do I need to add black pepper?
Black pepper contains a compound called piperine, which dramatically increases the bioavailability of curcumin, the active anti-inflammatory compound in turmeric. Without the pepper, your body absorbs very little of the turmeric’s benefits. It also adds a subtle warmth to the flavor profile, so it’s a win-win.
PrintWholesome Golden Spiced Elderberry Immune Syrup
A warm, spiced, and slightly sweet immune syrup made with elderberries, turmeric, ginger, and honey. It’s a comforting, homemade alternative to store-bought remedies that actually tastes good.
- Prep Time: 15 minutes
- Cook Time: 45 minutes
- Total Time: 1 hour 15 minutes
- Yield: 16 servings 1x
- Category: Condiment
- Cuisine: American
Ingredients
- ½ cup dried elderberries
- 2-inch piece fresh ginger, sliced
- 2-inch piece fresh turmeric, sliced
- 2 cinnamon sticks
- 1 teaspoon whole cloves
- ½ teaspoon black peppercorns
- 4 cups filtered water
- ½ to 1 cup raw honey
Instructions
- Combine the Ingredients: In a medium saucepan, add the dried elderberries, sliced ginger, sliced turmeric, cinnamon sticks, whole cloves, and black peppercorns. Pour in the filtered water and stir to submerge everything.
- Bring to a Gentle Boil: Set the pot over medium-high heat and bring to a boil, watching closely. As soon as bubbles break the surface, reduce the heat to low (about 5-7 minutes).
- Simmer, Don’t Boil: Cover the pot with a lid, leaving it slightly ajar. Let it simmer gently for 45 minutes. The liquid will reduce by about half.
- Mash and Steep: After 45 minutes, turn off the heat. Using the back of a wooden spoon, gently mash the elderberries against the side of the pot. Let the mixture sit, covered, for another 15-20 minutes to steep and cool slightly.
- Strain Thoroughly: Place a fine-mesh strainer over a large bowl or glass measuring cup. Carefully pour the liquid through the strainer, pressing on the solids to extract all the syrup. Discard the solids. You should have about 1.5 to 2 cups of liquid.
- Cool to Room Temperature: Let the strained liquid cool completely (about 1 hour). You can speed this up with a cold water bath.
- Add the Honey: Once the liquid is completely cool, stir in the raw honey. Start with ½ cup, taste, and add more if desired. Stir until fully dissolved.
- Bottle and Store: Pour the finished syrup into a sterilized glass jar or bottle. Seal tightly and refrigerate.
Notes
Do not use fresh elderberries—they must be cooked to be safe. Add honey only after the liquid has cooled completely to preserve its beneficial enzymes. Black pepper is essential for turmeric absorption. Store in the refrigerator for up to 3 months. For children over 1 year old, give 1 teaspoon per day. Not suitable for infants under 1 year due to honey.
Nutrition
- Serving Size: 1 tablespoon
- Calories: 45
- Sugar: 11
- Carbohydrates: 12
Keywords: elderberry syrup, immune syrup, golden syrup, turmeric syrup, homemade syrup, immune booster, wellness recipe, elderberry recipe