My niece didn’t even blink when I handed her a plate. She grabbed one, bit right into the knuckle, and said, “These are better than the ones from the bakery, Auntie.” That’s how I knew these spooky witch finger cookies with almond nails were a keeper. Not because I thought they looked perfect, but because a seven-year-old with zero filter chose them over a store-bought treat without a second thought.
I had spent the better part of that Saturday morning hunched over my counter, shaping almond paste into tiny fingernails and pressing creases into dough with the back of a knife. My kitchen looked like a crime scene, honestly. Flour everywhere, a stray almond sliver stuck to the wall, and my hands smelled like butter and vanilla for the rest of the day. But watching her reach for a second one, completely unfazed by the creepy factor, I knew this recipe was something special.
These cookies are the perfect mix of spooky and delicious. They look genuinely unsettling, like something you’d find in a Halloween horror movie, but they taste like a soft, buttery shortbread with a sweet almond finish. The best part? They’re surprisingly simple to make, even if you think you’re not a “decorative baker.” I promise you, if I can shape these crooked little fingers without any fancy tools, so can you.
There’s something deeply satisfying about watching someone’s face when they realize the “witch finger” they just grabbed is actually a cookie. It’s a little moment of magic, you know? And that’s why this recipe has become our Halloween tradition.
Why You’ll Love This Recipe
Let’s be real for a second. Halloween treats can be a total gamble. Some look amazing but taste like cardboard, and others taste great but look like a blob of frosting. These spooky witch finger cookies with almond nails hit that sweet spot where creepy meets delicious. They’re the kind of cookie that makes people do a double-take before laughing and grabbing a handful.
- Surprisingly Simple: No piping bags, no food coloring that stains your hands for days. Just basic cookie dough and a few clever tricks.
- Perfect Halloween Party Food: These are the star of any spooky spread. They’re conversation starters, photo ops, and crowd-pleasers all in one.
- Kid-Friendly Fun: Kids absolutely love making these. It’s like edible play-doh with a creepy twist. My niece helped press the almond nails in, and she was so proud.
- Incredibly Delicious: Underneath all that spooky fun, you get a tender, buttery shortbread cookie with a lovely almond flavor. No scary taste, I promise.
- Make-Ahead Magic: You can prep the dough a day or two ahead, which makes Halloween day so much less stressful. Just shape and bake when you’re ready.
What really sets these apart from other Halloween cookies is the texture. The dough is firm enough to hold its shape, so your “fingers” don’t turn into blobs in the oven. The almond “nails” stay put and look genuinely creepy, like a real fingernail. I’ve tried other recipes where the nails just fell off or melted into the dough, and it was a disaster. This one works, and it works every time.
These cookies aren’t just about looking spooky. They’re about that moment of shared surprise, the laughter when someone realizes they just ate a “witch’s finger,” and the joy of creating something that’s both playful and genuinely tasty. That’s why I keep coming back to this recipe year after year.
What Ingredients You Will Need
You won’t need a trip to a specialty baking store for these spooky witch finger cookies with almond nails. Most of these ingredients are probably sitting in your pantry right now. The key is using good quality butter and fresh almond extract for the best flavor.
- For the Cookie Dough:
- 1 cup (2 sticks or 226g) unsalted butter, softened to room temperature
- 1 cup (200g) granulated sugar
- 1 large egg, at room temperature
- 1 teaspoon pure vanilla extract
- 1 teaspoon almond extract (this is the secret to that authentic marzipan-like flavor)
- 2 ½ cups (315g) all-purpose flour, spooned and leveled
- ½ teaspoon salt
- ½ teaspoon baking powder (helps with a slight puff, but not too much)
- For the “Nails” and Details:
- ⅓ cup (about 40g) sliced almonds or whole almonds, sliced lengthwise (I prefer Blue Diamond for consistent size)
- Red food coloring (gel works best, a tiny dot goes a long way)
- A small jar of raspberry or strawberry jam (for the “blood” at the base)
Ingredient Tips from My Kitchen: Don’t skip the almond extract. It gives these cookies that distinct, almost marzipan-like flavor that makes them taste like something from a fancy bakery. If you only have imitation almond extract, that works fine too, just use a tiny bit less as it can be stronger.
For the almonds, you want them to look like fingernails. Sliced almonds are perfect because they have that natural curved shape. If you only have whole almonds, just slice them lengthwise with a sharp knife. It takes a little extra time, but it’s worth it for the creepy effect.
For the “blood,” I’ve tried everything from corn syrup with red dye to store-bought blood gel. Honestly, a simple raspberry jam works best. It has the right color, a nice sticky texture, and it tastes good with the almond cookie. Strawberry jam works too, but raspberry has that deeper, more realistic red.
Equipment Needed
You don’t need a professional pastry kit to make these spooky witch finger cookies with almond nails. Just a few basic tools you probably already own.
- Stand mixer or hand mixer: For creaming the butter and sugar. A hand mixer works perfectly fine, just takes a minute or two longer.
- Baking sheets: Two standard half-sheet pans work great. No need for anything fancy.
- Parchment paper: Absolute must. It prevents sticking and makes cleanup a breeze. Silicone baking mats work too.
- Sharp knife or bench scraper: For creating the knuckle creases. A butter knife works in a pinch, but a sharp knife gives cleaner lines.
- Small bowl: For the red food coloring and a tiny brush or toothpick for painting the “blood.”
- Cooling rack: Helps the cookies cool evenly without getting soggy bottoms.
I used a cheap offset spatula to help transfer the shaped cookies to the baking sheet, but honestly, your hands work best for this recipe. The dough is sturdy enough that you can just pick them up and place them. No special equipment needed, just a little patience and a sense of humor.
Preparation Method
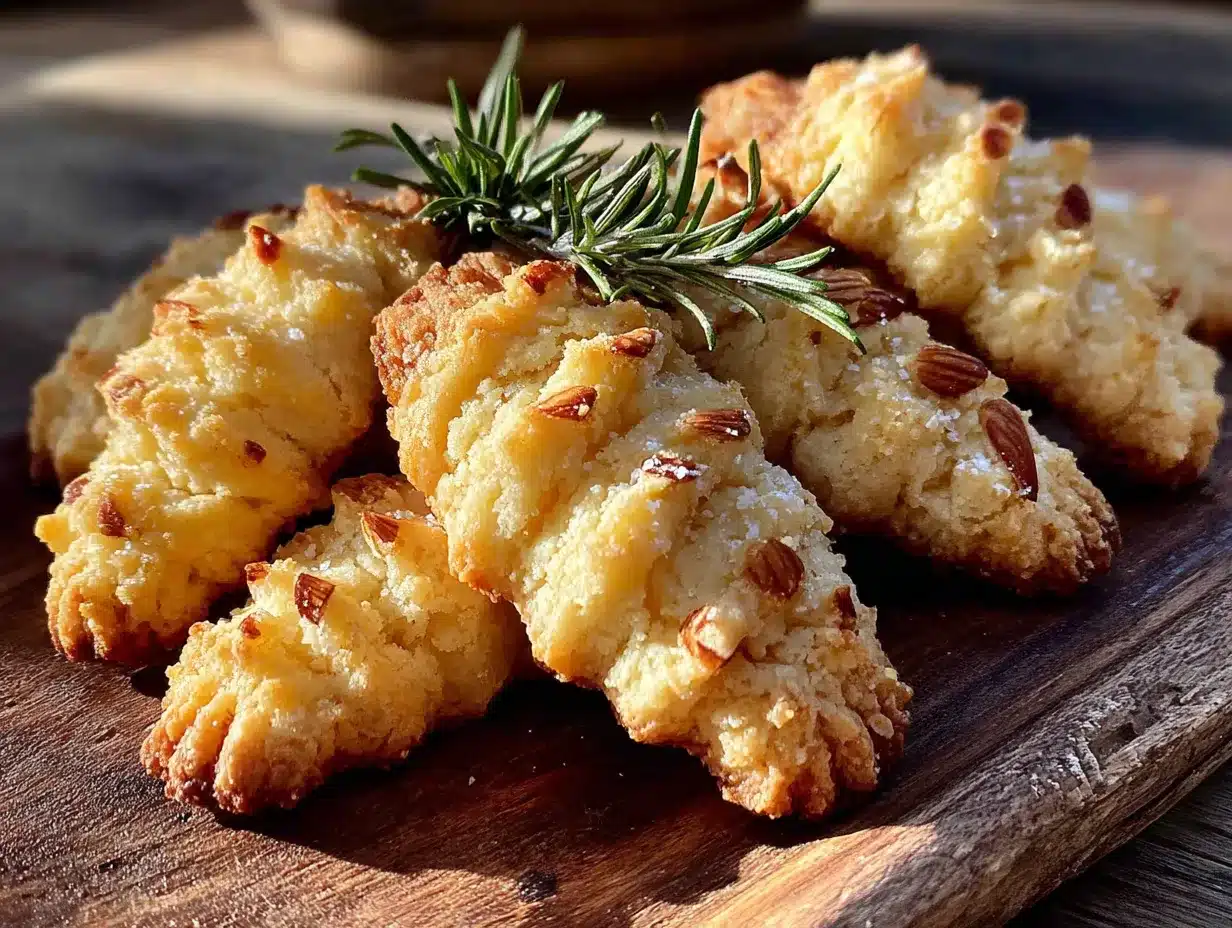
This is where the magic happens. Follow these steps, and you’ll have a batch of spooky witch finger cookies with almond nails that look like they came straight from a haunted bakery.
- Cream the butter and sugar: In your mixing bowl, beat the softened butter and granulated sugar together on medium speed for about 3 minutes, until it’s light, fluffy, and pale in color. Scrape down the sides of the bowl halfway through. Don’t rush this step, it’s what gives the cookies their tender texture.
- Add the wet ingredients: Beat in the egg, vanilla extract, and almond extract until fully combined. The mixture might look a little curdled at this point, that’s totally normal. Don’t panic.
- Mix the dry ingredients: In a separate bowl, whisk together the flour, salt, and baking powder. Gradually add this to the wet mixture, mixing on low speed until a soft dough forms. It should be pliable but not sticky. If it feels too sticky, add a tablespoon of flour at a time until it comes together.
- Chill the dough: Divide the dough in half, flatten each half into a disc, wrap tightly in plastic wrap, and refrigerate for at least 1 hour. This is non-negotiable. Chilled dough is so much easier to shape, and it helps the cookies hold their finger shape in the oven.
- Preheat and prepare: When you’re ready to bake, preheat your oven to 325°F (160°C). Line your baking sheets with parchment paper.
- Shape the “fingers”: Take a small piece of chilled dough, about the size of a walnut, and roll it into a log shape, about 3 inches long and ¾ inch thick. One end should be slightly thicker (the “wrist” end) and the other end should taper a bit (the “fingertip” end). Place it on the prepared baking sheet. Repeat with the remaining dough, spacing them about 2 inches apart.
- Create the knuckles: Using the back of a sharp knife or a bench scraper, gently press 2 or 3 horizontal lines into each “finger” to create the knuckle creases. Don’t press too hard, you just want an indentation. You can also gently squeeze the sides of the finger to make it look more realistic and less like a perfect cylinder.
- Add the almond “nails”: Press one sliced almond firmly into the tapered end of each finger. Make sure it’s pushed in enough that it won’t fall off during baking. The almond should look like a fingernail growing out of the fingertip.
- Bake: Bake for 12-15 minutes, or until the edges are just barely starting to turn golden. The cookies will still be soft, but they’ll firm up as they cool. Don’t overbake, or they’ll be hard instead of tender.
- Cool and decorate: Let the cookies cool on the baking sheet for 5 minutes, then transfer them to a cooling rack. While they’re still slightly warm, use a small brush or a toothpick to dab a tiny bit of red food coloring around the “nail” area and at the base of the finger (the “wrist” end) to look like blood. For extra gore, add a tiny dot of raspberry jam at the “cut” end.
My personal tip: Don’t worry if your fingers look a little crooked or uneven. Real fingers aren’t perfect either! The imperfections actually make them look more realistic and creepy. My first batch looked like fat little sausages, and I was so disappointed. But once I added the almond nails and the red coloring, they transformed into something genuinely spooky.
Cooking Tips & Techniques
I’ve made these spooky witch finger cookies with almond nails more times than I can count, and I’ve definitely learned a few things the hard way. Here are my best tips to save you from my mistakes.
The Dough Temperature is Everything: If your dough gets too warm while you’re shaping it, just pop it back in the fridge for 10 minutes. Warm dough is sticky and won’t hold its shape. I learned this the first time I made them, and my “fingers” looked more like melted puddles. Chilled dough is your best friend.
Don’t Overwork the Almonds: When you press the almond “nail” into the dough, do it firmly but gently. If you press too hard, the almond will sink into the cookie and disappear. You want it to sit right on the surface, looking like it’s growing out of the finger. I ruined a whole batch by pressing too hard, and the almonds just vanished into the dough.
The Knuckle Trick: After you press the creases for the knuckles, use your fingers to gently squeeze the sides of the “finger” right at the crease. This makes the knuckle look more defined and realistic. It’s a tiny detail, but it makes a huge difference in the final look.
Baking in Batches: These cookies don’t spread much, so you can fit quite a few on a baking sheet. But don’t overcrowd them. They need a little space for the heat to circulate. I usually bake one sheet at a time in the center of the oven for the most even results.
The “Blood” Timing: Add the red coloring and jam while the cookies are still slightly warm. The warmth helps the jam spread a little and look more like real blood. If you wait until they’re completely cool, the jam just sits on top in a blob.
Variations & Adaptations
One of the best things about this recipe is how easy it is to customize. These spooky witch finger cookies with almond nails are a fantastic base for all kinds of creepy creations.
Gluten-Free Version: Substitute the all-purpose flour with a 1:1 gluten-free baking flour blend that contains xanthan gum. I’ve used Bob’s Red Mill with great success. The texture will be slightly more delicate, so handle the dough gently. They still look just as creepy and taste fantastic.
Vegan Witch Fingers: Use vegan butter (like Earth Balance) and a flax egg (1 tablespoon ground flaxseed mixed with 3 tablespoons water, let sit for 5 minutes). The dough will be a bit softer, so extra chilling time is crucial. They bake up beautifully and are perfect for a plant-based Halloween party.
Chocolate-Dipped Fingertips: For an extra indulgent twist, dip the “fingertip” end of the baked and cooled cookies into melted dark chocolate. Let the excess drip off and place them on parchment to set. It looks like dirty, grimy fingernails, and it’s absolutely delicious. I did this for a party once, and they were gone in minutes.
Different “Nail” Colors: Instead of natural almond nails, you can paint the almonds with food coloring before pressing them into the dough. Green, purple, or black nails add a whole new level of spooky. Just use a tiny brush and let them dry for a few minutes before using.
Spiced-Up Dough: Add 1 teaspoon of pumpkin pie spice or cinnamon to the flour mixture for a fall-flavored witch finger. The warm spices pair beautifully with the almond extract and give the cookies a cozy, autumnal feel. This version is perfect for a pumpkin chai latte afternoon.
Serving & Storage Suggestions
These spooky witch finger cookies with almond nails are best served at room temperature, right after they’ve been decorated. The “blood” looks its freshest and creepiest within the first few hours.
Serving Ideas: Arrange them on a black or dark-colored platter for maximum spooky effect. You can scatter them around a Halloween cake, pile them on a fall charcuterie board for a horror twist, or serve them in a “witch’s cauldron” bowl. They’re also fantastic paired with a warm cup of homemade pumpkin spice latte for a cozy Halloween movie night.
Storage Instructions: Store the undecorated cookies in an airtight container at room temperature for up to 5 days. If you’ve already added the jam or food coloring, they’ll still keep for 3-4 days, but the “blood” might start to look a little dried out. Layer them between sheets of parchment paper to prevent the almond nails from breaking off.
Freezer Instructions: You can freeze the shaped, unbaked cookies on a baking sheet until solid, then transfer them to a freezer bag for up to 3 months. Bake them straight from frozen, just add 2-3 minutes to the baking time. You can also freeze the baked, undecorated cookies for up to 2 months. Thaw at room temperature before adding the “blood.”
Reheating: These cookies are meant to be eaten at room temperature. If you want to warm them up slightly, pop them in a 300°F (150°C) oven for 3-4 minutes. Don’t microwave them, it will make the “nails” soggy.
Nutritional Information & Benefits
Let’s be honest, these spooky witch finger cookies with almond nails are a treat, not a health food. But that doesn’t mean they can’t have a few redeeming qualities.
Per cookie (based on 24 cookies), you’re looking at approximately:
- Calories: 145
- Fat: 8g
- Carbohydrates: 17g
- Sugar: 8g
- Protein: 2g
Health Highlights: The almonds provide a small dose of healthy fats, vitamin E, and magnesium. The butter, while indulgent, does contain some fat-soluble vitamins. If you use a high-quality raspberry jam, you’re getting a tiny bit of fruit antioxidants. It’s not much, but every little bit counts, right?
Dietary Considerations: This recipe contains gluten, dairy, eggs, and nuts (almonds). For a nut-free version, you can skip the almond extract and use a small piece of white chocolate or a sunflower seed for the “nail.” For a gluten-free option, see the variations section above.
My personal philosophy? Halloween comes once a year. Enjoy the cookies, savor the spooky fun, and don’t stress about the calories. Life is too short not to eat cookies that look like witch fingers.
Conclusion
There you have it, my favorite recipe for spooky witch finger cookies with almond nails. They’re creepy, they’re delicious, and they’re surprisingly easy to make. Whether you’re hosting a Halloween party, looking for a fun activity with the kids, or just want to surprise your friends with something delightfully disturbing, these cookies deliver every single time.
I love this recipe because it’s more than just a cookie. It’s an experience. It’s the laughter, the double-takes, and the “oh my gosh, that’s so gross!” reactions. It’s the memory of my niece biting into one without a second thought, completely unphased by its creepy appearance. That’s the kind of joy that makes all the flour-dusted countertops and sticky fingers worth it.
I’d love to see your spooky creations! Tag me in your photos or leave a comment below telling me how your batch turned out. Did you try a fun variation? Did your kids love making them? Share your stories, I read every single one. And if you’re looking for more Halloween fun, check out my Reese’s peanut butter poke cake for another easy, crowd-pleasing treat. Happy baking, and have a wonderfully spooky Halloween!
Frequently Asked Questions
Can I make the dough ahead of time?
Absolutely! You can prepare the dough up to 3 days in advance. Just wrap it tightly in plastic wrap and keep it in the refrigerator. When you’re ready to bake, let it sit at room temperature for about 10-15 minutes to soften slightly, making it easier to shape.
My almond “nails” keep falling off during baking. What am I doing wrong?
This usually happens if the almond isn’t pressed firmly enough into the dough. Make sure you push it in until it’s about halfway embedded. Also, make sure your dough is well-chilled. Warm dough will puff up around the almond and push it out. If it’s still a problem, you can press the almonds in right after the cookies come out of the oven while they’re still warm and soft.
Can I use a different type of nut for the nails?
Yes! Sliced almonds are the most realistic, but you can use whole blanched almonds (just slice them in half lengthwise), or even pistachios for a green “witchy” nail. For a nut-free option, use a small piece of white chocolate or a candy corn pressed in sideways.
How can I make the “blood” look more realistic?
For a more realistic blood effect, mix a tiny drop of red food coloring with a bit of corn syrup. This creates a glossy, thick “blood” that looks very convincing. You can also use store-bought red icing gel. The key is to use it sparingly, a little goes a long way for that creepy effect.
My cookies spread too much and lost their finger shape. What went wrong?
The most common reason is that the dough wasn’t chilled enough. Make sure you chill the dough for at least 1 hour before shaping. Also, if your butter was too soft when you creamed it, that can cause spreading. Finally, double-check your oven temperature with an oven thermometer. If your oven runs cool, the cookies will spread before they set.
Pin This Recipe!
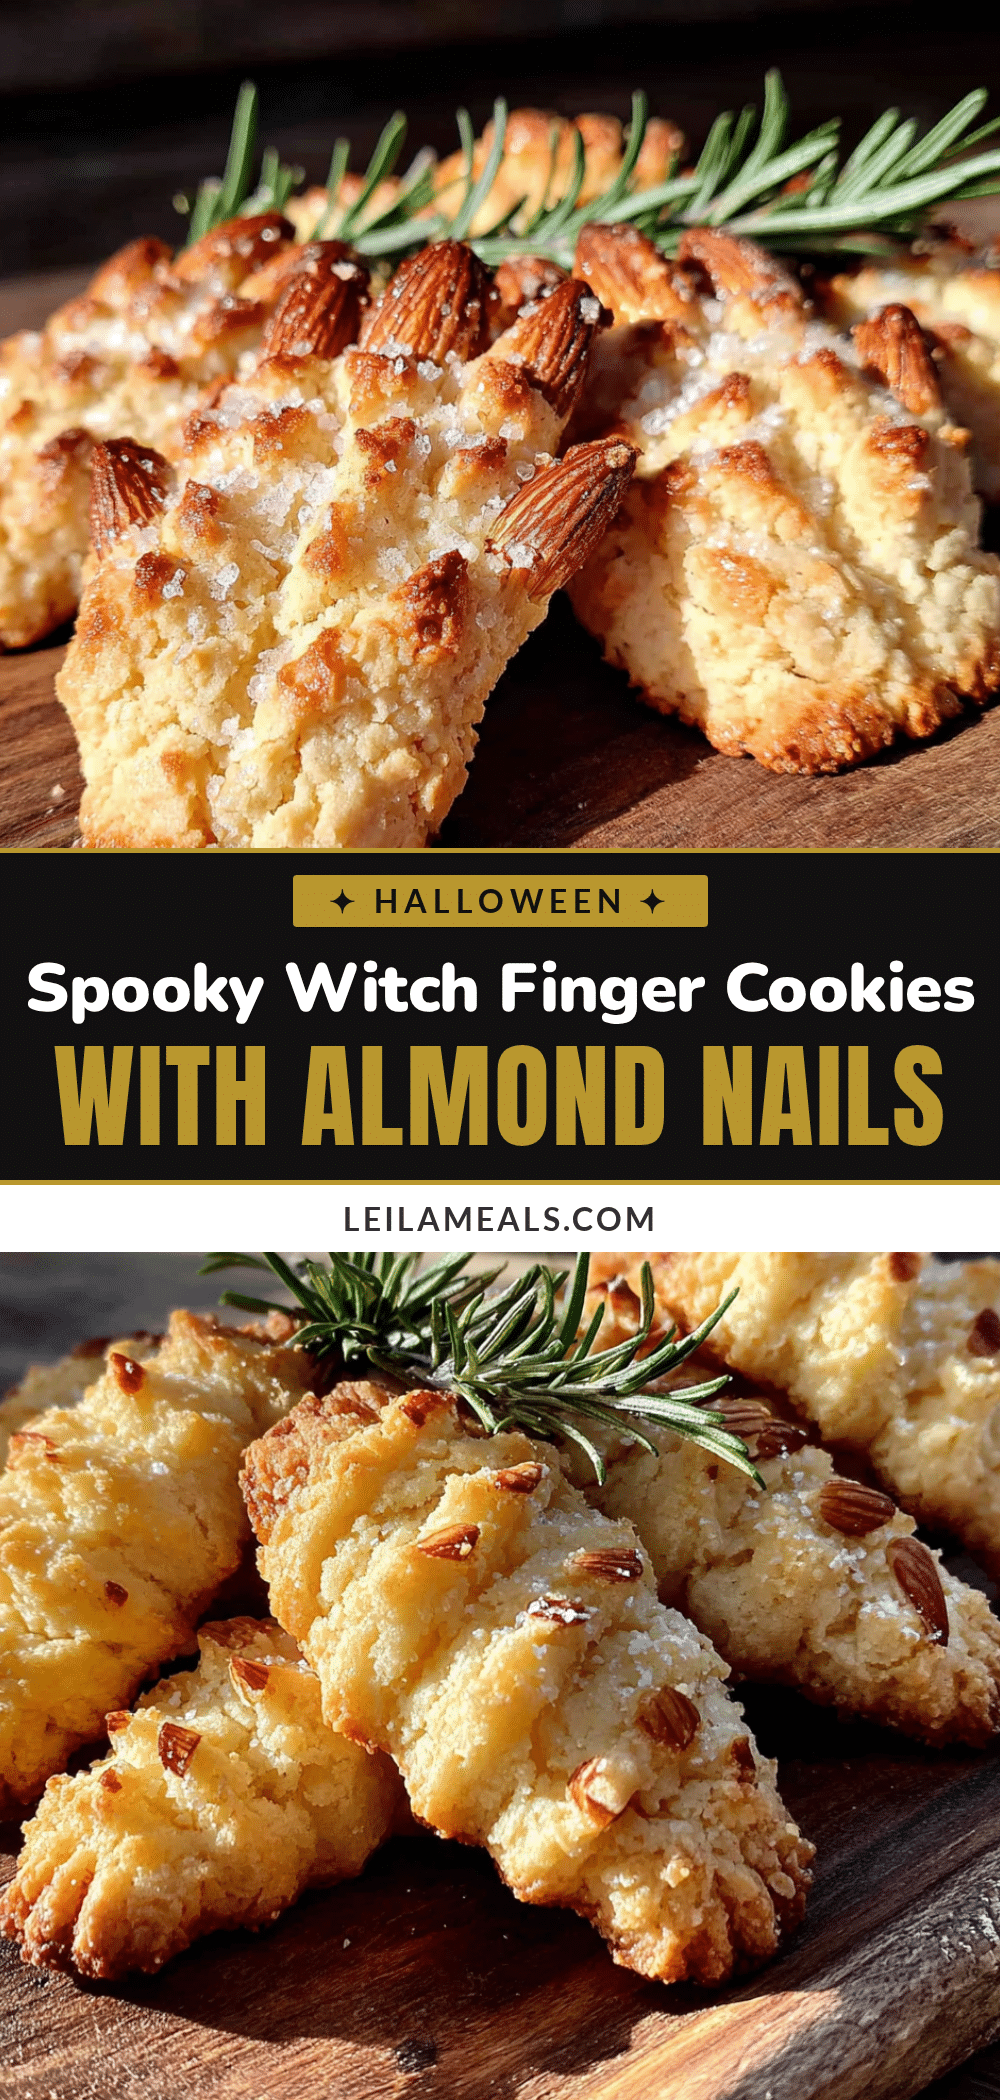
Spooky Witch Finger Cookies with Almond Nails
These spooky witch finger cookies with almond nails are the perfect mix of creepy and delicious. They look genuinely unsettling but taste like a soft, buttery shortbread with a sweet almond finish, and they’re surprisingly simple to make.
- Prep Time: 20 minutes
- Cook Time: 15 minutes
- Total Time: 1 hour 35 minutes (includes 1 hour chilling)
- Yield: 24 cookies 1x
- Category: Dessert
- Cuisine: American
Ingredients
- 1 cup (2 sticks or 226g) unsalted butter, softened to room temperature
- 1 cup (200g) granulated sugar
- 1 large egg, at room temperature
- 1 teaspoon pure vanilla extract
- 1 teaspoon almond extract
- 2 ½ cups (315g) all-purpose flour, spooned and leveled
- ½ teaspoon salt
- ½ teaspoon baking powder
- ⅓ cup (about 40g) sliced almonds or whole almonds, sliced lengthwise
- Red food coloring (gel works best)
- A small jar of raspberry or strawberry jam
Instructions
- Cream the butter and sugar: In your mixing bowl, beat the softened butter and granulated sugar together on medium speed for about 3 minutes, until it’s light, fluffy, and pale in color. Scrape down the sides of the bowl halfway through.
- Add the wet ingredients: Beat in the egg, vanilla extract, and almond extract until fully combined. The mixture might look a little curdled at this point, that’s totally normal.
- Mix the dry ingredients: In a separate bowl, whisk together the flour, salt, and baking powder. Gradually add this to the wet mixture, mixing on low speed until a soft dough forms. It should be pliable but not sticky. If it feels too sticky, add a tablespoon of flour at a time until it comes together.
- Chill the dough: Divide the dough in half, flatten each half into a disc, wrap tightly in plastic wrap, and refrigerate for at least 1 hour.
- Preheat and prepare: When you’re ready to bake, preheat your oven to 325°F (160°C). Line your baking sheets with parchment paper.
- Shape the ‘fingers’: Take a small piece of chilled dough, about the size of a walnut, and roll it into a log shape, about 3 inches long and ¾ inch thick. One end should be slightly thicker (the ‘wrist’ end) and the other end should taper a bit (the ‘fingertip’ end). Place it on the prepared baking sheet. Repeat with the remaining dough, spacing them about 2 inches apart.
- Create the knuckles: Using the back of a sharp knife or a bench scraper, gently press 2 or 3 horizontal lines into each ‘finger’ to create the knuckle creases. Don’t press too hard, you just want an indentation. You can also gently squeeze the sides of the finger to make it look more realistic.
- Add the almond ‘nails’: Press one sliced almond firmly into the tapered end of each finger. Make sure it’s pushed in enough that it won’t fall off during baking.
- Bake: Bake for 12-15 minutes, or until the edges are just barely starting to turn golden. The cookies will still be soft, but they’ll firm up as they cool.
- Cool and decorate: Let the cookies cool on the baking sheet for 5 minutes, then transfer them to a cooling rack. While they’re still slightly warm, use a small brush or a toothpick to dab a tiny bit of red food coloring around the ‘nail’ area and at the base of the finger (the ‘wrist’ end) to look like blood. For extra gore, add a tiny dot of raspberry jam at the ‘cut’ end.
Notes
Don’t skip the almond extract; it gives the cookies that distinct marzipan-like flavor. For the ‘blood,’ raspberry jam works best for color and taste. If the dough gets too warm while shaping, pop it back in the fridge for 10 minutes. Don’t overbake, or the cookies will be hard instead of tender. The imperfections in shaping make the fingers look more realistic.
Nutrition
- Serving Size: 1 cookie
- Calories: 145
- Sugar: 8
- Sodium: 75
- Fat: 8
- Saturated Fat: 4.5
- Carbohydrates: 17
- Fiber: 0.5
- Protein: 2
Keywords: Halloween cookies, witch finger cookies, spooky cookies, almond cookies, shortbread cookies, Halloween dessert, creepy cookies, easy Halloween recipe


