The last meringue ghost disappeared from the treat bag before I even finished tying the ribbon. My niece, who usually just grabs the candy and runs, actually stopped and held it up to the light. “It’s a little ghost,” she whispered, like she’d found something magical. That’s when I knew these spooky ghost meringue cookies were more than just another Halloween recipe.
Honestly, I stumbled onto this idea by accident. I was testing a batch of plain meringues for a friend’s tea party, and one of them came out looking suspiciously like a ghost. I added two tiny chocolate chip eyes, and suddenly, I had a whole new Halloween tradition on my hands. These aren’t just cookies; they’re the kind of thing that makes people smile before they even take a bite.
They’re light, they’re crispy, and they melt in your mouth like a sweet little cloud. Plus, they’re ridiculously easy to make, which is my favorite kind of recipe. No complicated piping, no special equipment, just a few simple ingredients and a little bit of patience. I’ve been making them for three Halloweens now, and they never fail to get the best reaction. Trust me, once you see how easy these are, you’ll be making them for every Halloween party, school treat bag, and spooky movie night from now on.
Why You’ll Love This Recipe
I’ve tested a lot of Halloween treats over the years, and these spooky ghost meringue cookies hit a sweet spot that most recipes miss. They’re impressive enough to get oohs and ahhs, but simple enough that you don’t need a pastry degree. Here’s why I keep coming back to this recipe:
- Quick & Easy: The active prep time is about 15 minutes. The oven does the rest of the work while you get on with your day.
- Simple Ingredients: You probably have everything in your pantry right now. Eggs, sugar, vanilla, and chocolate chips. That’s it.
- Perfect for Halloween: They’re the star of any treat bag, classroom party, or spooky dessert table. Kids and adults both go crazy for them.
- Crowd-Pleaser: They’re naturally gluten-free and low in fat, so everyone can enjoy them without worry.
- Unbelievably Delicious: The outside is crisp and light, while the inside stays slightly chewy and melts on your tongue. It’s pure magic.
What makes these different from every other meringue recipe out there is the technique. I use a tiny bit of cream of tartar to stabilize the egg whites, which means you get perfect, glossy peaks every single time. No collapsed ghosts, no weeping meringue, just perfect little spooks. This isn’t just another version—it’s the one that actually works.
These cookies are the kind of treat that makes you feel like a kid again. The first bite is always followed by a little “mmm” sound. They’re light, airy, and just sweet enough to satisfy that Halloween candy craving without the sugar crash. Whether you’re making them for your own family or for a big Halloween bash, these ghosts will steal the show.
What Ingredients You Will Need
This recipe uses simple, pantry-friendly ingredients to create something truly special. Each one has a specific job to do, and together they make pure magic. Don’t skip the cream of tartar—it’s the secret to stable, glossy meringue that doesn’t collapse.
- Egg whites (4 large, room temperature): The foundation of our ghosts. Room temperature egg whites whip up higher and hold more air than cold ones. Separate them carefully—any yolk will ruin the meringue.
- Granulated sugar (1 cup / 200g): This gives the meringue its structure and sweetness. Use fine granulated sugar for best results; it dissolves faster and creates a smoother meringue.
- Cream of tartar (1/2 teaspoon): This is my secret weapon. It stabilizes the egg whites and helps them hold their shape. If you don’t have it, you can use a teaspoon of lemon juice or white vinegar instead.
- Vanilla extract (1 teaspoon): Adds warmth and depth to the flavor. I prefer pure vanilla extract, but imitation works in a pinch.
- Mini chocolate chips (1/4 cup / 45g): These become the ghost’s eyes. Use mini chips so they’re proportional to the cookie. Dark chocolate chips give the best contrast against the white meringue.
- Optional: Sanding sugar or edible glitter: For a little extra sparkle. I sometimes add a pinch of black sanding sugar for a “dirt” effect on the bottom of the ghosts.
I always use organic eggs when I can—they whip up beautifully and have a better flavor. For the sugar, any brand of fine granulated sugar works, but avoid superfine sugar as it can make the meringue too fragile. And please, please use room temperature eggs. Trust me on this one.
Equipment Needed
You don’t need a fancy kitchen to make these spooky ghost meringue cookies. Here’s what you’ll need:
- Electric mixer (stand or hand-held): You could whip meringue by hand, but you’d be there for a very long time. A mixer makes it effortless.
- Large mixing bowl: Glass or metal works best. Plastic bowls can hold onto grease, which prevents egg whites from whipping properly.
- Baking sheet: A standard half-sheet pan works perfectly. Line it with parchment paper for easy cleanup.
- Piping bag or zip-top bag: A piping bag with a round tip gives you more control, but a zip-top bag with the corner snipped off works just as well.
- Spatula: For scraping down the bowl and transferring the meringue.
- Small offset spatula or toothpick: For placing the chocolate chip eyes and fixing any imperfections.
I’ve made these with both a stand mixer and a hand mixer, and both work perfectly. The stand mixer is more hands-off, but the hand mixer is easier to clean. If you’re using a hand mixer, just make sure you hold the beaters steady and move them around the bowl to incorporate all the egg whites evenly.
Preparation Method
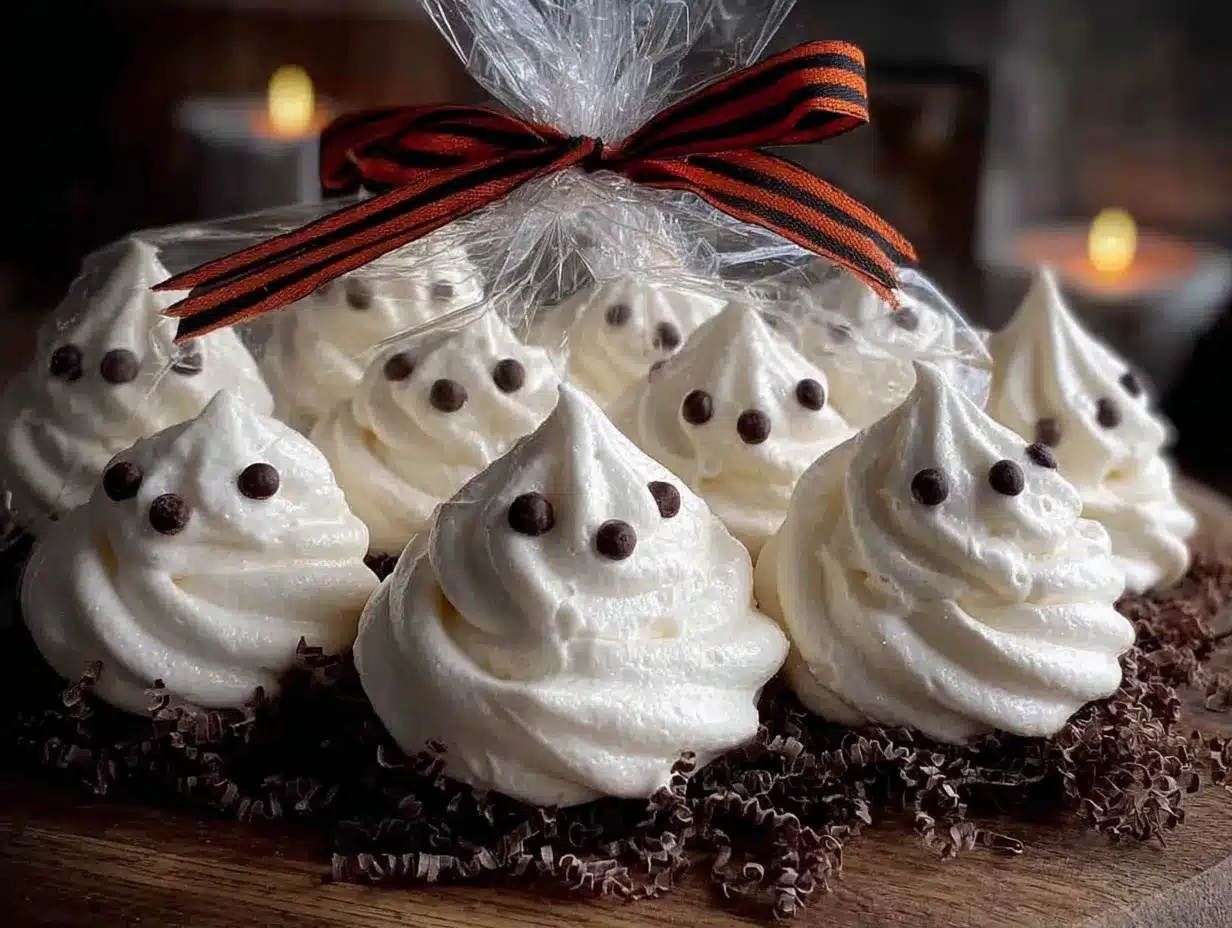
Making these spooky ghost meringue cookies is easier than you think. Follow these steps, and you’ll have a whole army of adorable ghosts ready for Halloween.
- Preheat and prep: Preheat your oven to 200°F (95°C). Line a large baking sheet with parchment paper. This low temperature is crucial—it dries the meringues out slowly without browning them.
- Whip the egg whites: In a clean, dry mixing bowl, add the room temperature egg whites and cream of tartar. Beat on medium speed until foamy and soft peaks form, about 2-3 minutes. The mixture should look like frothy sea foam.
- Add the sugar slowly: With the mixer running on medium-high, add the sugar one tablespoon at a time. This takes about 5-7 minutes total. Be patient—adding it too fast can cause the meringue to collapse. The mixture will become glossy and thick.
- Check for stiff peaks: Once all the sugar is added, increase the speed to high and beat for another 2-3 minutes. You’re looking for stiff, glossy peaks that hold their shape when you lift the beater. Rub a little between your fingers—if it feels gritty, keep beating until it’s smooth.
- Add vanilla: Beat in the vanilla extract on low speed for about 10 seconds, just until combined. Don’t overmix at this stage.
- Pipe the ghosts: Transfer the meringue to a piping bag fitted with a round tip (or a zip-top bag with a corner snipped off). Pipe small dollops onto the prepared baking sheet, about 1.5 inches wide and 2 inches tall. Leave about 1 inch between each ghost. Make them slightly taller than wide for that classic ghost shape.
- Add the eyes: Gently press two mini chocolate chips into each ghost for eyes. Place them close together near the top of the ghost. Don’t push them in too deep or they’ll disappear into the meringue.
- Bake low and slow: Place the baking sheet in the preheated oven and bake for 60-75 minutes. The meringues should be dry to the touch and easily lift off the parchment paper. They shouldn’t be brown at all—just a pale, creamy white.
- Cool completely: Turn off the oven and leave the ghosts inside with the door slightly ajar for another 30 minutes. This helps them dry out completely and prevents cracking. Transfer to a wire rack to cool completely before handling.
A quick note: if your kitchen is humid, the meringues might take a little longer to dry. That’s okay—just leave them in the oven a bit longer. They’re done when they lift off the parchment easily without sticking.
Cooking Tips & Techniques
I’ve made these spooky ghost meringue cookies more times than I can count, and I’ve learned a few things the hard way. Here are my best tips for perfect ghosts every time.
Don’t rush the sugar. I know it’s tempting to dump it all in at once, but trust me on this one. Adding the sugar slowly gives it time to dissolve completely, which means a smoother, more stable meringue. If you feel grittiness between your fingers, keep beating.
Watch the humidity. Meringues are divas about humidity. If it’s a rainy day, they’ll take longer to dry and might end up sticky. I try to make these on dry, sunny days for best results. If you must make them in humid weather, add an extra 15-20 minutes to the baking time.
Don’t open the oven. I learned this one the hard way. Opening the oven door during baking lets in cool air, which can cause the meringues to crack or collapse. Resist the temptation to peek. Just trust the process.
Make extra. These ghosts are fragile, and some might break. I always make a few extra to account for casualties. Plus, they’re so light and delicious that extras never go to waste.
Practice your piping. If you’re new to piping, practice on a piece of parchment first. You want a nice, rounded dollop that stands up tall. Hold the bag straight up and down, squeeze gently, and pull away quickly for a little peak on top.
Variations & Adaptations
Once you’ve mastered the basic spooky ghost meringue cookies, the possibilities are endless. Here are some of my favorite variations:
- Chocolate ghosts: Replace 2 tablespoons of the sugar with unsweetened cocoa powder. Sift it into the meringue at the end and fold gently. You’ll get little chocolate ghosts that look like they’ve been playing in the mud.
- Peppermint ghosts: Add 1/4 teaspoon of peppermint extract along with the vanilla. These are perfect for a winter-themed Halloween party or a Christmas treat bag.
- Colorful ghosts: Add a drop of gel food coloring to the meringue before piping. Purple, green, or orange ghosts are super fun for Halloween. Just fold the color in gently to avoid deflating the meringue.
- Vegan version: Use aquafaba (the liquid from a can of chickpeas) instead of egg whites. Whip it with cream of tartar just like you would egg whites, and follow the same recipe. It works surprisingly well.
- Giant ghosts: Pipe larger ghosts for a dramatic centerpiece. Just increase the baking time to 90-120 minutes, checking for doneness.
I once made a batch of chocolate peppermint ghosts for a Halloween party, and they were the first thing to disappear. The combination of rich chocolate and cool peppermint is absolutely addictive. Don’t be afraid to experiment—these cookies are very forgiving.
Serving & Storage Suggestions
These spooky ghost meringue cookies are best served at room temperature, straight from the baking sheet. They’re incredibly light and airy, with a satisfying crunch that gives way to a melt-in-your-mouth texture. I love serving them alongside a warm mug of hot chocolate or a creamy pumpkin spice latte for the ultimate Halloween treat. For a festive presentation, arrange them on a platter with a few caramel apple cream cheese dip and some apple slices for dipping.
For storage, keep the ghosts in an airtight container at room temperature. They’ll stay fresh for up to 2 weeks, though they rarely last that long in my house. Do not refrigerate them—the moisture will make them sticky and soft. If you need to store them longer, you can freeze them for up to 3 months. Just place them in a single layer in a freezer-safe container with parchment paper between layers.
To re-crisp frozen ghosts, let them come to room temperature on the counter for about 30 minutes. If they’ve absorbed a little moisture, you can pop them in a 200°F (95°C) oven for 10 minutes to dry them out again. They’ll be just as good as fresh.
These ghosts also make fantastic additions to Halloween treat bags. I like to put 2-3 ghosts in a small cellophane bag, tie it with a black or orange ribbon, and add a little tag that says “Boo!” They’re the perfect non-candy treat for school parties and trick-or-treaters.
Nutritional Information & Benefits
While these spooky ghost meringue cookies are definitely a treat, they’re surprisingly light compared to most Halloween goodies. Here’s the approximate nutritional breakdown per ghost (based on 24 cookies):
- Calories: 35
- Fat: 0.5g
- Carbohydrates: 8g
- Sugar: 7g
- Protein: 1g
- Sodium: 15mg
These cookies are naturally gluten-free, low in fat, and contain no dairy. The egg whites provide a small amount of protein, and the cream of tartar adds a touch of potassium. Of course, they’re still a sugary treat, but they’re a much lighter option than a candy bar or a slice of cake.
For those with dietary restrictions, these ghosts are a lifesaver. They’re perfect for gluten-free, dairy-free, and nut-free diets. Just make sure your chocolate chips are certified gluten-free if that’s a concern. I’ve made these for friends with celiac disease, and they were thrilled to have a Halloween treat they could actually eat.
Conclusion
These spooky ghost meringue cookies are the kind of recipe that makes you feel like a kitchen wizard. They look impressive, they taste incredible, and they’re so simple that you’ll wonder why you haven’t been making them for years. Whether you’re filling Halloween treat bags, setting up a dessert table, or just looking for a fun activity to do with the kids, these ghosts deliver every single time.
I love making these because they remind me that the best Halloween treats don’t have to be complicated. Sometimes the simplest things—a little egg white, a little sugar, a few chocolate chips—can create something truly magical. And when you see the look on someone’s face when they pull a little ghost out of their treat bag? That’s the real reward.
I’d love to hear how your ghosts turn out! Drop a comment below and let me know if you tried any fun variations, or tag me in your photos on social media. Happy Halloween, and happy baking!
Frequently Asked Questions
Can I make these meringue ghosts without cream of tartar?
Yes, you can substitute it with 1 teaspoon of fresh lemon juice or white vinegar. The acid serves the same purpose of stabilizing the egg whites and helping them hold their shape.
Why did my meringue ghosts turn out sticky?
Sticky meringues are usually a sign that they weren’t baked long enough or the humidity was too high. Make sure you bake them at a low temperature for the full 60-75 minutes, and let them cool completely in the oven with the door slightly open.
Can I use liquid food coloring instead of gel?
I don’t recommend it. Liquid food coloring adds too much moisture to the meringue, which can cause it to deflate or become sticky. Gel or paste food coloring is much better because it’s concentrated and doesn’t affect the texture.
How do I keep the chocolate chips from sinking?
Make sure your meringue is thick and stiff enough to hold the chips. If the chips are sinking, your meringue might be under-whipped. Also, gently press the chips into the surface rather than pushing them deep into the meringue.
Can I double this recipe?
Absolutely! This recipe doubles beautifully. Just make sure you have enough baking sheets and oven space. You might need to bake them in batches, and that’s perfectly fine. The meringue will hold in the piping bag at room temperature for up to an hour.
Pin This Recipe!
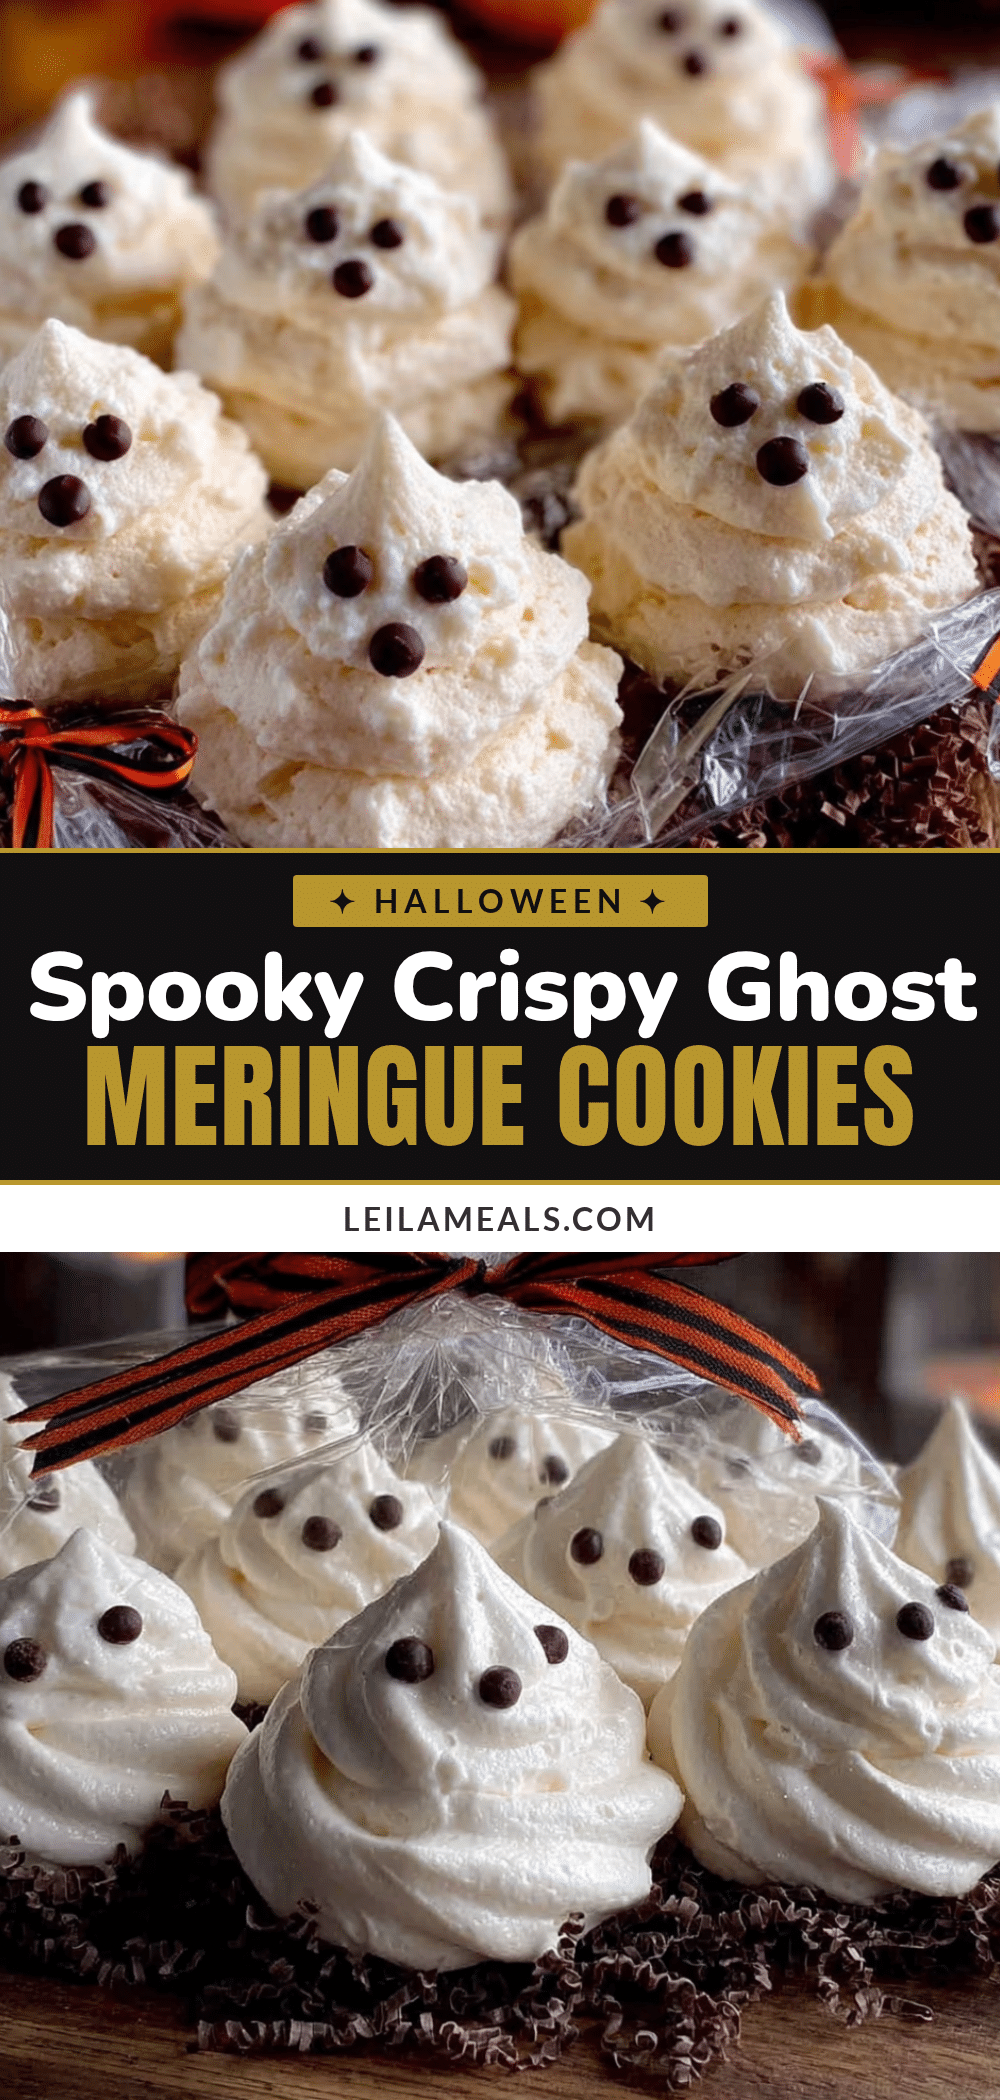
Spooky Ghost Meringue Cookies: Easy Halloween Treat Bags
These spooky ghost meringue cookies are light, crispy, and melt in your mouth like a sweet little cloud. They’re ridiculously easy to make with simple ingredients and are perfect for Halloween treat bags, parties, or spooky movie nights.
- Prep Time: 15 minutes
- Cook Time: 60-75 minutes
- Total Time: 1 hour 45 minutes to 2 hours
- Yield: 24 cookies 1x
- Category: Dessert
- Cuisine: American
Ingredients
- 4 large egg whites, room temperature
- 1 cup (200g) granulated sugar
- 1/2 teaspoon cream of tartar
- 1 teaspoon vanilla extract
- 1/4 cup (45g) mini chocolate chips
- Optional: sanding sugar or edible glitter
Instructions
- Preheat oven to 200°F (95°C). Line a large baking sheet with parchment paper.
- In a clean, dry mixing bowl, add room temperature egg whites and cream of tartar. Beat on medium speed until foamy and soft peaks form, about 2-3 minutes.
- With mixer running on medium-high, add sugar one tablespoon at a time, taking about 5-7 minutes total. The mixture will become glossy and thick.
- Increase speed to high and beat for another 2-3 minutes until stiff, glossy peaks form. Rub a little between your fingers; if it feels gritty, keep beating until smooth.
- Beat in vanilla extract on low speed for about 10 seconds, just until combined.
- Transfer meringue to a piping bag fitted with a round tip (or a zip-top bag with a corner snipped off). Pipe small dollops onto prepared baking sheet, about 1.5 inches wide and 2 inches tall, leaving 1 inch between each ghost.
- Gently press two mini chocolate chips into each ghost for eyes, placing them close together near the top.
- Bake for 60-75 minutes until meringues are dry to the touch and easily lift off the parchment. They should not be brown.
- Turn off oven and leave ghosts inside with door slightly ajar for 30 minutes. Transfer to a wire rack to cool completely.
Notes
For best results, use room temperature eggs and add sugar slowly. Avoid making meringues on humid days. Do not open the oven during baking. Make extra ghosts as they are fragile. Store in an airtight container at room temperature for up to 2 weeks, or freeze for up to 3 months.
Nutrition
- Serving Size: 1 cookie
- Calories: 35
- Sugar: 7
- Sodium: 15
- Fat: 0.5
- Carbohydrates: 8
- Protein: 1
Keywords: Halloween cookies, meringue cookies, ghost cookies, easy Halloween treats, gluten-free cookies, low-fat cookies, spooky treats


