“Mom, can you pack the lunch that looks like a treasure box?” my six-year-old asked, sliding into the kitchen after school last Tuesday. I blinked at him, confused. He meant the bento box I’d thrown together that morning when we were running late and I was out of bread. The one with the turkey rolled around cheese and that ranch dressing he dips everything into. That lunch, thrown together from panic and pantry scraps, had apparently become legendary at the first-grade lunch table. And honestly? That is how this recipe was born—not from a food blog brainstorm, but from a desperate Tuesday morning and a kid who refused to eat another sandwich.
These Easy Turkey Ranch Roll-Ups Bento Box Lunch for Kids have saved my sanity more times than I can count. They take about ten minutes to assemble, use ingredients I almost always have on hand, and somehow make my kids feel like they are opening a present at lunchtime. The best part? No heating required, no soggy bread complaints, and zero negotiation at the table. I have been making these for over a year now, tweaking the fillings and the box combinations until I found the magic formula that gets empty containers back at pickup.
There is something quietly satisfying about packing a lunch your kid actually looks forward to. It is not about being a Pinterest-perfect parent. It is about finding that one thing that works, that one recipe that makes the morning rush feel less like a battle and more like a small act of love. These roll-ups became that for us.
Why You’ll Love This Recipe
I have tested this recipe through picky-eater phases, school holiday parties, and even a few “I don’t like anything” weeks. Here is why it stuck around in our lunch rotation:
- Quick & Easy: These come together in under 10 minutes. Seriously. If you can spread cream cheese and roll a tortilla, you can make this lunch happen even on your most chaotic mornings.
- Simple Ingredients: No fancy grocery trips needed. You likely already have tortillas, turkey, cream cheese, and ranch seasoning in your kitchen right now.
- Perfect for School Lunches: These hold up beautifully in a lunchbox. No sogginess, no falling apart, and they taste just as good at noon as they did at 7 AM.
- Crowd-Pleaser: My kids love them. Their friends want them. Even my husband has been caught sneaking one from the fridge.
- Unbelievably Customizable: You can switch up the fillings based on what your kids like or what you have in the fridge. It is practically impossible to mess up.
What makes this version different from every other roll-up recipe? It is the ratio. I spent months figuring out the perfect amount of cream cheese and ranch seasoning so that the roll-ups hold their shape without getting messy. No gushy filling, no dry bites. Just creamy, herby, perfectly rolled turkey and cheese that stays intact from your kitchen to the lunch table.
This is the kind of recipe that makes you feel like you have it together, even on days when you definitely do not. It is comfort food reimagined for the lunchbox—faster, simpler, and with the same satisfying feeling of feeding your kids something they actually enjoy.
What Ingredients You Will Need
This recipe uses simple, wholesome ingredients to deliver big flavor without the fuss. Most of these are pantry staples for anyone who packs lunches regularly.
- Large flour tortillas (burrito size works best for rolling; use gluten-free if needed)
- 8 oz cream cheese, softened to room temperature (full-fat gives the best texture, but reduced-fat works fine)
- 1 packet ranch seasoning mix (I prefer Hidden Valley for consistent flavor)
- 8-10 slices deli turkey breast (oven-roasted or honey turkey both work great)
- 4-6 slices provolone or cheddar cheese (provolone rolls easier, cheddar adds more flavor)
- Optional add-ins: shredded lettuce, thinly sliced cucumber, or bell pepper strips for crunch
Ingredient Selection Tips: Look for tortillas that are soft and pliable—stiff ones crack when you roll them. If your tortillas feel dry, microwave them for 10 seconds wrapped in a damp paper towel. For the cream cheese, let it sit on the counter for about 20 minutes before mixing. Cold cream cheese creates lumpy spread that tears the tortillas.
Brand Recommendations: I have tested this with several brands, and Mission tortillas roll the best without cracking. For turkey, Boar’s Head oven-roasted gives a clean flavor that kids actually like. If you want a cleaner ingredient list, look for cream cheese with no artificial preservatives—Philadelphia works perfectly.
Substitution Guidance: Use dairy-free cream cheese and vegan cheese slices for a dairy-free version. Swap turkey for ham, roast beef, or even hummus and roasted veggies for a vegetarian option. If your kid does not like ranch, try everything bagel seasoning mixed into the cream cheese instead. For a lower-carb option, use large lettuce leaves instead of tortillas—just know they won’t hold up as well in a lunchbox.
Equipment Needed
You do not need fancy equipment for these roll-ups, which is part of why I love this recipe so much.
- Cutting board (any size works, but a large one gives you room to roll)
- Sharp knife (a serrated bread knife works best for clean slices without squishing)
- Small mixing bowl (for combining the cream cheese and ranch seasoning)
- Spatula or butter knife (for spreading the cream cheese mixture evenly)
- Bento box or lunch container (I use the Yumbox or Bentgo brands—they keep everything separate and portioned perfectly)
- Plastic wrap or parchment paper (for wrapping the rolls before slicing, helps them hold their shape)
Budget-Friendly Options: You do not need a fancy bento box. A simple compartmentalized container from the dollar store works just as well. I used regular plastic food containers for years before investing in bento boxes. If you do not have plastic wrap, wax paper works fine for wrapping the rolls before slicing.
Personal Experience: I learned the hard way that a dull knife squishes these roll-ups flat. Invest in a good serrated knife—it makes the difference between perfect pinwheels and sad, flattened discs. Also, do not skip the plastic wrap step. I tried once thinking I could save time, and my roll-ups unrolled in the fridge overnight. Lesson learned.
Preparation Method
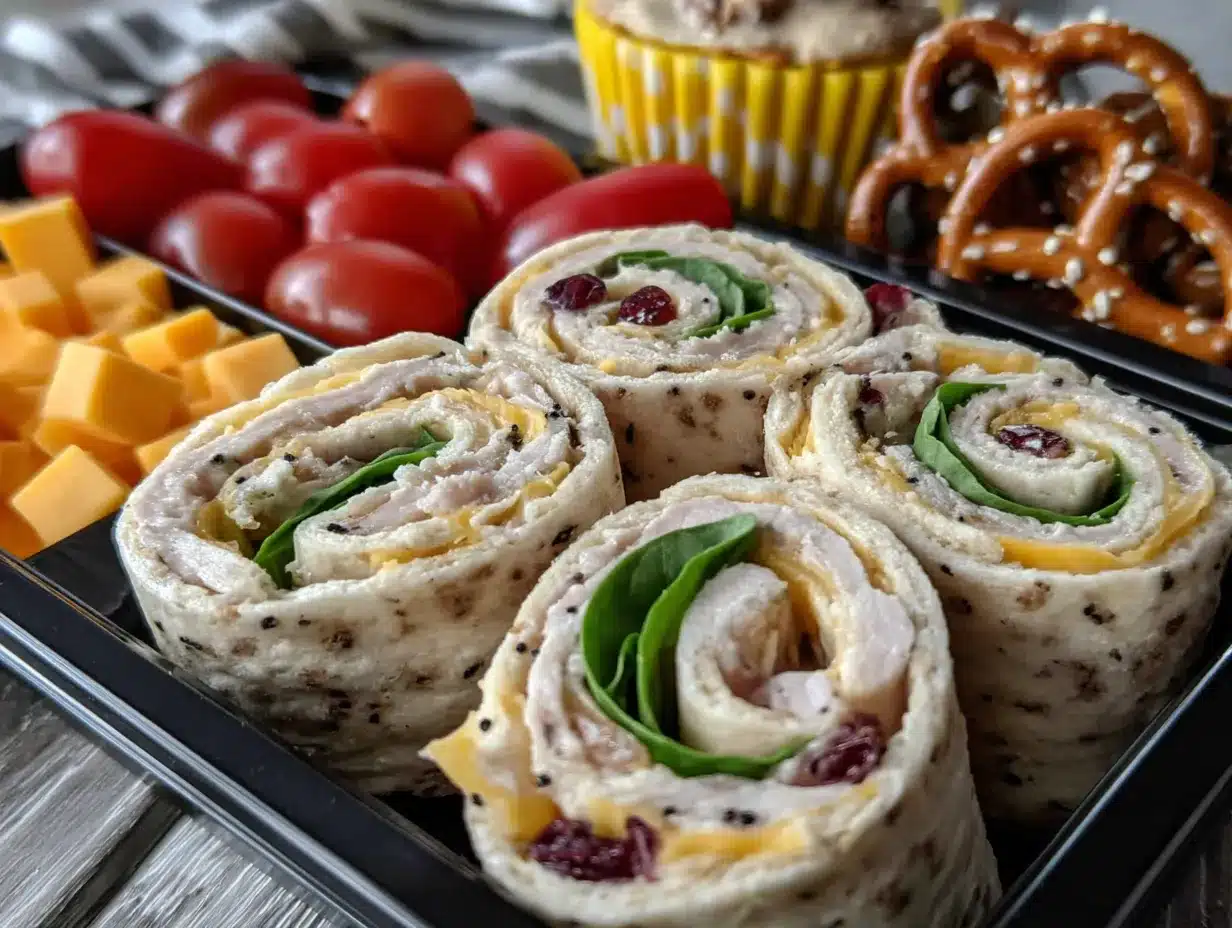
- Soften the cream cheese. Take the cream cheese out of the fridge about 20 minutes before you start. If you forgot, microwave it for 10-15 seconds in a bowl—just watch it so it does not melt. You want it soft enough to mix easily but not warm.
- Mix the ranch seasoning. In a small bowl, combine the softened cream cheese and the entire packet of ranch seasoning. Stir until completely smooth and uniform. Taste it—if you want a stronger ranch flavor, add a little more seasoning. I usually save half a packet for a milder version my youngest prefers.
- Prepare your tortillas. Lay one tortilla flat on your cutting board. If the edges are curling up, microwave it for 10 seconds to relax the gluten. Spread about 2 tablespoons of the ranch cream cheese mixture evenly across the entire surface, leaving a 1-inch border around the edges. Do not skimp on the edges—this is what holds the roll together.
- Layer the turkey and cheese. Place 2-3 slices of turkey flat over the cream cheese, overlapping slightly so there are no gaps. Lay 1-2 slices of cheese on top of the turkey. If you are adding veggies, place a thin layer of lettuce or cucumber strips along one edge.
- Roll it tightly. Starting from one edge, roll the tortilla as tightly as you can without tearing it. Use your fingers to tuck the filling in as you go. Think of it like rolling a sleeping bag—firm and even pressure. When you reach the end, press the seam gently to seal.
- Wrap and chill. Wrap the rolled tortilla tightly in plastic wrap or parchment paper. Twist the ends like a candy wrapper to keep it secure. Refrigerate for at least 15-20 minutes. This step is non-negotiable—chilling sets the cream cheese and makes slicing possible without squishing.
- Slice into pinwheels. Unwrap the chilled roll and place it on your cutting board. Using a sharp serrated knife, slice the roll into 1-inch pieces. Use a gentle sawing motion rather than pressing down. You should get about 6-8 pieces per tortilla depending on how thick you cut them.
- Assemble the bento box. Arrange 4-6 roll-up slices in the main compartment of your bento box. Fill the smaller compartments with sides like baby carrots, cucumber slices, apple slices, grapes, or a small container of extra ranch for dipping. Add a fun pick or food pick for extra kid appeal.
Sensory Cue: The cream cheese mixture should look smooth and creamy, not lumpy. When you roll the tortilla, you should feel it tightening evenly. The finished roll should feel firm when you squeeze it gently, not squishy. When you slice, the pinwheels should hold their shape without the filling oozing out.
Troubleshooting: If your roll-ups are falling apart, you probably did not spread the cream cheese all the way to the edges, or you skipped the chilling step. If the tortillas crack, they were too dry—microwave them next time. If the filling is oozing out, you used too much cream cheese. A thin, even layer is all you need.
Cooking Tips & Techniques
After making these roll-ups at least fifty times (I am not exaggerating), I have collected a few tricks that make the process smoother and the results better.
Temperature matters. Room temperature cream cheese spreads like a dream. Cold cream cheese tears tortillas and leaves lumps. Set it out while you pack the rest of the lunch or make the cream cheese mixture the night before and let it sit on the counter for a few minutes before spreading.
Rolling technique is everything. I used to roll these loosely and wonder why they fell apart. Now I roll them like I mean it. Start with the filling spread evenly, then roll firmly, using your fingers to keep the filling tucked in. The tighter the roll, the prettier the pinwheels. I ruined my first few batches by being too gentle.
Do not skip the chill. I know, I know—you are in a rush. But the chilling step is what makes these lunchbox-ready. Without it, the cream cheese is too soft and the rolls flatten when you slice them. Fifteen minutes in the fridge transforms them from messy to perfect.
Knife choice matters. A dull knife is the enemy of a good pinwheel. It squishes the roll and drags the filling out. Use a sharp serrated knife and a gentle sawing motion. Clean the knife between cuts if the cream cheese builds up on the blade.
Make ahead strategy. These roll-ups actually taste better after a few hours in the fridge. The flavors meld together, and the tortilla softens slightly. I often make a batch on Sunday night and pack them for the whole week. They stay fresh for up to 4 days in an airtight container.
My biggest failure: The first time I made these, I used cold cream cheese straight from the fridge. The mixture was lumpy, the tortillas tore, and the final pinwheels looked like a crime scene. My kid took one bite and asked for a sandwich. Learn from my mistakes—soften that cream cheese.
Variations & Adaptations
One of the best things about this recipe is how flexible it is. Here are some variations we have tried and loved:
Vegetarian Version: Swap the turkey for hummus, roasted red peppers, and spinach. Spread a thin layer of hummus instead of the ranch cream cheese, then layer the veggies and roll. My daughter actually prefers this version now.
Low-Carb Option: Use large lettuce leaves instead of tortillas. Butter lettuce or romaine leaves work best. Spread the cream cheese mixture thinly, add turkey and cheese, and roll carefully. These are more delicate, so pack them in a container that keeps them from getting squished.
Flavor Twist: Mix the cream cheese with different seasonings instead of ranch. Everything bagel seasoning, garlic and herb, or even a little bit of sriracha for older kids who like heat. I made a batch with everything bagel seasoning last month and my husband ate half of them before I could pack them for lunch.
Holiday Theme: Use green tortillas for St. Patrick’s Day or add red and green bell pepper strips for Christmas. For Halloween, use orange cheddar and arrange the pinwheels to look like pumpkins with a small pretzel stick stem.
Dairy-Free Adaptation: Use dairy-free cream cheese and vegan cheese slices. The texture is slightly softer, so chill them a little longer before slicing. I have tested this with Kite Hill cream cheese and it works surprisingly well.
Personal Variation: My favorite version includes a thin layer of cranberry sauce under the turkey. It adds a sweet-tart pop that balances the creamy ranch flavor. I started making these for Thanksgiving leftovers and now I make them year-round with canned cranberry sauce.
Serving & Storage Suggestions
Serving Temperature: These roll-ups are best served cold or at room temperature. They come straight from the fridge into the lunchbox, and by lunchtime, they are perfectly chilled but not cold. If you are serving them for a party or snack, let them sit at room temperature for about 10 minutes before serving.
Presentation Ideas: Arrange the pinwheels in a single layer in the bento box so they do not get squished. Add a small container of extra ranch dressing for dipping—kids love the interactive element. Use food picks shaped like animals or stars to make the lunch feel special. A silicone muffin cup in the bento box adds color and keeps different foods separated.
Complementary Sides: These pair beautifully with fresh fruit like apple slices, grapes, or berries. Add crunchy veggies like baby carrots, cucumber rounds, or bell pepper strips. For a heartier lunch, include a small container of creamy thermos-ready mac and cheese on the side. You can also add a small treat like no-bake peanut butter oat energy bites for a balanced lunch that keeps kids full all afternoon.
Storage Instructions: Store leftover roll-ups in an airtight container in the refrigerator for up to 4 days. Place a paper towel in the container to absorb any excess moisture. Do not freeze these—the cream cheese gets grainy and the tortillas become soggy when thawed.
Reheating: These are meant to be eaten cold, but if you want to warm them slightly, microwave them for 10-15 seconds. Do not overheat or the cream cheese will melt and the tortilla will get soft.
Flavor Development: These roll-ups actually taste better the next day. The ranch flavor deepens and the tortilla softens slightly, making them even more enjoyable. I often make a double batch on Sunday and pack them for Monday through Wednesday.
Nutritional Information & Benefits
Here is the approximate nutritional breakdown for a serving of 4 roll-up slices (about 1/2 of a full tortilla roll):
- Calories: 280-320
- Protein: 18-22g
- Carbohydrates: 22-26g
- Fat: 14-18g
- Fiber: 1-2g
- Sugar: 3-5g
Health Benefits: Turkey is an excellent source of lean protein, which helps kids stay full and focused throughout the school day. Cream cheese provides calcium for growing bones, and the ranch seasoning adds flavor without extra sugar. If you use whole wheat tortillas, you add fiber and complex carbohydrates for sustained energy.
Dietary Considerations: This recipe can easily be made gluten-free by using gluten-free tortillas. For a lower-sodium version, use low-sodium turkey and reduced-sodium ranch seasoning. The dairy-free version works well for kids with lactose intolerance.
Potential Allergens: This recipe contains dairy (cream cheese, cheese) and gluten (tortillas). It may also contain soy depending on the brands you use. Always check labels if you are packing for a child with food allergies.
Personal Wellness Perspective: I love that this lunch feels indulgent to my kids but is actually pretty balanced. They get protein, calcium, and carbs without the added sugar found in many pre-packaged lunch options. It is one of those rare recipes that checks the boxes for both nutrition and kid approval.
Conclusion
These Easy Turkey Ranch Roll-Ups Bento Box Lunch for Kids have become a staple in our house for good reason. They are quick, simple, and somehow make lunch feel special without requiring any actual effort. Whether you are packing for a picky eater, a busy school morning, or just want a lunch that comes back empty, this recipe delivers every single time.
I love that this recipe is more of a template than a rigid set of rules. Use whatever cheese your kids like. Switch up the fillings based on what is in the fridge. Add veggies or leave them out. The beauty of these roll-ups is that they work with whatever you have and whatever your kids will actually eat. They have saved me on countless mornings when I had nothing planned and needed lunch packed in under ten minutes.
If you try these, I would love to hear how they turned out. Did your kids love them? Did you add a fun twist? Drop a comment below and let me know. And if you are looking for more lunchbox inspiration, check out our healthy protein-packed turkey avocado bento box or these easy mini caprese skewer lunchbox bites for more ideas. Happy packing, and may your lunchboxes come back empty!
Frequently Asked Questions
Can I make these the night before?
Absolutely. In fact, I recommend it. The flavors meld together overnight and the roll-ups hold their shape even better. Just wrap them tightly in plastic wrap and store them in the fridge. Slice them in the morning before packing.
How do I keep the roll-ups from getting soggy in the lunchbox?
The key is the cream cheese layer. It acts as a barrier that keeps the moisture from the turkey and any veggies from soaking into the tortilla. Also, make sure your turkey is not too wet—pat it dry with a paper towel if it looks moist.
Can I use a different type of cheese?
Yes, any sliced cheese works. Provolone, cheddar, Swiss, mozzarella, or even pepper jack for a little kick. Just make sure it is thinly sliced so it rolls easily without creating thick bumps.
How long do these stay fresh in the fridge?
They stay fresh for up to 4 days in an airtight container. After that, the tortillas start to get soft and the cream cheese can separate slightly. I usually make a batch on Sunday and pack them through Wednesday.
My kids don’t like ranch. What else can I use?
The cream cheese base is totally customizable. Try everything bagel seasoning, garlic and herb seasoning, a little bit of honey mustard, or even plain cream cheese with a sprinkle of salt and pepper. You can also skip the seasoning entirely and just use plain cream cheese mixed with shredded cheese for a cheesier version.
Pin This Recipe!
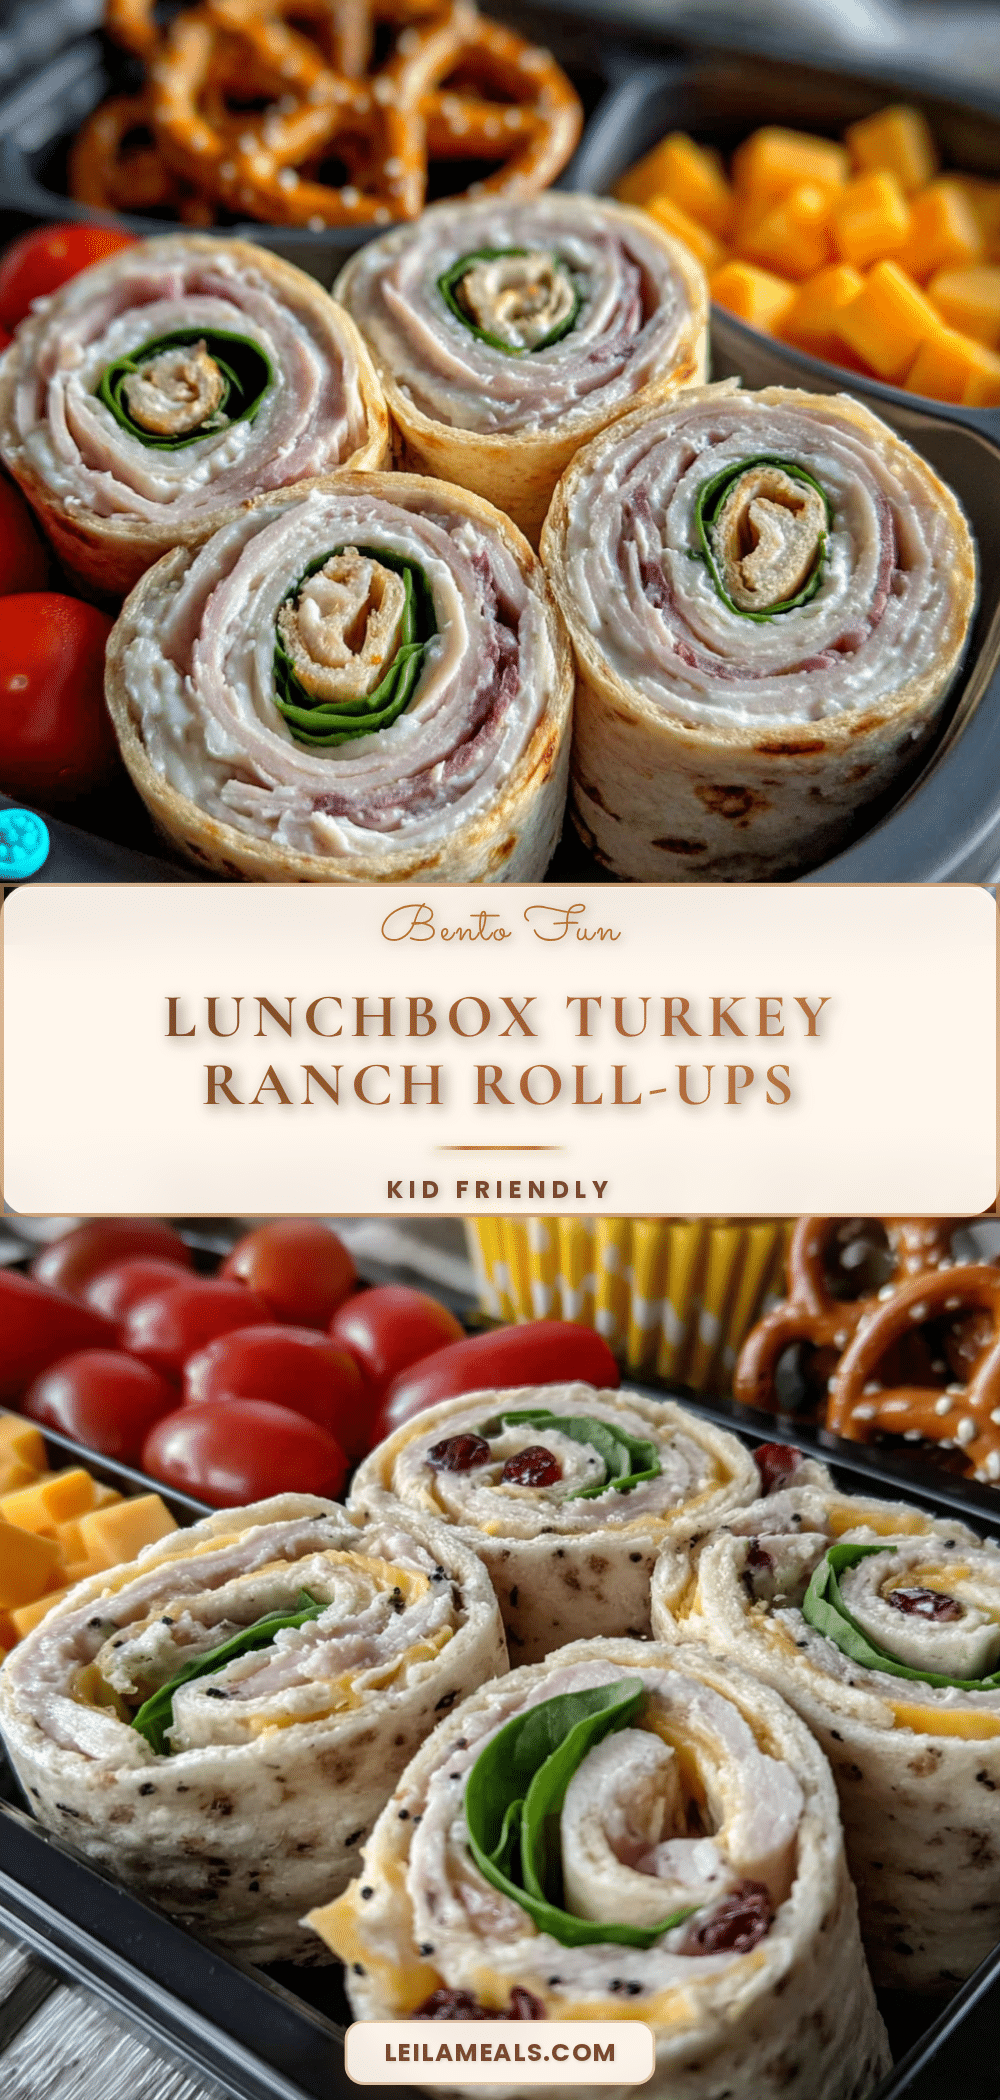
Easy Turkey Ranch Roll-Ups Bento Box Lunch for Kids

These Easy Turkey Ranch Roll-Ups Bento Box Lunch for Kids take about ten minutes to assemble, use simple ingredients, and make kids feel like they are opening a present at lunchtime. No heating required, no soggy bread complaints, and zero negotiation at the table.
- Prep Time: 10 minutes
- Cook Time: 0 minutes
- Total Time: 30 minutes (including chilling time)
- Yield: 4 servings 1x
- Category: Lunch
- Cuisine: American
Ingredients
- Large flour tortillas (burrito size works best; use gluten-free if needed)
- 8 oz cream cheese, softened to room temperature
- 1 packet ranch seasoning mix
- 8–10 slices deli turkey breast
- 4–6 slices provolone or cheddar cheese
- Optional add-ins: shredded lettuce, thinly sliced cucumber, or bell pepper strips
Instructions
- Soften the cream cheese. Take the cream cheese out of the fridge about 20 minutes before you start. If you forgot, microwave it for 10-15 seconds in a bowl—just watch it so it does not melt. You want it soft enough to mix easily but not warm.
- Mix the ranch seasoning. In a small bowl, combine the softened cream cheese and the entire packet of ranch seasoning. Stir until completely smooth and uniform. Taste it—if you want a stronger ranch flavor, add a little more seasoning.
- Prepare your tortillas. Lay one tortilla flat on your cutting board. If the edges are curling up, microwave it for 10 seconds to relax the gluten. Spread about 2 tablespoons of the ranch cream cheese mixture evenly across the entire surface, leaving a 1-inch border around the edges.
- Layer the turkey and cheese. Place 2-3 slices of turkey flat over the cream cheese, overlapping slightly so there are no gaps. Lay 1-2 slices of cheese on top of the turkey. If you are adding veggies, place a thin layer of lettuce or cucumber strips along one edge.
- Roll it tightly. Starting from one edge, roll the tortilla as tightly as you can without tearing it. Use your fingers to tuck the filling in as you go. When you reach the end, press the seam gently to seal.
- Wrap and chill. Wrap the rolled tortilla tightly in plastic wrap or parchment paper. Twist the ends like a candy wrapper to keep it secure. Refrigerate for at least 15-20 minutes.
- Slice into pinwheels. Unwrap the chilled roll and place it on your cutting board. Using a sharp serrated knife, slice the roll into 1-inch pieces. Use a gentle sawing motion rather than pressing down. You should get about 6-8 pieces per tortilla.
- Assemble the bento box. Arrange 4-6 roll-up slices in the main compartment of your bento box. Fill the smaller compartments with sides like baby carrots, cucumber slices, apple slices, grapes, or a small container of extra ranch for dipping.
Notes
Room temperature cream cheese spreads like a dream. Cold cream cheese tears tortillas and leaves lumps. Do not skip the chilling step—it sets the cream cheese and makes slicing possible without squishing. A dull knife squishes the roll-ups flat; use a sharp serrated knife. These roll-ups actually taste better the next day as the flavors meld together.
Nutrition
- Serving Size: 4 roll-up slices (ab
- Calories: 300
- Sugar: 4
- Sodium: 800
- Fat: 16
- Saturated Fat: 8
- Carbohydrates: 24
- Fiber: 1.5
- Protein: 20
Keywords: turkey ranch roll-ups, bento box lunch, kids lunch, easy lunch, no-cook lunch, school lunch, pinwheels


