That gentle clink of a thermos lid opening — the kind that makes your heart skip because you hope the lunch inside is still warm and inviting — takes me back to early autumn school mornings. The kitchen would be quiet except for the hum of the kettle, and the smell of melting cheese mingled with a faint whisper of butter. I remember how the creamy mac and cheese I packed for my kid’s lunchbox wasn’t just a meal; it was a tiny comfort, a reminder of home tucked into their day. It wasn’t fancy, but it was exactly right — warm, cheesy, and just soft enough to feel like a spoonful of love through the midday chaos.
Making mac and cheese thermos-ready isn’t as simple as just reheating leftovers. It’s about getting that perfect creamy texture that holds up well in a lunchbox, not turning into a gluey mess or drying out. Honestly, I learned this the slow way, with a few too many soggy pasta days before cracking the code. Now, every time I prepare this creamy thermos-ready mac and cheese lunchbox for kids, I think about how this recipe became my secret weapon for stress-free school lunches. And it’s one I’m happy to share because it’s practical, heartwarming, and honestly, kid-approved every single time.
Why You’ll Love This Recipe
After countless lunchbox experiments, this mac and cheese recipe stands out for several reasons that make it a go-to in our home:
- Quick & Easy: Ready in under 30 minutes, perfect for busy mornings or last-minute lunch preps.
- Simple Ingredients: Uses pantry staples like elbow macaroni, cheddar, and milk—no hunt for fancy stuff.
- Perfect for Lunchboxes: Designed specifically to stay creamy and warm in a thermos, making it ideal for school or daycare.
- Crowd-Pleaser: Kids love it, and it’s a hit with parents who appreciate a less messy, more nutritious option.
- Unbelievably Delicious: The sauce is silky with just the right balance of sharp and mild cheddar, creating that comforting, cheesy hug with every bite.
This recipe isn’t just another mac and cheese. The trick is in how the cheese melts smoothly without clumping, thanks to a light roux base and a splash of creaminess from cream cheese, which you might not expect but it really locks in that luscious texture. Plus, it holds up well in a thermos without separating or drying out — a total game-changer for lunches on the go.
It’s also a recipe that’s been tested by a kid’s taste buds and a parent’s sanity, so you get a balance of practical and delicious. The kind of meal that makes you realize lunch doesn’t have to be rushed and boring — it can be a little moment of joy, even at school.
What Ingredients You Will Need
This recipe uses simple, wholesome ingredients that combine to deliver bold flavor and a satisfyingly creamy texture without fuss. Most are pantry staples, making this mac and cheese easy to whip up anytime. Here’s what you’ll grab:
- Elbow Macaroni – 8 ounces (about 225 grams), the classic shape for holding onto that cheesy sauce perfectly.
- Unsalted Butter – 3 tablespoons, softened (adds richness and helps create the roux).
- All-Purpose Flour – 3 tablespoons, to thicken the sauce just right.
- Whole Milk – 2 cups (480 ml), room temperature recommended for smoother sauce.
- Cream Cheese – 2 ounces (56 grams), softened (this secret ingredient boosts creaminess and helps keep the sauce stable in a thermos).
- Sharp Cheddar Cheese – 2 cups shredded (about 8 ounces/225 grams), freshly shredded for best melting texture. I like Cabot or Tillamook for their rich flavor.
- Mild Cheddar Cheese – 1 cup shredded (about 4 ounces/115 grams), balances the sharpness.
- Salt – 1/2 teaspoon (adjust to taste).
- Black Pepper – A pinch, optional but adds a subtle depth.
- Mustard Powder – 1/4 teaspoon, optional but it really brings out the cheese flavor without overpowering kids.
- Optional: A dash of smoked paprika or a tiny pinch of cayenne for a grown-up twist if you’re feeling adventurous.
For variations, you can swap all-purpose flour for gluten-free flour blends, and use dairy-free cream cheese or milk alternatives to accommodate dietary needs. The recipe is forgiving and flexible, but fresh cheese and proper melting are key to that creamy finish.
Equipment Needed
- Medium Saucepan: For cooking pasta and making the cheese sauce. A heavy-bottomed pan helps prevent scorching.
- Whisk: Essential for stirring the roux and sauce to keep it smooth and lump-free.
- Measuring Cups and Spoons: Accuracy helps with the sauce consistency.
- Cheese Grater: Freshly shredded cheese melts better than pre-shredded.
- Thermos Container: A good quality, insulated food thermos to keep the mac and cheese warm until lunchtime—this is crucial for the lunchbox success.
- Colander: To drain pasta efficiently.
If you don’t have a whisk, a sturdy spoon works but whisking will give you the smoothest sauce. And for thermoses, brands like Thermos or Zojirushi tend to perform well for heat retention. I’ve found keeping the thermos pre-warmed with hot water before adding the mac and cheese makes a noticeable difference.
Preparation Method

- Cook the Pasta: Bring a large pot of salted water to a boil. Add 8 ounces (225 g) elbow macaroni and cook until just al dente, about 6-7 minutes. Drain and rinse briefly under warm water to stop cooking. Set aside.
- Make the Roux: In the same saucepan, melt 3 tablespoons of unsalted butter over medium heat. Once melted, whisk in 3 tablespoons all-purpose flour. Stir constantly for about 2 minutes until the mixture is bubbly and slightly golden—this cooks the raw flour taste out.
- Add Milk: Gradually whisk in 2 cups (480 ml) whole milk, pouring slowly to avoid lumps. Keep whisking until the sauce thickens, about 4-5 minutes. It should coat the back of a spoon.
- Incorporate Cream Cheese: Add 2 ounces (56 g) softened cream cheese, stirring until fully melted and smooth. This step is key for that ultra-creamy texture that holds up well in a thermos.
- Add Cheese and Season: Remove the saucepan from heat. Stir in 2 cups (about 225 g) sharp cheddar cheese and 1 cup (115 g) mild cheddar cheese in small batches, stirring until melted. Season with 1/2 teaspoon salt, a pinch of black pepper, and 1/4 teaspoon mustard powder. Taste and adjust seasoning.
- Combine Pasta and Sauce: Fold the drained pasta gently into the cheese sauce. Make sure every piece is coated—this keeps it creamy and prevents drying.
- Fill the Thermos: Preheat your thermos by filling it with boiling water for 5 minutes, then empty it. Immediately pour in the mac and cheese, seal tightly, and pack in the lunchbox.
- Enjoy Warm: The mac and cheese will stay warm and creamy for hours, perfect for your kid’s lunchtime. If you want to serve immediately, a quick bake for 5 minutes at 350°F (175°C) can add a golden crust.
Common hiccup: if the sauce looks too thick, add a splash of milk before packing it into the thermos. If it seems runny, let it thicken a bit longer on the stove before mixing with pasta. Stirring constantly during sauce preparation keeps lumps at bay.
Cooking Tips & Techniques
Cheese sauce can be tricky, but a few tricks have saved me from disaster more than once:
- Use Freshly Shredded Cheese: Pre-shredded cheese often has anti-caking agents that prevent smooth melting, leading to a grainy sauce.
- Cook Pasta Al Dente: Since it will stay warm in the thermos, slightly undercooked pasta prevents it from becoming mushy later.
- Make a Proper Roux: Cooking the flour and butter before adding milk avoids that raw flour taste and ensures a smooth base.
- Don’t Overheat Cheese: Add cheese off the heat to prevent it from breaking or becoming oily.
- Preheat the Thermos: This simple step keeps your mac and cheese warm longer and maintains creaminess.
- Stir Gently: Overstirring pasta with sauce can break noodles, so fold gently to keep texture intact.
Once, I skipped the creaming step and ended up with a sauce that separated halfway through the lunch. Lesson learned: patience and temperature control are everything here.
Variations & Adaptations
This creamy thermos-ready mac and cheese lunchbox for kids is flexible enough to suit different tastes and dietary needs:
- Gluten-Free Version: Use gluten-free pasta and substitute all-purpose flour with cornstarch or a gluten-free flour blend.
- Dairy-Free Option: Swap milk with unsweetened almond or oat milk, and use dairy-free cream cheese and cheddar-style vegan cheese.
- Veggie Boost: Stir in finely chopped steamed broccoli, carrots, or peas for added nutrition and color. These hold up well in the thermos.
- Spiced Up: For older kids or adults, add a pinch of smoked paprika or a dash of hot sauce before packing.
I once made a version with a swirl of pesto stirred into the cheese sauce for a fresh herb twist that my kids surprisingly loved. You can also try mixing in a little cooked bacon for a smoky bite, similar to the creamy richness in my favorite pulled pork sliders with creamy coleslaw.
Serving & Storage Suggestions
This mac and cheese is perfect served warm directly from the thermos. For a lunchbox treat, pair it with fresh fruit or crunchy veggies for a balanced meal. It also goes well with simple sides like cherry tomatoes or a small salad.
Leftovers can be stored in an airtight container in the refrigerator for up to 3 days. To reheat, add a splash of milk and warm gently on the stove or microwave, stirring occasionally to bring back that creamy goodness.
If you want to prepare in advance, you can make the mac and cheese sauce ahead and store it separately from the pasta. Mix them together just before packing to keep the pasta texture fresh.
Flavors mellow beautifully overnight, making the dish even more comforting the next day. Just remember to reheat thoroughly before putting it into the thermos to keep it warm for lunchtime.
Nutritional Information & Benefits
This recipe provides a balanced combination of carbs, protein, and fat, making it a satisfying meal for growing kids. The elbow macaroni delivers energy through complex carbohydrates, while the cheddar cheese and cream cheese add quality protein and calcium essential for bone growth.
Using whole milk keeps the fat content moderate, which helps with vitamin absorption and satiety. You can adjust cheese quantities slightly for lower fat versions or swap in reduced-fat dairy options if preferred.
For families managing allergies, the recipe can be adjusted to gluten-free and dairy-free versions as noted. It’s hearty without relying on processed additives, making it a wholesome choice for lunchboxes.
Conclusion
This creamy thermos-ready mac and cheese recipe has become a quiet hero in my kitchen, turning hectic mornings into a chance to send my kids off with something warm and nourishing. I love how it’s simple but thoughtfully crafted to keep that smooth, cheesy texture even hours later. It’s proof that comfort food can be practical, too.
Feel free to tweak the cheese blends or sneak in veggies to suit your family’s tastes. It’s a recipe that welcomes your personal touch without losing its heart. And if making lunchboxes easier and tastier sounds good to you, this mac and cheese might just become your new best friend.
Would love to hear how your kids like it or any clever twists you come up with—drop a comment and share your version!
FAQs
Can I make this mac and cheese ahead of time?
Yes! You can prepare the cheese sauce and pasta separately, then combine them just before packing into the thermos. This helps keep the pasta from becoming mushy.
What kind of thermos works best for keeping mac and cheese warm?
Look for an insulated food thermos with a wide mouth and good heat retention. Brands like Thermos and Zojirushi tend to perform well. Pre-warming the thermos with hot water also helps.
Can I add vegetables to this recipe?
Absolutely! Finely steamed and chopped veggies like broccoli, peas, or carrots mix in nicely without affecting the texture or warmth in the thermos.
Is this recipe suitable for kids with dairy allergies?
It can be adapted by using dairy-free cream cheese, plant-based milk, and vegan cheddar-style cheese. Be sure to check that all substitutes melt well for the best texture.
How do I prevent the mac and cheese from drying out in the thermos?
Preheat the thermos before filling and pack the mac and cheese while it’s still hot. Adding a little extra milk or cream cheese in the sauce also helps retain moisture.
For an easy sweet finish to pair with your kid’s lunch, you might enjoy these savory mini apple pie bites with cheddar crust or a refreshing treat like no-bake bomb pop popsicle cake to round out the meal beautifully.
Pin This Recipe!
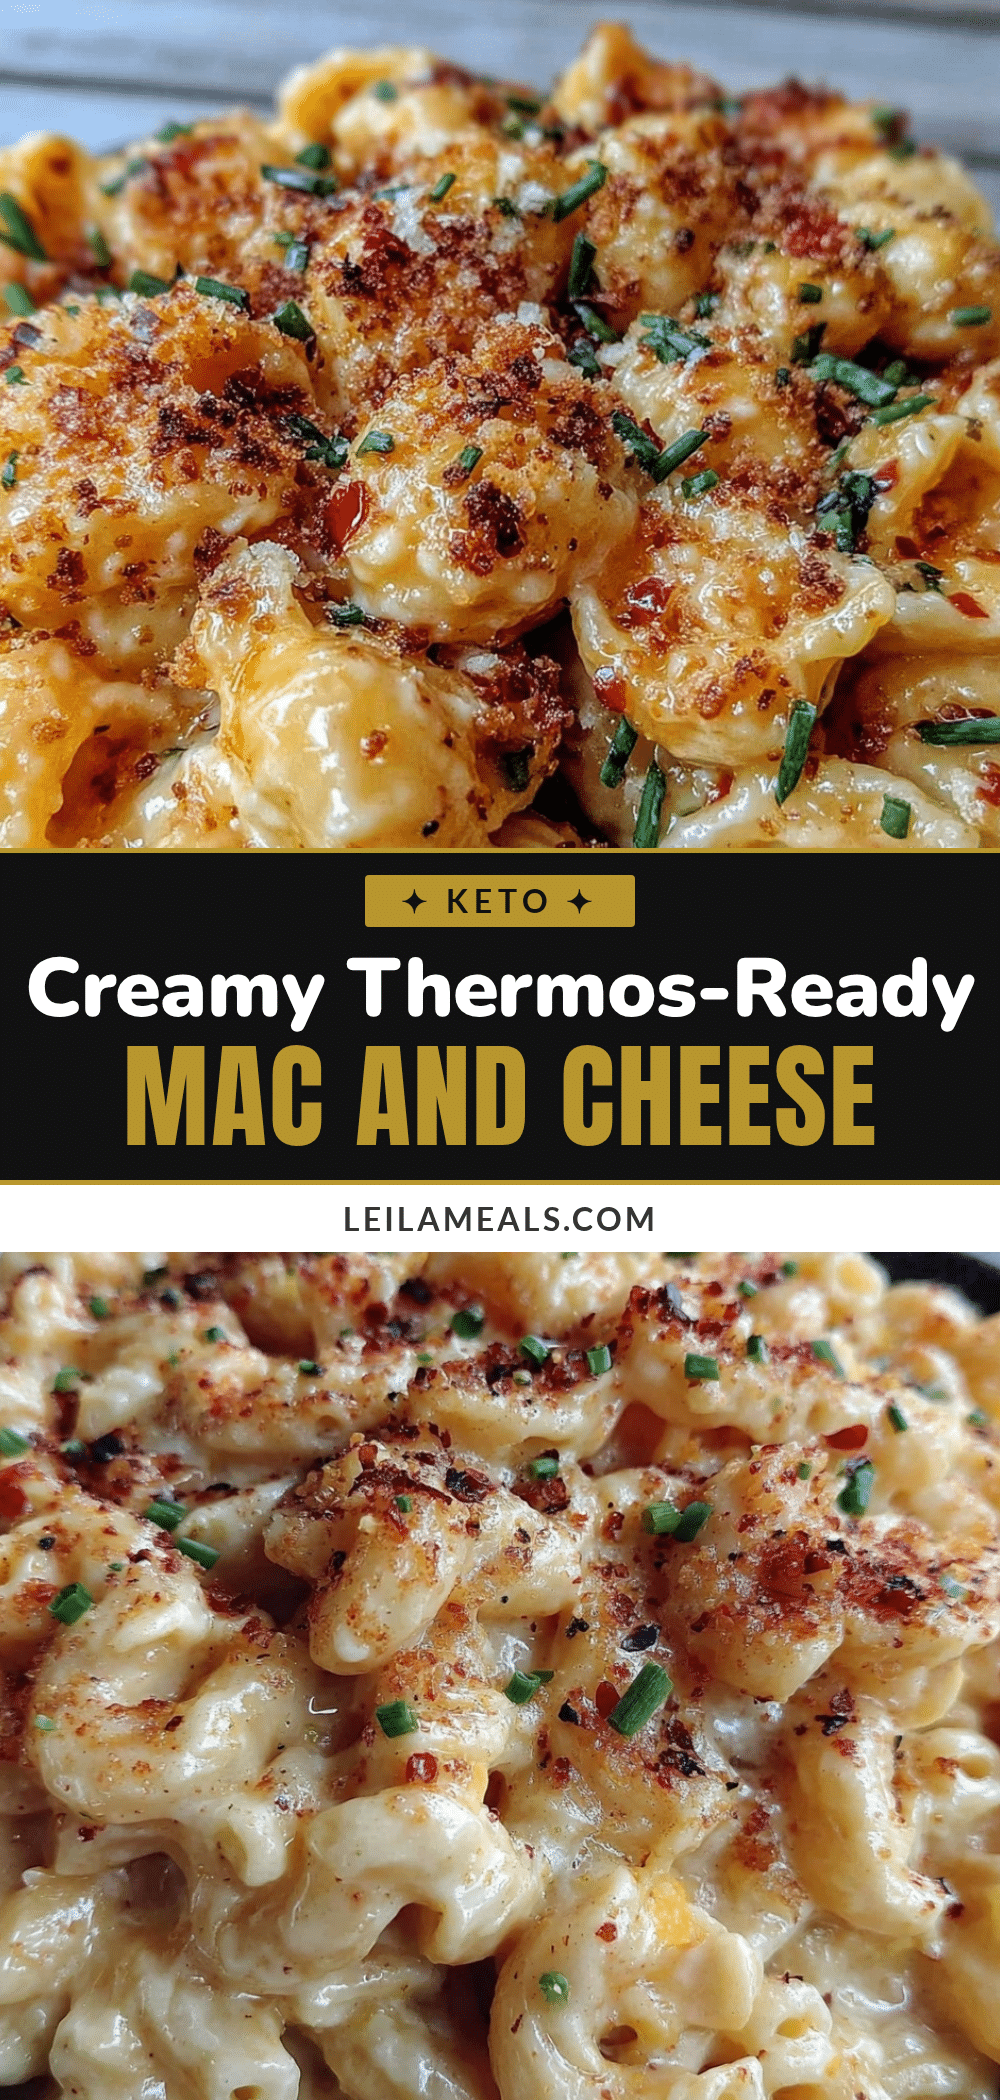
Creamy Thermos-Ready Mac and Cheese

A creamy, kid-approved mac and cheese recipe designed to stay warm and creamy in a thermos, perfect for school or daycare lunchboxes.
- Prep Time: 10 minutes
- Cook Time: 15 minutes
- Total Time: 25 minutes
- Yield: 4 servings 1x
- Category: Main Course
- Cuisine: American
Ingredients
- 8 ounces elbow macaroni (about 225 grams)
- 3 tablespoons unsalted butter, softened
- 3 tablespoons all-purpose flour
- 2 cups whole milk (480 ml), room temperature
- 2 ounces cream cheese, softened
- 2 cups sharp cheddar cheese, shredded (about 8 ounces/225 grams)
- 1 cup mild cheddar cheese, shredded (about 4 ounces/115 grams)
- 1/2 teaspoon salt
- Pinch of black pepper (optional)
- 1/4 teaspoon mustard powder
- Optional: dash of smoked paprika or pinch of cayenne
Instructions
- Bring a large pot of salted water to a boil. Add 8 ounces elbow macaroni and cook until just al dente, about 6-7 minutes. Drain and rinse briefly under warm water to stop cooking. Set aside.
- In the same saucepan, melt 3 tablespoons of unsalted butter over medium heat. Once melted, whisk in 3 tablespoons all-purpose flour. Stir constantly for about 2 minutes until the mixture is bubbly and slightly golden.
- Gradually whisk in 2 cups whole milk, pouring slowly to avoid lumps. Keep whisking until the sauce thickens, about 4-5 minutes. It should coat the back of a spoon.
- Add 2 ounces softened cream cheese, stirring until fully melted and smooth.
- Remove the saucepan from heat. Stir in 2 cups sharp cheddar cheese and 1 cup mild cheddar cheese in small batches, stirring until melted. Season with 1/2 teaspoon salt, a pinch of black pepper, and 1/4 teaspoon mustard powder. Taste and adjust seasoning.
- Fold the drained pasta gently into the cheese sauce, ensuring every piece is coated.
- Preheat your thermos by filling it with boiling water for 5 minutes, then empty it. Immediately pour in the mac and cheese, seal tightly, and pack in the lunchbox.
- The mac and cheese will stay warm and creamy for hours. To serve immediately, bake for 5 minutes at 350°F (175°C) for a golden crust.
Notes
Use freshly shredded cheese for best melting texture. Cook pasta al dente to prevent mushiness in the thermos. Preheat the thermos with hot water before filling to keep the mac and cheese warm longer. Stir gently when combining pasta and sauce to keep noodles intact. If sauce is too thick, add a splash of milk before packing. For a dairy-free or gluten-free version, substitute ingredients accordingly.
Nutrition
- Serving Size: 1 cup
- Calories: 450
- Sugar: 6
- Sodium: 600
- Fat: 25
- Saturated Fat: 15
- Carbohydrates: 40
- Fiber: 2
- Protein: 18
Keywords: mac and cheese, thermos lunch, kids lunchbox, creamy mac and cheese, easy mac and cheese, school lunch, comfort food


