My neighbor handed me a pint of store-bought pumpkin ice cream last September and said, “Try this, it’s good.” I tried it. It was fine. But three days later, I found myself staring at a can of pumpkin puree in my pantry at 9 PM, wondering if I could do better. So I grabbed my stand mixer bowl, a can of sweetened condensed milk, and decided to wing it. No ice cream maker, no fancy equipment, just a freezer and a whole lot of hope.
The first batch came out too icy. The second was somehow too sweet and not pumpkiny enough. But the third? My husband ate three scoops standing at the kitchen counter and said, “Don’t buy the store kind anymore.” That was it. That was the moment I knew this Easy No-Churn Pumpkin Spice Ice Cream recipe was something special. No machine, no constant stirring, no complicated steps—just real ingredients that turn into the creamiest fall dessert you’ll ever make at home.
Honestly, I was surprised at how well it worked. You’d think a custard base or an ice cream maker would be non-negotiable for good texture. But nope. This method relies on whipped cream and sweetened condensed milk, which creates a silky, scoopable texture that rivals anything from the store. The pumpkin puree adds body and that unmistakable autumn flavor, while the spice blend—cinnamon, ginger, nutmeg, cloves—makes the whole kitchen smell like Thanksgiving in a bowl.
This isn’t one of those recipes that requires planning ahead or special trips to the store. You probably have most of the ingredients right now. And if you’re anything like me, you’ll find yourself making a batch every single week from September through December. It’s that good.
Why You’ll Love This Recipe
Let me tell you why this Easy No-Churn Pumpkin Spice Ice Cream has become my most-requested fall recipe. I’ve tested it at least a dozen times, tweaked the ratios, and even brought it to a Friendsgiving dinner where it disappeared before the pie.
- No Ice Cream Maker Required : Seriously, you don’t need any fancy equipment. Just a mixer and a freezer-safe container. That’s it.
- Ready in Under 30 Minutes : Active prep time is maybe 20 minutes. The freezer does the rest of the work overnight.
- Simple Pantry Ingredients : Heavy cream, sweetened condensed milk, pumpkin puree, and basic fall spices. Nothing weird or hard to find.
- Perfect for Fall Gatherings : Bring this to any autumn party, Thanksgiving, or Halloween get-together, and people will lose their minds.
- Creamier Than Store-Bought : The texture is unreal—smooth, rich, and scoopable straight from the freezer. No ice crystals, no weird aftertaste.
- Endlessly Customizable : Add mix-ins, change the spice level, make it dairy-free. This recipe adapts to whatever you’re craving.
What makes this recipe different from all the other pumpkin ice creams out there? It’s the ratio. Most no-churn recipes use too much pumpkin, which makes the ice cream icy. Too little, and you can’t taste it. I landed on the perfect balance after a few failed batches—enough puree for real pumpkin flavor, but not so much that it messes with the creamy texture. Plus, I add a splash of vanilla extract and a pinch of salt to deepen everything. Trust me, this is the version you’ll come back to year after year.
There’s something about making your own ice cream that feels almost magical. You take a few simple ingredients, whip them together, and a few hours later you have this luxurious, homemade treat. And when it’s pumpkin spice season? Forget about it. This is comfort food in its purest form—creamy, spiced, and just sweet enough to satisfy that fall dessert craving without being overwhelming.
What Ingredients You Will Need
This recipe uses simple, wholesome ingredients to deliver bold pumpkin flavor and that signature creamy texture without any fuss. Most of these are pantry staples for fall baking, but I’ll walk you through each one so you know exactly what to look for.
- Heavy Cream (2 cups / 480 ml) : This is the backbone of your no-churn ice cream. You need heavy cream or heavy whipping cream with at least 36% milk fat. Don’t substitute half-and-half or milk—the high fat content is what creates that silky, scoopable texture. I prefer organic heavy cream from a local dairy, but any good-quality brand works fine. Chill it well before whipping for best results.
- Sweetened Condensed Milk (1 can, 14 oz / 397 g) : This magical ingredient replaces the traditional custard base. It adds sweetness, creaminess, and body without any cooking. I use Eagle Brand or Borden, but store brands work too. Do not confuse this with evaporated milk—they are not the same. Sweetened condensed milk is thick, sticky, and very sweet.
- Pumpkin Puree (¾ cup / 170 g) : Make sure you’re buying 100% pumpkin puree, not pumpkin pie filling. The pie filling already has sugar and spices added, which will throw off the balance. I recommend Libby’s brand for consistent results. If you’re feeling ambitious, you can make your own roasted pumpkin puree, but canned works beautifully here.
- Pure Vanilla Extract (1 teaspoon) : A good vanilla rounds out the spices and adds depth. I use Nielsen-Massey Madagascar vanilla, but any pure vanilla extract works. Avoid imitation vanilla if you can—the flavor is noticeably different.
- Pumpkin Pie Spice (1½ teaspoons) : You can use store-bought or make your own. I usually make mine with cinnamon, ginger, nutmeg, and a tiny pinch of cloves. If you’re using a pre-made blend, check the expiration date—spices lose potency over time.
- Ground Cinnamon (½ teaspoon) : This adds extra warmth and depth. I add a bit more cinnamon than what’s in the pumpkin pie spice because I love that cozy flavor.
- Salt (¼ teaspoon) : Don’t skip this. Salt enhances all the other flavors and balances the sweetness. I use fine sea salt.
Optional Add-Ins for Extra Flavor :
- Graham Cracker Crumbs (½ cup) : Stir these in at the end for a pie-crust texture throughout the ice cream.
- Chopped Pecans or Walnuts (½ cup) : Toast them first for extra crunch and nutty flavor.
- Caramel Sauce (¼ cup) : Swirl it in just before freezing for a ribbons effect.
- Bourbon (1 tablespoon) : A little bourbon adds warmth and also helps keep the ice cream slightly softer. Use a good-quality bourbon you’d drink.
Substitution Guidance :
- Dairy-Free Version : Use full-fat coconut cream (chilled) instead of heavy cream, and use a dairy-free sweetened condensed coconut milk. The texture will be slightly different but still delicious.
- Lower Sugar Option : You can use a sugar-free sweetened condensed milk, but the texture may be a bit icier. Add 1 tablespoon of cornstarch or arrowroot powder to help with creaminess.
- Spice Variations : If you don’t have pumpkin pie spice, use 1 teaspoon cinnamon, ½ teaspoon ginger, ¼ teaspoon nutmeg, and ⅛ teaspoon cloves.
Equipment Needed
You don’t need much for this recipe, which is exactly why I love it. Here’s what you’ll need:
- Stand Mixer or Hand Mixer : A stand mixer with the whisk attachment makes whipping cream effortless, but a hand mixer works just as well. If you’re using a hand mixer, use a deep metal or glass bowl—plastic bowls can feel unstable.
- Large Mixing Bowl : You’ll need one bowl for the whipped cream and another for mixing the pumpkin base. Stainless steel or glass works best.
- Rubber Spatula : For folding everything together gently. A silicone spatula is ideal because it won’t scratch your bowls.
- 9×5 Inch Loaf Pan or Freezer-Safe Container : A standard loaf pan works perfectly. You can also use a 2-quart freezer-safe container with a lid. I like using a glass loaf pan because I can see the layers as I spread them.
- Plastic Wrap or Parchment Paper : To press directly onto the surface of the ice cream before freezing. This prevents ice crystals from forming on top.
- Measuring Cups and Spoons : Accurate measurements matter here, especially for the spices and pumpkin puree.
If you don’t have a stand mixer, don’t worry. I’ve made this recipe with a hand mixer many times. Just make sure your cream is very cold, and whip it on medium-high speed until stiff peaks form. It takes about 3-5 minutes with a hand mixer. And if you’re using a loaf pan, line it with parchment paper for easier removal later—though it’s not strictly necessary.
Preparation Method
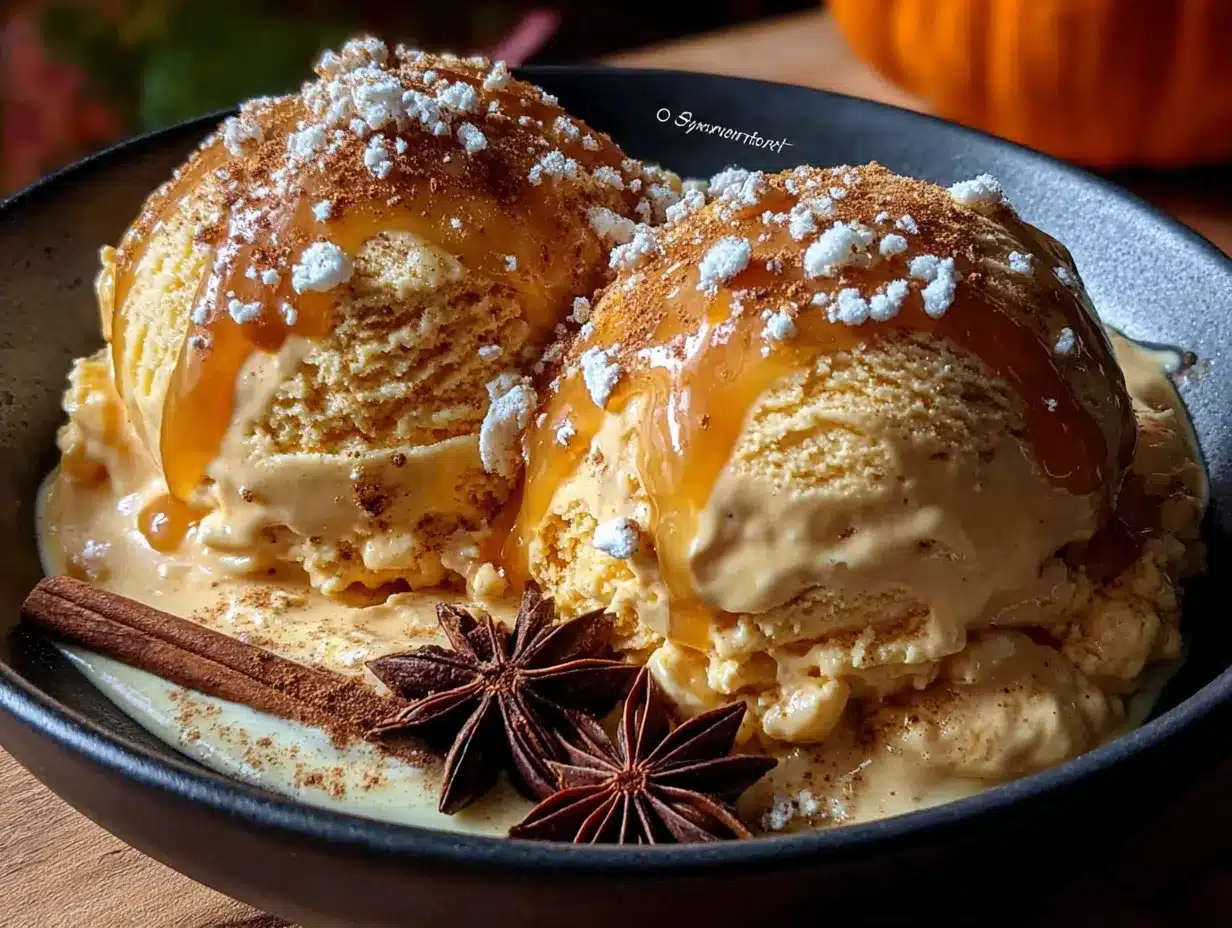
Let me walk you through this step by step. I’ve made this recipe so many times that I’ve got it down to a science. Follow along, and you’ll have the creamiest homemade pumpkin ice cream in no time.
- Chill Your Equipment : Place your mixing bowl and whisk attachment (or beaters) in the freezer for 15 minutes before you start. Cold equipment helps the cream whip up faster and hold its shape better. This is a small step that makes a big difference.
- Whip the Heavy Cream : Pour 2 cups of cold heavy cream into your chilled bowl. Beat on medium speed for about 1 minute until it starts to thicken, then increase to medium-high speed. Continue whipping until stiff peaks form—this means when you lift the whisk, the cream stands up straight without drooping. This usually takes 3-4 minutes with a stand mixer or 4-5 minutes with a hand mixer. Be careful not to over-whip, or you’ll end up with butter. You’ll know it’s ready when the cream looks billowy and holds its shape firmly.
- Mix the Pumpkin Base : In a separate medium bowl, combine the can of sweetened condensed milk, ¾ cup pumpkin puree, 1 teaspoon vanilla extract, 1½ teaspoons pumpkin pie spice, ½ teaspoon ground cinnamon, and ¼ teaspoon salt. Whisk until completely smooth. Taste it here—you should get a strong pumpkin spice flavor because it will mellow out after freezing. If you want more spice, add another ¼ teaspoon of cinnamon.
- Fold Gently : Add about one-third of the whipped cream to the pumpkin mixture and fold it in with a rubber spatula. Use a gentle cutting motion—don’t stir vigorously or you’ll deflate the cream. Once it’s mostly combined, add the remaining whipped cream in two additions, folding gently after each. The goal is a uniform mixture with no white streaks of cream remaining. It should look like a thick, fluffy mousse.
- Add Mix-Ins (Optional) : If you’re using graham cracker crumbs, chopped nuts, or caramel sauce, gently fold them in now. For caramel or bourbon, drizzle it over the mixture and fold just 2-3 times to create swirls—you don’t want it fully incorporated.
- Transfer to Container : Spoon the mixture into your loaf pan or freezer container. Smooth the top with a spatula. Tap the pan gently on the counter a few times to release any air bubbles.
- Cover and Freeze : Press a piece of plastic wrap directly onto the surface of the ice cream. This is crucial—it prevents ice crystals from forming on top. Then cover the pan with a lid or another layer of foil. Freeze for at least 6 hours, but overnight is best. The ice cream needs time to firm up completely.
- Soften Before Serving : When you’re ready to serve, let the ice cream sit at room temperature for 5-10 minutes. This makes scooping much easier. If it’s been frozen for more than 24 hours, you might need 10-15 minutes. Use a sturdy ice cream scoop dipped in warm water for clean scoops.
A few things I’ve learned the hard way: Don’t rush the whipping step. Under-whipped cream will give you a dense, icy texture. And don’t skip the plastic wrap on the surface—I did that once and ended up with a layer of ice crystals that ruined the top layer. Also, if you’re adding mix-ins, fold them in gently. Over-mixing will break down the air bubbles and make the ice cream less creamy.
Cooking Tips & Techniques
After making this recipe more times than I can count, I’ve picked up a few tricks that make the process smoother and the results more consistent. Here are my best tips:
Temperature Matters More Than You Think : Cold cream whips better and holds its shape longer. I keep my heavy cream in the coldest part of the fridge (usually the back, not the door). And chilling your bowl and beaters? That’s not just a suggestion—it genuinely makes a difference, especially on warm days or if your kitchen runs hot.
Don’t Over-Whip the Cream : This is probably the most common mistake I see. You want stiff peaks, but stop the second you get there. If you keep going, the cream will start to look grainy and eventually separate into butter and buttermilk. If you’re nervous, whip on medium speed and watch closely after the 3-minute mark. The cream should be glossy and hold a firm peak when you lift the whisk.
Pumpkin Puree Can Be Tricky : Canned pumpkin puree varies in water content depending on the brand. If your puree looks watery or has liquid pooling on top, drain it through a fine-mesh sieve or a paper towel-lined strainer for 10 minutes before using. This prevents the ice cream from becoming icy. I learned this after a batch came out more like pumpkin sorbet than ice cream.
Patience Is Key : I know it’s tempting to check after 4 hours, but 6 hours is the minimum for scoopable ice cream. Overnight is ideal. The ice cream needs time to freeze completely and develop that creamy texture. If you scoop too early, it’ll be soft and melty.
Storage Container Matters : Use a container with a tight-fitting lid. If you’re using a loaf pan, wrap it well with plastic wrap and then foil. Air exposure leads to ice crystals and freezer burn. I’ve started using a 2-quart glass container with a snap-on lid, and it works perfectly.
Multitasking Strategy : While the cream is whipping, mix your pumpkin base. While you’re folding, get your loaf pan ready. The active time is short, so being organized helps. I also like to set a timer for the whipping step so I don’t get distracted and over-whip.
Variations & Adaptations
One of the best things about this Easy No-Churn Pumpkin Spice Ice Cream is how adaptable it is. Here are some of my favorite variations:
Vegan / Dairy-Free Version : Replace the heavy cream with 2 cans of full-fat coconut cream (chilled overnight in the fridge). Scoop out the solid cream part and whip it just like you would heavy cream. Use a dairy-free sweetened condensed coconut milk. The texture will be slightly less creamy but still delicious. I’ve made this for a friend with dairy allergies, and she said it was the best vegan ice cream she’d ever had.
Pumpkin Pie Ice Cream : After spreading half the mixture in the pan, crumble 2-3 graham crackers on top, then add the remaining mixture. Swirl in ¼ cup caramel sauce and sprinkle with another crushed graham cracker. It tastes just like frozen pumpkin pie.
Bourbon Pumpkin Spice : Add 1-2 tablespoons of bourbon to the pumpkin base before folding. The alcohol won’t freeze completely, so the ice cream stays slightly softer and easier to scoop. Plus, the bourbon adds a warm, oaky note that pairs beautifully with the spices.
Extra Spicy Version : Double the spices and add a pinch of cayenne pepper for a spicy-sweet kick. This is great for anyone who loves a little heat with their sweet treats. I made this for a Halloween party, and it was a hit with the adults.
Low-Carb / Keto Option : Use a sugar-free sweetened condensed milk and replace the heavy cream with a mixture of 1½ cups heavy cream and ½ cup cream cheese (softened). The cream cheese adds body and richness without the sugar. You’ll need to add a low-carb sweetener like monk fruit or erythritol to taste.
Chocolate Pumpkin Swirl : Melt ¼ cup dark chocolate chips with 1 tablespoon coconut oil. Let it cool slightly, then drizzle it over the ice cream mixture and fold 2-3 times before freezing. The chocolate and pumpkin combination is surprisingly amazing.
If you’re feeling adventurous, try adding crushed pumpkin chocolate chip cookies as a mix-in. The cookie chunks soften slightly in the ice cream, creating a texture similar to cookie dough bites.
Serving & Storage Suggestions
This ice cream is best served straight from the freezer with a slight softening. Here’s how to make the most of it:
Serving Temperature : Let the ice cream sit at room temperature for 5-10 minutes before scooping. If it’s been frozen for more than 24 hours, give it 10-15 minutes. A warm ice cream scoop dipped in hot water makes perfect round scoops every time.
Presentation Ideas : Serve in a bowl with a drizzle of caramel sauce, a sprinkle of cinnamon, and a few toasted pecans on top. For a fun twist, serve it in a mini pie crust shell or between two pumpkin snickerdoodles for an ice cream sandwich. You can also make a float by adding a scoop to a glass of root beer or ginger ale.
Complementary Pairings : This ice cream pairs beautifully with warm apple crisp, pecan pie, or a slice of pumpkin banana bread. For drinks, try it with a warm pumpkin chai latte or a cold brew coffee.
Storage Instructions : Store the ice cream in an airtight container in the freezer for up to 2 weeks. After that, the texture starts to decline and ice crystals may form. If you’re making it for a party, make it 1-2 days ahead for best results.
Reheating (Sort Of) : If the ice cream becomes too hard after a few days, microwave it for 10-15 seconds on low power to soften it slightly. Or leave it on the counter for 15 minutes before scooping. Don’t microwave for too long or you’ll melt it.
How Flavors Develop : The spices actually mellow and deepen after a day or two in the freezer. The first day, the pumpkin flavor is very forward. By day three, the spices have melded together more, creating a more rounded, complex flavor. Honestly, I think it tastes best on day two.
Nutritional Information & Benefits
Here’s the approximate nutritional breakdown per serving (based on 8 servings):
- Calories : 380
- Total Fat : 24g
- Saturated Fat : 15g
- Cholesterol : 85mg
- Sodium : 180mg
- Total Carbohydrates : 38g
- Dietary Fiber : 1g
- Sugars : 34g
- Protein : 5g
- Vitamin A : 70% of Daily Value
- Calcium : 15% of Daily Value
While this is definitely a treat, pumpkin puree is packed with vitamin A, which supports eye health and immune function. The heavy cream provides calcium and healthy fats that help you feel satisfied. And the spices—cinnamon, ginger, nutmeg—have anti-inflammatory properties. So yes, it’s dessert, but it’s not empty calories.
Dietary Considerations : This recipe contains dairy and gluten (if using graham crackers). For a dairy-free version, see the variations section. It’s naturally egg-free and can be made gluten-free by skipping the graham crackers or using certified gluten-free ones.
I believe in balance. I eat my vegetables, drink my water, and then I enjoy a scoop of homemade ice cream without guilt. Life’s too short for bad desserts.
Conclusion
There you have it—my Easy No-Churn Pumpkin Spice Ice Cream recipe that has earned a permanent spot in my fall rotation. It’s creamy, spiced, and so simple that you’ll wonder why you ever bought the store-bought stuff. No ice cream maker, no complicated techniques, just honest ingredients and a little patience.
What I love most about this recipe is how customizable it is. You can keep it classic, or you can go wild with mix-ins and swirls. Make it for Thanksgiving, Halloween, or just a random Tuesday when you need a little autumn comfort. It never disappoints.
I’d love to hear how yours turns out. Did you add any fun mix-ins? Did you serve it with something unexpected? Drop a comment below and let me know. And if you’re looking for more fall dessert inspiration, check out my salted caramel apple blondies or my maple pecan cinnamon roll bundt cake—both are perfect for this time of year.
Until next time, happy cooking—and happy scooping!
Frequently Asked Questions
Can I make this without a mixer?
Yes, you can whip the cream by hand with a whisk, but it will take about 8-10 minutes of vigorous whisking. Make sure the cream is very cold, and use a large metal bowl. It’s a good arm workout, but a hand mixer is much easier.
Why is my ice cream icy instead of creamy?
Icy ice cream usually means one of three things: the cream wasn’t whipped enough, too much pumpkin puree was used, or the container wasn’t sealed properly. Make sure your cream reaches stiff peaks, drain any excess liquid from the pumpkin, and press plastic wrap directly onto the surface before freezing.
How long does this ice cream keep in the freezer?
It stays creamy and scoopable for about 2 weeks. After that, the texture may become icier. For best results, enjoy it within the first week. If it gets too hard, let it sit at room temperature for 10-15 minutes before scooping.
Can I use pumpkin pie filling instead of pumpkin puree?
I don’t recommend it. Pumpkin pie filling already has sugar and spices added, which will throw off the balance of this recipe. Stick with 100% pumpkin puree for the best results. If you only have pie filling, reduce the sugar and spices in the recipe by half.
Can I double this recipe?
Absolutely. Just double all the ingredients and use a larger container. A 9×13 inch baking dish works well for a double batch. You may need to freeze it for an extra hour or two since there’s more volume to freeze through.
Pin This Recipe!
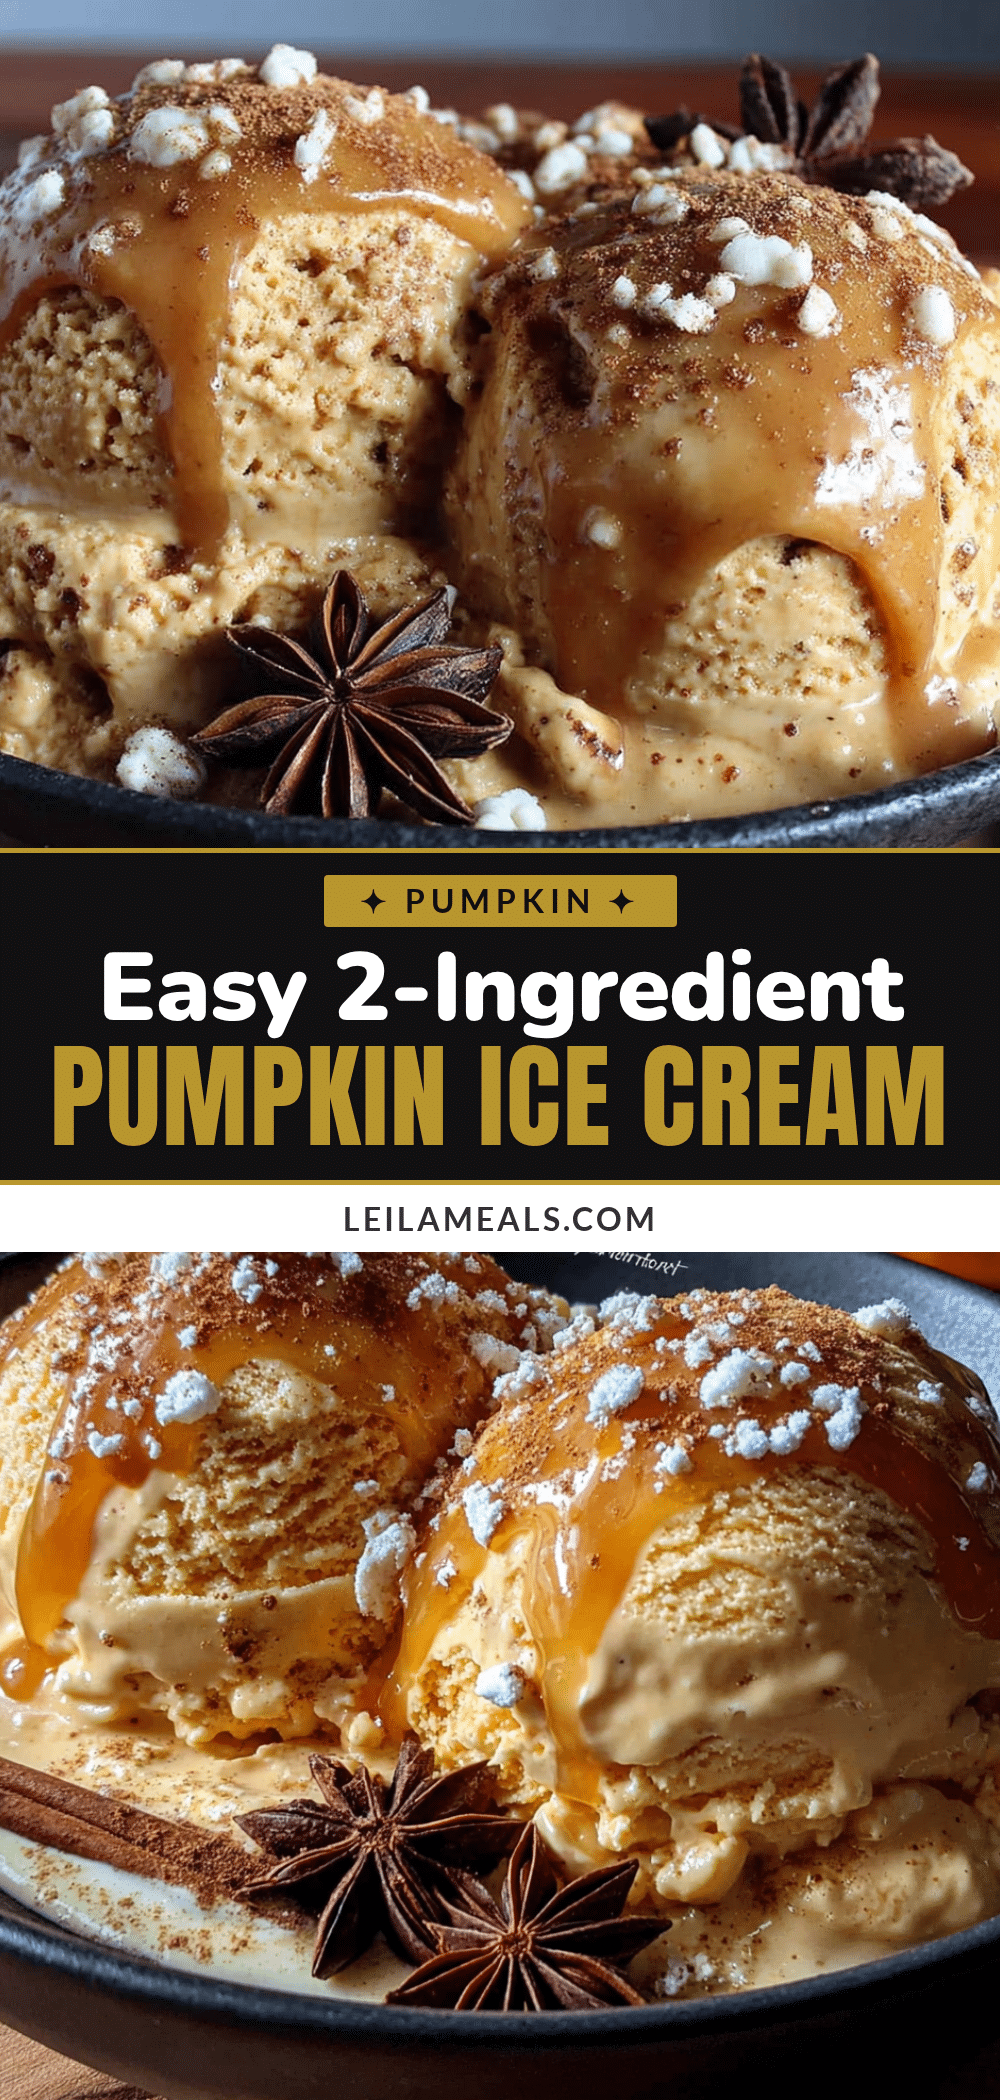
Easy No-Churn Pumpkin Spice Ice Cream: The Best Homemade Fall Dessert
This easy no-churn pumpkin spice ice cream is creamy, spiced, and requires no ice cream maker. Made with simple pantry ingredients, it’s the perfect fall dessert that rivals anything from the store.
- Prep Time: 20 minutes
- Cook Time: 0 minutes
- Total Time: 6 hours 20 minutes (includes freezing)
- Yield: 8 servings 1x
- Category: Dessert
- Cuisine: American
Ingredients
- 2 cups (480 ml) heavy cream
- 1 can (14 oz / 397 g) sweetened condensed milk
- 3/4 cup (170 g) pumpkin puree
- 1 teaspoon pure vanilla extract
- 1 1/2 teaspoons pumpkin pie spice
- 1/2 teaspoon ground cinnamon
- 1/4 teaspoon salt
- Optional: 1/2 cup graham cracker crumbs
- Optional: 1/2 cup chopped pecans or walnuts
- Optional: 1/4 cup caramel sauce
- Optional: 1 tablespoon bourbon
Instructions
- Chill your mixing bowl and whisk attachment in the freezer for 15 minutes.
- Pour 2 cups of cold heavy cream into the chilled bowl. Beat on medium speed for 1 minute, then increase to medium-high speed until stiff peaks form (3-5 minutes).
- In a separate bowl, whisk together sweetened condensed milk, pumpkin puree, vanilla extract, pumpkin pie spice, cinnamon, and salt until smooth.
- Add one-third of the whipped cream to the pumpkin mixture and fold gently with a rubber spatula. Add the remaining whipped cream in two batches, folding until no white streaks remain.
- If using optional mix-ins, gently fold them in now.
- Spoon the mixture into a 9×5 inch loaf pan or freezer-safe container. Smooth the top and tap gently to release air bubbles.
- Press plastic wrap directly onto the surface of the ice cream, then cover with a lid or foil. Freeze for at least 6 hours, preferably overnight.
- Before serving, let the ice cream sit at room temperature for 5-10 minutes to soften. Scoop with a warm ice cream scoop.
Notes
For best texture, ensure cream is very cold and whipped to stiff peaks. Drain any excess liquid from pumpkin puree if watery. Press plastic wrap directly onto the surface to prevent ice crystals. The ice cream keeps for up to 2 weeks in the freezer.
Nutrition
- Serving Size: 1/2 cup
- Calories: 380
- Sugar: 34
- Sodium: 180
- Fat: 24
- Saturated Fat: 15
- Carbohydrates: 38
- Fiber: 1
- Protein: 5
Keywords: no-churn ice cream, pumpkin spice, fall dessert, easy ice cream, homemade ice cream, pumpkin ice cream


