The silence in my kitchen that afternoon was broken by a sound I hadn’t heard in months — the high-pitched, delighted squeal of my seven-year-old niece. She had just spotted the spider web stencil I’d printed at work, her eyes going wide as she connected the dots between my scribbled recipe notes and the bag of cream cheese on the counter. That sound — pure, unfiltered, slightly unhinged excitement — is what this whole thing is about, honestly. I wasn’t trying to be the “fun aunt” that day. I was just trying to use up leftover graham crackers before they went stale. But somewhere between crushing the crackers and mixing the cream cheese, I realized I was building a memory.
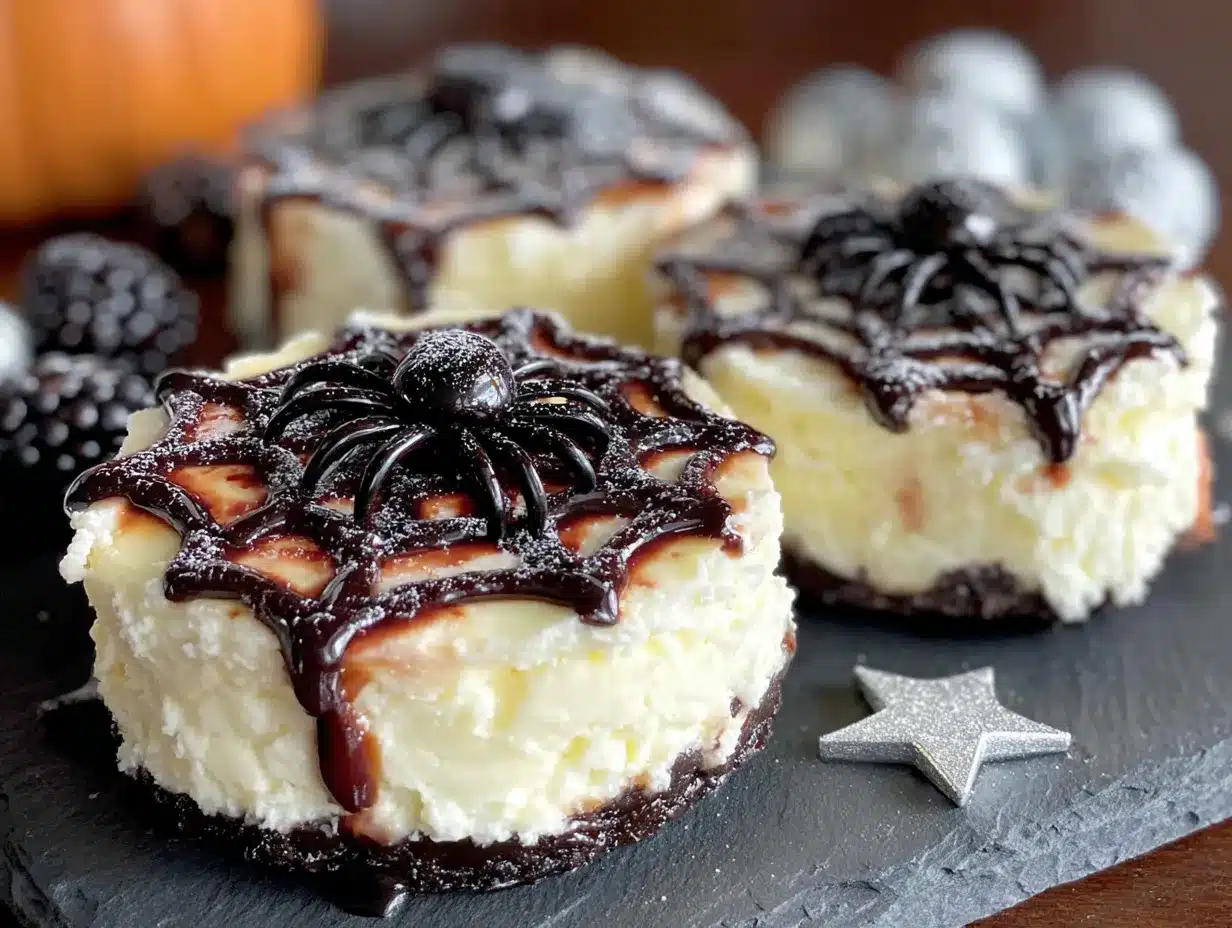
These Easy No-Bake Halloween Spider Web Cheesecake Bites came from a place of pure necessity — I needed a dessert that looked like I spent hours on it but actually came together during a single episode of a cartoon. No oven required, no gelatin, no complicated piping bags. Just a simple cheesecake filling, a chocolate wafer crust, and a clever little trick with melted white chocolate that creates that iconic spider web design. It’s the kind of recipe that makes you look like a kitchen wizard without actually having to be one.
The first batch disappeared before I could even take a photo. My niece had chocolate on her chin, my brother was sneaking extras from the fridge, and I just stood there holding a spatula, feeling like I’d accidentally stumbled onto something good. Not just good — perfect for Halloween parties, school treat boxes, or those nights when you want to make something fun without turning your kitchen into a disaster zone. So let me show you how to make these little bites of spooky goodness.
Why You’ll Love These Spider Web Cheesecake Bites
Let’s be real — Halloween desserts can be a pain. Between the fondant, the food coloring, and the three-hour decorating sessions, it’s easy to feel overwhelmed. These bites are the opposite of that. They’re the kind of recipe you can make with kids, after work, or even the morning of a party without breaking a sweat.
- No-Bake & Stress-Free: No oven, no water bath, no worrying about cracks. Just mix, chill, and decorate. It doesn’t get easier than that.
- Simple Pantry Ingredients: Cream cheese, heavy cream, graham crackers, butter, sugar, and a little vanilla. You probably have most of this already.
- Perfect for Halloween Gatherings: Whether it’s a classroom party, a spooky movie night, or a potluck, these bites travel well and look incredible on a platter.
- Crowd-Pleasing Flavor: That creamy, tangy cheesecake filling paired with a buttery chocolate crust is a classic combo that kids and adults both go crazy for.
- Visually Stunning (But Secretly Easy): The spider web design looks complicated, but it’s just a few drizzles and a toothpick drag. I promise, if I can do it, you can do it.
What makes these different from other no-bake cheesecake recipes is the texture. I use a little trick — whipping the cream cheese with cold heavy cream instead of using gelatin — which gives you a light, mousse-like filling that doesn’t feel heavy. It’s not dense or gluey like some no-bake cheesecakes can be. It’s airy, smooth, and melts in your mouth.
And honestly? There’s something about making a dessert that looks this good that just makes you feel proud. You set these on the table and people go, “Whoa, you made these?” And you get to smile and say, “Yeah, they’re actually super easy.” That feeling never gets old.
What Ingredients You Will Need
This recipe uses simple, wholesome ingredients to create a decadent little treat. Most of these are pantry staples, and the ones that aren’t are easy to find at any grocery store. Here’s everything you’ll need, broken down by component.
For the Crust
- 1 ½ cups (150g) chocolate graham cracker crumbs — You can use regular graham crackers and add a tablespoon of cocoa powder, but the chocolate version gives a deeper flavor. I prefer the Nabisco brand for consistent texture.
- ¼ cup (50g) granulated sugar — Just a touch of sweetness to balance the bitter chocolate.
- 6 tablespoons (85g) unsalted butter, melted — This binds the crust. If you use salted butter, skip adding any extra salt.
- Pinch of salt — Enhances the chocolate flavor. Trust me on this one.
For the Cheesecake Filling
- 16 oz (450g) full-fat cream cheese, softened — This is non-negotiable. Low-fat cream cheese has too much water and will make your filling runny. Leave it on the counter for about an hour before starting.
- ½ cup (100g) granulated sugar — You can reduce this to ⅓ cup if you prefer a less sweet cheesecake.
- 1 teaspoon vanilla extract — Pure vanilla, not imitation, if you can swing it. The flavor difference is real.
- 1 cup (240ml) cold heavy cream — This replaces gelatin and gives the filling its light, airy texture. Make sure it’s very cold.
For the Spider Web Decoration
- ½ cup (120ml) white chocolate chips or melting wafers — I like Ghirardelli white chocolate melting wafers because they melt smoothly without seizing.
- 1 teaspoon coconut oil or vegetable shortening — This helps thin the white chocolate for easier drizzling. Don’t skip it.
- Optional: Small candy spiders or chocolate sprinkles — For an extra creepy touch. I found little plastic spider rings at the dollar store that work perfectly.
Substitution Notes
If you’re gluten-free, use gluten-free graham crackers or crushed gluten-free cookies like Pamela’s brand. For a dairy-free version, use a plant-based cream cheese like Kite Hill and coconut cream instead of heavy cream — just note the texture will be slightly different. And if white chocolate isn’t your thing, you can use dark chocolate for the web design, though the contrast won’t be as striking.
Equipment Needed
You don’t need a lot of fancy gadgets for this recipe, which is part of the beauty. Here’s what I used:
- 12-cup mini cheesecake pan or a standard muffin tin — I prefer a mini cheesecake pan with removable bottoms for easy release, but a regular muffin tin lined with paper liners works just fine.
- Food processor or zip-top bag and rolling pin — For crushing the graham crackers. I use my food processor because it’s faster and gives a finer crumb, but a bag and rolling pin is a great arm workout.
- Medium mixing bowls — One for the crust, one for the filling.
- Electric hand mixer or stand mixer — You need this to whip the cream cheese and heavy cream properly. A whisk and a lot of elbow grease could work, but your arm will hate you.
- Small microwave-safe bowl — For melting the white chocolate.
- Piping bag or small zip-top bag — For drizzling the spider web. I just use a sandwich bag with the corner snipped off.
- Toothpick or skewer — This is the secret tool for creating the web pattern.
If you don’t have a mini cheesecake pan, don’t stress. I’ve made these in a silicone muffin pan before and they popped out perfectly. Just make sure to grease it lightly or use liners.
Preparation Method
Alright, let’s get into the good stuff. This recipe has three main phases: the crust, the filling, and the decoration. Take your time with each step, and you’ll have perfect little cheesecake bites.
Step 1: Make the Crust
Start by crushing your chocolate graham crackers into fine crumbs. If you’re using a food processor, pulse until you have a sandy texture. If you’re using a bag, seal the crackers and go to town with a rolling pin — it’s oddly satisfying. You need 1 ½ cups of crumbs.
In a medium bowl, combine the graham cracker crumbs, sugar, and a pinch of salt. Pour in the melted butter and stir with a fork until the mixture looks like wet sand. It should clump together when you squeeze it in your fist.
Divide the crust mixture evenly among your 12 mini cheesecake pan cavities (or muffin tin liners). Use the bottom of a small glass or a shot glass to press the crumbs down firmly. You want a compact, even layer — about ¼ inch thick. Pop the pan in the fridge while you make the filling. This helps the crust set.
Step 2: Make the Cheesecake Filling
In a large mixing bowl, beat the softened cream cheese with an electric mixer on medium speed until it’s smooth and fluffy — about 2 minutes. Scrape down the sides and bottom of the bowl with a spatula. Add the sugar and vanilla, then beat for another minute until everything is well combined and smooth.
Now, here’s the trick: With the mixer running on low, slowly pour in the cold heavy cream. Once it’s all added, increase the speed to medium-high and whip for 2 to 3 minutes. The mixture will thicken dramatically and become light and airy, like a mousse. You’ll know it’s ready when it holds stiff peaks — if you lift the beaters, the filling should stand up without drooping.
Don’t overwhip, or you’ll end up with butter. Stop as soon as it looks thick and luscious.
Step 3: Assemble the Bites
Take the crust-lined pan out of the fridge. Spoon the cheesecake filling evenly over each crust, dividing it among all 12 cavities. Smooth the tops with the back of a spoon or a small offset spatula. Tap the pan gently on the counter a few times to release any air bubbles.
Cover the pan loosely with plastic wrap and refrigerate for at least 4 hours, but overnight is better. The filling needs time to firm up so the spider web decoration doesn’t sink into it. Patience is key here — I’ve rushed this step before and ended up with messy webs.
Step 4: Create the Spider Web Design
Once the cheesecakes are fully chilled and firm, it’s time for the fun part. Melt the white chocolate chips with the coconut oil in a microwave-safe bowl. Microwave in 20-second bursts, stirring between each, until smooth. Let it cool for about 2 minutes — you don’t want it hot enough to melt the cheesecake.
Spoon the melted white chocolate into a small piping bag or a zip-top bag. Snip off a tiny corner — we’re talking smaller than you think, like 1/16 inch. You can always cut more, but you can’t undo a too-big hole.
Working with one cheesecake at a time, pipe a small circle of white chocolate in the center. Then pipe a larger circle around it, leaving about ¼ inch of space between the circles. Repeat with a third, even larger circle near the edge. You should have three concentric circles.
Here’s the magic: Take a toothpick or skewer and gently drag it from the center circle outward through all the circles, like pulling a line from the center to the edge. Repeat this around the cheesecake, making about 6 to 8 lines radiating from the center. As you drag, the white chocolate will pull into a beautiful web pattern. Wipe the toothpick clean between each drag for the cleanest lines.
If you want, place a small candy spider on top of each cheesecake while the chocolate is still wet. Let the chocolate set for about 15 minutes at room temperature, then refrigerate again until serving.
Cooking Tips & Techniques
I’ve made these cheesecake bites about a dozen times now, and I’ve learned a few things the hard way. Here are my best tips for success.
Room temperature cream cheese is crucial. If you try to whip cold cream cheese, you’ll end up with lumps that never fully dissolve. Leave it on the counter for at least an hour. In a pinch, you can microwave it in 10-second bursts, but be careful not to melt it.
Don’t skip the chill time. I know it’s tempting to rush, but the filling needs that full 4 hours to set properly. If you try to decorate too early, the white chocolate will just sink into the cheesecake and you’ll get blobs instead of webs. Trust me, I’ve been there.
Keep your heavy cream very cold. Warm cream won’t whip properly. I stick my bowl and beaters in the freezer for 10 minutes before starting — it makes a noticeable difference in how quickly the filling thickens.
Practice the web technique on a plate first. If you’re nervous about the spider web design, pipe a few test circles on a plate and practice the toothpick drag. It takes about 30 seconds to get the hang of it, and it’s way less stressful than learning on your finished cheesecakes.
Work in batches. Don’t try to pipe the webs on all 12 cheesecakes at once. The white chocolate can start to set, and the web effect works best when the chocolate is still liquid. Do 3 or 4 at a time, then pipe fresh chocolate for the next batch.
One more thing — if your white chocolate seizes (gets clumpy and grainy), you probably got a drop of water in it. Start over with fresh chocolate. It happens to everyone, so don’t beat yourself up.
Variations & Adaptations
These cheesecake bites are incredibly versatile. Here are some ways to switch them up.
Pumpkin Spice Version: Add ⅓ cup pumpkin puree and 1 teaspoon pumpkin pie spice to the cheesecake filling. Reduce the heavy cream to ¾ cup. This gives you a fall-inspired twist that pairs perfectly with the chocolate crust. For more pumpkin inspiration, check out our Creamy Pumpkin Cheesecake Bars — they’re another favorite.
Chocolate Lover’s Twist: Melt 4 oz of dark chocolate and fold it into the cheesecake filling before whipping. Use dark chocolate for the web design instead of white. The result is a rich, fudgy bite that’s dangerously good.
Peanut Butter Dream: Add ¼ cup of creamy peanut butter to the cream cheese before whipping. Drizzle melted peanut butter instead of white chocolate for the web. It’s a salty-sweet combo that disappears fast. This pairs beautifully with our Best Reese’s Peanut Butter Poke Cake for a full peanut butter dessert spread.
Vegan Option: Use dairy-free cream cheese and coconut cream (the solid part from a can of full-fat coconut milk). The texture will be slightly softer, so chill for at least 6 hours. Use vegan white chocolate for the web.
Mini Bites: Use a 24-cup mini muffin tin instead of a 12-cup pan. Reduce the chill time to 2 hours. These are perfect for parties where you want people to grab and go.
I once made a batch with a swirl of caramel sauce in the filling and topped them with flaky sea salt. It was a happy accident — I was out of white chocolate and had to improvise. They were gone in 10 minutes.
Serving & Storage Suggestions
These cheesecake bites are best served cold, straight from the fridge. The filling is firm but creamy, and the web design stays sharp. Arrange them on a black platter or a cake stand for maximum Halloween effect. A few fake spider webs around the plate add a fun touch — just keep them away from the food.
For a full Halloween dessert table, pair these with our Creamy Caramel Apple Cheesecake Dip for a no-bake cheesecake theme that’s easy to pull together. The contrast between the spooky webs and the caramel apple flavors is a hit at parties.
Storage: Store the cheesecake bites in an airtight container in the refrigerator for up to 5 days. They actually taste better on day two — the flavors meld and the texture becomes even creamier. I don’t recommend freezing them, as the filling can become watery when thawed.
Reheating: These are served cold, so no reheating needed. If you’ve stored them for a few days, let them sit at room temperature for about 5 minutes before serving to take the chill off.
Transporting: If you’re taking these to a party, keep them in the cheesecake pan until you arrive. The crust is sturdy, but the filling can shift if jostled. Once you’re at the party, pop them out and arrange on your serving platter.
One note on the spider web design — if you refrigerate them for more than a day, the white chocolate may start to soften and lose its crisp lines. That’s totally fine; they’ll still taste amazing. For best presentation, decorate them the day you plan to serve.
Nutritional Information & Benefits
Let’s be honest — these are a treat, not a health food. But here’s the breakdown for one cheesecake bite (based on 12 servings):
| Nutrient | Amount |
|---|---|
| Calories | 285 |
| Total Fat | 20g |
| Saturated Fat | 12g |
| Cholesterol | 55mg |
| Sodium | 180mg |
| Total Carbohydrates | 24g |
| Dietary Fiber | 1g |
| Sugars | 16g |
| Protein | 4g |
The cream cheese provides a good amount of calcium and protein, while the heavy cream adds vitamin A. The chocolate graham cracker crust offers a small amount of iron. If you’re watching your sugar intake, you can reduce the sugar in the filling to ⅓ cup without affecting the texture too much.
These are gluten-free if you use certified gluten-free graham crackers. They’re also nut-free (check your white chocolate brand for cross-contamination warnings). For a lower-calorie version, use Neufchâtel cheese instead of full-fat cream cheese — it cuts about 30 calories per serving.
I personally believe that desserts like this are good for the soul. They bring people together, create memories, and make ordinary moments feel special. That’s worth every calorie.
Conclusion
These Easy No-Bake Halloween Spider Web Cheesecake Bites are proof that you don’t need to be a professional baker to make something that looks and tastes incredible. They’re fun, they’re forgiving, and they’re exactly the kind of recipe that makes Halloween feel magical without the stress.
I love that this recipe has become a tradition in my family. Every October, my niece asks, “Auntie, are we making the spider webs this year?” And every year, I say yes. It’s our little ritual — messy, chocolate-stained, and full of laughter. I hope this recipe becomes that for you too.
Make them your own. Experiment with the flavors. Add extra sprinkles. Use orange food coloring in the white chocolate. This is your kitchen, and you get to decide what “spooky” looks like. If you try them, I’d love to hear how they turned out. Drop a comment below, tag me in your photos, or tell me about your own Halloween traditions. Happy haunting, and happy baking!
Frequently Asked Questions
Can I make these spider web cheesecake bites ahead of time?
Absolutely! You can prepare the cheesecake bites (without the spider web decoration) up to 3 days in advance. Keep them covered in the refrigerator. Add the white chocolate web design on the day you plan to serve for the best visual effect.
What if I don’t have a mini cheesecake pan?
No problem at all. Use a standard 12-cup muffin tin lined with paper liners. The cheesecakes will be slightly larger, so you might only get 10 to 11 instead of 12. Just divide the filling evenly among the cups.
My white chocolate seized while melting. What went wrong?
White chocolate is sensitive to moisture and heat. If even a drop of water gets into the bowl, the chocolate can seize and become grainy. Always use a completely dry bowl and utensils. If it does seize, you can try adding a teaspoon of coconut oil and stirring vigorously, but sometimes it’s best to start fresh.
Can I freeze these cheesecake bites?
I don’t recommend freezing them. The cream cheese and heavy cream filling can become watery and grainy when thawed. They’re best enjoyed fresh from the refrigerator within 5 days of making them.
How do I get clean spider web lines?
The key is to work quickly while the white chocolate is still liquid. Pipe your circles, then immediately drag the toothpick through them. Wipe the toothpick clean between each drag to prevent dragging chocolate back onto the web. If the chocolate starts to set, pop the bowl in the microwave for 5 seconds to rewarm it.
Pin This Recipe!
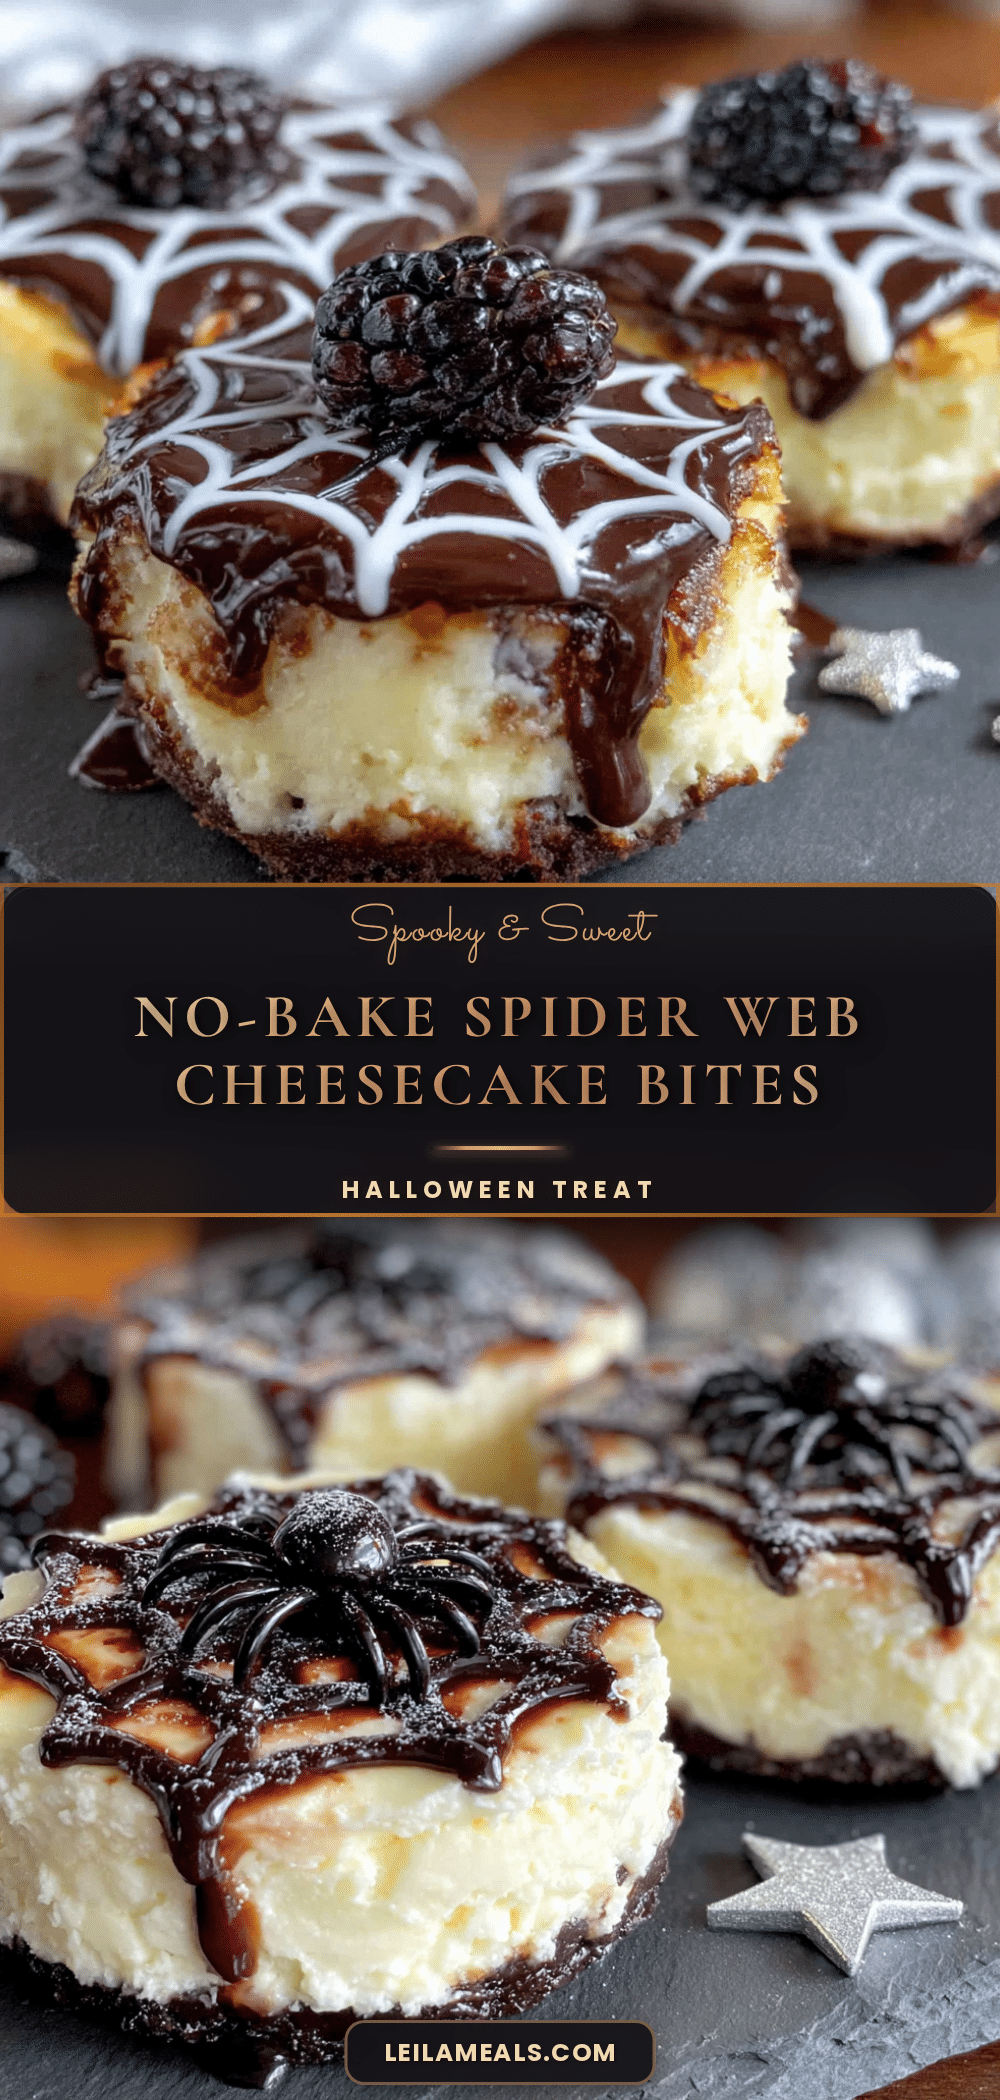
Easy No-Bake Halloween Spider Web Cheesecake Bites
These no-bake cheesecake bites feature a creamy, mousse-like filling on a chocolate graham cracker crust, topped with a stunning white chocolate spider web design. Perfect for Halloween parties, they look impressive but come together easily with simple ingredients.
- Prep Time: 20 minutes
- Cook Time: 0 minutes
- Total Time: 4 hours 20 minutes (includes chilling)
- Yield: 12 servings 1x
- Category: Dessert
- Cuisine: American
Ingredients
- 1 ½ cups (150g) chocolate graham cracker crumbs
- ¼ cup (50g) granulated sugar
- 6 tablespoons (85g) unsalted butter, melted
- Pinch of salt
- 16 oz (450g) full-fat cream cheese, softened
- ½ cup (100g) granulated sugar
- 1 teaspoon vanilla extract
- 1 cup (240ml) cold heavy cream
- ½ cup (120ml) white chocolate chips or melting wafers
- 1 teaspoon coconut oil or vegetable shortening
- Optional: Small candy spiders or chocolate sprinkles
Instructions
- Crush chocolate graham crackers into fine crumbs. In a medium bowl, combine crumbs, ¼ cup sugar, and a pinch of salt. Pour in melted butter and stir until mixture resembles wet sand.
- Divide crust mixture evenly among 12 mini cheesecake pan cavities or muffin tin liners. Press firmly with the bottom of a small glass to form a compact layer. Refrigerate while making filling.
- In a large bowl, beat softened cream cheese with an electric mixer on medium speed until smooth and fluffy, about 2 minutes. Add ½ cup sugar and vanilla, beat for another minute.
- With mixer on low, slowly pour in cold heavy cream. Increase speed to medium-high and whip for 2-3 minutes until mixture holds stiff peaks and is light and airy.
- Spoon cheesecake filling evenly over each crust, smoothing tops. Tap pan gently to release air bubbles. Cover loosely with plastic wrap and refrigerate for at least 4 hours or overnight.
- Once cheesecakes are fully chilled, melt white chocolate chips with coconut oil in a microwave-safe bowl in 20-second bursts, stirring between each, until smooth. Let cool for 2 minutes.
- Spoon melted white chocolate into a small piping bag or zip-top bag. Snip off a tiny corner. Pipe a small circle in the center of each cheesecake, then larger concentric circles around it, leaving ¼ inch gaps.
- Using a toothpick, gently drag from the center circle outward through all circles, creating 6-8 radiating lines. Wipe toothpick clean between each drag. Place candy spider on top if desired.
- Let chocolate set for 15 minutes at room temperature, then refrigerate until serving.
Notes
Room temperature cream cheese is crucial for a smooth filling. Don’t skip the chill time—the filling needs at least 4 hours to set properly. Keep heavy cream very cold for best whipping results. Practice the web technique on a plate first if nervous. Work in batches when piping webs to keep chocolate liquid.
Nutrition
- Serving Size: 1 cheesecake bite
- Calories: 285
- Sugar: 16
- Sodium: 180
- Fat: 20
- Saturated Fat: 12
- Carbohydrates: 24
- Fiber: 1
- Protein: 4
Keywords: Halloween, no-bake cheesecake, spider web, cheesecake bites, easy dessert, Halloween dessert, no-bake dessert


