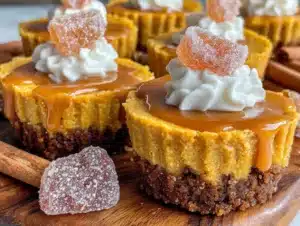
My neighbor Jen wasn’t trying to impress anyone. I’d stopped by to borrow a ladder—ours had mysteriously vanished after a garage sale—and the smell of ginger and toasted sugar hit me before I even got through the screen door. She was standing at her counter in old sweatpants, casually pressing crumbs into a mini muffin tin like she was just going through the motions. “Oh, those,” she said when I asked, barely looking up. “Just something I threw together for the kids’ lunchboxes.” I took a bite of the one she handed me—still warm, the filling barely set—and honestly, I almost forgot about the ladder entirely. That’s the thing about these Easy Mini Pumpkin Cheesecake Bites with Gingersnap Crust. They don’t announce themselves with a lot of fuss. They just show up, perfectly sized, and somehow disappear before you’ve had your fair share. Jen shrugged when I asked for the recipe, like it was nothing special. But I watched her hands—how she didn’t overmix the filling, how she pressed the crust just firm enough without compacting it into a brick. She’d been making them for years, apparently. Just another Tuesday night recipe that nobody in her family thought to write down. I begged her to scribble it on a sticky note before I left. It’s been stuck to my fridge ever since, splattered with butter and barely readable, and I’ve made it at least a dozen times now. Maybe you’ve been there—that moment when you taste something so simple and perfect that you can’t believe it didn’t come from a bakery. That’s this recipe. Let me tell you, it’s the kind of thing you’ll start making for no reason at all, just because you want the house to smell like fall.
These little bites are a game-changer for weeknights. They come together fast, use ingredients you probably already have, and they make you look like you actually planned ahead. Plus, they’re mini—which means portion control is built right in. Or at least that’s what I tell myself when I’ve eaten four.
Why You’ll Love These Mini Pumpkin Cheesecake Bites
I’ve tested this recipe more times than I care to count, and every single batch has disappeared within hours. Here’s why these little guys are worth every bit of effort:
- Quick & Easy: From start to finish, you’re looking at about 30 minutes of active work. The oven does the rest. Perfect for those evenings when you need dessert but don’t want to spend an hour in the kitchen.
- Simple Ingredients: No trips to specialty stores. Cream cheese, pumpkin puree, gingersnap cookies—these are things you can grab on a regular grocery run. I’ve made them with store-brand cream cheese and fancy organic pumpkin, and honestly? Both work great.
- Perfect for Fall Gatherings: Whether it’s a school bake sale, a Thanksgiving potluck, or just a random Tuesday when you need a little seasonal joy, these bites deliver. They’re portable, they don’t require forks, and they’re naturally portion-controlled.
- Crowd-Pleaser: I’ve served these to kids who swear they hate pumpkin and adults who claim they don’t eat dessert. Every single person has asked for the recipe. The gingersnap crust is the secret weapon—it adds that warm, spicy crunch that makes everything better.
- Unbelievably Delicious: The texture is what gets me every time. Creamy, tangy pumpkin filling against that crunchy, buttery crust. It’s like a cheesecake and a cookie had a perfect little baby.
What makes this version different from all the other pumpkin cheesecake recipes out there? It’s the ratio. I spent a good three batches getting the filling just right—not too dense, not too loose, with just enough pumpkin to taste like fall without overwhelming the cream cheese. And that crust? It’s not just crushed cookies. There’s a little trick with butter and brown sugar that makes it stay together without getting soggy. Trust me, I’ve learned the hard way what happens when you skip that step.
This isn’t just another pumpkin dessert. It’s the kind that makes you close your eyes after the first bite. The kind you’ll find yourself making in October, then again in November, and then suddenly it’s February and you’re buying canned pumpkin just to get your fix. It’s comfort food reimagined—faster, simpler, but with the same soul-soothing satisfaction that makes you feel like everything’s going to be okay.
Ingredients You Will Need
This recipe uses simple, wholesome ingredients to deliver bold flavor and satisfying texture without the fuss. Most of these are pantry staples, especially if you do any fall baking at all. Here’s what you’ll need:
For the Gingersnap Crust
- 1 ½ cups gingersnap cookie crumbs (about 20-25 cookies, crushed fine—I prefer Nabisco or a bakery brand for consistent texture)
- 3 tablespoons brown sugar, packed (light or dark both work; dark gives a deeper molasses flavor)
- 4 tablespoons unsalted butter, melted (salted butter works too, just reduce the added salt elsewhere)
- Pinch of salt (skip this if your cookies are already salty)
For the Pumpkin Cheesecake Filling
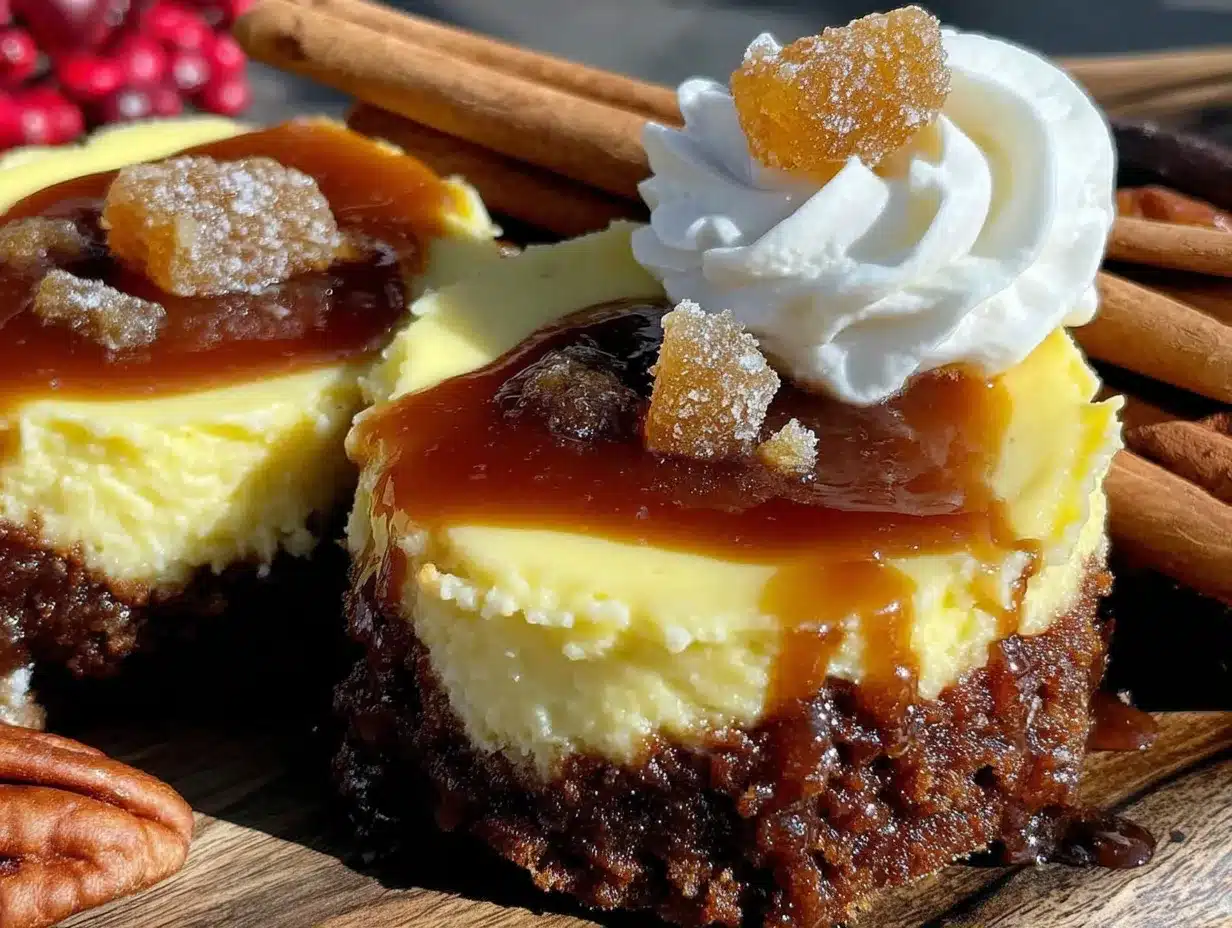
- 8 ounces cream cheese, softened to room temperature (full-fat gives the best texture, but reduced-fat works in a pinch)
- ½ cup granulated sugar
- ½ cup pumpkin puree (not pumpkin pie filling—make sure it’s 100% pumpkin. I like Libby’s for consistent results)
- 1 large egg, room temperature
- 1 teaspoon vanilla extract (pure vanilla, not imitation, if you can swing it)
- ½ teaspoon pumpkin pie spice (or make your own with ¼ teaspoon cinnamon, ⅛ teaspoon ginger, ⅛ teaspoon nutmeg, and a pinch of cloves)
- ¼ teaspoon cinnamon (extra, because why not)
For the Topping (Optional but Highly Recommended)
- ¼ cup heavy cream, whipped to soft peaks (or use store-bought whipped topping in a pinch)
- Caramel sauce for drizzling (store-bought is fine—I use the one in the ice cream aisle)
- Extra crushed gingersnaps for garnish
A few notes on ingredient selection: When you’re picking cream cheese, go for the block style, not the spreadable tub. The tub version has extra air and water whipped in, which can make your filling too loose. For the pumpkin puree, I’ve tested this with both canned and fresh roasted pumpkin. Canned is actually more consistent here because the water content is more predictable. Fresh pumpkin can be a little watery, so if you go that route, let it drain in a cheesecloth for about 30 minutes first.
If you’re out of gingersnaps, you can substitute graham crackers with a teaspoon of ginger and a tablespoon of molasses mixed into the butter. It’s not quite the same, but it’ll still be good. For a gluten-free version, use gluten-free ginger cookies—they work beautifully.
Equipment Needed
You don’t need a fancy kitchen to make these. Here’s what you’ll need:
- Mini muffin tin (24-cup works best, but you can do two batches with a 12-cup if that’s all you have)
- Mixing bowls (one medium, one small)
- Hand mixer or stand mixer (a whisk and some elbow grease works too, but your arm will thank you for the mixer)
- Measuring cups and spoons
- Food processor or zip-top bag and rolling pin (for crushing cookies—I’ve used both methods and honestly, the bag and rolling pin is oddly satisfying)
- Rubber spatula (for scraping every last bit of filling)
- Small cookie scoop or spoon (for portioning the filling evenly)
- Cooling rack (not strictly necessary, but helps them cool faster)
If you don’t have a mini muffin tin, you can use a regular muffin tin with paper liners and adjust the baking time by about 5-7 minutes. The bites will be bigger, but just as delicious. I’ve also made these in silicone mini muffin molds with great results—no greasing needed.
Preparation Method
Alright, let’s get into it. This is where the magic happens. I’ve broken it down step by step so you don’t miss a thing.
- Preheat your oven to 350°F (175°C). Lightly grease your mini muffin tin with butter or non-stick spray. If you’re using a silicone pan, you can skip the greasing.
- Make the crust. Place the gingersnap cookies in a food processor and pulse until you have fine crumbs. No food processor? Put the cookies in a zip-top bag and go to town with a rolling pin. It’s a great stress reliever, honestly. You want about 1 ½ cups of crumbs. Transfer to a medium bowl, add the brown sugar and salt, and stir to combine. Pour in the melted butter and mix with a fork until every crumb is moistened. It should look like wet sand.
- Press the crust into the pan. Scoop about a tablespoon of the crust mixture into each mini muffin cup. Use a small glass or your thumb to press it down firmly. You want it compacted—not too tight, but enough that it holds together. I use the bottom of a shot glass for this, and it works perfectly. Make sure the crust comes up slightly on the sides to create a little cup for the filling.
- Bake the crusts. Pop the pan into the oven for 5 minutes. This step is crucial—it sets the crust so it doesn’t get soggy later. Pull them out and let them cool slightly while you make the filling. Leave the oven on.
- Make the filling. In a large bowl, beat the softened cream cheese with an electric mixer until smooth and creamy. No lumps allowed here, so take your time. Add the sugar and beat until combined, scraping down the sides of the bowl. Add the pumpkin puree, egg, vanilla, pumpkin pie spice, and cinnamon. Beat on low speed until just combined. Do not overmix—overbeating incorporates too much air and can cause cracks later. Trust me, I learned this the hard way with a batch that looked like the surface of the moon.
- Fill the cups. Spoon the filling into each crust-lined cup, filling them almost to the top. A small cookie scoop makes this so much easier and keeps the portions even. The filling will puff up a little as it bakes, so don’t overfill. Leave about 1/8 inch of space at the top.
- Bake. Place the pan in the oven and bake for 12-15 minutes. You’ll know they’re done when the edges are set and the centers are slightly jiggly—like a proper cheesecake. They’ll continue to set as they cool. Don’t overbake, or they’ll be dry and crack.
- Cool completely. Let the pan cool on a wire rack for about 15 minutes. Then gently run a knife around the edges of each bite to loosen them. Carefully lift them out and transfer to a plate. Refrigerate for at least 2 hours before serving. This is the hardest part, I know. But the texture really does improve after a chill.
- Add toppings. Just before serving, top each bite with a dollop of whipped cream, a drizzle of caramel sauce, and a sprinkle of extra crushed gingersnaps. Or keep them plain—they’re fantastic either way.
Cooking Tips & Techniques
After making these about a dozen times, I’ve picked up a few tricks that make a real difference. Here’s what I wish someone had told me:
Room temperature ingredients matter. I know, I know—every recipe says this. But with cream cheese, it’s non-negotiable. Cold cream cheese creates lumps that no amount of beating will fix. Leave it on the counter for at least 30 minutes before you start. Same with the egg. Trust me, I’ve made the mistake of rushing this step, and the filling was never as smooth.
Don’t overmix the filling. This was my biggest learning curve. When you beat the filling too much, you incorporate air bubbles that expand in the oven and then collapse, leaving cracks. Mix just until everything comes together. A few streaks of pumpkin are fine—they’ll disappear as you fold.
Use a water bath? Nope. One of the best things about this mini version is that you don’t need a water bath. The small size means they bake evenly without the fuss. Just don’t overbake them, and you’ll be fine.
Let them chill properly. I know you’re going to want to eat one right away. I get it. But the texture really does improve after a few hours in the fridge. The flavors meld, the crust sets, and the filling becomes perfectly creamy. If you can wait overnight, even better.
Watch your oven. Every oven runs a little differently. Mine runs hot, so I check at the 10-minute mark. Start checking early, especially on your first batch. The difference between perfect and overbaked is about 2 minutes.
Make ahead tip: These actually taste better the next day. Make them a day ahead, keep them in the fridge, and add toppings just before serving. Perfect for holiday prep when you’re already juggling a million things.
Variations & Adaptations
One of the best things about this recipe is how easy it is to adapt. Here are some variations I’ve tried and loved:
Gluten-Free Version: Swap the gingersnaps for gluten-free ginger cookies. I’ve used the Pamela’s brand and they work beautifully. Everything else in the recipe is naturally gluten-free, so this is an easy switch.
Dairy-Free Option: Use dairy-free cream cheese (Kite Hill or Violife work well) and coconut oil instead of butter for the crust. The texture will be slightly different—a little less creamy—but still delicious. I made these for a friend with dairy allergies and they disappeared just as fast.
Chocolate Twist: Add a teaspoon of cocoa powder to the crust mixture and a handful of mini chocolate chips to the filling. The chocolate and pumpkin combo is surprisingly good. My kids request this version every time.
Maple Pecan: Swap the brown sugar in the crust for maple sugar, and add a tablespoon of maple syrup to the filling. Top with a candied pecan half. This is my personal favorite for Thanksgiving.
Pumpkin Chai: Add a teaspoon of chai spice blend (or the contents of one chai tea bag) to the filling. The cardamom and ginger notes complement the pumpkin beautifully. I stumbled on this by accident when I ran out of pumpkin pie spice, and it’s been a regular ever since.
No-Bake Version: If you’re short on time or don’t want to turn on the oven, you can make a no-bake version by folding the pumpkin mixture into stabilized whipped cream instead of baking. The texture is lighter, more like a mousse, and it sets in about 4 hours in the fridge. I’ll share that recipe another time, but it’s worth experimenting with.
Serving & Storage Suggestions
These little bites are versatile, which is part of why I love them. Here’s how to serve and store them:
Serving Temperature: Serve them cold, straight from the fridge. The filling firms up beautifully and the crust stays crunchy. If you’ve added whipped cream, add it right before serving so it doesn’t wilt.
Presentation Ideas: Arrange them on a platter with a dusting of cinnamon and a few whole gingersnaps scattered around. For a holiday party, I like to serve them on a cake stand with a drizzle of caramel sauce over the top. They also look gorgeous on a tiered tray alongside other mini desserts.
What to Serve With: These pair beautifully with coffee, hot cider, or a glass of cold milk. For a dessert board, arrange them alongside apple slices, candied pecans, and dark chocolate chunks. They’re also fantastic after a bowl of chili or a hearty soup—the sweetness balances the savory perfectly.
Storage: Store any leftovers in an airtight container in the refrigerator for up to 5 days. Place them in a single layer or separate layers with parchment paper so the toppings don’t get smushed. I’ve never had them last that long, but theoretically, they’ll keep.
Freezing: These freeze like a dream. Place the cooled, un-topped bites on a baking sheet and freeze until solid (about 2 hours). Transfer to a freezer-safe container or zip-top bag, separating layers with parchment. They’ll keep for up to 3 months. Thaw in the refrigerator overnight, then add toppings before serving. I always keep a batch in the freezer for unexpected guests or late-night cravings.
Flavor Development: Here’s something I’ve noticed: these actually get better after a day or two in the fridge. The flavors meld together, the crust softens just slightly (in a good way), and the texture becomes perfectly creamy. So don’t be afraid to make them ahead.
Nutritional Information & Benefits
Let’s be real—these are a treat. But compared to a full slice of cheesecake, they’re practically a health food. Here’s the breakdown per bite (based on 24 servings, without optional toppings):
- Calories: Approximately 120-130
- Fat: 7g (4g saturated)
- Carbohydrates: 13g (9g sugar)
- Protein: 2g
- Fiber: 0.5g
- Sodium: 95mg
Health Highlights: Pumpkin is packed with vitamin A (great for eye health and immunity) and fiber. The gingersnaps provide a little iron and calcium from the molasses. Cream cheese offers a small amount of protein and calcium. Plus, the portion control aspect means you’re less likely to overindulge—though I can’t make any promises.
Dietary Notes: These can be made gluten-free and dairy-free with simple substitutions. They’re naturally vegetarian. If you’re watching sugar, you can reduce it to ⅓ cup without major texture changes—I’ve tested it.
Allergen Information: Contains dairy, gluten (unless modified), and eggs. The crust may contain traces of soy depending on the cookie brand.
I’m not a nutritionist, just someone who likes to know what’s in her food. These are a treat, but they’re a treat made with real ingredients, which counts for something in my book.
Frequently Asked Questions
Can I use pumpkin pie filling instead of pumpkin puree?
I wouldn’t recommend it. Pumpkin pie filling already has sugar and spices added, which will throw off the balance of the recipe. Your bites will end up too sweet and the texture might be off. Stick with 100% pumpkin puree for the best results.
My crust keeps falling apart. What am I doing wrong?
This usually happens when there isn’t enough butter or the crust isn’t pressed firmly enough. Make sure your crumbs are evenly moistened—they should clump together when squeezed. And don’t be shy about pressing them into the pan. Use the bottom of a glass or a shot glass to really compact them. The pre-bake also helps set the crust, so don’t skip that step.
Can I make these in a regular muffin tin instead?
Absolutely. You’ll get about 12 regular-sized cheesecakes instead of 24 minis. Increase the baking time to 18-22 minutes, checking for the same doneness cues—edges set, center slightly jiggly. You might also want to use paper liners for easier removal.
Why did my cheesecake bites crack on top?
Cracks usually happen from overbaking or overmixing. The filling expands too much in the oven and then collapses as it cools. Next time, check them a few minutes earlier and make sure you’re mixing just until combined. Also, cooling them slowly—in the oven with the door cracked open for 10 minutes—can help prevent cracks.
Can I leave out the egg for an egg-free version?
You can, but the texture will be denser and less creamy. For an egg substitute, try ¼ cup of plain yogurt or 2 tablespoons of cornstarch mixed with 3 tablespoons of water. The bites won’t puff up as much, and they’ll be a little more like a dense cheesecake bar. Still delicious, just different.
Conclusion
Look, I’m not going to tell you these Easy Mini Pumpkin Cheesecake Bites with Gingersnap Crust will change your life. But they might change your Tuesday night. They’re the kind of recipe that proves you don’t need a pastry degree or a kitchen full of fancy equipment to make something that tastes like it came from a bakery. They’re forgiving, adaptable, and reliably delicious—everything a weeknight recipe should be.
I’ve made these for potlucks, holiday parties, and random Wednesdays when I needed a little pick-me-up. Every single time, someone asks for the recipe. And every single time, I think of Jen in her sweatpants, barely looking up from her counter, making something extraordinary look like no big deal. That’s the energy I want you to bring to your kitchen. Don’t overthink it. Don’t stress about perfection. Just make them, eat them, and share them with someone you love.
If you try these, I’d love to hear about it. Drop a comment below and tell me how they turned out—did you add any fun variations? Did they disappear as fast as mine always do? And if you’re feeling generous, share this recipe with a friend who needs a little fall joy in their life. Happy baking, friend.
Pin This Recipe!
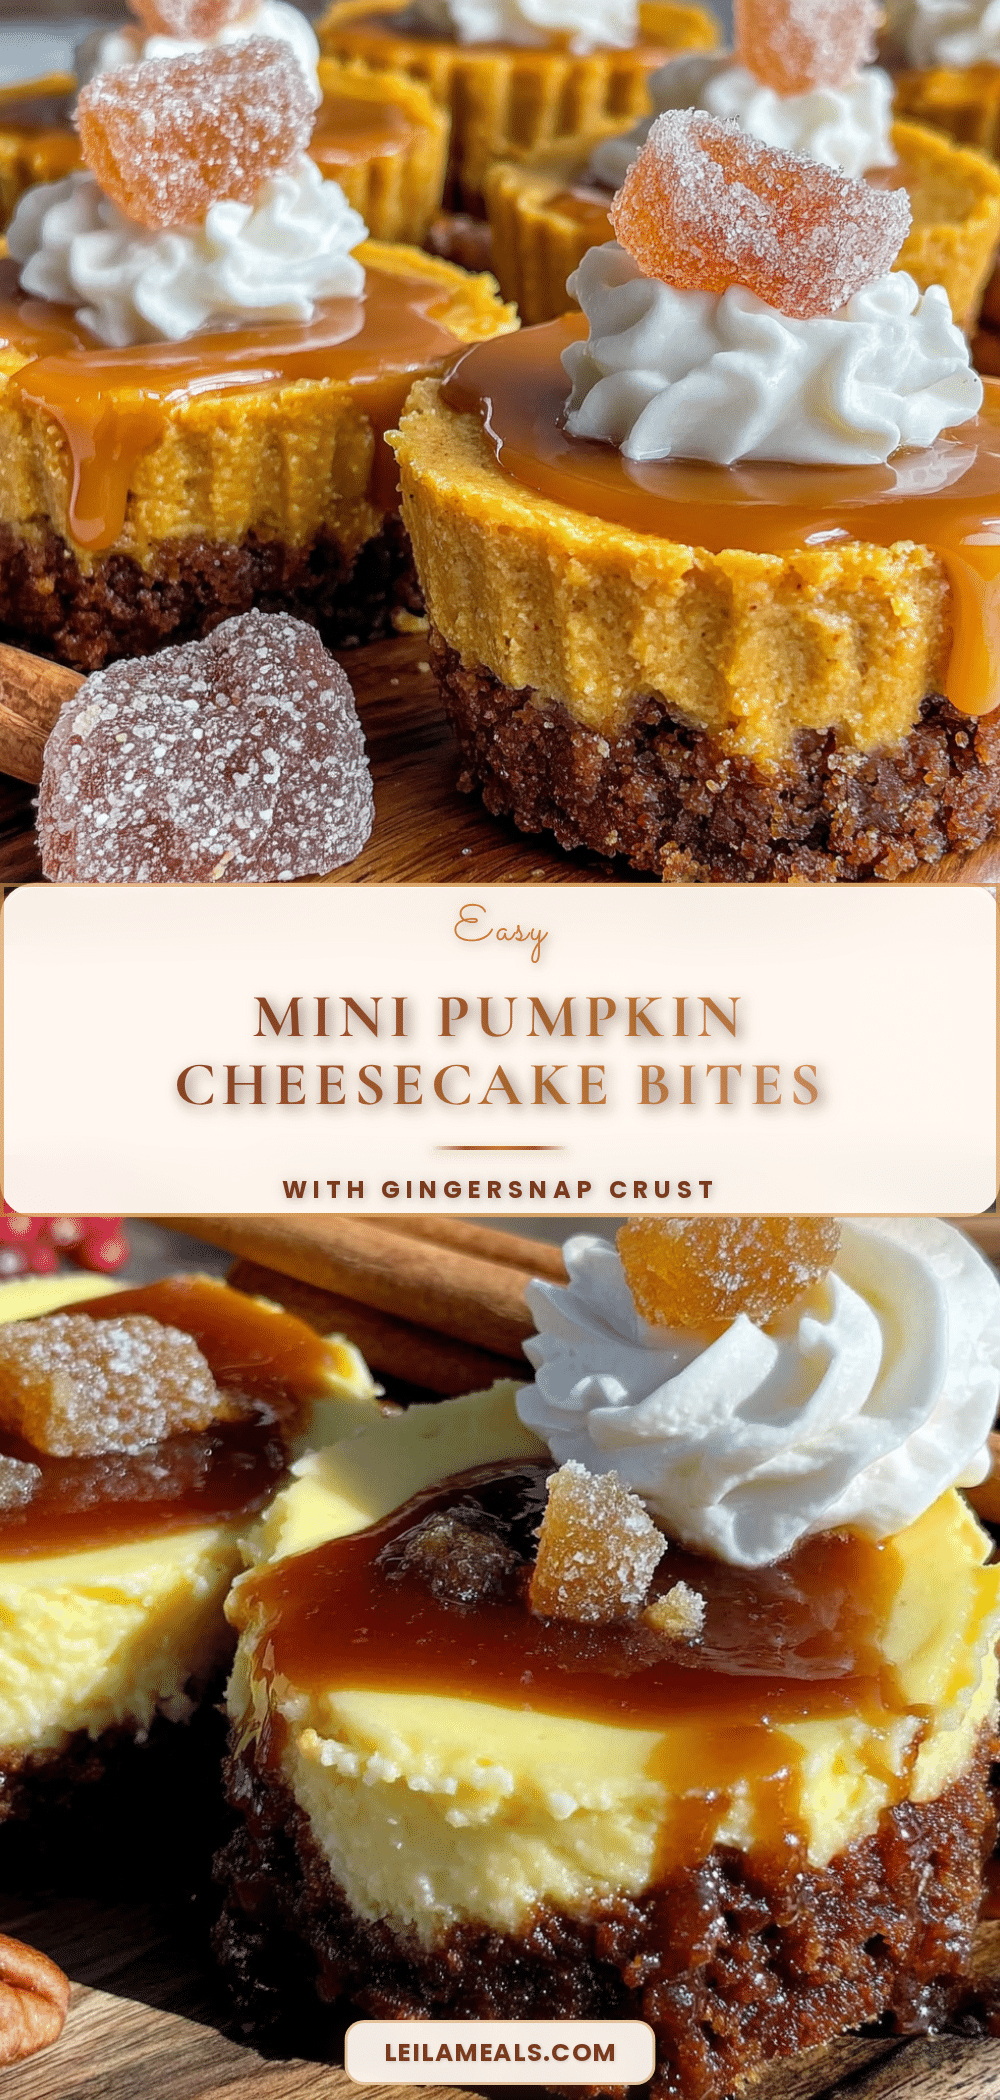
Easy Mini Pumpkin Cheesecake Bites with Perfect Gingersnap Crust
These mini pumpkin cheesecake bites feature a crunchy gingersnap crust and a creamy, perfectly spiced pumpkin filling. They’re quick to make, use simple ingredients, and are perfect for fall gatherings or weeknight treats.
- Prep Time: 30 minutes
- Cook Time: 15 minutes
- Total Time: 2 hours 45 minutes (includes chilling)
- Yield: 24 servings 1x
- Category: Dessert
- Cuisine: American
Ingredients
- 1 ½ cups gingersnap cookie crumbs (about 20–25 cookies)
- 3 tablespoons brown sugar, packed
- 4 tablespoons unsalted butter, melted
- Pinch of salt
- 8 ounces cream cheese, softened to room temperature
- ½ cup granulated sugar
- ½ cup pumpkin puree (not pumpkin pie filling)
- 1 large egg, room temperature
- 1 teaspoon vanilla extract
- ½ teaspoon pumpkin pie spice
- ¼ teaspoon cinnamon
- ¼ cup heavy cream, whipped to soft peaks (optional topping)
- Caramel sauce for drizzling (optional topping)
- Extra crushed gingersnaps for garnish (optional topping)
Instructions
- Preheat your oven to 350°F (175°C). Lightly grease a mini muffin tin with butter or non-stick spray.
- Make the crust: Place gingersnap cookies in a food processor and pulse until fine crumbs form. Transfer to a medium bowl, add brown sugar and salt, and stir. Pour in melted butter and mix with a fork until every crumb is moistened (like wet sand).
- Press the crust into the pan: Scoop about a tablespoon of crust mixture into each mini muffin cup. Use a small glass or your thumb to press it down firmly, making sure the crust comes up slightly on the sides.
- Bake the crusts: Bake for 5 minutes. Remove and let cool slightly while you make the filling. Leave the oven on.
- Make the filling: In a large bowl, beat softened cream cheese with an electric mixer until smooth. Add sugar and beat until combined, scraping down the sides. Add pumpkin puree, egg, vanilla, pumpkin pie spice, and cinnamon. Beat on low speed until just combined. Do not overmix.
- Fill the cups: Spoon the filling into each crust-lined cup, filling almost to the top (leave about 1/8 inch space).
- Bake: Place the pan in the oven and bake for 12-15 minutes, until edges are set and centers are slightly jiggly.
- Cool completely: Let the pan cool on a wire rack for 15 minutes. Gently run a knife around the edges of each bite to loosen, then transfer to a plate. Refrigerate for at least 2 hours before serving.
- Add toppings: Just before serving, top each bite with a dollop of whipped cream, a drizzle of caramel sauce, and a sprinkle of extra crushed gingersnaps (optional).
Notes
Room temperature ingredients are crucial for a smooth filling. Do not overmix the filling to avoid cracks. These can be made ahead and taste even better the next day. For gluten-free, use gluten-free ginger cookies. For dairy-free, use dairy-free cream cheese and coconut oil instead of butter.
Nutrition
- Serving Size: 1 bite
- Calories: 125
- Sugar: 9
- Sodium: 95
- Fat: 7
- Saturated Fat: 4
- Carbohydrates: 13
- Fiber: 0.5
- Protein: 2
Keywords: mini pumpkin cheesecake bites, gingersnap crust, fall dessert, easy cheesecake recipe, pumpkin dessert