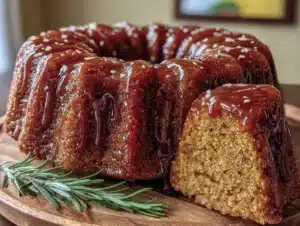
There used to be a tiny café tucked between a vintage bookstore and a dusty antiques shop on the west side of town called The Gilded Spoon. They made a pumpkin bundt cake that had this haunting, almost nutty flavor I couldn’t place—something deeper than plain cinnamon or clove. When they closed their doors two autumns ago, I honestly felt a little lost. That cake had become my seasonal ritual, the thing I looked forward to when the air started smelling like fallen leaves and woodsmoke.
After twelve tries—twelve, let me tell you, some of them were downright embarrassing—I finally cracked the code. The secret was brown butter. That rich, toasty, liquid-gold stuff that turns ordinary baked goods into something that makes people close their eyes mid-bite. I burned my first batch pretty badly (the kitchen smelled like burnt popcorn for days), but once I got the timing right, everything clicked. This cozy brown butter pumpkin bundt cake with maple glaze is the exact cake I was chasing. It’s dense but tender, spiced just enough to feel like fall without screaming PUMPKIN SPICE at you, and that glaze? It soaks into the warm cake in the most beautiful way. Maybe you’ve been there, chasing a flavor memory from a place that no longer exists. This one is worth the hunt.
Why You’ll Love This Recipe
This isn’t just another pumpkin cake recipe. After testing this thing more times than I care to admit, I can promise you it delivers something special. Here is why this cozy brown butter pumpkin bundt cake with maple glaze stands out from the crowd:
- Deep, Complex Flavor : The brown butter adds a nutty, caramelized richness that plain butter just cannot replicate. It transforms the humble pumpkin cake into something that tastes like you spent hours in the kitchen (you won’t).
- Perfectly Moist Texture : Pumpkin puree keeps the crumb incredibly tender, while the brown butter adds just enough richness to prevent that dreaded dry, crumbly texture. Every slice stays moist for days.
- Simple Pantry Ingredients : You likely have most of these items already. No weird specialty flours or hard-to-find extracts. Just real, honest ingredients that work together beautifully.
- Make-Ahead Friendly : This cake actually tastes better the next day. The flavors meld together overnight, making it perfect for holiday baking or weekend brunch prep.
- Impressive Without Stress : A bundt cake looks fancy and elaborate, but it is genuinely one of the easiest cakes to make. No layering, no frosting skills required—just a beautiful pan and a simple glaze.
- Crowd-Pleasing Comfort : I have brought this to potlucks, family dinners, and casual coffee dates. It gets the same reaction every time: quiet chewing followed by requests for the recipe. It is comfort food at its finest—familiar yet surprising.
What Ingredients You Will Need
This recipe uses simple, wholesome ingredients that come together to create something truly special. The magic really happens when the butter browns and the pumpkin puree meets those warm spices. Here is everything you need:
For the Cake
- 1 cup (226g) unsalted butter — You will brown this yourself. I recommend using a good quality butter like Kerrygold or Land O’Lakes for the best flavor. The browning process concentrates the dairy solids, creating that signature nutty taste.
- 1 ¾ cups (350g) granulated sugar — Regular white sugar works perfectly here. It dissolves easily into the brown butter mixture and helps create a tender crumb.
- 1 cup (240ml) pumpkin puree — Make sure you grab pure pumpkin puree, not pumpkin pie filling. Libby’s is my go-to brand for consistent results. If you are feeling ambitious, homemade puree from roasted sugar pumpkins works beautifully too.
- 3 large eggs — Room temperature eggs incorporate more evenly into the batter. Take them out of the fridge about 30 minutes before you start baking.
- 1 teaspoon vanilla extract — Pure vanilla extract adds warmth and depth. Avoid imitation vanilla here—the flavor difference is noticeable.
- 2 ½ cups (312g) all-purpose flour — Spoon and level your flour for the most accurate measurement. Scooping directly from the bag can pack in too much flour, leading to a dry cake.
- 2 teaspoons baking powder — This gives the cake its gentle lift. Make sure your baking powder is fresh—test it by dropping a little in hot water; it should bubble immediately.
- 1 teaspoon baking soda — Helps the cake rise and also helps neutralize the acidity from the pumpkin and brown sugar.
- ½ teaspoon salt — Fine sea salt is best. It balances the sweetness and enhances all the warm spices.
- 2 teaspoons ground cinnamon — The backbone of the spice blend. Use a good quality cinnamon like Saigon or Ceylon for a more complex flavor.
- 1 teaspoon ground ginger — Adds a gentle warmth without being overpowering.
- ½ teaspoon ground nutmeg — Freshly grated nutmeg is a game-changer if you have it. It has a much brighter, more aromatic flavor than pre-ground.
- ¼ teaspoon ground cloves — A little goes a long way. Cloves add depth and that classic pumpkin pie vibe.
- ½ cup (120ml) buttermilk — Room temperature buttermilk keeps the cake incredibly tender. If you don’t have buttermilk, add 1 tablespoon of lemon juice or white vinegar to regular milk and let it sit for 5 minutes.
For the Maple Glaze
- 1 ½ cups (180g) powdered sugar — Sift it if it looks lumpy. Smooth glaze starts with smooth sugar.
- 3 tablespoons pure maple syrup — Please use real maple syrup, not pancake syrup. Grade A dark amber has a robust flavor that stands up beautifully to the brown butter and pumpkin.
- 2 tablespoons milk or heavy cream — Heavy cream makes a richer, thicker glaze. Milk works perfectly too for a slightly thinner consistency.
- ½ teaspoon vanilla extract — A tiny addition that rounds out the maple flavor nicely.
- Pinch of salt — Just a tiny pinch to balance the sweetness.
Equipment Needed
You do not need a fully stocked professional kitchen for this recipe, but a few specific tools will make your life much easier. Here is what I recommend:
- 10 to 12-cup Bundt pan — This is non-negotiable. A standard 10-cup pan works perfectly. I use a Nordic Ware classic bundt pan—it conducts heat evenly and releases cakes beautifully. If your pan is non-stick, be extra careful not to scratch the surface.
- Light-colored saucepan — A stainless steel or light-colored pan is ideal for browning butter. Dark pans make it hard to see when the butter solids turn golden, which means you are more likely to burn it.
- Stand mixer or hand mixer — Either works well. A stand mixer with the paddle attachment makes creaming the butter and sugar effortless, but a hand mixer gets the job done too.
- Large mixing bowls — You will need at least two: one for dry ingredients and one for wet ingredients.
- Whisk — For combining dry ingredients and for making the glaze smooth.
- Rubber spatula — Essential for scraping down the bowl and for gently folding the batter.
- Cooling rack — Allows air to circulate around the cake so it cools evenly. A wire rack is best.
- Measuring cups and spoons — Accurate measurements matter in baking. Use dry measuring cups for flour and sugar, and liquid measuring cups for the pumpkin puree and buttermilk.
If you do not have a stand mixer, do not worry. A hand mixer and a sturdy bowl work perfectly. I actually made my first few test cakes with a hand mixer and they turned out great. Just make sure you cream the butter and sugar for the full amount of time—that is where the texture comes from.
Preparation Method
Let me walk you through this step by step. Trust me, if I can do this after burning butter and forgetting the sugar once (yes, really), you can absolutely nail it on your first try.
- Brown the butter. Place the 1 cup of unsalted butter in your light-colored saucepan over medium heat. Let it melt completely, then continue cooking, swirling the pan occasionally. The butter will foam up, then subside, and you will start to see golden brown specks forming at the bottom. This takes about 5 to 7 minutes. The moment it smells nutty and looks like liquid amber, pull it off the heat immediately. Pour it into a heatproof bowl to stop the cooking process. Let it cool for about 15 minutes—it should be warm but not hot when you add it to the sugar.
- Preheat and prepare the pan. Preheat your oven to 350°F (175°C). Generously grease your bundt pan with softened butter or a baking spray that contains flour. Make sure you get into every nook and cranny of the pan’s design. I cannot stress this enough—a well-greased pan is the difference between a beautiful cake and a tragic pile of crumbs.
- Combine dry ingredients. In a medium bowl, whisk together the 2 ½ cups all-purpose flour, 2 teaspoons baking powder, 1 teaspoon baking soda, ½ teaspoon salt, 2 teaspoons cinnamon, 1 teaspoon ginger, ½ teaspoon nutmeg, and ¼ teaspoon cloves. Set this aside.
- Cream the butter and sugar. In your stand mixer bowl (or a large bowl with a hand mixer), combine the cooled brown butter and 1 ¾ cups granulated sugar. Beat on medium speed for 2 to 3 minutes until the mixture looks lighter in color and slightly fluffy. The brown butter will make this look a bit different from regular creamed butter—that is totally normal.
- Add the wet ingredients. Add the 1 cup pumpkin puree and beat until combined. The mixture might look a little separated at this point—do not panic, that is just the pumpkin doing its thing. Add the 3 room-temperature eggs one at a time, beating well after each addition. Stir in the 1 teaspoon vanilla extract.
- Alternate dry ingredients and buttermilk. With the mixer on low speed, add about one-third of the dry ingredients, then half of the ½ cup buttermilk. Repeat with another third of dry ingredients, the remaining buttermilk, and finish with the last of the dry ingredients. Mix just until the flour disappears—overmixing will make the cake tough. Scrape down the sides and bottom of the bowl with your rubber spatula to make sure everything is evenly incorporated.
- Fill the pan. Spoon the thick, luscious batter into your prepared bundt pan. Use your spatula to spread it evenly. Give the pan a gentle tap on the counter to release any air bubbles trapped in the batter.
- Bake. Place the pan on the middle rack of your preheated oven and bake for 45 to 55 minutes. The cake is done when a wooden skewer inserted into the thickest part comes out clean or with just a few moist crumbs attached. The top should be golden brown and spring back when you gently press it.
- Cool in the pan. Let the cake cool in the pan on a wire rack for exactly 15 minutes. This is crucial—too soon and it will fall apart, too late and it will stick. After 15 minutes, place a wire rack or serving plate over the top of the pan and carefully invert it. Lift the pan off slowly. If any stubborn bits stick, gently tap the pan or give it a gentle shake.
- Cool completely. Let the cake cool completely on the wire rack before glazing. This usually takes about 1 to 2 hours. Warm cake will absorb the glaze rather than letting it sit beautifully on top.
- Make the maple glaze. In a small bowl, whisk together the 1 ½ cups powdered sugar, 3 tablespoons maple syrup, 2 tablespoons milk or heavy cream, ½ teaspoon vanilla extract, and a pinch of salt. Whisk until smooth and pourable. If it is too thick, add a tiny splash more milk. If it is too thin, add a little more powdered sugar.
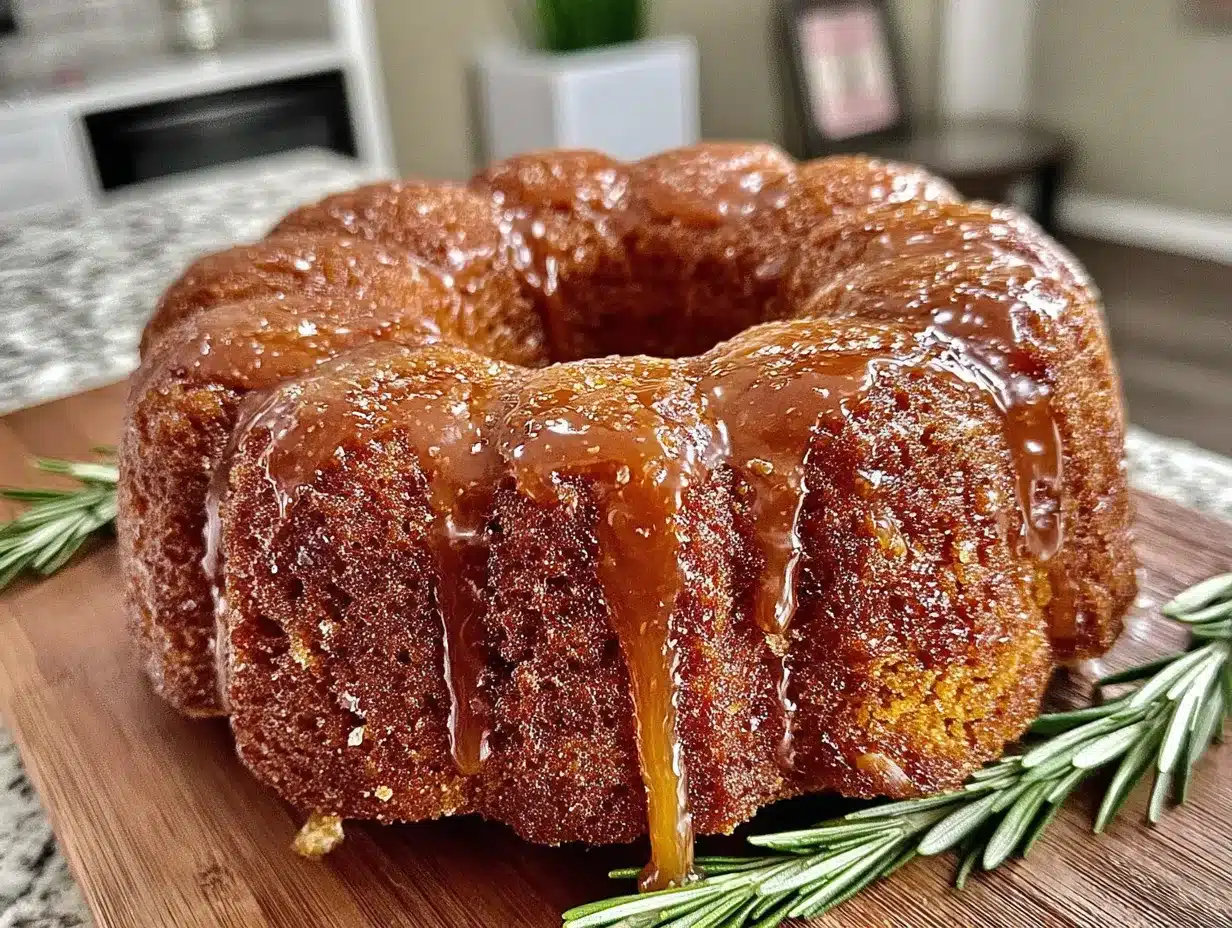
- Glaze the cake. Place the cooled cake on your serving plate. Slowly pour the maple glaze over the top, letting it drip down the sides naturally. Use a spoon to guide it if needed. Let the glaze set for about 15 minutes before slicing.
Cooking Tips & Techniques
I have made enough mistakes with this cake to fill a small notebook. Let me save you the trouble with these hard-earned tips.
Watch the butter like a hawk. Brown butter can go from perfect to burnt in about 30 seconds. As soon as you see those golden specks and smell that nutty aroma, pull it off the heat. I once got distracted by a phone call and ended up with black butter that tasted like regret. Keep your eyes on that pan.
Room temperature ingredients matter. I know it is tempting to use cold eggs straight from the fridge, but cold ingredients do not emulsify properly with the brown butter. Your batter will look curdled and the cake texture will suffer. Set your eggs and buttermilk out 30 minutes before you start. If you forget, place the eggs in a bowl of warm water for 5 minutes.
Grease that pan like your life depends on it. Use a pastry brush to get melted butter into every ridge and crevice of your bundt pan. Then dust it lightly with flour, tapping out the excess. I have had cakes stick in the most heartbreaking ways, and it almost always comes down to insufficient greasing. A baking spray with flour (like Baker’s Joy) is my secret weapon.
Do not overmix the batter. Once you add the flour mixture, mix only until it disappears. Overmixing develops gluten, which makes the cake dense and tough instead of tender and light. A few streaks of flour are fine—fold them in gently with your spatula.
Check for doneness early. Ovens vary wildly. Start checking your cake at the 45-minute mark. Insert a skewer into the center—if it comes out clean or with just a few moist crumbs, it is done. If it still looks wet, give it another 5 minutes and check again.
Let it cool properly. I know you are excited to see that beautiful cake, but patience pays off here. The 15-minute rest in the pan allows the structure to set. If you try to flip it too early, the cake will collapse. If you wait too long, condensation can make it stick. Set a timer—I learned this the hard way.
Variations & Adaptations
One of the best things about this cozy brown butter pumpkin bundt cake with maple glaze is how adaptable it is. Here are some variations I have tried and loved:
Gluten-Free Version : Substitute the all-purpose flour with a high-quality 1:1 gluten-free baking flour blend. I have had great results with King Arthur Measure for Measure. Add 1 teaspoon of xanthan gum if your blend does not already include it. The texture will be slightly more delicate, so handle the cake gently when removing it from the pan.
Dairy-Free Adaptation : Use a high-quality vegan butter for browning (Miyoko’s works beautifully) and replace the buttermilk with ½ cup of unsweetened almond or oat milk mixed with 1 tablespoon of lemon juice. For the glaze, use a dairy-free milk like coconut or oat milk. The brown butter flavor will be slightly different but still delicious.
Spice It Up : If you love a bolder spice profile, add ½ teaspoon of cardamom and a pinch of black pepper to the dry ingredients. The cardamom adds an almost floral warmth, and the pepper gives a subtle, unexpected kick that complements the maple glaze perfectly. I tried this on a whim one rainy Sunday and it was a revelation.
Nutty Crunch : Fold ¾ cup of toasted pecans or walnuts into the batter just before pouring it into the pan. The nuts add a lovely crunch that contrasts with the tender crumb. Make sure you toast them first—raw nuts can taste a bit flat. Toast them in a dry skillet over medium heat for 3 to 4 minutes until fragrant.
Citrus Twist : Add 1 tablespoon of fresh orange zest to the batter along with the pumpkin puree. The bright citrus notes cut through the richness of the brown butter and maple beautifully. I love this version for Thanksgiving—it feels a little more festive and bright.
Serving & Storage Suggestions
This cake is lovely at room temperature, but I actually prefer it slightly warm. Pop a slice in the microwave for about 10 seconds—the glaze softens and the cake becomes incredibly tender. It is perfect with a cup of black coffee or a chai latte.
For a more decadent presentation, serve each slice with a dollop of lightly sweetened whipped cream or a scoop of vanilla bean ice cream. The cold creaminess against the spiced, maple-glazed cake is absolutely heavenly. I have also been known to drizzle a little extra maple syrup over the top because, honestly, why not?
Storage: Store the cake in an airtight container at room temperature for up to 3 days. The glaze will stay beautiful and the cake will remain moist. If your kitchen runs warm, you can refrigerate it, but let slices come to room temperature before serving for the best texture.
Freezing: This cake freezes beautifully. Wrap the unglazed cake tightly in plastic wrap, then in a layer of aluminum foil. Freeze for up to 3 months. When you are ready to enjoy it, thaw it overnight in the refrigerator, bring it to room temperature, then make the fresh glaze and pour it over the top. The cake tastes just as good as the day you baked it.
Flavor Development: Honestly, this cake tastes even better on day two. The spices meld together and the brown butter flavor deepens overnight. I often bake this a day ahead of when I plan to serve it. Just wait to glaze it until the day you are serving for the prettiest presentation.
Nutritional Information & Benefits
While this is absolutely a treat-yourself dessert, there are a few redeeming qualities worth mentioning. One slice (based on 12 servings) contains approximately 380 calories, 18g fat, 52g carbohydrates, and 5g protein.
Pumpkin puree is packed with vitamin A (in the form of beta-carotene), which supports eye health and immune function. It also provides a good amount of fiber, which helps with digestion and keeps you feeling satisfied. The brown butter, while indulgent, adds a small amount of vitamin A and healthy fats that help your body absorb the fat-soluble vitamins from the pumpkin.
The cinnamon and ginger in this recipe are not just for flavor—they have anti-inflammatory properties and can help regulate blood sugar levels. Maple syrup contains antioxidants and minerals like zinc and manganese, though it is still sugar, so enjoy it in moderation.
This cake is vegetarian-friendly. For those with dietary restrictions, the gluten-free and dairy-free variations above work wonderfully. It does contain nuts only if you choose to add them, and it is egg-based, so it is not suitable for a vegan diet without significant modification.
Conclusion
This cozy brown butter pumpkin bundt cake with maple glaze is more than just a recipe—it is the flavor of autumn captured in a single slice. After all those failed attempts chasing the memory of that little café cake, I can honestly say this version is even better. It has that same haunting, nutty depth, but with a tenderness and a maple sweetness that feels completely my own.
I hope you give this recipe a try and make it your own. Maybe you will add extra cinnamon, or fold in some pecans, or drizzle even more maple glaze on top (I fully support that decision). Baking is about making something that brings you joy, and this cake delivers that in spades.
When you make it—and I really hope you do—come back and let me know how it turned out. Did you try a variation? Did your family love it? Did you burn the butter on your first try like I did? Share your stories in the comments below. Happy baking, friends. This one is a keeper.
Frequently Asked Questions
Can I use canned pumpkin pie filling instead of pumpkin puree?
No, please do not substitute pumpkin pie filling for pure pumpkin puree. Pumpkin pie filling already contains sugar and spices, which will throw off the balance of this recipe completely. Stick with 100% pure pumpkin puree for the best results.
Why did my bundt cake stick to the pan?
This usually happens for one of two reasons: the pan was not greased thoroughly enough, or the cake was not cooled long enough in the pan before flipping. Make sure you get butter or baking spray into every crevice of the pan. Also, let the cake cool for exactly 15 minutes in the pan before inverting it.
Can I make this cake without a stand mixer?
Absolutely. A hand mixer works perfectly fine for this recipe. You can even mix it by hand with a whisk and some elbow grease, though it will take a bit more effort to cream the butter and sugar properly. Just make sure you beat the mixture until it looks lighter and slightly fluffy.
How do I know when the brown butter is ready?
Watch for three signs: the butter will stop foaming, you will see golden brown specks forming at the bottom of the pan, and it will smell intensely nutty and toasty. This usually takes 5 to 7 minutes over medium heat. Remove it from the heat immediately once you see those specks.
Can I freeze this cake with the glaze already on it?
I do not recommend freezing the cake with the glaze. The glaze can become watery and lose its beautiful appearance when thawed. Instead, freeze the unglazed cake tightly wrapped, then thaw it overnight in the refrigerator, bring it to room temperature, and make a fresh batch of maple glaze to pour over the top.
Pin This Recipe!
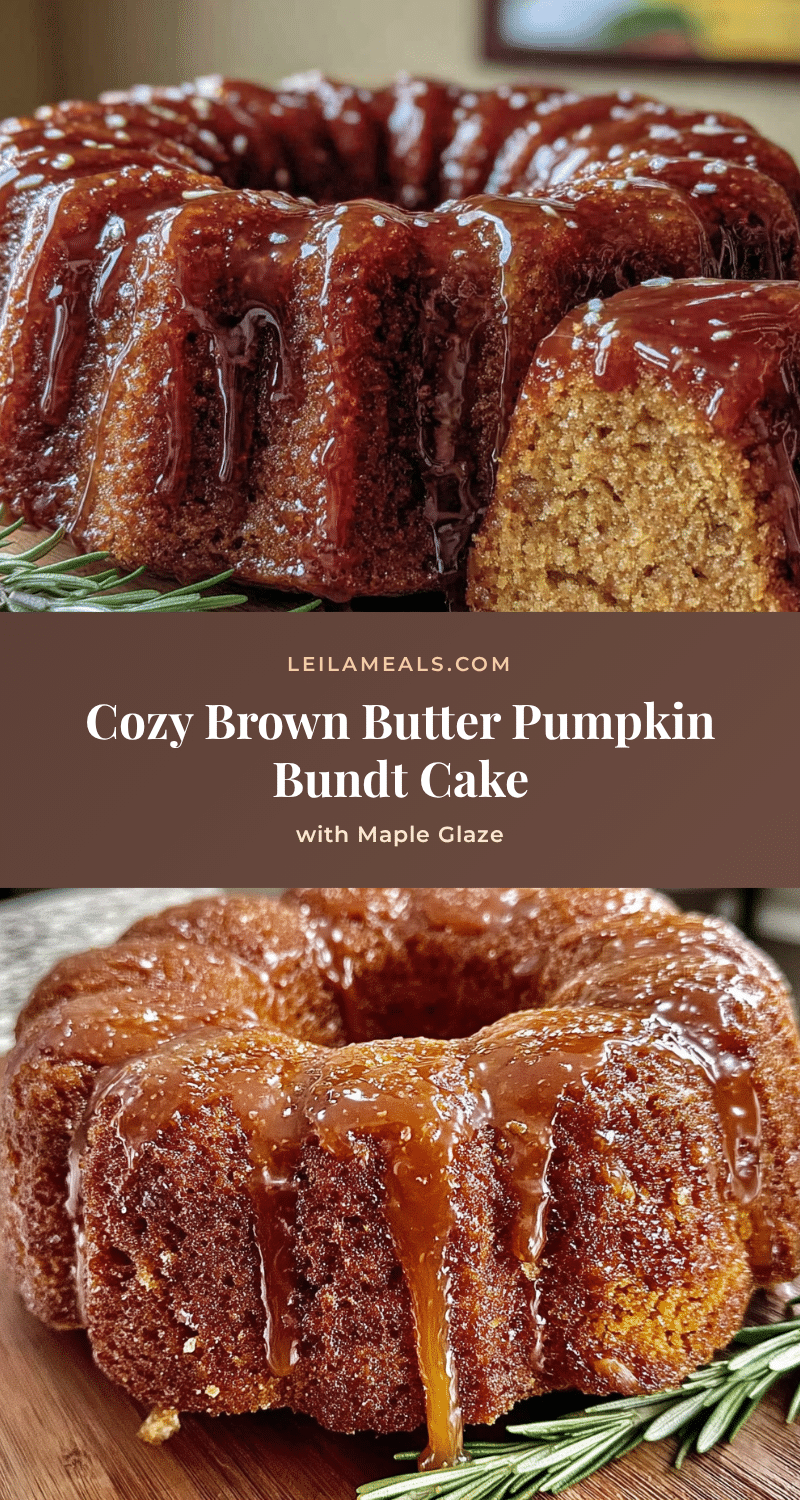
Cozy Brown Butter Pumpkin Bundt Cake with Maple Glaze
A dense, tender pumpkin bundt cake with nutty brown butter and a sweet maple glaze, perfect for fall baking.
- Prep Time: 20 minutes
- Cook Time: 50 minutes
- Total Time: 1 hour 10 minutes
- Yield: 12 servings 1x
- Category: Dessert
- Cuisine: American
Ingredients
- 1 cup (226g) unsalted butter
- 1 ¾ cups (350g) granulated sugar
- 1 cup (240ml) pumpkin puree
- 3 large eggs, room temperature
- 1 teaspoon vanilla extract
- 2 ½ cups (312g) all-purpose flour
- 2 teaspoons baking powder
- 1 teaspoon baking soda
- ½ teaspoon salt
- 2 teaspoons ground cinnamon
- 1 teaspoon ground ginger
- ½ teaspoon ground nutmeg
- ¼ teaspoon ground cloves
- ½ cup (120ml) buttermilk, room temperature
- 1 ½ cups (180g) powdered sugar
- 3 tablespoons pure maple syrup
- 2 tablespoons milk or heavy cream
- ½ teaspoon vanilla extract
- Pinch of salt
Instructions
- Brown the butter: Melt 1 cup unsalted butter in a light-colored saucepan over medium heat. Cook, swirling occasionally, until golden brown specks appear and it smells nutty (5-7 minutes). Pour into a heatproof bowl and let cool for 15 minutes.
- Preheat oven to 350°F (175°C). Generously grease a 10 to 12-cup bundt pan with softened butter or baking spray with flour.
- In a medium bowl, whisk together flour, baking powder, baking soda, salt, cinnamon, ginger, nutmeg, and cloves. Set aside.
- In a stand mixer or large bowl, beat cooled brown butter and granulated sugar on medium speed for 2-3 minutes until lighter and fluffy.
- Add pumpkin puree and beat until combined. Add eggs one at a time, beating well after each. Stir in vanilla extract.
- With mixer on low, add dry ingredients in three additions, alternating with buttermilk (starting and ending with dry). Mix just until combined; do not overmix.
- Spoon batter into prepared bundt pan and spread evenly. Tap pan gently on counter to release air bubbles.
- Bake for 45-55 minutes, until a skewer inserted in the center comes out clean or with a few moist crumbs.
- Cool in pan on a wire rack for exactly 15 minutes. Invert onto rack or plate and lift pan off. Cool completely (1-2 hours).
- Make glaze: Whisk together powdered sugar, maple syrup, milk or cream, vanilla, and salt until smooth and pourable.
- Place cooled cake on serving plate. Pour glaze over top, letting it drip down sides. Let set for 15 minutes before slicing.
Notes
Watch the butter carefully to avoid burning. Use room temperature ingredients for best texture. Grease the pan thoroughly to prevent sticking. The cake tastes even better the next day. Freeze unglazed for up to 3 months.
Nutrition
- Serving Size: 1 slice
- Calories: 380
- Sugar: 35
- Sodium: 320
- Fat: 18
- Saturated Fat: 11
- Carbohydrates: 52
- Fiber: 2
- Protein: 5
Keywords: pumpkin bundt cake, brown butter, maple glaze, fall dessert, pumpkin cake, bundt cake