The striated layers, and that’s the whole point. Not the sweetness, not the nostalgia—the way those three distinct bands sit perfectly stacked, one on top of the other, like a tiny edible sunset trapped in a pan. White, then orange, then yellow, each one holding its ground without bleeding into the next. I spent a solid ten minutes just staring at the first batch I made, running my finger along the edge of the pan to feel where each layer met the next. There’s something almost compulsive about it, that clean division. And honestly? That’s what makes these the best candy corn sugar cookie bars I’ve ever made. The rest is just butter and sugar doing what they do best.
I wasn’t trying to reinvent fall baking. I was standing in my kitchen last September, staring at a bag of candy corn I’d bought on impulse (you know how that goes), and I thought—what if the cookie bar looked like the candy? Not just tasted like it, but actually looked the part. The kind of thing you bring to a gathering and people do that little double-take before grabbing one. So I started testing. First batch was a mess—colors bled everywhere, looked like a toddler’s art project. Second batch was better. Third batch? That’s the one I’m giving you today.
These Easy Candy Corn Sugar Cookie Bars are chewy, buttery, and just sweet enough without being cloying. They’re the kind of dessert that makes people smile before they even take a bite. And the best part? They’re way easier than they look. No rolling, no cutting, no fuss. Just press, layer, bake, and watch the magic happen.
Why You’ll Love This Recipe
Let me tell you why these bars have earned a permanent spot in my fall baking rotation. I’ve tested this recipe about seven times now, and every single batch disappeared faster than I expected. Here’s what makes them special:
- Quick & Easy: From start to finish, you’re looking at about 35 minutes. No chilling, no rolling dough into individual cookies. Just press everything into a pan and bake.
- Simple Ingredients: You probably have most of this stuff in your kitchen right now. Butter, sugar, flour, eggs—the usual suspects. No weird extracts or hard-to-find specialty items.
- Perfect for Fall Gatherings: These bars scream autumn without being pumpkin-flavored (which, let’s face it, we’ve all had enough of by mid-October). They’re great for Halloween parties, Thanksgiving dessert tables, or just a cozy afternoon treat.
- Crowd-Pleaser: I brought a batch to my neighbor’s potluck last month, and three people asked for the recipe before the night was over. Kids love the colors, adults love the buttery sugar cookie base.
- Unbelievably Delicious: The texture is what gets you. Soft, chewy centers with slightly crisp edges, and that sweet vanilla-candy corn flavor in every bite. It’s comfort food in bar form.
What makes this recipe different from all the other candy corn desserts out there? It’s the layering technique. Most recipes just mix candy corn into the batter and call it a day. But these bars actually look like candy corn, which makes them twice as fun to serve. Plus, I’ve dialed in the exact bake time so the layers stay distinct without getting dry. Trust me, I’ve eaten enough overbaked cookie bars to know the difference.
This is the kind of dessert that makes you close your eyes after the first bite. It’s nostalgic without being dated, fun without being childish, and honestly? It’s exactly what you want when the weather starts turning cool and you need something sweet to go with your tea.
What Ingredients You Will Need
This recipe uses simple, pantry-friendly ingredients to create something that looks way more complicated than it actually is. Here’s everything you’ll need:
For the Cookie Bar Base
- 1 cup unsalted butter, softened (I use Kerrygold for the richest flavor, but any good butter works)
- 1 cup granulated sugar
- 1 large egg, room temperature
- 1 teaspoon vanilla extract (pure, not imitation—it makes a difference)
- 2 cups all-purpose flour (spooned and leveled, don’t scoop straight from the bag)
- ½ teaspoon baking powder
- ¼ teaspoon salt
For the Candy Corn Layers
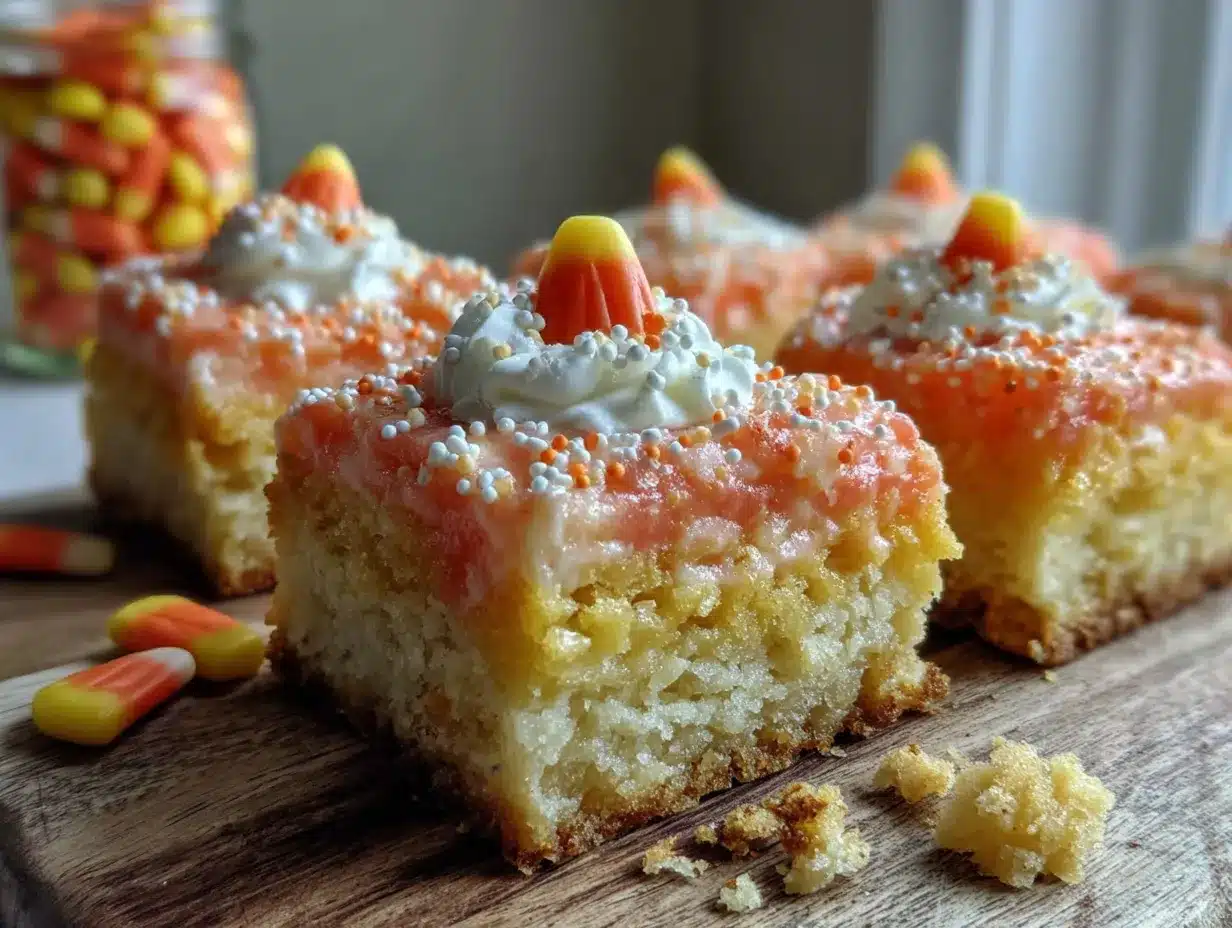
- 1 cup candy corn, divided (I use Brach’s—they hold their color best during baking)
- Yellow food coloring (gel works better than liquid for vibrant color)
- Orange food coloring (same deal—gel is your friend)
A few notes on ingredients before we get started. The butter needs to be genuinely soft—not melted, not cold, but that perfect Goldilocks zone where your finger leaves an indent without sinking all the way through. Leave it on the counter for about an hour before you start.
For the candy corn, I’ve tested this with store-brand versions and they work fine, but Brach’s really does hold its shape and color better during baking. Something about their formula just works. If you’re using a different brand, keep an eye on them—some cheaper candy corns melt into blobs instead of staying distinct.
The food coloring situation is important. Liquid food coloring will work in a pinch, but you’ll need more drops to get the right shade, and that can throw off the dough’s moisture balance. Gel coloring gives you vibrant color with just a tiny dab. I use Americolor brand, but any gel works. Start with less than you think you need—you can always add more, but you can’t take it away.
If you want to get fancy, you can add a pinch of cinnamon or nutmeg to the dough for a subtle fall warmth. I’ve done it both ways, and honestly? The plain vanilla version is my favorite. It lets the candy corn flavor shine without competing spices. But if you’re feeling adventurous, go for it.
Equipment Needed
You don’t need much for this recipe, which is part of why I love it. Here’s what you’ll need:
- 9×13-inch baking pan—glass or metal both work, but glass gives you better visibility on the layers
- Parchment paper—non-negotiable for easy removal and clean slicing
- Stand mixer or hand mixer—you can do this by hand, but your arm will get tired
- Mixing bowls—one large, one medium
- Rubber spatula—for scraping every last bit of dough
- Measuring cups and spoons
- Small bowls—for dividing and coloring the dough
- Toothpick—for testing doneness
- Cooling rack
If you don’t have a stand mixer, no worries. A hand mixer works just as well, and honestly, I’ve made these bars with just a wooden spoon when my mixer was on the fritz. It took a little more elbow grease, but the results were the same. The only thing I wouldn’t skip is the parchment paper. Trust me on this one—trying to lift an entire pan of cookie bars out without it is a recipe for disaster.
Preparation Method
Alright, let’s get to the good stuff. Here’s how to make these Easy Candy Corn Sugar Cookie Bars step by step.
- Preheat your oven to 350°F (175°C). Line your 9×13-inch baking pan with parchment paper, leaving a little overhang on the long sides. This is your lifeline for lifting the bars out later.
- Cream the butter and sugar. In a large mixing bowl, beat the softened butter and granulated sugar together until light and fluffy—about 3-4 minutes with a mixer on medium speed. You’re looking for a pale, airy texture. Scrape down the sides of the bowl halfway through.
- Add the egg and vanilla. Beat in the egg and vanilla extract until fully combined. The mixture should look smooth and slightly glossy at this point. Don’t overmix—just until it comes together.
- Mix the dry ingredients. In a separate bowl, whisk together the flour, baking powder, and salt. Gradually add this to the wet mixture, mixing on low speed until just combined. You want a soft, slightly sticky dough. Don’t keep mixing once the flour disappears—overworking the dough makes tough bars.
- Divide the dough. Split the dough into three equal portions in separate small bowls. This doesn’t have to be perfect—eyeballing it is fine. One portion stays plain (that’s your white layer), one gets colored orange, and one gets colored yellow.
- Color the dough. Add yellow gel food coloring to one portion and orange to another. Start with a tiny dab—like, the size of a peppercorn—and mix thoroughly. Add more if needed until you reach a shade that makes you happy. The white portion stays as-is.
- Press the first layer. Take the yellow dough and press it evenly into the bottom of your prepared pan. Use your fingers or the back of a spoon to spread it all the way to the edges. This layer should be about ¼-inch thick.
- Add the orange layer. Carefully press the orange dough on top of the yellow layer, spreading it evenly. Take your time here—if you press too hard, the colors will mix. Gentle, even pressure is the key.
- Finish with the white layer. Press the white dough on top, again spreading it gently to the edges. You should now have three distinct layers: yellow on bottom, orange in the middle, white on top. Don’t worry if it looks a little imperfect—baking smooths things out.
- Press in the candy corn. Gently press the remaining candy corn into the top layer in a scattered pattern. Don’t push them all the way in—just enough so they stick. Some will sink during baking, and that’s totally fine.
- Bake for 20-22 minutes. The edges should be lightly golden and the center should look set but still soft. A toothpick inserted in the center should come out with a few moist crumbs, not wet batter. Every oven runs differently, so start checking at 18 minutes if yours runs hot.
- Cool completely. Let the bars cool in the pan on a wire rack for at least 30 minutes. Then use the parchment paper to lift them out and transfer to a cutting board. Let them cool completely before slicing—about another 20 minutes. I know it’s hard to wait, but warm bars fall apart when you cut them.
- Slice and serve. Use a sharp knife to cut into squares or rectangles. Wipe the knife clean between cuts for the cleanest edges. Aim for 24 bars, but honestly? Cut them however you want.
A few things I’ve learned the hard way: If your dough feels too sticky to press into the pan, lightly wet your fingers with cold water. It helps the dough release without sticking to your hands. And if the layers start to blend while you’re pressing, pop the pan in the fridge for 10 minutes to firm everything up before continuing.
The sensory cues are important here. When you’re creaming the butter and sugar, you’re looking for a texture that reminds you of fluffy clouds. When you press the dough into the pan, it should feel like soft play-doh—malleable but not sticky. And when those bars come out of the oven, the kitchen should smell like butter and vanilla with just a hint of candy corn sweetness.
Cooking Tips & Techniques
After making these bars more times than I care to admit, I’ve picked up a few tricks that make the process smoother and the results better.
Room temperature ingredients matter. I know, I know—every recipe says this. But here’s why it actually matters for these bars: cold butter doesn’t cream properly with sugar, which means your layers won’t hold their shape as well. Take the egg out of the fridge when you start, and let the butter sit out for a full hour before you begin. Your future self will thank you.
The first time I made these, I used too much food coloring. Like, way too much. The dough turned neon orange and yellow, and honestly? It looked radioactive. Start with less than you think you need. You can always add more, but you can’t take it away. A tiny dab of gel goes a long way.
Here’s a mistake I made twice before I learned: Don’t press the candy corn too deep into the top layer. I thought pushing them all the way in would make them stay put, but they just melted into the dough and disappeared. A gentle press is all you need—enough so they stay in place, but shallow enough that you can still see them after baking.
Timing is everything. These bars go from perfectly done to overbaked in about 90 seconds. Set a timer for 18 minutes and start checking. The edges should be golden, the center should look set but still soft, and the whole pan should smell like a bakery. If the center still jiggles when you shake the pan, give it two more minutes and check again.
For clean slices, use a sharp knife and wipe it between cuts. I use a long chef’s knife, run it under hot water, dry it off, then make one clean cut. Wipe the blade clean, rinse with hot water again, and repeat. It takes an extra minute, but the difference in presentation is worth it.
One more thing: If you’re making these for a party, bake them the day before. They actually taste better the next day—the flavors meld together and the texture gets even softer. Just store them in an airtight container at room temperature.
Variations & Adaptations
One of my favorite things about this recipe is how easy it is to tweak. Here are some variations I’ve tried and loved:
Pumpkin Spice Version: Add 1 teaspoon of pumpkin pie spice to the flour mixture before dividing the dough. It gives the bars a warm, fall flavor that pairs beautifully with the candy corn. I made this version for a pumpkin muffin taste-test party, and it was a hit.
Chocolate Drizzle: After the bars cool, melt ½ cup of semi-sweet chocolate chips with 1 teaspoon of coconut oil and drizzle it over the top. The chocolate cuts through the sweetness and adds a nice contrast. Plus, it makes them look even more impressive.
Gluten-Free Option: Substitute the all-purpose flour with a 1:1 gluten-free baking flour. I’ve tested this with Bob’s Red Mill, and the texture is almost identical. Just make sure your gluten-free flour contains xanthan gum, or add ½ teaspoon separately.
Dairy-Free Adaptation: Use vegan butter in place of regular butter. I’ve had good results with Miyoko’s—it creams up just like dairy butter. The flavor is slightly different, but still delicious.
Mini Version: Press the dough into a mini muffin tin instead of a 9×13 pan. Bake for 12-14 minutes instead of 20-22. These little bites are perfect for parties or lunchbox treats.
No Candy Corn Version: If you’re not a candy corn fan (I know, I know, but some people aren’t), skip the candy corn on top and use the layering technique with different colors. Red, white, and blue for the Fourth of July? Green and red for Christmas? The possibilities are endless.
Serving & Storage Suggestions
These bars are best served at room temperature, but honestly? I’ve eaten them straight from the fridge and they’re still amazing. The texture firms up when cold, giving them a slightly denser, chewier bite that some people prefer.
For presentation, I like to arrange them on a white platter in a grid pattern. The layers show up beautifully against the white background. If you’re serving them at a fall gathering, scatter a few extra candy corns around the platter for a festive touch.
These bars pair perfectly with a warm drink. I love them with a homemade pumpkin spice latte or a hot cup of apple cider. The sweetness of the bars balances the warmth of the drink, and honestly? It’s the perfect fall afternoon combo.
Storage instructions: Keep the bars in an airtight container at room temperature for up to 5 days. If your kitchen runs warm, store them in the fridge—they’ll last up to a week. Layer them between sheets of parchment paper to prevent sticking.
Freezer instructions: These bars freeze beautifully. Wrap individual bars in plastic wrap, then place them in a freezer-safe bag. They’ll keep for up to 3 months. When you’re ready to eat one, let it thaw at room temperature for about 30 minutes. The texture comes back perfectly—I’ve tested this multiple times.
Reheating tip: If you want that just-baked warmth, pop a bar in the microwave for 10-15 seconds. It softens the cookie without making it soggy. Don’t go longer than 15 seconds, or the candy corn on top might get too melty.
One thing I’ve noticed: the flavors actually get better after a day or two. The candy corn flavor melds into the cookie base, and the vanilla becomes more pronounced. So don’t be afraid to make these ahead of time.
Nutritional Information & Benefits
Let’s be real—these are a treat, not a health food. But here’s the nutritional breakdown per bar (based on 24 servings):
| Nutrient | Amount per Bar |
|---|---|
| Calories | 195 |
| Total Fat | 9g |
| Saturated Fat | 5g |
| Cholesterol | 32mg |
| Sodium | 68mg |
| Total Carbohydrates | 28g |
| Sugars | 18g |
| Protein | 2g |
These bars contain dairy, eggs, and gluten. If you’re serving them at a gathering where allergies might be a concern, I recommend making the gluten-free or dairy-free variations I mentioned earlier.
On the health benefits side: there aren’t many, and I’m not going to pretend there are. But here’s what I will say—these bars are made with real ingredients. Butter, eggs, flour, sugar. No preservatives, no artificial flavors (well, except the food coloring, but you can use natural colors if you prefer). Compared to store-bought cookies with ingredient lists a mile long, these are a win in my book.
Plus, there’s the emotional health benefit. Sometimes you need a treat that makes you smile, and these bars do exactly that. I’ve seen the way people’s faces light up when they see those three layers. That’s worth something.
Conclusion
These Easy Candy Corn Sugar Cookie Bars are everything I want in a fall dessert—fun, flavorful, and surprisingly simple to make. They look like you spent hours on them, but the whole process takes about 35 minutes from start to finish. That’s my favorite kind of recipe.
I love how customizable these are. You can stick with the classic candy corn colors, or go wild with your own combinations. I’ve made a version with red and green layers for Christmas, and another with pink and white for Valentine’s Day. The technique works for any occasion.
If you make these bars, I’d love to hear about it. Drop a comment below and let me know how they turned out—did you stick with the classic version or try a variation? Did anyone at your gathering ask for the recipe? Those are my favorite stories to read.
And hey, if you’re looking for more fall dessert inspiration, check out my brown butter pumpkin chocolate chip cookies or my one-bowl pumpkin banana bread. Both are perfect for this time of year.
Happy baking, friends. Go make something that makes you smile.
Frequently Asked Questions
Can I use salted butter instead of unsalted?
Yes, you can. Just reduce the added salt in the recipe to ⅛ teaspoon instead of ¼ teaspoon. The bars will still turn out great—they might just be slightly saltier, which honestly pairs well with the sweet candy corn.
Why did my layers blend together?
This usually happens when the dough is too warm or you press too hard when adding the layers. If your kitchen is warm, chill the dough portions for 10 minutes before pressing them into the pan. And use gentle, even pressure when adding each layer.
Can I use liquid food coloring instead of gel?
You can, but you’ll need more drops to get vibrant color, which can add extra moisture to the dough. Start with 8-10 drops and mix well. If the dough feels too sticky after adding the coloring, add a tablespoon of flour to balance it out.
How do I know when the bars are done baking?
The edges should be lightly golden, and the center should look set but still soft. A toothpick inserted in the center should come out with a few moist crumbs—not wet batter. If the toothpick comes out clean, you’ve overbaked them slightly.
Can I make these bars ahead of time?
Absolutely. In fact, they taste even better the next day. Bake them up to two days ahead, store them in an airtight container at room temperature, and slice them just before serving. They also freeze beautifully for up to three months.
Pin This Recipe!
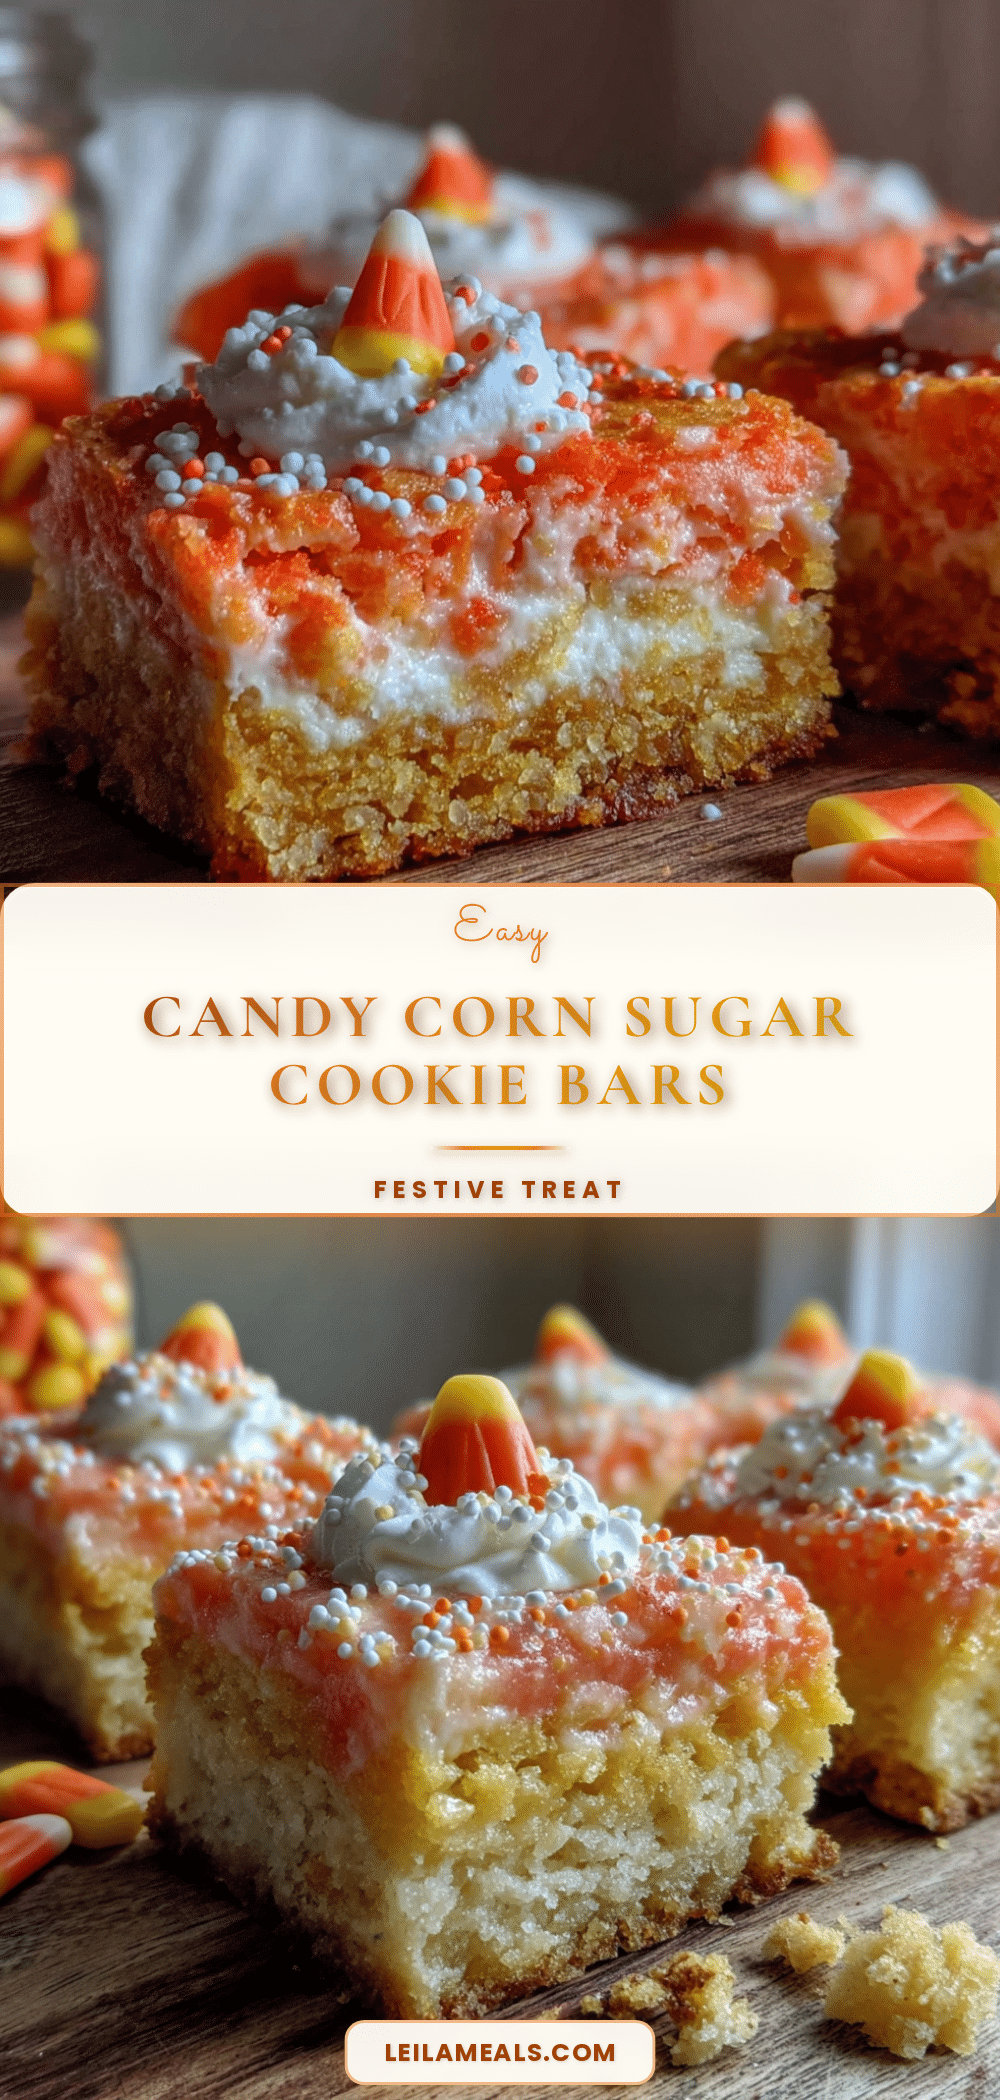
Easy Candy Corn Sugar Cookie Bars: Best Fall Dessert

These Easy Candy Corn Sugar Cookie Bars are chewy, buttery, and just sweet enough without being cloying. They’re the kind of dessert that makes people smile before they even take a bite, with distinct yellow, orange, and white layers that look like candy corn.
- Prep Time: 15 minutes
- Cook Time: 22 minutes
- Total Time: 37 minutes
- Yield: 24 bars 1x
- Category: Dessert
- Cuisine: American
Ingredients
- 1 cup unsalted butter, softened
- 1 cup granulated sugar
- 1 large egg, room temperature
- 1 teaspoon vanilla extract (pure)
- 2 cups all-purpose flour (spooned and leveled)
- ½ teaspoon baking powder
- ¼ teaspoon salt
- 1 cup candy corn, divided (e.g., Brach’s)
- Yellow gel food coloring
- Orange gel food coloring
Instructions
- Preheat your oven to 350°F (175°C). Line a 9×13-inch baking pan with parchment paper, leaving overhang on the long sides.
- In a large mixing bowl, beat the softened butter and granulated sugar together until light and fluffy, about 3-4 minutes on medium speed. Scrape down the sides halfway through.
- Beat in the egg and vanilla extract until fully combined and smooth.
- In a separate bowl, whisk together the flour, baking powder, and salt. Gradually add to the wet mixture, mixing on low speed until just combined. Do not overmix.
- Divide the dough into three equal portions in separate small bowls. Leave one portion plain (white layer), color one yellow, and one orange.
- Add yellow gel food coloring to one portion and orange to another, starting with a tiny dab and mixing thoroughly until desired shade is reached.
- Press the yellow dough evenly into the bottom of the prepared pan, about ¼-inch thick.
- Carefully press the orange dough on top of the yellow layer, spreading evenly with gentle pressure to avoid mixing colors.
- Press the white dough on top, spreading gently to the edges to form three distinct layers: yellow, orange, white.
- Gently press the remaining candy corn into the top layer in a scattered pattern, just enough to stick.
- Bake for 20-22 minutes, until edges are lightly golden and center is set but still soft. A toothpick inserted in the center should come out with a few moist crumbs.
- Cool in the pan on a wire rack for at least 30 minutes. Use parchment paper to lift out and transfer to a cutting board. Cool completely before slicing.
- Slice into squares or rectangles using a sharp knife, wiping clean between cuts for neat edges. Aim for 24 bars.
Notes
Room temperature ingredients matter for proper layering. Start with less food coloring than you think you need. Don’t press candy corn too deep into the top layer. Bake the day before for best flavor. For clean slices, use a sharp knife wiped clean between cuts. If dough is too sticky, lightly wet fingers with cold water. If layers start to blend, chill pan for 10 minutes.
Nutrition
- Serving Size: 1 bar
- Calories: 195
- Sugar: 18
- Sodium: 68
- Fat: 9
- Saturated Fat: 5
- Carbohydrates: 28
- Protein: 2
Keywords: candy corn, sugar cookie bars, fall dessert, Halloween, easy, layered, cookie bars


