My air fryer had been sitting on the counter for three months, still in the box. A gift from my mother-in-law, and honestly, I was intimidated. Then came a Tuesday night where I had thawed chicken thighs, a half-stick of butter, and absolutely zero energy for a messy, splattery stovetop situation. The garlic was starting to sprout in the basket, and I needed dinner on the table in under thirty minutes.
I opened the box, peeled off the plastic, and just went for it. No recipe, no plan—just chicken thighs patted dry, a quick rub of salt and garlic powder, and a prayer that I wouldn’t set off the smoke alarm. Twenty minutes later, I pulled out the crispiest, most golden-brown chicken I had ever made at home. The skin was shatter-crisp, the meat was juicy, and I had a moment of pure, ridiculous triumph in my kitchen. I drizzled some melted garlic butter over the top, and honestly, I almost cried. It was that good.
That accidental dinner became a weekly staple, and after tweaking the timing and temperature over a dozen batches, I finally nailed it. This crispy air fryer chicken thighs with garlic butter recipe is the result of all those happy accidents. It is the kind of meal that makes you feel like a professional chef, even when you are just trying to get dinner done on a random weeknight.
Why You’ll Love This Recipe
I have tested this recipe more times than I care to admit—some batches were dry, some were undercooked, and a few were just… fine. But this version? This is the one. It is the result of trial, error, and a lot of garlic butter.
- Quick & Easy : From fridge to plate in under 30 minutes. No marinating, no complicated steps. Perfect for those nights when you need dinner now.
- Simple Ingredients : You probably already have everything in your kitchen. Chicken thighs, butter, garlic, salt, pepper—that is it. No fancy grocery runs required.
- Crowd-Pleaser : My kids devour these, my husband asks for seconds, and even my picky mother-in-law (yes, the one who gave me the air fryer) gave it her seal of approval.
- Unbelievably Crispy : The air fryer does the magic here. You get that deep-fried crunch without the oil bath, and the garlic butter takes it over the top.
- Perfect for Meal Prep : These reheat beautifully, which means you can make a double batch and have lunches sorted for days. (Not that they usually last that long.)
What sets this apart from other chicken thigh recipes is the technique. I pat the skin dry, season generously, and let the air fryer work its convection magic. The garlic butter is brushed on at the very end, so it stays glossy and flavorful instead of burning off. It is simple, but it works every single time.
What Ingredients You Will Need
This recipe relies on a handful of pantry staples that come together to deliver big flavor with minimal effort. Here is what you will need:
- Bone-in, skin-on chicken thighs (about 4-6 thighs, depending on size) – The skin is essential for that crispy texture. Boneless thighs will work, but you will lose some of the crunch. I prefer thighs from a trusted brand like Bell & Evans or just whatever is on sale at my local market.
- Garlic powder (1 teaspoon) – Not fresh garlic here, as it can burn in the air fryer. Garlic powder gives you that flavor without the risk of bitterness.
- Onion powder (1/2 teaspoon) – Adds a subtle sweetness that rounds out the savory notes.
- Smoked paprika (1 teaspoon) – This is my secret weapon. It adds color, a hint of smokiness, and makes the chicken look gorgeous.
- Salt (1 teaspoon) – I use fine sea salt. Adjust based on your preference and the saltiness of your butter.
- Black pepper (1/2 teaspoon) – Freshly ground is always better, but pre-ground works in a pinch.
- Unsalted butter (3 tablespoons) – Unsalted gives you control over the salt level. If you only have salted butter, reduce the added salt slightly.
- Fresh garlic (3 cloves, minced) – This goes into the melted butter at the end. Fresh garlic adds that pungent, aromatic kick that powder just cannot replicate.
- Fresh parsley (optional, for garnish) – Adds a pop of color and freshness. Totally optional, but pretty.
For the best results, look for chicken thighs that are roughly the same size so they cook evenly. If your thighs are on the larger side, you may need to add a couple of minutes to the cooking time. And if you are out of smoked paprika, regular paprika works fine—you will just miss that subtle smoky depth.
Equipment Needed
You do not need a lot of fancy gear for this one. Here is what I use:
- Air fryer (any size will work) – I use a 5.8-quart Cosori, but I have tested this in smaller baskets too. Just make sure the thighs are in a single layer with space between them for air to circulate. If your air fryer is small, cook in batches.
- Tongs – For flipping the chicken without tearing the skin. Silicone-tipped tongs are gentle on the air fryer basket.
- Small saucepan or microwave-safe bowl – For melting the butter and infusing it with garlic.
- Pastry brush – For brushing the garlic butter onto the cooked chicken. A silicone brush works best, but a regular one is fine too.
- Instant-read thermometer – This is non-negotiable for me. Chicken thighs need to hit 175°F to 185°F for the best texture, and a thermometer takes the guesswork out of it.
- Paper towels – For patting the chicken dry. This step is crucial for crispy skin, so do not skip it.
If you do not have a pastry brush, you can just drizzle the garlic butter over the chicken with a spoon. It is less elegant, but it tastes the same. And if you are using a smaller air fryer, just cook the thighs in two batches—it is worth the extra few minutes.
Preparation Method
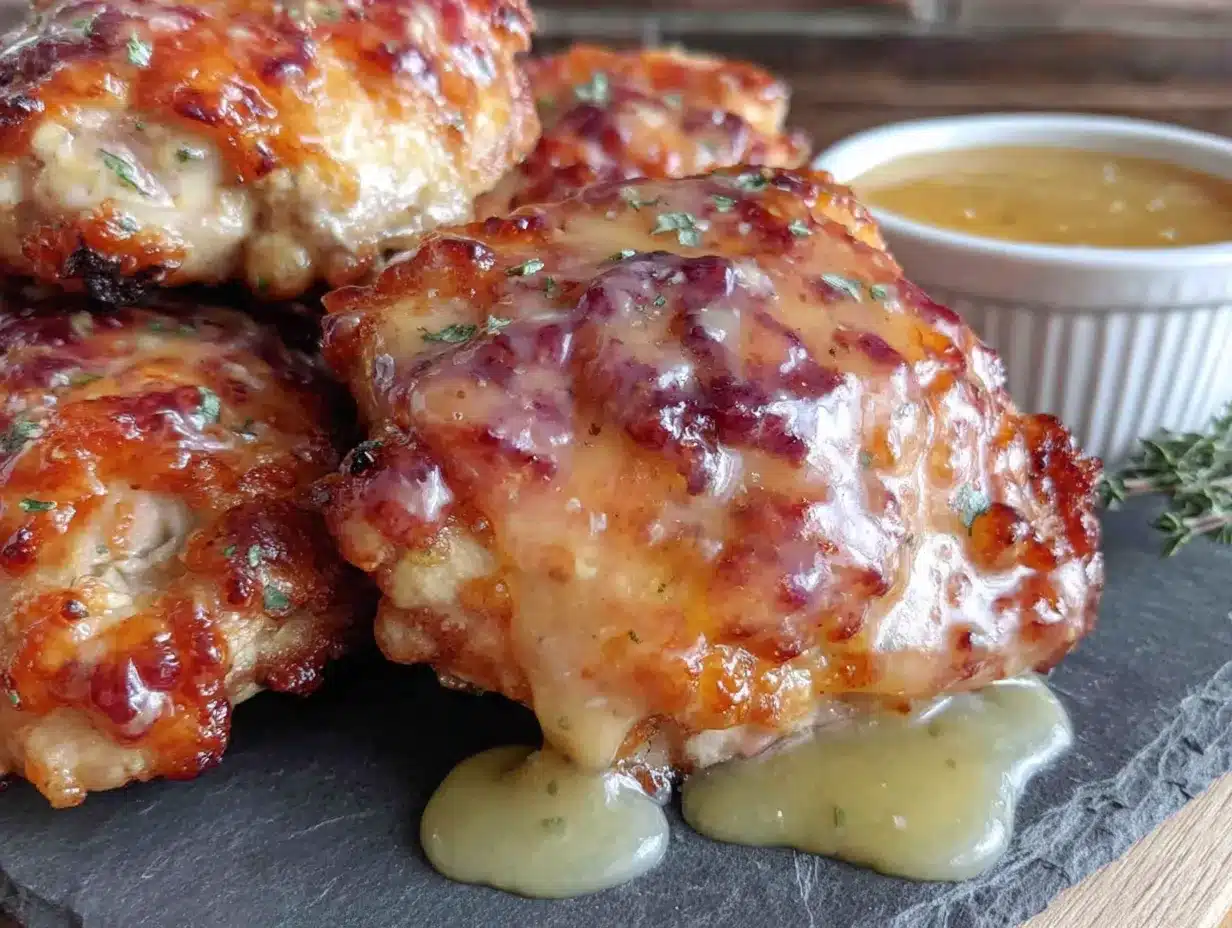
Follow these steps, and you will have the crispiest, juiciest chicken thighs of your life. Trust me on this one.
- Preheat your air fryer to 400°F (200°C). Most air fryers need about 3-5 minutes to preheat. I usually turn it on while I am prepping the chicken. This ensures the hot air hits the skin immediately, which is key for crispiness.
- Pat the chicken thighs dry with paper towels. This is the most important step. Moisture is the enemy of crispy skin. Take your time and really press those paper towels into the skin to absorb as much moisture as possible. (I have learned this the hard way—soggy skin is sad skin.)
- Season the chicken. In a small bowl, mix together the garlic powder, onion powder, smoked paprika, salt, and black pepper. Sprinkle this mixture evenly over both sides of the chicken thighs. Rub it in gently with your hands. Do not be shy—get every bit of that seasoning on there.
- Arrange the thighs in the air fryer basket. Place them skin-side down in a single layer. Make sure they are not touching—leave about an inch of space between each thigh for air to circulate. If they are crowded, they will steam instead of crisp.
- Air fry at 400°F (200°C) for 12 minutes. Set a timer. Do not open the basket during this time. Let the air fryer do its thing.
- Flip the thighs. Using tongs, carefully flip each thigh over so the skin side is now facing up. Be gentle—the skin should already be starting to crisp, and you do not want to tear it.
- Air fry for another 10-12 minutes. The total cooking time will depend on the size of your thighs. Start checking at the 10-minute mark. The skin should be deep golden brown and crispy to the touch. The internal temperature should reach at least 175°F (80°C) when measured at the thickest part, but 185°F (85°C) is even better for fall-apart tenderness.
- Make the garlic butter while the chicken cooks. In a small saucepan over low heat, melt the butter. Add the minced fresh garlic and cook for about 30 seconds, just until fragrant. Do not let the garlic brown—it will turn bitter. Remove from heat and set aside.
- Brush the garlic butter over the hot chicken. As soon as the thighs come out of the air fryer, brush them generously with the garlic butter. The residual heat will melt it right into the skin. Sprinkle with fresh parsley if you are using it.
- Let the chicken rest for 5 minutes. I know it is tempting to dig in right away, but resting allows the juices to redistribute. This is the difference between juicy chicken and dry chicken. Trust me on this one.
Cooking Tips & Techniques
I have made this recipe at least twenty times, and I have made every mistake in the book. Here is what I have learned:
Do not overcrowd the basket. I cannot stress this enough. If your thighs are touching, they will steam rather than crisp. Cook in batches if you have to. It is worth the extra time.
Pat the skin dry twice. I know I said it already, but it is that important. Even a little bit of moisture will prevent the skin from getting that shatter-crisp texture. I pat them dry, let them sit for a minute, and then pat them dry again.
Use an instant-read thermometer. Chicken thighs are forgiving, but they are best when cooked to 175°F to 185°F. Below that, the fat has not fully rendered, and the texture can be chewy. Above that, they start to dry out. A thermometer takes the guesswork out of it.
Let the butter cool slightly before brushing. If the butter is too hot, it will slide right off the chicken. Let it cool for a minute or two after melting, so it thickens slightly and clings to the skin.
Flip only once. Resist the urge to open the air fryer and check on the chicken every few minutes. Each time you open it, you let out heat and extend the cooking time. Flip once, and let the air fryer do the rest.
I once forgot to pat the skin dry and ended up with chicken that looked pale and sad. It was edible, but it was not the crispy, golden-brown masterpiece I was hoping for. Learn from my mistakes—dry skin is happy skin.
Variations & Adaptations
This recipe is incredibly versatile, and I have tried several variations over the months. Here are some of my favorites:
- Spicy Version: Add 1/2 teaspoon of cayenne pepper or red pepper flakes to the seasoning mix. The heat pairs beautifully with the garlic butter. I made this for a game day gathering, and it disappeared in minutes.
- Lemon Herb Version: Add 1 teaspoon of dried oregano and the zest of one lemon to the seasoning mix. After brushing with garlic butter, squeeze fresh lemon juice over the top. It is bright, fresh, and perfect for spring.
- Honey Garlic Version: Add 1 tablespoon of honey to the melted garlic butter. Brush it on during the last 2 minutes of cooking for a sticky, sweet-and-savory glaze. This one is my kids’ absolute favorite.
- Boneless Thighs: If you only have boneless, skin-on thighs, reduce the cooking time to 10-12 minutes total (6 minutes per side). The skin will still get crispy, but the meat cooks faster.
- Skinless Option: If you are watching your fat intake, you can use skinless thighs. They will not be crispy, but they will still be juicy and flavorful. Reduce the cooking time by a few minutes and brush with garlic butter generously.
I have also tried this with drumsticks, and it works beautifully—just add a few minutes to the cooking time. The possibilities are endless, and that is what makes this recipe so fun.
Serving & Storage Suggestions
These chicken thighs are best served hot, right after brushing with garlic butter. The skin is at its crispiest within the first 10 minutes, so do not let them sit around too long.
Serving Suggestions: I love serving these with a simple side salad, roasted vegetables, or mashed potatoes. The garlic butter drips down and soaks into whatever is on the plate, which is basically the best part. For a low-carb option, pair them with steamed broccoli or cauliflower rice. And if you are feeling fancy, a side of creamy corn dip is a surprisingly good match.
Storage: Store leftover chicken thighs in an airtight container in the refrigerator for up to 4 days. The skin will lose its crispiness, but the meat will stay juicy.
Reheating: The air fryer is your best friend here. Reheat at 375°F (190°C) for 3-4 minutes, or until the skin crisps back up and the meat is warmed through. You can also reheat in a 375°F oven for about 10 minutes. Avoid the microwave—it will make the skin rubbery and sad.
Freezing: These freeze beautifully. Let the cooked chicken cool completely, then wrap each thigh individually in plastic wrap and place them in a freezer-safe bag. They will keep for up to 3 months. To reheat, thaw in the refrigerator overnight and then reheat in the air fryer as directed above.
I have made a double batch and frozen half for busy weeknights. It is a lifesaver on those days when you just cannot bring yourself to cook.
Nutritional Information & Benefits
Here is the approximate nutritional breakdown for one serving (one chicken thigh with garlic butter):
| Nutrient | Amount |
|---|---|
| Calories | 320 |
| Protein | 28g |
| Fat | 22g |
| Saturated Fat | 9g |
| Carbohydrates | 2g |
| Fiber | 0g |
| Sugar | 0g |
| Sodium | 580mg |
Chicken thighs are a great source of protein, iron, and B vitamins. The skin does add fat, but it also provides that satisfying crunch that makes this recipe so enjoyable. If you are watching your sodium, you can reduce the salt in the seasoning mix and use unsalted butter.
This recipe is naturally gluten-free and low-carb, making it a great option for those following a keto or paleo diet. Just be sure to check your spice blends for any hidden additives if you have dietary restrictions.
I personally love that this recipe feels indulgent without being overly heavy. It is comfort food that fits into a balanced lifestyle, and that is exactly what I need on a busy weeknight.
Conclusion
This crispy air fryer chicken thighs with garlic butter recipe has become a staple in my kitchen for good reason. It is fast, foolproof, and delivers restaurant-quality results with minimal effort. The skin gets impossibly crispy, the meat stays juicy, and the garlic butter takes it all over the top. It is the kind of meal that makes you feel like you have your life together, even on the most chaotic days.
I love that this recipe is endlessly adaptable. Whether you are in the mood for something spicy, herby, or sweet, you can tweak it to match your cravings. And because it comes together in under 30 minutes, it is perfect for weeknights when time is tight but you still want something special.
I would love to hear how this turns out for you! Leave a comment below and let me know what variations you tried, or tag me in your photos on social media. Your feedback helps me create better recipes for you, and I genuinely love seeing your creations. Until next time, happy cooking!
Frequently Asked Questions
Can I use boneless, skinless chicken thighs for this recipe?
Yes, you can, but the texture will be different. Boneless, skinless thighs will not get crispy on the outside, but they will still be juicy and flavorful. Reduce the cooking time to about 10-12 minutes total, and brush generously with garlic butter to add richness.
Do I need to flip the chicken halfway through cooking?
Yes, flipping is important for even cooking and crispiness. Start with the skin side down for the first 12 minutes, then flip so the skin side is up for the remaining time. This allows the skin to crisp directly against the hot air.
Can I make this recipe without an air fryer?
Absolutely. You can bake the chicken thighs in a 425°F (220°C) oven on a wire rack set over a baking sheet. Bake for 25-30 minutes, flipping once, until the skin is golden and crispy. The texture will be slightly different, but it is still delicious.
How do I prevent the garlic butter from burning?
The key is to brush the garlic butter on after the chicken is cooked, not before. The residual heat will melt the butter and infuse the garlic flavor without burning it. If you add it too early, the garlic will turn bitter and the butter will smoke.
Can I double this recipe for a crowd?
Yes, but you will need to cook the chicken in batches to avoid overcrowding the air fryer basket. Each batch takes about 22-24 minutes, so plan accordingly. Keep the cooked chicken warm in a 200°F (90°C) oven while you finish the remaining batches.
Pin This Recipe!

Crispy Air Fryer Chicken Thighs with Garlic Butter

Juicy, crispy air fryer chicken thighs brushed with garlic butter. Ready in under 30 minutes with simple ingredients for a perfect weeknight dinner.
- Prep Time: 5 minutes
- Cook Time: 22-24 minutes
- Total Time: 27-29 minutes
- Yield: 4 servings 1x
- Category: Main Course
- Cuisine: American
Ingredients
- 4–6 bone-in, skin-on chicken thighs
- 1 teaspoon garlic powder
- 1/2 teaspoon onion powder
- 1 teaspoon smoked paprika
- 1 teaspoon fine sea salt
- 1/2 teaspoon black pepper
- 3 tablespoons unsalted butter
- 3 cloves fresh garlic, minced
- Fresh parsley for garnish (optional)
Instructions
- Preheat air fryer to 400°F (200°C).
- Pat chicken thighs dry with paper towels.
- Mix garlic powder, onion powder, smoked paprika, salt, and pepper. Season both sides of chicken.
- Place thighs skin-side down in a single layer in air fryer basket, leaving space between them.
- Air fry at 400°F for 12 minutes.
- Flip thighs skin-side up and air fry for another 10-12 minutes until internal temperature reaches 175-185°F.
- While chicken cooks, melt butter in a small saucepan over low heat. Add minced garlic and cook 30 seconds until fragrant. Remove from heat.
- Brush garlic butter over hot chicken. Garnish with parsley if desired.
- Let rest 5 minutes before serving.
Notes
Pat skin dry twice for maximum crispiness. Do not overcrowd the basket. Brush garlic butter after cooking to prevent burning. Let chicken rest 5 minutes before serving.
Nutrition
- Serving Size: 1 chicken thigh
- Calories: 320
- Sodium: 580
- Fat: 22
- Saturated Fat: 9
- Carbohydrates: 2
- Protein: 28
Keywords: air fryer chicken thighs, crispy chicken thighs, garlic butter chicken, easy chicken recipe, weeknight dinner