I pulled the baking sheet out of the oven, and the smell of browned butter and pumpkin spice filled the whole kitchen. My husband wandered in, coffee cup in hand, and just stood there looking at them. He didn’t say anything for a solid ten seconds. Then he asked if he could have one before they cooled down. That’s when I knew this small-batch pumpkin scones recipe was a keeper.
Honestly, I wasn’t even trying to create the perfect fall pastry that day. I had a third of a can of pumpkin puree sitting in the fridge leftover from making a batch of creamy pumpkin cheesecake bars the weekend before. I hate wasting ingredients, and I didn’t want to make another full batch of anything. I just wanted enough scones for the two of us, maybe a third one for the freezer. Something that felt cozy but didn’t leave me with a dozen pastries going stale by Tuesday.
These scones turned out exactly how I hoped they would — tender, flaky, and not too sweet. The maple glaze on top is thin enough to soak into all those craggy cracks but thick enough to leave a sticky-sweet finish on your lips. And the small-batch thing? It’s the whole point. No leftovers lingering around tempting you all week. Just enough to feel satisfied.
So if you’ve been looking for a pumpkin scone recipe that doesn’t require a trip to the coffee shop or a half-day in the kitchen, this one’s for you. It’s the kind of baking project that feels special without being a production.
Why You’ll Love This Recipe
Let me tell you why these scones keep showing up on my counter every single fall. I’ve tested this recipe about five times now, tweaking the butter temperature and the glaze consistency until everything clicked. Here’s what makes it worth your time:
- Small-Batch Perfection : This recipe makes just 6 scones. No more, no less. Perfect for a quiet weekend morning or sharing with one other person. You won’t be eating stale scones four days later.
- Simple Ingredients : You probably have most of these already. Flour, butter, pumpkin puree, sugar, spices. The maple glaze uses just three ingredients you likely have in your pantry right now.
- Quick to Make : From start to finish, you’re looking at about 35 minutes. The dough comes together in one bowl, and there’s no waiting around for anything to rise or chill.
- Perfect for Fall Mornings : These scones pair beautifully with a warm drink. I love having one alongside a cozy spiced pumpkin chai latte with oat milk on chilly mornings.
- Better Than Bakery Scones : Most coffee shop scones are dry and crumbly. These stay soft in the middle with just the right amount of crunch on the edges. The maple glaze makes them taste like something fancy, but they’re secretly simple.
What makes this recipe different from all the other pumpkin scone recipes out there? It’s the browned butter. I know, I know — browning butter sounds like an extra step you don’t want. But trust me, it takes about 4 minutes and it transforms the whole scone. That nutty, toasty flavor mixed with pumpkin and warm spices is something you can’t get from plain melted butter. It’s the secret that makes people close their eyes after the first bite.
This is the kind of recipe that makes you feel like you’ve got your life together, even if it’s just for a Tuesday morning. It’s comfort food that comes together fast, with ingredients you already have, and it makes your kitchen smell like heaven.
What Ingredients You Will Need
This recipe uses simple, everyday ingredients to create something that tastes bakery-fancy without any weird additives or hard-to-find items. Here’s what you’ll need:
For the Scones
- All-purpose flour — 1 ½ cups (180g). Spoon and level it into your measuring cup for the most accurate measurement.
- Granulated sugar — 3 tablespoons (36g). Just enough to sweeten without overpowering the pumpkin.
- Baking powder — 2 teaspoons. Make sure it’s fresh for the best rise.
- Pumpkin pie spice — 1 ½ teaspoons. Store-bought is fine, or make your own with cinnamon, nutmeg, ginger, and cloves.
- Ground cinnamon — ½ teaspoon. Adds extra warmth.
- Salt — ¼ teaspoon. Balances the sweetness and brings out the pumpkin flavor.
- Unsalted butter — 5 tablespoons (70g), cold and cut into small cubes. You’ll brown 4 tablespoons and keep 1 tablespoon cold for cutting into the flour.
- Pumpkin puree — ⅓ cup (80g). Not pumpkin pie filling. Make sure you grab the pure stuff.
- Heavy cream — 3 tablespoons (45ml). Plus a little extra for brushing the tops.
- Vanilla extract — 1 teaspoon. Pure vanilla extract makes a difference here.
For the Maple Glaze
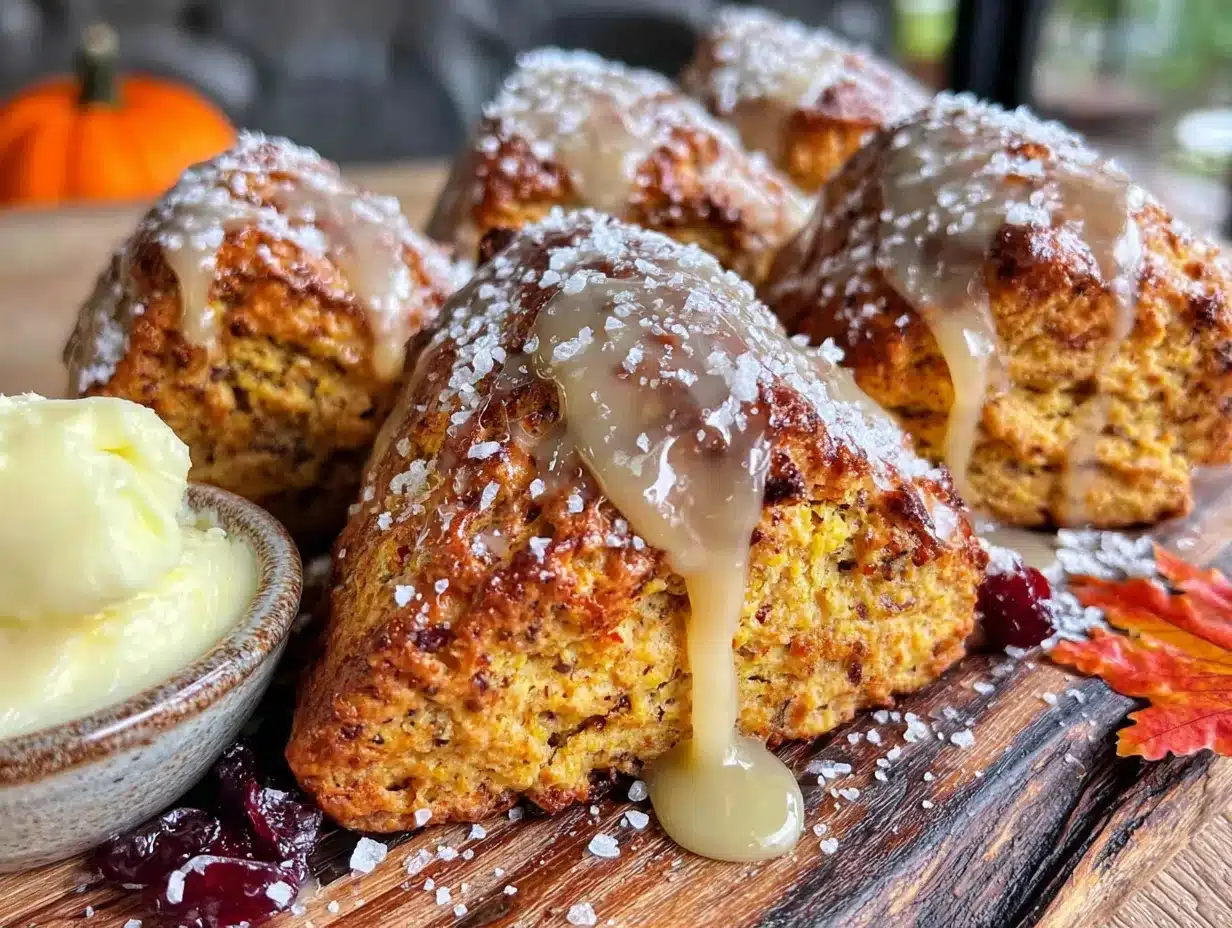
- Powdered sugar — ¾ cup (90g). Sifted if it’s clumpy.
- Pure maple syrup — 2 tablespoons (30ml). Use the real stuff, not pancake syrup. Grade A dark amber works beautifully.
- Milk or heavy cream — 1 to 2 teaspoons (5-10ml). Just enough to get the right drizzle consistency.
A quick note on the butter — I use unsalted butter so I can control the salt level. If you only have salted butter on hand, just reduce the added salt to a pinch. For the pumpkin puree, I prefer Libby’s brand for its consistent thickness, but any 100% pure pumpkin works great. Avoid pumpkin pie filling because it’s already sweetened and spiced, which will throw off the whole recipe.
If you want to make these scones dairy-free, you can substitute the butter with a good quality vegan butter block (not the spreadable kind) and use full-fat oat milk or coconut cream instead of heavy cream. The texture will be slightly different, but still delicious.
Equipment Needed
You don’t need any fancy gadgets for this recipe. Here’s what I use:
- Baking sheet — A standard half-sheet pan works perfectly. Line it with parchment paper for easy cleanup.
- Large mixing bowl — For combining the dry ingredients.
- Small skillet or saucepan — For browning the butter. A light-colored pan helps you see when the butter turns golden.
- Pastry cutter or two forks — For cutting the cold butter into the flour. You can also use your fingertips if you work quickly.
- Bench scraper or sharp knife — For cutting the scone dough into wedges.
- Pastry brush — For brushing cream on top before baking. A silicone one works great.
- Cooling rack — Helps the scones cool evenly so the glaze sets properly.
If you don’t have a pastry cutter, honestly, two forks work just as well. I’ve also used a food processor in a pinch — just pulse the dry ingredients with the cold butter until it looks like coarse meal, then transfer to a bowl and add the wet ingredients. Just be careful not to over-process or the butter will get too warm.
Preparation Method
Let me walk you through this step by step. I’ve included all the little details I wish someone had told me the first time I made scones.
- Preheat your oven to 400°F (200°C). Line a baking sheet with parchment paper and set it aside. Getting the oven hot before you start mixing is key — scones need that initial blast of heat to rise properly.
- Brown the butter. Place 4 tablespoons of the cold butter in a small skillet or saucepan over medium heat. Stir it constantly with a spatula or wooden spoon. The butter will melt, then foam, then start to turn golden. Keep stirring until you see little brown specks forming at the bottom and it smells nutty and amazing — this takes about 3-4 minutes. Immediately pour it into a small bowl to stop the cooking. Let it cool for 5 minutes while you prep the other ingredients. Don’t skip the browning step, even if you’re tempted. It makes a huge difference.
- Mix the dry ingredients. In a large mixing bowl, whisk together the flour, sugar, baking powder, pumpkin pie spice, cinnamon, and salt. Make sure the baking powder is evenly distributed so your scones rise evenly.
- Cut in the cold butter. Take the remaining 1 tablespoon of cold butter (the one you didn’t brown) and cut it into small cubes. Drop them into the flour mixture. Using a pastry cutter or two forks, cut the butter into the flour until the mixture looks like coarse meal with some pea-sized butter pieces remaining. Work quickly so the butter stays cold — cold butter is what creates those flaky layers.
- Combine the wet ingredients. In a separate small bowl, whisk together the pumpkin puree, heavy cream, vanilla extract, and the cooled browned butter. The browned butter should still be liquid but not hot — warm enough to mix easily but not so hot it cooks the cream.
- Bring it together. Pour the wet ingredients into the dry ingredients. Stir with a spatula just until the dough comes together. It will look shaggy and a little messy — that’s exactly what you want. Do not overmix or your scones will be tough. If there are a few dry spots at the bottom, use your hands to gently press them in.
- Shape the dough. Turn the dough out onto a lightly floured surface. Gently bring it together into a ball, then pat it into a 6-inch circle that’s about ¾ inch thick. Don’t use a rolling pin — your hands work better here. The dough should be soft but not sticky. If it’s too sticky, sprinkle a tiny bit more flour on top.
- Cut the scones. Using a sharp knife or bench scraper, cut the circle into 6 equal wedges like you’re cutting a pizza. Try to make clean cuts straight down — don’t saw back and forth or the edges won’t rise as nicely.
- Bake. Place the scones on the prepared baking sheet, spacing them about 2 inches apart. Brush the tops with a little extra heavy cream — this helps them get that golden, slightly crunchy top. Bake for 14-16 minutes, until the scones are golden brown on the edges and a toothpick inserted in the center comes out clean. Your kitchen should smell incredible at this point.
- Cool. Transfer the scones to a cooling rack and let them cool for at least 10 minutes before glazing. If you glaze them while they’re too hot, the glaze will just melt right off and pool on the rack.
- Make the glaze. While the scones cool, whisk together the powdered sugar, maple syrup, and 1 teaspoon of milk or cream. Add the remaining teaspoon of milk if needed to reach a pourable consistency. The glaze should be thick but runny enough to drizzle — think the texture of slightly warm honey.
- Glaze and serve. Drizzle the maple glaze over the warm scones using a spoon or a small whisk. Let it set for about 5 minutes before serving. The glaze will harden slightly as it cools, creating that beautiful crackled look.
Cooking Tips & Techniques
I’ve made scones that came out flat, tough, and dry more times than I’d like to admit. Here’s what I learned the hard way so you don’t have to:
Keep everything cold. This is the number one rule of scone making. The cold butter creates steam pockets as it melts in the oven, which gives you those flaky layers. If your kitchen is warm, pop the shaped scones in the fridge for 10 minutes before baking. I’ve done this plenty of times when my apartment was too warm.
Don’t overwork the dough. Scone dough should be handled gently and minimally. The more you mix and knead, the more gluten develops, and the tougher your scones will be. I used to knead my scone dough like bread dough and wondered why they came out like hockey pucks. Just bring it together until it holds, then stop.
Measure your flour correctly. Spoon the flour into your measuring cup and level it off with a knife. Scooping directly with the measuring cup packs the flour down, and you can end up with 20-30% more flour than the recipe calls for. That extra flour makes dry, dense scones every time.
Watch the browning butter carefully. Butter goes from perfectly browned to burnt in about 30 seconds. Keep stirring and watch for those brown specks. When it smells nutty and toasty, pull it off the heat immediately. I’ve burned butter more times than I want to admit — it’s a sad, smoky mess.
Let the scones cool before glazing. I know it’s tempting to drizzle that maple glaze on as soon as they come out of the oven, but patience pays off here. Warm scones will absorb the glaze instead of letting it sit on top. You want that beautiful glaze layer, not soggy scones.
Variations & Adaptations
One of the best things about this recipe is how easy it is to adapt. Here are some variations I’ve tried and loved:
Pumpkin Chocolate Chip Scones — Fold in ⅓ cup of dark chocolate chips or white chocolate chips right before shaping the dough. The chocolate melts into little pockets of sweetness that pair beautifully with the pumpkin spice. I made this version for a friend who doesn’t like maple, and she ate three in one sitting.
Gluten-Free Version — Substitute the all-purpose flour with a 1:1 gluten-free baking flour blend that contains xanthan gum. I’ve tested this with Bob’s Red Mill 1:1 Baking Flour and it works beautifully. The texture is slightly more tender than the original, but still delicious. Add an extra tablespoon of heavy cream since gluten-free flours tend to absorb more liquid.
Vegan Version — Use a vegan butter block (like Miyoko’s or Earth Balance) for both the browned butter and the cold butter. Replace the heavy cream with full-fat oat milk or canned coconut cream. The scones won’t be quite as flaky, but they’ll still be tender and flavorful. I made these for a vegan brunch and they disappeared fast.
Maple Pecan Scones — Toast ¼ cup of chopped pecans and fold them into the dough along with the wet ingredients. The crunchy nuts add texture and the maple flavor pairs perfectly with pecans. Sprinkle a few extra chopped pecans on top of the glaze for a pretty presentation.
Savory Pumpkin Scones — This is a fun twist if you’re feeling adventurous. Reduce the sugar to 1 tablespoon, skip the pumpkin pie spice and cinnamon, and add ½ teaspoon of black pepper, ½ teaspoon of garlic powder, and ¼ cup of shredded sharp cheddar cheese. The browned butter and pumpkin still shine, but in a savory way. These are incredible with a bowl of creamy roasted tomato basil soup.
Serving & Storage Suggestions
These scones are best served warm, ideally within an hour of baking. The edges are slightly crisp, the inside is tender, and the maple glaze is still a little soft. Pair them with a hot cup of coffee or a homemade pumpkin spice latte with real pumpkin for the ultimate fall breakfast or afternoon treat.
For a more indulgent serving, split a scone in half and toast it lightly, then spread a little salted butter on the cut sides. The butter melts into the warm scone and the salt balances the sweetness of the glaze. I won’t tell anyone if you eat it this way.
Storage: Store leftover scones in an airtight container at room temperature for up to 2 days. After that, they start to dry out. If you live in a humid climate, the glaze might get a little sticky — just pop them in a 300°F oven for 5 minutes to re-crisp the edges.
Freezing: These scones freeze beautifully. You can freeze the baked, unglazed scones for up to 3 months. Wrap each scone individually in plastic wrap, then place them in a freezer bag. When you’re ready to eat, thaw at room temperature, then warm in a 350°F oven for 5-7 minutes. Glaze after warming. You can also freeze the unbaked scone wedges on a baking sheet, then transfer to a freezer bag. Bake from frozen, adding 2-3 extra minutes to the baking time.
Reheating: The best way to reheat a scone is in the oven or a toaster oven at 350°F for 5 minutes. The microwave works in a pinch but makes the edges soft instead of crisp. If you’re using the microwave, just do 15 seconds — any longer and you’ll have a rubbery scone.
The flavors actually develop a bit overnight. Day-old scones taste more deeply spiced and the maple glaze sets into a nice crust. They’re still delicious, just not quite as tender as fresh-baked.
Nutritional Information & Benefits
Here’s the approximate nutritional breakdown for one scone (with glaze), based on the recipe as written:
| Nutrient | Amount per Scone |
|---|---|
| Calories | 285 |
| Total Fat | 13g |
| Saturated Fat | 8g |
| Carbohydrates | 38g |
| Sugar | 18g |
| Fiber | 1.5g |
| Protein | 4g |
| Vitamin A | 45% DV |
These scones aren’t health food, but they do have some redeeming qualities. Pumpkin is packed with Vitamin A, which supports eye health and immune function. The pumpkin also adds moisture, which means you can use less butter than traditional scone recipes. The maple syrup in the glaze is a more natural sweetener than refined sugar, with a lower glycemic index and trace amounts of minerals like zinc and manganese.
If you’re watching your sugar intake, you can reduce the glaze or skip it entirely — the scones themselves are only lightly sweetened. For a lower-carb option, try using a sugar substitute like monk fruit sweetener in the dough and a sugar-free maple syrup for the glaze. The texture will be slightly different, but still satisfying.
These scones contain dairy and gluten. For dairy-free or gluten-free options, check the variations section above.
Conclusion
These cozy small-batch pumpkin scones with maple glaze have become my go-to fall baking project for a reason. They’re quick enough for a weekday morning but special enough for a weekend brunch. The browned butter adds a depth of flavor that makes them taste like something from a fancy bakery, but they come together in one bowl with ingredients you probably already have.
What I love most about this recipe is how forgiving it is. The first time I made it, I forgot to add the vanilla and they still turned out great. Another time I over-browned the butter and it was only slightly darker than usual — still delicious. It’s the kind of recipe that works with your schedule, not against it.
I’d love to hear how these turn out for you. Did you add chocolate chips? Skip the glaze? Try the savory version? Drop a comment below and let me know what you did. And if you share a photo on social media, tag me — I love seeing your baking creations. These scones are meant to be shared, even if it’s just with one other person on a quiet autumn morning.
Happy baking, friends. Your kitchen is about to smell incredible.
Frequently Asked Questions
Can I use pumpkin pie filling instead of pumpkin puree?
No, I wouldn’t recommend it. Pumpkin pie filling is already sweetened and spiced, which will throw off the balance of this recipe. It also has a different texture that can make the scones too wet. Stick with 100% pure pumpkin puree for the best results.
Why did my scones turn out flat?
Flat scones usually mean one of three things: your baking powder is old, your butter was too warm when you mixed it in, or you overworked the dough. Check the expiration date on your baking powder and make sure your butter is cold when you cut it into the flour. Also, handle the dough as little as possible.
Can I make the dough ahead of time?
Yes! You can shape the scone wedges, place them on a parchment-lined baking sheet, and refrigerate them for up to 24 hours before baking. Cover them loosely with plastic wrap. You can bake them straight from the fridge — just add 1-2 minutes to the baking time.
How do I know when the scones are done baking?
The scones are done when the edges are golden brown and the tops look dry and lightly golden. You can also insert a toothpick into the center of a scone — it should come out clean or with just a few moist crumbs. The bottoms should be golden brown when you lift one up.
My maple glaze is too thin. How do I fix it?
If your glaze is runny, just add a little more powdered sugar, one tablespoon at a time, until it reaches the right consistency. If it’s too thick, add a tiny splash of milk or cream. The perfect glaze should drizzle off a spoon in a steady ribbon but still hold its shape slightly on the scone.
Pin This Recipe!
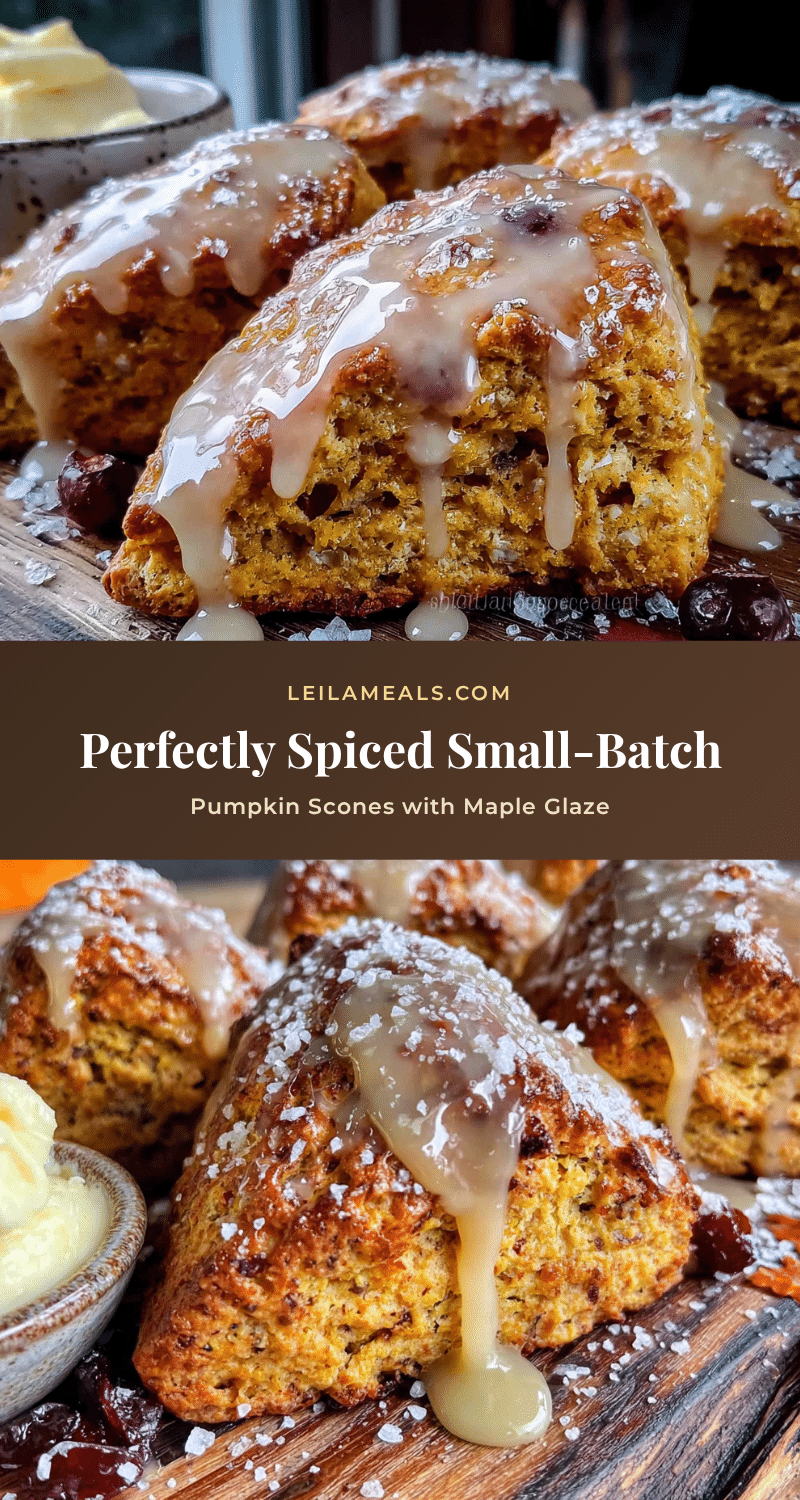
Cozy Small-Batch Pumpkin Scones with Maple Glaze
Tender, flaky pumpkin scones made in a small batch with browned butter and topped with a sweet maple glaze. Perfect for a cozy fall morning with a warm drink.
- Prep Time: 15 minutes
- Cook Time: 16 minutes
- Total Time: 35 minutes
- Yield: 6 scones 1x
- Category: Breakfast
- Cuisine: American
Ingredients
- 1 ½ cups (180g) all-purpose flour
- 3 tablespoons (36g) granulated sugar
- 2 teaspoons baking powder
- 1 ½ teaspoons pumpkin pie spice
- ½ teaspoon ground cinnamon
- ¼ teaspoon salt
- 5 tablespoons (70g) unsalted butter, cold and cut into small cubes (4 tablespoons for browning, 1 tablespoon for cutting into flour)
- ⅓ cup (80g) pumpkin puree (not pumpkin pie filling)
- 3 tablespoons (45ml) heavy cream, plus extra for brushing
- 1 teaspoon vanilla extract
- ¾ cup (90g) powdered sugar, sifted if clumpy
- 2 tablespoons (30ml) pure maple syrup
- 1 to 2 teaspoons (5-10ml) milk or heavy cream (for glaze)
Instructions
- Preheat your oven to 400°F (200°C). Line a baking sheet with parchment paper and set aside.
- Brown the butter: Place 4 tablespoons of the cold butter in a small skillet or saucepan over medium heat. Stir constantly until the butter melts, foams, and turns golden with brown specks (about 3-4 minutes). Immediately pour into a small bowl to stop cooking. Let cool for 5 minutes.
- Mix the dry ingredients: In a large mixing bowl, whisk together the flour, sugar, baking powder, pumpkin pie spice, cinnamon, and salt.
- Cut in the cold butter: Add the remaining 1 tablespoon of cold butter (cut into small cubes) to the flour mixture. Using a pastry cutter or two forks, cut the butter into the flour until the mixture looks like coarse meal with some pea-sized butter pieces.
- Combine the wet ingredients: In a separate small bowl, whisk together the pumpkin puree, heavy cream, vanilla extract, and cooled browned butter.
- Bring it together: Pour the wet ingredients into the dry ingredients. Stir with a spatula just until the dough comes together (it will be shaggy). Do not overmix.
- Shape the dough: Turn the dough out onto a lightly floured surface. Gently bring it together into a ball, then pat into a 6-inch circle about ¾ inch thick.
- Cut the scones: Using a sharp knife or bench scraper, cut the circle into 6 equal wedges. Make clean cuts straight down.
- Bake: Place the scones on the prepared baking sheet, spacing them about 2 inches apart. Brush tops with extra heavy cream. Bake for 14-16 minutes until golden brown on edges and a toothpick inserted in center comes out clean.
- Cool: Transfer scones to a cooling rack and let cool for at least 10 minutes before glazing.
- Make the glaze: While scones cool, whisk together powdered sugar, maple syrup, and 1 teaspoon of milk or cream. Add remaining teaspoon if needed to reach a pourable consistency (thick but runny).
- Glaze and serve: Drizzle the maple glaze over the warm scones. Let set for about 5 minutes before serving.
Notes
Keep butter cold for flaky layers. Don’t overwork the dough. Let scones cool before glazing to prevent glaze from melting off. For best results, use fresh baking powder and real maple syrup.
Nutrition
- Serving Size: 1 scone
- Calories: 285
- Sugar: 18
- Sodium: 200
- Fat: 13
- Saturated Fat: 8
- Carbohydrates: 38
- Fiber: 1.5
- Protein: 4
Keywords: pumpkin scones, small batch scones, maple glaze, fall baking, browned butter scones, easy scone recipe


