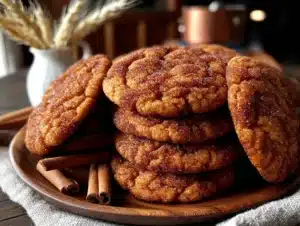
I want a snickerdoodle. Not just any snickerdoodle, though—the kind that hits that fall craving square in the chest. The kind where the butter has gone nutty and brown, the pumpkin adds a quiet heft, and the cinnamon-sugar coating cracks just a little when you bite in. I have the butter. I have the pumpkin. What I don’t have is a recipe that puts them together in a way that makes sense. So I’m making one up on the spot, standing in my kitchen at 9 p.m. on a Tuesday, because that’s how good cookies happen—when you stop waiting for permission.
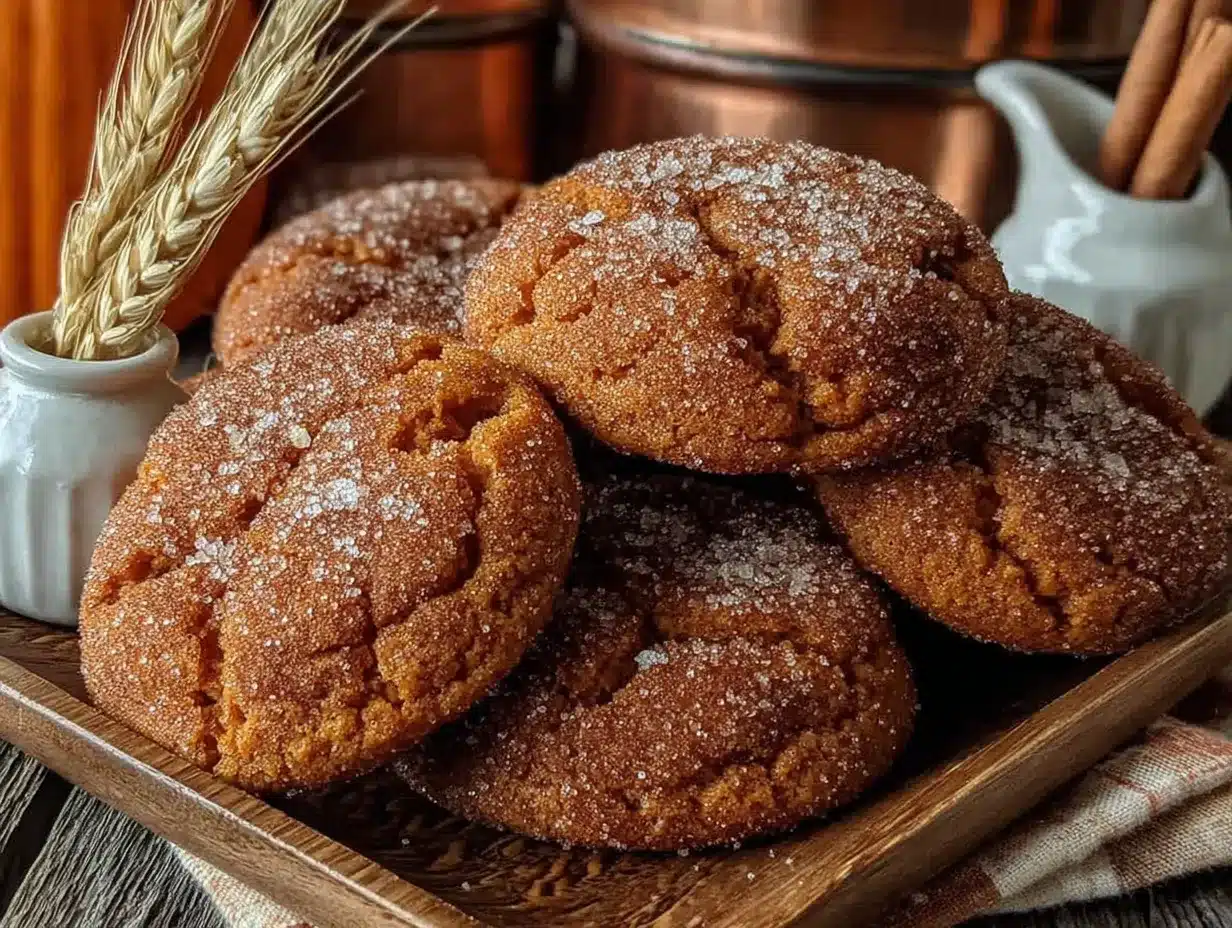
This is not another pumpkin cookie that tastes like air and sadness. This is a brown butter pumpkin snickerdoodle cookie, and it’s the cookie I didn’t know I needed until I was elbow-deep in browned butter and cinnamon. The brown butter brings this deep, almost butterscotch warmth that wraps around the pumpkin like a cozy sweater. The pumpkin keeps the centers soft and pillowy, while the edges get that perfect crinkly top from the sugar coating. It’s the kind of cookie that makes you close your eyes after the first bite, not for drama, but because it’s actually that good.
I’ve made a lot of pumpkin cookies over the years—some good, some forgettable—but these brown butter pumpkin snickerdoodle cookies are the ones I keep coming back to. They’re the ones I make when I want to impress myself, not just other people. And honestly? They’re the ones that finally made me stop searching for the perfect fall cookie recipe. Because I found it.
Why You’ll Love This Recipe
Let me tell you why these cookies are about to become your new fall obsession. I’ve tested this recipe six times (yes, six—my family is very patient) to get the texture and flavor just right. The first batch was too cakey. The second was too flat. But the third? That was the sweet spot, and I’ve refined it from there.
- Quick & Easy: From start to finish, these come together in about 30 minutes. No chilling required—though you can if you want deeper flavor. Perfect for those “I need cookies NOW” moments.
- Simple Ingredients: You probably have most of these in your pantry already. Pumpkin puree, butter, flour, sugar, and cinnamon. No weird extracts or specialty flours needed.
- Perfect for Fall: These are made for cozy afternoons, Thanksgiving dessert tables, and those crisp evenings when you want something warm with your tea. They pair beautifully with a spiced pumpkin chai latte for the ultimate fall moment.
- Crowd-Pleaser: I brought these to a potluck last month, and three people asked for the recipe before I even sat down. Kids love them, adults love them, and even the pumpkin skeptics were reaching for seconds.
- Unbelievably Delicious: The brown butter adds this nutty, toasty flavor that you just can’t get from regular butter. It’s the secret weapon here, and it makes these cookies taste like you spent way more effort than you actually did.
What makes these different from every other pumpkin cookie recipe out there? It’s the technique. Browning the butter first deepens the flavor profile in a way that complements the pumpkin without overwhelming it. Plus, I use a higher ratio of brown sugar to white sugar, which keeps the cookies tender and gives them that subtle molasses note that pairs so perfectly with pumpkin. This isn’t just another version of a pumpkin cookie—it’s the version you’ll actually want to make again and again.
These cookies are the kind that make you feel like you’ve got your life together, even if you’re eating three of them for breakfast. They’re comfort food, but elevated. Simple, but special. And they’re exactly what you need this fall.
What Ingredients You Will Need
This recipe uses simple, wholesome ingredients to deliver that signature snickerdoodle tang with a cozy pumpkin twist. Most of these are pantry staples, though you’ll want to grab some pumpkin puree and maybe a fresh stick of butter for browning.
- Unsalted butter, 1 cup (2 sticks) — You’ll brown this, so don’t skip the unsalted part. Salted butter can foam unpredictably and throw off the seasoning. I prefer Kerrygold for its rich flavor, but any good-quality unsalted butter works.
- Pumpkin puree, ½ cup — Make sure it’s 100% pure pumpkin, not pumpkin pie filling. Libby’s is my go-to because it’s consistent and not too watery. If your pumpkin puree looks a bit loose, blot it with a paper towel to remove excess moisture.
- Granulated sugar, 1 cup — For the dough and the coating. You’ll need extra for rolling.
- Brown sugar, ½ cup, packed — Light or dark works, but dark brown sugar gives a deeper molasses flavor that plays beautifully with the brown butter. I use dark brown sugar in the fall and light brown sugar the rest of the year.
- All-purpose flour, 2 cups — Spoon and level it. Don’t scoop directly from the bag or you’ll end up with dry cookies. If you want a whole wheat option, swap in ½ cup whole wheat pastry flour for ½ cup all-purpose.
- Baking soda, 1 teaspoon — Helps the cookies spread just enough without turning into pancakes.
- Cream of tartar, 2 teaspoons — This is the secret to the snickerdoodle tang. Don’t skip it—baking powder is not a substitute here. Cream of tartar gives that signature slightly sour note that makes snickerdoodles, well, snickerdoodles.
- Salt, ½ teaspoon — I use fine sea salt. If you only have kosher, use a full teaspoon.
- Pumpkin pie spice, 1½ teaspoons — Store-bought is fine, but I make my own with cinnamon, nutmeg, ginger, and a tiny pinch of cloves. It’s fresher and you can adjust it to your taste.
- Cinnamon, 1 teaspoon (plus more for coating) — You’ll need about 2 tablespoons total for the cinnamon-sugar coating. I use Saigon cinnamon for its bold, sweet warmth.
- Egg, 1 large, room temperature — Cold eggs can seize the brown butter. Leave it on the counter for 30 minutes or place it in a bowl of warm water for 5 minutes.
- Vanilla extract, 1½ teaspoons — Pure vanilla, not imitation. It makes a difference in a simple cookie like this one. I like Nielsen-Massey, but any pure vanilla works.
For the coating:
- Granulated sugar, ¼ cup
- Cinnamon, 1½ tablespoons
- Pinch of nutmeg (optional) — I add this in the fall for extra warmth.
Equipment Needed
You don’t need a fancy kitchen to make these cookies, but a few key tools will make the process smoother.
- Light-colored saucepan or skillet — This is crucial for browning butter. A dark pan makes it hard to see the color change, and you’ll end up with burnt butter. I use a stainless steel saucepan. A heavy-bottomed one distributes heat more evenly.
- Stand mixer or hand mixer — You can mix by hand, but a mixer makes creaming the butter and sugar much easier, especially after the brown butter has cooled. I use my KitchenAid for this, but a hand mixer works just fine.
- Large mixing bowls — One for dry ingredients, one for wet. Glass or stainless steel is best.
- Whisk — For combining dry ingredients evenly.
- Spatula — A silicone spatula is perfect for scraping down the bowl and folding in the flour.
- Cookie scoop (1.5-tablespoon size) — This gives you uniform cookies that bake evenly. If you don’t have one, use two spoons to portion the dough.
- Baking sheets — I use light-colored aluminum sheets. Dark sheets can cause the bottoms to burn before the centers are done. Line them with parchment paper or a silicone baking mat.
- Cooling rack — Essential for letting the cookies cool properly so they don’t get soggy on the bottom.
If you don’t have a cookie scoop, a tablespoon measure works in a pinch. And if you’re using a dark baking sheet, lower the oven temperature by 25°F to prevent burning. I learned that the hard way after ruining a batch of my brown butter pumpkin chocolate chip cookies because I wasn’t paying attention to the pan color.
Preparation Method
Step 1: Brown the Butter
Place the butter in your light-colored saucepan over medium heat. Let it melt completely, then swirl the pan occasionally. You’ll hear it crackle and pop as the water cooks out—that’s normal. After a few minutes, the butter will start to foam, and you’ll see little brown specks forming at the bottom. This is the milk solids toasting, and it’s where the magic happens. Keep swirling until the butter turns a deep amber color and smells nutty and fragrant. This takes about 5-7 minutes. As soon as it reaches that color, pour it into a heat-safe bowl to stop the cooking process. Don’t walk away from the stove—brown butter goes from perfect to burnt in about 30 seconds.
Step 2: Cool the Brown Butter
Let the brown butter cool for about 10-15 minutes. You want it warm but not hot—if it’s too hot, it will cook the egg when you add it. If you’re in a hurry, you can place the bowl in the fridge for 5 minutes, stirring occasionally. The butter should be liquid but comfortable to touch, like warm bathwater.
Step 3: Mix the Dry Ingredients
In a medium bowl, whisk together the flour, baking soda, cream of tartar, salt, and pumpkin pie spice. Set this aside. Whisking aerates the flour and ensures the leavening agents are evenly distributed—no one wants a pocket of baking soda in one cookie.
Step 4: Cream the Butter and Sugars
In the bowl of your stand mixer (or a large bowl with a hand mixer), combine the cooled brown butter, granulated sugar, and brown sugar. Beat on medium speed for 2-3 minutes until the mixture looks light and fluffy. It won’t get as fluffy as regular butter because of the brown butter’s liquid content, but it should look well combined and slightly thickened. Scrape down the sides and bottom of the bowl with your spatula.
Step 5: Add the Wet Ingredients
Add the pumpkin puree, egg, and vanilla extract to the butter-sugar mixture. Beat on low speed until just combined. The mixture might look a little curdled or separated at this point—don’t panic. That’s just the pumpkin and butter not wanting to be friends yet. They’ll come together once the flour is added. Scrape down the bowl again.
Step 6: Combine Wet and Dry
Add the dry ingredients to the wet mixture in two additions, mixing on low speed after each until just combined. You don’t want to overmix here, or the cookies will be tough. Stop as soon as you don’t see any more streaks of flour. The dough will be soft and slightly sticky—that’s exactly what you want.
Step 7: Make the Cinnamon-Sugar Coating
In a small bowl, whisk together the ¼ cup granulated sugar, 1½ tablespoons cinnamon, and the optional pinch of nutmeg. Set this near your baking station.
Step 8: Shape and Coat the Cookies
Preheat your oven to 350°F (175°C) and line two baking sheets with parchment paper. Using your cookie scoop or a tablespoon, portion out about 1.5 tablespoons of dough. Roll each portion into a ball between your palms—the dough will be soft, so work quickly. Drop each ball into the cinnamon-sugar mixture and roll it around to coat generously. Place the coated dough balls on the prepared baking sheets, spacing them about 2 inches apart. They’ll spread, so don’t crowd them.
Step 9: Bake
Bake for 10-12 minutes, rotating the pans halfway through. The cookies should look puffed and set around the edges but still slightly soft in the center. They’ll continue to set as they cool, so don’t overbake them. If you want softer, chewier cookies, pull them at 10 minutes. For slightly crisper edges, go to 12 minutes. The tops should have that classic crinkly snickerdoodle look.
Step 10: Cool and Enjoy
Let the cookies cool on the baking sheet for 5 minutes—this is important because they’re fragile right out of the oven. After 5 minutes, transfer them to a wire rack to cool completely. Or, you know, eat one warm. I won’t judge. The brown butter flavor really shines once they’ve cooled for about 10 minutes, but a warm cookie with a glass of cold milk is hard to beat.
Cooking Tips & Techniques
I’ve made this recipe enough times to know exactly where things can go wrong. Here’s what I’ve learned the hard way so you don’t have to.
Don’t skip the cream of tartar. I know it’s a weird ingredient that you might not have on hand, but it’s non-negotiable for snickerdoodles. It gives that signature tangy flavor and helps with the texture. Without it, you just have a cinnamon sugar cookie—which is fine, but it’s not a snickerdoodle. If you absolutely must substitute, use 2 teaspoons of lemon juice or white vinegar, but the texture will be slightly different.
Watch the brown butter like a hawk. I ruined two batches of butter before I got it right. The butter will go from pale yellow to golden to amber very quickly. Once you see those brown specks forming and smell that nutty aroma, pull it off the heat immediately. Pour it into a cool bowl to stop the cooking. Burnt brown butter tastes bitter and will ruin the cookies.
Chill the dough if you have time. While this recipe works without chilling, refrigerating the dough for 30 minutes to an hour will deepen the flavors and prevent the cookies from spreading too much. The brown butter flavor becomes more pronounced after resting. If you’re making these ahead, you can chill the dough for up to 3 days—just let it sit at room temperature for 10 minutes before scooping.
Use a cookie scoop for consistent size. Uniform cookies bake evenly. I use a 1.5-tablespoon scoop, and I get exactly 24 cookies every time. If you’re using a larger scoop, adjust the baking time by 1-2 minutes.
Don’t overmix the dough. Once you add the flour, mix only until you don’t see any white streaks. Overmixing develops gluten, which makes cookies tough and cakey instead of tender and chewy. I’ve made this mistake more times than I’d like to admit, and the difference is noticeable.
Room temperature ingredients matter. Cold egg and cold pumpkin can seize the brown butter, creating a greasy dough. Let your egg sit out for 30 minutes, and if your pumpkin puree is straight from the fridge, let it come to room temperature too. Your cookies will thank you.
If you’re looking for another fall treat that uses similar techniques, my small batch pumpkin muffins with maple glaze are a great option when you don’t want a full batch of cookies.
Variations & Adaptations
One of the best things about this recipe is how adaptable it is. Here are some of my favorite variations.
Gluten-Free Version: Substitute the all-purpose flour with a 1:1 gluten-free baking flour blend that contains xanthan gum. I’ve used Bob’s Red Mill 1:1 Baking Flour with great results. The texture is slightly more delicate, so handle the dough gently. Bake for the same amount of time, but check at 10 minutes.
Dairy-Free Version: Use vegan butter sticks (like Earth Balance) for the brown butter. The browning process works the same way, though the flavor is slightly different. Coconut oil works in a pinch, but the cookies will be flatter and have a subtle coconut taste that might clash with the pumpkin.
Pumpkin Spice Extra: If you’re a pumpkin spice fanatic (I see you), add an extra teaspoon of pumpkin pie spice to the dough and a pinch of ginger to the coating. It amps up the warmth without overpowering the brown butter.
Chocolate Lover’s Version: Fold in ½ cup of white chocolate chips or butterscotch chips after the flour is incorporated. White chocolate pairs beautifully with pumpkin and brown butter. I’ve also tried dark chocolate chips, and while it’s delicious, it masks some of the brown butter flavor.
Maple Glazed: Skip the cinnamon-sugar coating and drizzle the cooled cookies with a simple maple glaze (½ cup powdered sugar + 2 tablespoons maple syrup + 1 teaspoon milk). It adds a whole new layer of fall flavor and makes them look fancy for holiday cookie exchanges.
Spiced Chai Version: Add 1 teaspoon of chai spice blend to the dough and use a chai-infused sugar for the coating. It’s a fun twist that pairs perfectly with a homemade pumpkin spice latte.
Serving & Storage Suggestions
These cookies are best served slightly warm, when the brown butter flavor is at its peak and the edges are still a little soft. Let them cool on the baking sheet for 5 minutes, then transfer to a wire rack. If you want that “fresh from the oven” experience, pop a cooled cookie in the microwave for 10 seconds before serving.
For serving, I love pairing these with a cold glass of oat milk or a warm mug of chai. They’re also fantastic crumbled over vanilla ice cream for a quick fall dessert. If you’re putting together a fall dessert board, these cookies fit right in alongside a simple fall harvest charcuterie board for a stunning presentation.
Storage: Store the cookies in an airtight container at room temperature for up to 5 days. Place a slice of bread in the container to keep them soft—the cookies will absorb moisture from the bread. Just replace the bread slice every other day.
Freezing: These freeze beautifully. You can freeze the baked cookies in a zip-top bag for up to 3 months. Thaw at room temperature for about 30 minutes. Or, freeze the unbaked dough balls on a baking sheet, then transfer to a freezer bag. Bake from frozen, adding 2-3 minutes to the baking time. This is my favorite method for having fresh cookies on demand—just pull out what you need and bake.
Reheating: For that just-baked texture, reheat cookies in a 300°F oven for 5 minutes. The microwave works in a pinch, but the cookies will be softer and lose some of their texture.
The flavors actually develop and deepen after a day or two. I’ve found these cookies taste even better on day two, as the brown butter and pumpkin flavors meld together. If you can resist eating them all immediately, they’re worth the wait.
Nutritional Information & Benefits
These cookies are a treat, but they do have some redeeming qualities. Here’s the estimated nutritional breakdown per cookie (based on 24 cookies):
| Nutrient | Amount per Cookie |
|---|---|
| Calories | 165 |
| Total Fat | 8g |
| Saturated Fat | 5g |
| Cholesterol | 30mg |
| Sodium | 95mg |
| Total Carbohydrates | 22g |
| Dietary Fiber | 1g |
| Sugars | 13g |
| Protein | 2g |
| Vitamin A | 15% DV |
Pumpkin is packed with vitamin A (in the form of beta-carotene), which supports eye health and immune function. It’s also a good source of fiber, which helps keep you full and aids digestion. The brown butter adds a small amount of vitamin A and D, plus healthy fats that help your body absorb the fat-soluble vitamins from the pumpkin.
Dietary Considerations: This recipe is vegetarian. For gluten-free, dairy-free, or vegan options, see the variations section above. These cookies contain wheat, dairy, and eggs, so they’re not suitable for those with allergies to those ingredients. The cream of tartar is naturally gluten-free, but always check your brand to be sure.
While these aren’t health food by any stretch, they’re made with real ingredients and no artificial preservatives or hydrogenated oils. That’s something I feel good about when I’m reaching for a second cookie.
FAQs
Can I use pumpkin pie filling instead of pumpkin puree?
No, please don’t. Pumpkin pie filling has added sugar, spices, and thickeners that will throw off the recipe completely. Use 100% pure pumpkin puree. If you only have pumpkin pie filling, you’ll need to adjust the sugar and spices, but I can’t guarantee the results. Stick with pure pumpkin for the best outcome.
Why did my cookies turn out flat?
Flat cookies usually mean the butter was too warm or the dough wasn’t chilled. Brown butter is softer than regular butter, so the dough tends to spread more. If your cookies are pancake-flat, try chilling the dough for 30 minutes before baking. Also, make sure your baking soda is fresh—old baking soda loses its leavening power. Test it by dropping a little in vinegar; if it fizzes vigorously, it’s still good.
Can I make these cookies without cream of tartar?
You can, but they won’t be true snickerdoodles. Cream of tartar gives the cookies their signature tangy flavor and helps with the texture. If you don’t have it, you can substitute with 2 teaspoons of lemon juice or white vinegar, but the texture will be slightly different—more cake-like and less chewy. Alternatively, use 2 teaspoons of baking powder instead of the cream of tartar and baking soda combo, but again, the flavor won’t be the same.
How do I know when the brown butter is done?
Look for three signs: color, smell, and sound. The butter will turn from pale yellow to a deep amber color. You’ll smell a nutty, toasty aroma that’s distinctly different from regular melted butter. And the crackling and popping will subside as the water cooks off. Once you see those little brown specks forming at the bottom of the pan and the butter smells like toasted nuts, it’s done. Pour it into a cool bowl immediately to stop the cooking.
Can I double this recipe?
Absolutely. This recipe doubles beautifully. Just make sure you brown the butter in two batches—browning too much butter at once makes it hard to control the temperature and you’ll end up with uneven browning. Use two pans or do one batch after the other. The rest of the recipe doubles without any adjustments, though you might need to bake in batches if you only have two baking sheets.
Conclusion
These brown butter pumpkin snickerdoodle cookies are everything I want in a fall cookie—warm, spiced, nutty, and just the right amount of sweet. They’re the kind of cookie that makes you slow down and actually taste what you’re eating, instead of mindlessly reaching for another one. (Though you will reach for another one. Probably several.)
I love how adaptable this recipe is, how forgiving it is for a first-time baker, and how it manages to feel both familiar and new at the same time. The brown butter adds a depth that regular cookies just can’t match, and the pumpkin keeps everything soft and tender without making the cookies taste like a muffin.
I’d love to hear how these turn out for you. Did you add chocolate chips? Try the maple glaze? Make them gluten-free? Drop a comment below and let me know—I read every single one, and your adaptations might inspire someone else. And if you share a photo on Pinterest or Instagram, tag me so I can see your beautiful cookies. Happy baking, friends—may your butter brown perfectly and your cookies come out soft in the center.
Pin This Recipe!
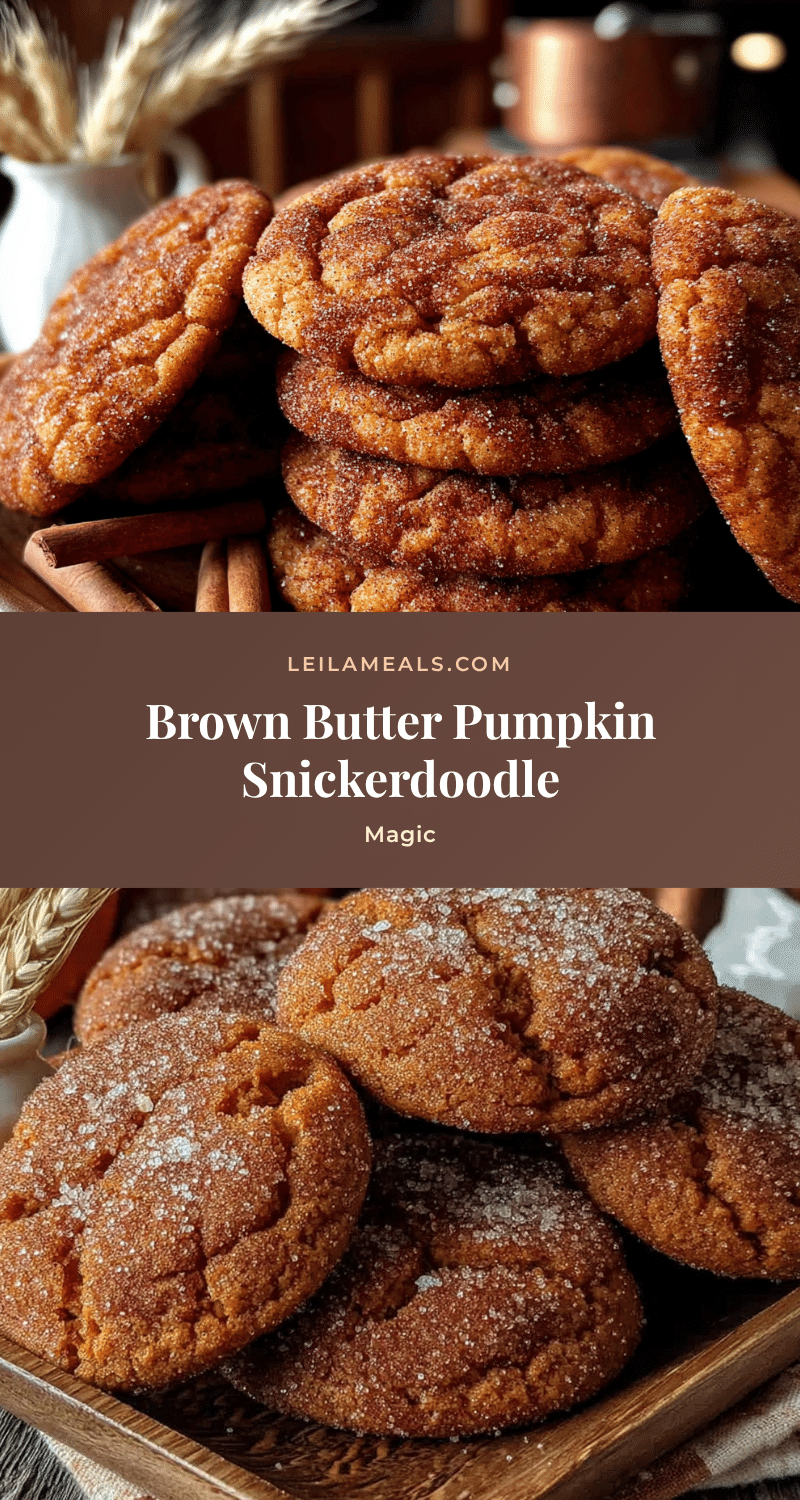
Easy Brown Butter Pumpkin Snickerdoodle Cookies
These brown butter pumpkin snickerdoodle cookies combine nutty browned butter with pumpkin and cinnamon-sugar for a soft, pillowy fall treat. No chilling required, ready in about 30 minutes.
- Prep Time: 15 minutes
- Cook Time: 12 minutes
- Total Time: 27 minutes
- Yield: 24 cookies 1x
- Category: Dessert
- Cuisine: American
Ingredients
- 1 cup (2 sticks) unsalted butter
- ½ cup pumpkin puree (100% pure pumpkin)
- 1 cup granulated sugar (plus ¼ cup for coating)
- ½ cup packed brown sugar (light or dark)
- 2 cups all-purpose flour
- 1 teaspoon baking soda
- 2 teaspoons cream of tartar
- ½ teaspoon fine sea salt
- 1½ teaspoons pumpkin pie spice
- 1 teaspoon cinnamon (plus 1½ tablespoons for coating)
- 1 large egg, room temperature
- 1½ teaspoons pure vanilla extract
- Pinch of nutmeg (optional, for coating)
Instructions
- Brown the butter: Place butter in a light-colored saucepan over medium heat. Melt completely, swirling occasionally. Cook until butter turns deep amber and smells nutty, about 5-7 minutes. Pour into a heat-safe bowl immediately to stop cooking.
- Cool the brown butter: Let cool for 10-15 minutes until warm but not hot (like warm bathwater).
- Mix dry ingredients: In a medium bowl, whisk together flour, baking soda, cream of tartar, salt, and pumpkin pie spice. Set aside.
- Cream butter and sugars: In a stand mixer or large bowl with hand mixer, beat cooled brown butter, granulated sugar, and brown sugar on medium speed for 2-3 minutes until light and fluffy.
- Add wet ingredients: Add pumpkin puree, egg, and vanilla extract. Beat on low until just combined (mixture may look curdled).
- Combine wet and dry: Add dry ingredients in two additions, mixing on low after each until just combined. Do not overmix.
- Make coating: In a small bowl, whisk together ¼ cup granulated sugar, 1½ tablespoons cinnamon, and optional pinch of nutmeg.
- Shape and coat: Preheat oven to 350°F (175°C). Line baking sheets with parchment. Using a 1.5-tablespoon cookie scoop, portion dough and roll into balls. Roll each ball in cinnamon-sugar mixture to coat. Place 2 inches apart on prepared sheets.
- Bake: Bake for 10-12 minutes, rotating pans halfway through. Cookies should be puffed and set at edges but soft in center.
- Cool: Let cool on baking sheet for 5 minutes, then transfer to wire rack to cool completely.
Notes
Don’t skip cream of tartar—it gives the signature tang. Watch brown butter carefully; it burns quickly. Chilling dough for 30 minutes deepens flavor and prevents spreading. Use room temperature ingredients for best results.
Nutrition
- Serving Size: 1 cookie
- Calories: 165
- Sugar: 13
- Sodium: 95
- Fat: 8
- Saturated Fat: 5
- Carbohydrates: 22
- Fiber: 1
- Protein: 2
Keywords: brown butter, pumpkin, snickerdoodle, fall cookies, easy cookie recipe, pumpkin spice