I told my friend I was making witch fingers for our Halloween party, and she looked at me like I’d lost my mind. That look—half horrified, half intrigued—is exactly the reaction you want when you walk into a room with a platter of these Spooky Witch Finger Pretzel Rods with White Chocolate. I mean, let’s be honest, most Halloween treats are cute. Ghosts made of marshmallows, pumpkins made of Rice Krispies. Cute is fine, but it’s not creepy. I wanted something that made people do a double-take before they laughed and grabbed one. These pretzel rods are exactly that. They’re salty, sweet, crunchy, and just the right amount of unsettling. The white chocolate gives them that pale, witchy skin tone, and the almond sliver fingernails? Pure genius. It took me about three tries to get the “knuckle” wrinkles right (pro tip: don’t go too deep with the knife or the chocolate cracks), but once I nailed it, I couldn’t stop making them. They’re the kind of treat that makes people say, “Wait, that’s a pretzel?” and then immediately ask for the recipe. Honestly, that’s my favorite kind of cooking—the kind that surprises you. These aren’t just a snack. They’re a conversation starter. And really, isn’t that what Halloween is all about?
Why You’ll Love This Recipe
I’ve made a lot of Halloween treats over the years. Some were adorable. Some were disasters. These witch finger pretzel rods sit right in that sweet spot where spooky meets delicious, and they couldn’t be easier to pull off. Here’s why they’ll become your go-to for every Halloween gathering.
- Quick & Easy : From start to finish, you’re looking at about 30 minutes of active time. The hardest part is waiting for the chocolate to set. Perfect for those last-minute Halloween party invites.
- Simple Ingredients : You only need four things—pretzel rods, white chocolate melting wafers, almond slices, and a little green food coloring. That’s it. No weird specialty items.
- Perfect for Halloween Parties : These are the kind of treat that steals the show. They look creepy on the platter, but everyone knows a pretzel rod is going to taste amazing. It’s the best of both worlds.
- Crowd-Pleaser : Kids love the spooky factor. Adults love the salty-sweet combo. I’ve watched a whole platter disappear in under ten minutes at more than one party.
- Unbelievably Delicious : The contrast between the salty, crunchy pretzel and the sweet, creamy white chocolate is just chef’s kiss. Add a little almond flavor from the fingernails? It’s dangerously good.
What sets these apart from other witch finger recipes is the texture. Using a pretzel rod instead of a cookie dough or shortbread base gives you that satisfying crunch that doesn’t get soggy. Plus, you don’t have to bake anything. If you’ve ever made a batch of crispy witch finger shortbread cookies, you know the dough can be a little finicky. These pretzel rods skip all that fuss. They’re the shortcut version that tastes just as good.
I’ll be real with you—I made these for a Halloween movie night last year, and my neighbor, who claims she doesn’t like sweets, ate four of them. Four. She said, “I can’t stop eating the witch fingers.” That’s the kind of reaction that makes a recipe stick. It’s not just good. It’s the kind of good that makes you close your eyes after the first bite and forget they look like severed fingers.
What Ingredients You Will Need
This recipe keeps things simple. You don’t need a cart full of specialty baking supplies. A quick trip to the grocery store and you’re ready to go. Here’s what you’ll need and why each ingredient matters.
- Pretzel Rods (12-16 rods): The backbone of the recipe. Look for sturdy, thick pretzel rods—not the thin, fragile ones that snap in half when you look at them. I prefer the brand Utz or Snyder’s of Hanover for their consistent thickness and crunch. You want them long and straight so they actually look like fingers.
- White Chocolate Melting Wafers (12 oz): These are different from white chocolate chips. Melting wafers (like Ghirardelli or Wilton) contain a little oil that helps them melt smoothly without seizing up. If you use regular white chocolate chips, add a teaspoon of coconut oil or shortening to keep the texture silky. Trust me on this one—I learned the hard way with a grainy, clumpy mess my first time.
- Sliced Almonds (about 24-32 slices): These become the fingernails. Look for whole, unbroken almond slices if possible. The shape naturally mimics a nail bed, which is kind of unsettling and perfect. You’ll need one slice per finger (plus a few extras for breakage).
- Green Food Coloring (gel or liquid): This gives the white chocolate that pale, sickly witch skin tone. A little goes a long way. I recommend gel food coloring because it’s more concentrated and won’t thin out your chocolate. Start with a tiny drop and add more until you get that “I’ve been dead for a century” green.
- Optional : Red Gel Food Coloring or Raspberry Jam: For a bloody effect at the base of the fingernail or the “cut” end of the finger. Totally optional, but it takes the creepiness factor from a 7 to an 11. My kids insisted on it.
A quick note on substitutions. If you need a dairy-free option, use dairy-free white chocolate melting wafers. They work exactly the same way. For the almond slices, you can swap in pecan halves or even small slivers of dried apricot if you want a different look, but the almond shape really sells the fingernail effect. I wouldn’t skip it.
One more thing—don’t use candy melts that are labeled as “white” but taste like cheap vanilla. The quality of your white chocolate matters here because it’s the main flavor component. A good melting wafer will taste creamy and rich, not waxy. Your guests will notice the difference, even if they can’t name it.
Equipment Needed
You don’t need a fully stocked pastry kitchen for this one. Most of these tools are probably already in your drawers. Here’s what you’ll need.
- Baking Sheet: A standard half-sheet pan works perfectly. Line it with parchment paper or a silicone baking mat for easy cleanup.
- Double Boiler or Microwave-Safe Bowl: I use a glass measuring cup in the microwave because it’s faster. If you prefer stovetop, a double boiler gives you more control and reduces the risk of burning the chocolate.
- Small Offset Spatula or Butter Knife: For spreading the chocolate evenly over the pretzel rods. A pastry brush also works if you want a thinner, more textured coat.
- Toothpick or Small Skewer: This is for creating the knuckle wrinkles and finger lines in the chocolate. A toothpick is perfect because it’s thin enough to make fine lines without tearing the chocolate.
- Piping Bag or Small Ziploc Bag: For drizzling extra chocolate or adding red “blood” details. Snip a tiny corner off the bag and you’re good to go.
- Parchment Paper or Silicone Baking Mat: Essential for setting the finished fingers on. The chocolate won’t stick, and cleanup is a breeze.
If you don’t have a double boiler, no worries. A heatproof bowl set over a pot of simmering water does the exact same thing. Just make sure the bottom of the bowl doesn’t touch the water, or your chocolate can seize up. I’ve ruined a batch that way, and it’s frustrating. Also, a cheap set of tongs helps when you’re dipping the pretzels—less mess on your fingers.
Preparation Method
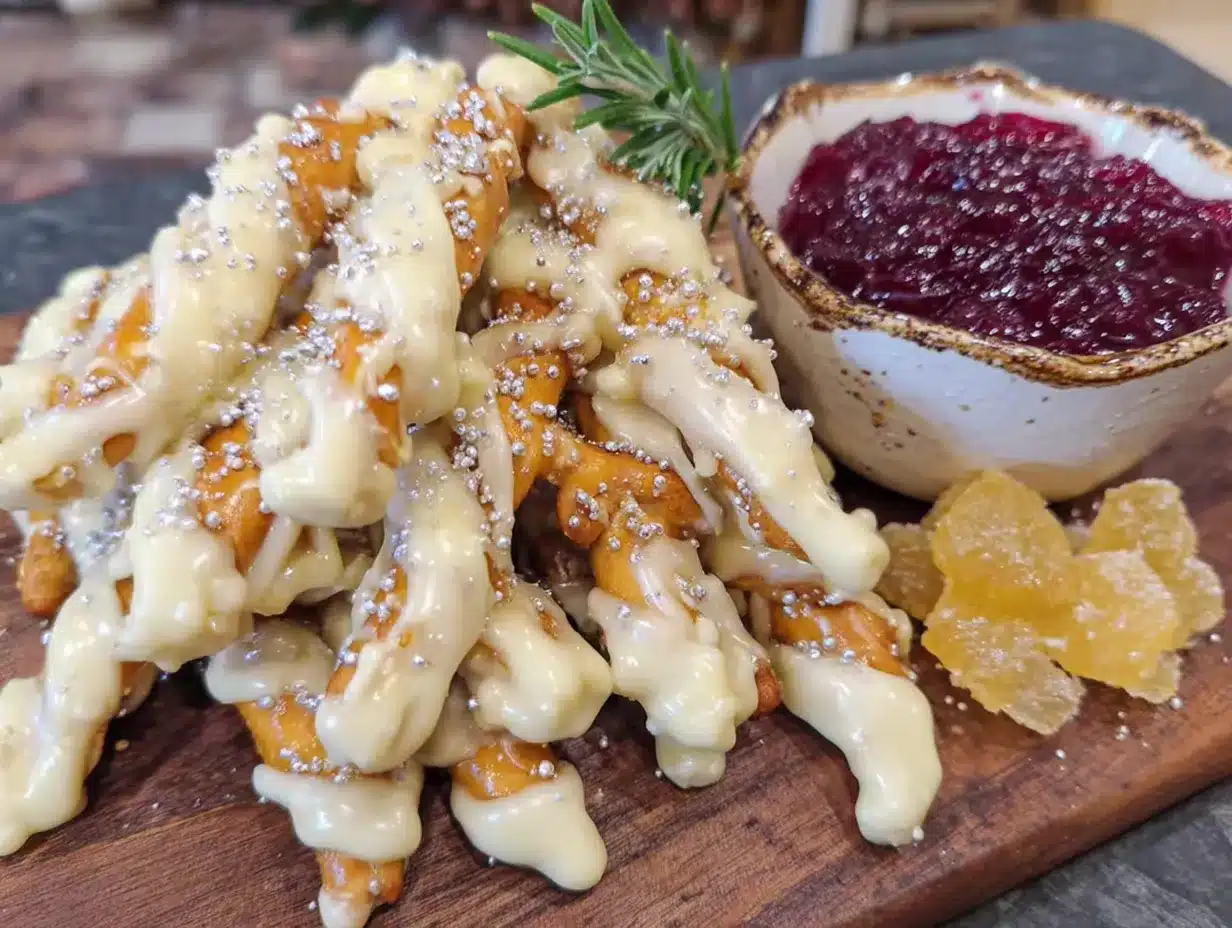
Alright, let’s get into it. This is where the magic—and the creepiness—happens. Take your time with the chocolate coating. Rushing leads to lumps, and nobody wants a lumpy witch finger.
- Melt the White Chocolate: Place your white chocolate melting wafers in a microwave-safe bowl. Microwave in 30-second intervals at 50% power, stirring between each interval. It usually takes about 2-3 minutes total. Stop heating when the chocolate is mostly melted with just a few small lumps left. Stir until completely smooth. If you’re using a double boiler, keep the heat low and stir constantly. Add one tiny drop of green gel food coloring and stir. You want a pale, sickly green—not bright neon. Add another drop if needed, but go slow. You can always add more, but you can’t take it out.
- Prepare Your Workstation: Line your baking sheet with parchment paper. Have your pretzel rods, almond slices, and toothpick ready within arm’s reach. Once you start dipping, you won’t want to stop and search for supplies. Lay out about 4-5 pretzel rods at a time so the chocolate doesn’t set before you add the details.
- Dip the Pretzel Rods: Hold a pretzel rod by one end and dip it into the melted green white chocolate. Tilt the bowl slightly so the chocolate pools on one side, making it easier to coat the pretzel evenly. Use a small offset spatula or butter knife to spread the chocolate about three-quarters of the way up the rod. Leave the top quarter bare (that’s the “cut” end of the finger). Let any excess chocolate drip back into the bowl. Place the coated pretzel on the parchment paper.
- Add the Fingernail: While the chocolate is still wet, press one almond slice onto the tip of the coated end. Position it so the rounded edge of the almond sticks out slightly past the end of the pretzel, like a fingernail extending past a fingertip. Press gently so it stays in place. Repeat for each pretzel rod.
- Create the Knuckle Wrinkles: This is the step that really sells the illusion. Take your toothpick and gently drag it across the chocolate to create horizontal lines where knuckles would be. I do three lines—one near the top (just below the fingernail), one in the middle, and one near the bottom. Don’t press too hard or you’ll cut through the chocolate and expose the pretzel. You’re looking for subtle indentations, not deep grooves. Add a few tiny vertical lines near the knuckles to mimic skin creases.
- Add Bloody Details (Optional but Recommended): If you’re using red gel food coloring or raspberry jam, now’s the time. Dip the tip of a toothpick into the red coloring and dab a small amount at the base of the almond fingernail. You can also add a little at the “cut” end of the finger (the bare pretzel end) to look like a bloody stump. My kids love this part. It’s gross and perfect.
- Let Them Set: Place the baking sheet in the refrigerator for about 15-20 minutes, or until the chocolate is completely firm. Don’t skip this step. If you try to move them too soon, the chocolate will smudge and your knuckles will disappear. I speak from experience—I had to redo an entire batch because I got impatient.
- Repeat: Continue dipping and decorating the remaining pretzel rods in small batches. Keeping the chocolate warm (but not hot) will make the process smoother. If the chocolate starts to thicken, pop it back in the microwave for 10 seconds.
Cooking Tips & Techniques
I’ve made these witch finger pretzel rods about a dozen times now, and I’ve picked up a few tricks along the way. Here’s what I wish someone had told me before my first attempt.
Don’t overheat the chocolate. White chocolate is sensitive. If you microwave it too long or at too high a power, it will seize up into a grainy, unusable paste. Low and slow is the way to go. If you accidentally overheat it, you can try whisking in a teaspoon of coconut oil to bring it back, but it’s not guaranteed. Prevention is better.
Work in small batches. I know it’s tempting to dip all 16 pretzels at once, but the chocolate will start to set while you’re still adding knuckles and fingernails. I do 4 or 5 at a time. It keeps the chocolate wet enough to work with and ensures every finger looks consistent.
Use a toothpick for fine details. A butter knife is too thick for the knuckle lines. A toothpick gives you control and precision. If the chocolate starts to drag or stick, dip the toothpick in a little vegetable oil first—it glides right through.
Chill them completely before serving. I know I said this already, but it’s worth repeating. Room temperature chocolate is soft and smudgy. Cold chocolate is firm and holds its shape. Plus, they taste better cold—the contrast between the cold chocolate and the salty pretzel is addictive.
Make extra for snacking. Seriously. These things disappear fast. I always double the batch because I inevitably eat three or four while I’m decorating them. The salty-sweet-crunchy combo is impossible to resist.
Variations & Adaptations
One of the best things about this recipe is how easy it is to customize. Here are a few variations I’ve tried and loved.
Chocolate Witch Fingers: Swap the white chocolate for dark or milk chocolate. The effect is less “pale witch” and more “chocolate-covered pretzel,” which is still delicious. You can skip the green food coloring entirely. My husband prefers these because he’s not a white chocolate fan.
Spooky Glitter Fingers: Before the chocolate sets, sprinkle a little edible glitter or luster dust over the coated pretzels. It gives them a magical, otherworldly shimmer—like witch fingers that have been dusted with fairy magic. My daughter went crazy for this version.
Bloody Stump Variation: Instead of leaving the top quarter of the pretzel bare, dip the entire rod in chocolate. Then, use a sharp knife to cut off the tip of the chocolate-coated end, exposing the pretzel inside. Add red gel coloring to the exposed end for a “severed finger” effect. It’s more work, but the shock value is worth it.
Gluten-Free Option: Use gluten-free pretzel rods. They’re available at most grocery stores now, and they work exactly the same way. Just check the label to make sure your white chocolate is also gluten-free.
Nut-Free Option: Skip the almond slices and use a small piece of dried apricot or a candy corn for the fingernail. Candy corn gives a more cartoonish, less realistic look, but it’s still fun. Or, you can pipe a small fingernail shape using extra white chocolate.
Serving & Storage Suggestions
These witch finger pretzel rods are best served cold or at cool room temperature. The chocolate stays firm, and the pretzel retains its crunch. I like to arrange them on a black platter or a dark-colored board to make the pale green really pop. A few fake spider webs or plastic spiders around the edges add to the spooky vibe.
For a Halloween party, I set them out about 15 minutes before guests arrive. Any longer and the chocolate might start to soften, especially if your house is warm. If it’s a hot day, keep the platter on ice packs or serve them straight from the fridge.
Storage is simple. Place the finished fingers in an airtight container, layered between sheets of parchment paper. They’ll keep in the refrigerator for up to a week. I don’t recommend freezing them—the texture of the chocolate changes when thawed, and the pretzel can get a little soft.
If you’re making them ahead for a party, you can prepare them up to three days in advance. Just keep them chilled and add any red “blood” details the day of serving so they look fresh and gruesome.
These also pair beautifully with a smoky blackberry bourbon sangria for a grown-up Halloween gathering. The sweet, fruity sangria balances the salty pretzels perfectly. For a non-alcoholic option, a creamy pumpkin chai latte is cozy and festive.
Nutritional Information & Benefits
Let’s be real—these are a treat, not a health food. But knowing what’s in them helps you make informed choices. Per serving (one witch finger pretzel rod), here’s the approximate breakdown.
- Calories: 180-200
- Fat: 10g
- Carbohydrates: 22g
- Protein: 3g
- Sugar: 14g
- Sodium: 280mg
The white chocolate provides a small amount of calcium, and the almonds add a little vitamin E and healthy fats. The pretzel itself is mostly carbs, so this isn’t a low-carb snack. But for a Halloween party, a little indulgence is part of the fun.
If you’re watching your sugar intake, you can use sugar-free white chocolate melting wafers. They’re available at most craft stores and online. The texture is slightly different—a little less creamy—but the overall effect is still fantastic. I’ve made them for friends with dietary restrictions, and they were just as happy.
These are also a great option for a mummy brownie bites platter if you’re mixing and matching Halloween treats. The contrast between the crunchy pretzel and the fudgy brownie is a crowd-pleaser.
Conclusion
These Spooky Witch Finger Pretzel Rods with White Chocolate are the kind of recipe that makes Halloween feel special. They’re creepy enough to impress, easy enough to make on a weeknight, and delicious enough that people will keep coming back for more. I love how they bring a little bit of theater to the table—everyone does a double-take, then laughs, then grabs one. That’s the magic of a good Halloween treat.
I hope you give them a try and make them your own. Maybe you’ll add extra knuckle wrinkles, or skip the green food coloring for a more classic look, or go all out with the bloody details. Whatever you choose, I’d love to hear about it. Drop a comment below and tell me how your witch fingers turned out. Did your kids scream? Did your guests love them? Share a photo on social media and tag me—I want to see your spooky creations.
Thanks for stopping by, and happy Halloween! Now go make some witch fingers and scare your friends with something delicious.
Frequently Asked Questions
Can I use regular white chocolate chips instead of melting wafers?
Yes, but you’ll need to add a teaspoon of coconut oil or shortening to help them melt smoothly. White chocolate chips have less cocoa butter and can seize up more easily. Melting wafers are more forgiving for beginners.
How far in advance can I make these?
You can make them up to three days ahead. Store them in an airtight container in the refrigerator. Add any red “blood” details on the day you serve them for the freshest look.
Why did my white chocolate turn out grainy?
This usually happens when the chocolate gets too hot or comes into contact with water. Make sure your bowl and utensils are completely dry. Microwave in short bursts at low power, and stir frequently to distribute the heat evenly.
Can I freeze witch finger pretzel rods?
I don’t recommend it. The texture of the chocolate changes when thawed, and the pretzel can lose its crunch. They’re best enjoyed fresh or within a few days of making them.
How do I make the green color look more natural?
Use gel food coloring instead of liquid. Start with one tiny drop and stir. You want a pale, muted green—like a zombie’s skin tone. Adding a tiny drop of yellow or brown gel coloring can also help mute the brightness for a more realistic “dead” look.
Pin This Recipe!

Spooky Witch Finger Pretzel Rods Easy Halloween Treat

These Spooky Witch Finger Pretzel Rods with White Chocolate are salty, sweet, crunchy, and just the right amount of unsettling. They’re the perfect Halloween treat that surprises everyone with their creepy yet delicious flavor.
- Prep Time: 15 minutes
- Cook Time: 5 minutes
- Total Time: 40 minutes (including chilling time)
- Yield: 12-16 servings 1x
- Category: Dessert
- Cuisine: American
Ingredients
- 12–16 pretzel rods (sturdy, thick ones like Utz or Snyder’s of Hanover)
- 12 oz white chocolate melting wafers (like Ghirardelli or Wilton)
- 24–32 sliced almonds (whole, unbroken slices)
- Green gel food coloring (a tiny drop)
- Optional: Red gel food coloring or raspberry jam for bloody effect
Instructions
- Melt the white chocolate: Place white chocolate melting wafers in a microwave-safe bowl. Microwave in 30-second intervals at 50% power, stirring between each interval, until mostly melted (about 2-3 minutes). Stir until smooth. Add one tiny drop of green gel food coloring and stir until you achieve a pale, sickly green. Add more if needed, but go slow.
- Prepare your workstation: Line a baking sheet with parchment paper. Have pretzel rods, almond slices, and a toothpick ready within arm’s reach. Work in small batches of 4-5 pretzel rods at a time.
- Dip the pretzel rods: Hold a pretzel rod by one end and dip it into the melted green white chocolate. Tilt the bowl to pool the chocolate for even coating. Use a small offset spatula or butter knife to spread the chocolate about three-quarters of the way up the rod, leaving the top quarter bare (the ‘cut’ end). Let excess drip off, then place on parchment paper.
- Add the fingernail: While the chocolate is still wet, press one almond slice onto the tip of the coated end, with the rounded edge sticking out slightly past the end of the pretzel. Press gently to secure.
- Create the knuckle wrinkles: Use a toothpick to gently drag horizontal lines across the chocolate where knuckles would be—one near the top (just below the fingernail), one in the middle, and one near the bottom. Add a few tiny vertical lines near the knuckles for skin creases. Do not press too hard to avoid exposing the pretzel.
- Add bloody details (optional): Dip the tip of a toothpick into red gel food coloring or raspberry jam and dab a small amount at the base of the almond fingernail and/or at the ‘cut’ end of the finger.
- Let them set: Place the baking sheet in the refrigerator for 15-20 minutes, or until the chocolate is completely firm.
- Repeat: Continue dipping and decorating the remaining pretzel rods in small batches. Keep the chocolate warm (but not hot) by microwaving for 10 seconds if it thickens.
Notes
Work in small batches to keep the chocolate wet for adding details. Use gel food coloring for a more natural green tone. Chill completely before serving to keep the chocolate firm. For a dairy-free option, use dairy-free white chocolate melting wafers. For a nut-free option, skip the almonds and use a small piece of dried apricot or candy corn for the fingernail.
Nutrition
- Serving Size: 1 witch finger pretz
- Calories: 190
- Sugar: 14
- Sodium: 280
- Fat: 10
- Saturated Fat: 6
- Carbohydrates: 22
- Fiber: 1
- Protein: 3
Keywords: Halloween treats, witch fingers, pretzel rods, white chocolate, spooky snacks, easy Halloween recipe


