“Red, white, and blue, but make it sweet.” That’s pretty much how the idea of these Perfect Stars and Stripes Sugar Cookies with Royal Icing came to life one hectic July 3rd. I was juggling last-minute plans for a small backyard gathering, the kitchen was chaos, and honestly, I didn’t think I’d have time to bake anything decent. Then, on a whim, I grabbed some basic pantry staples and started mixing up sugar cookie dough, figuring I’d just roll them out plain. But as I cut out the stars and stripes shapes, a spark of fun crept in. I remembered how much I loved decorating cookies as a kid—messy icing, bright colors, and all.
What surprised me was how easily the royal icing came together and how well it held the sharp details of the stars and stripes. The cookies baked up soft yet crisp on the edges, and the icing dried smooth and glossy, making each cookie feel like a little edible celebration. That day, what began as a rushed plan turned into a sweet tradition that’s stuck with me—because, honestly, nothing says summer quite like homemade, colorful sugar cookies that taste as joyful as they look.
There’s something quietly satisfying about pulling these cookies from the oven, watching the icing set in the warm kitchen air, and knowing the effort is truly worth it. It’s not just about the patriotic theme; it’s about the memories baked right into every bite. So, if you’re looking for a recipe that’s both festive and a little nostalgic, these Perfect Stars and Stripes Sugar Cookies with Royal Icing might just become your new go-to.
Why You’ll Love This Recipe
Having tested this recipe through multiple holiday weekends, I can say it’s a winner for so many reasons. Here’s why these sugar cookies with royal icing have earned a special spot on my baking list:
- Quick & Easy: The dough comes together in just 15 minutes, and the icing whips up in another 10—ideal for busy summer afternoons or last-minute celebrations.
- Simple Ingredients: No need for fancy stuff; you probably have everything in your pantry already, from all-purpose flour to granulated sugar and basic food coloring.
- Perfect for Patriotic Holidays: Whether it’s Independence Day, Memorial Day, or Labor Day, these cookies fit the mood perfectly with their classic stars and stripes design.
- Crowd-Pleaser: Kids love decorating them, and adults appreciate the balance of buttery cookie and sweet but not overpowering icing.
- Unbelievably Delicious: The cookie texture is just right—soft enough to melt in your mouth but with a pleasant snap at the edges, and the royal icing adds a smooth, crisp finish.
What sets this recipe apart is the technique I use for the royal icing—it’s got just the right consistency for detailed piping and smooth flooding, so your stars and stripes look sharp and professional, even if you’re not a seasoned decorator. Plus, the recipe avoids overly sweet or artificial tastes, making these cookies feel homemade and genuine.
Honestly, these cookies aren’t just a treat; they’re a little moment of joy and pride you can bake yourself. They’ve become my go-to when I want to bring a festive spirit to the table without fuss or stress. Plus, if you’re into a sweet breakfast twist, you might appreciate the simplicity after trying something like the crispy bacon cheddar waffle sandwich I made recently—it’s a whole other kind of comfort!
What Ingredients You Will Need
This recipe uses simple, wholesome ingredients to deliver bold flavor and satisfying texture without the fuss. Everything is either a pantry staple or easy to find, making it perfect for any last-minute baking mood.
- For the Sugar Cookie Dough:
- 2 ¾ cups (345g) all-purpose flour – I recommend King Arthur for consistent results
- 1 teaspoon baking powder – helps give a slight lift without puffing up too much
- ½ teaspoon salt
- 1 cup (226g) unsalted butter, softened – room temperature for easy creaming
- 1 ½ cups (300g) granulated sugar
- 1 large egg, room temperature
- 1 teaspoon pure vanilla extract – this adds a warm, comforting note
- 1 tablespoon milk – any kind, or dairy-free alternative works fine
- For the Royal Icing:
- 3 cups (360g) powdered sugar, sifted – ensures a smooth, lump-free icing
- 2 large egg whites or 4 tablespoons meringue powder + 5 tablespoons water – meringue powder is great if you want a safer, no-raw-egg option
- 1 teaspoon lemon juice or vanilla extract – lemon juice keeps icing bright and fresh
- Gel food coloring in red and blue – gel colors give vibrant hues without thinning the icing
Look for fresh eggs for best texture in the dough, and if you want to keep it gluten-free, swapping the all-purpose flour with a 1-to-1 gluten-free baking blend works pretty well (though texture may be slightly different). For the icing, I’ve found that Wilton gel food coloring holds color beautifully and doesn’t mess with the icing’s consistency.
While it’s tempting to rush, don’t skip sifting the powdered sugar for the royal icing—that little step really makes piping smoother and easier. Also, if you want to try a dairy-free version, the butter can be substituted with plant-based sticks, and almond or oat milk works fine instead of regular milk.
Equipment Needed
Here’s what you’ll want to have on hand to nail these stars and stripes sugar cookies:
- Mixing bowls – a large one for dough, a medium one for icing
- Electric mixer – handheld or stand mixer for creaming butter and beating icing
- Measuring cups and spoons – precise measurements make a big difference here
- Rolling pin – for even dough thickness
- Star and stripe-shaped cookie cutters – or a star cutter plus a rectangle or strip cutter
- Parchment paper or silicone baking mats – prevents sticking and makes clean-up easier
- Piping bags and small round piping tips (sizes #1 or #2) – for detailed royal icing work
- Toothpicks or scribe tools – essential for smoothing out icing and fixing little bubbles
If you don’t have specialized piping tips, you can snip the corner of a plastic sandwich bag for a makeshift piping bag—works surprisingly well. For maintenance, I recommend washing mixing bowls and piping tools immediately after use to avoid hardened icing cleanup.
Honestly, good quality cookie cutters make a big difference; I like using stainless steel cutters because they hold their shape better than plastic ones, especially for detailed designs.
Preparation Method
- Mix Dry Ingredients: In a medium bowl, whisk together the all-purpose flour, baking powder, and salt. Set aside. (This usually takes about 5 minutes.)
- Cream Butter and Sugar: In a large bowl, beat the softened butter and granulated sugar with an electric mixer on medium speed until fluffy and pale, about 3-4 minutes. This step is key to getting tender cookies.
- Add Wet Ingredients: Beat in the egg and vanilla extract until combined, then add the milk and mix just until incorporated. Don’t overmix here to keep the dough tender.
- Combine Dry and Wet: Gradually add the dry ingredients to the wet, mixing on low speed until just combined. The dough will be soft but not sticky. If it feels too sticky, chill for 10-15 minutes.
- Chill the Dough: Divide the dough into two disks, wrap tightly in plastic wrap, and chill in the fridge for at least 1 hour. This rest allows the dough to firm up for easier rolling and better shape retention.
- Preheat Oven and Prepare Baking Sheets: Preheat your oven to 350°F (175°C). Line baking sheets with parchment paper or silicone mats.
- Roll and Cut: On a lightly floured surface, roll one dough disk to about ¼-inch (6mm) thickness. Use your star and stripe cookie cutters to cut shapes. Transfer cookies carefully to prepared sheets, spacing about 1 inch apart.
- Bake: Bake for 8-10 minutes or until edges are just starting to turn golden. Avoid overbaking to keep them soft.
- Cool: Let cookies cool on baking sheets for 5 minutes, then transfer to wire racks to cool completely before icing.
- Prepare Royal Icing: Beat egg whites (or meringue powder and water) with powdered sugar and lemon juice until stiff peaks form. Divide into bowls and tint with gel colors for red, white (leave plain), and blue. Adjust consistency by adding water dropwise for flooding or thicker for outlining.
- Decorate: Use piping bags to outline stars and stripes shapes with thicker icing, then flood the inside with thinner icing. Use toothpicks to spread and smooth icing and pop air bubbles. Let dry completely—this can take 4-6 hours or overnight for best results.
Pro tip: If your dough warms up while rolling, pop it back in the fridge for a bit to prevent spreading. And don’t rush decorating; letting the outline dry before flooding helps keep clean lines.
Cooking Tips & Techniques
One trick I learned the hard way is that chilling the dough is non-negotiable for sharp cookie shapes. Skipping this step always results in cookies that spread too much and lose their crisp edges. Also, when making royal icing, always sift the powdered sugar—lumps turn into frustrating bumps on your finished cookies.
For icing consistency, think of it like honey for flooding and toothpaste for outlining. Too runny, and your colors run together; too thick, and you’ll struggle to spread it smoothly. If you’re new to piping, practice on parchment first—it’s easier than working directly on cookies.
Another tip: keep a damp cloth over your piping bags when not using them to prevent the icing from drying out. And when layering colors, patience is key—waiting for each section to dry before adding the next prevents mixing and messy edges.
I also like to bake a few extra cookies beyond what I think I need—some might break, some might get eaten during decorating, and it’s better to have backups. Plus, these cookies pair surprisingly well with an afternoon coffee, much like the rich flavors in the whiskey chocolate chip cookie skillet I tried last month.
Variations & Adaptations
These stars and stripes sugar cookies are great as is, but they also adapt well if you want to mix things up:
- Gluten-Free Version: Substitute all-purpose flour with a gluten-free blend like Bob’s Red Mill 1-to-1. The texture will be a bit more crumbly but still delicious.
- Flavored Icing: Add a few drops of almond or peppermint extract to your royal icing for a subtle twist. I once tried lemon zest in the dough for a bright summer feel—surprisingly good!
- Vegan Adaptation: Use vegan butter and substitute egg with flax egg (1 tablespoon ground flaxseed + 3 tablespoons water). For royal icing, use meringue powder with water or a vegan royal icing recipe.
- Seasonal Colors: Swap out the red and blue for fall tones like orange and yellow for a different holiday vibe, or try pastel shades for spring celebrations.
- Alternative Decorations: Instead of piping, try spreading the royal icing with an offset spatula and sprinkling edible glitter or colored sugar for a quicker but still festive look.
One personal favorite variation is adding a sprinkle of coarse sea salt on top of the royal icing before it dries—a tiny surprise of savory that balances the sweetness wonderfully.
Serving & Storage Suggestions
These sugar cookies are best served at room temperature so the royal icing is perfectly set but still tender to bite. They look fantastic arranged on a platter with fresh berries or alongside a bowl of whipped cream for dipping.
Pairing them with a refreshing summer drink or even a light coffee works beautifully, much like the bright contrast in the fresh watermelon arugula salad I adore for summertime meals.
To store, place cookies in an airtight container with parchment layers between them. They keep well at room temperature for up to 3 days or refrigerated for about a week. For longer storage, freeze the undecorated cookies wrapped tightly in plastic wrap and a freezer bag—decorate after thawing.
When reheating, avoid microwaving as it can soften the icing too much. Instead, bring cookies to room temperature naturally to maintain their crisp edges and smooth icing finish. Over time, the flavors meld nicely, making them even more enjoyable the day after baking.
Nutritional Information & Benefits
One cookie (about 2.5 inches wide) contains approximately:
| Calories | 150 |
|---|---|
| Fat | 7g |
| Carbohydrates | 22g |
| Protein | 1g |
| Sugar | 15g |
This recipe is vegetarian-friendly and can easily be made gluten-free or vegan with simple substitutions. The butter provides a source of fat for satiety, while the egg adds a bit of protein. Of course, these are treats, so enjoy them in moderation! Using natural extracts and quality ingredients adds a little boost to the flavor without relying on artificial additives.
From a wellness perspective, baking at home means you control what goes in—no preservatives or unexpected fillers. Plus, the simple joy of baking and sharing these cookies can be a sweet mental break, which is just as important.
Conclusion
These Perfect Stars and Stripes Sugar Cookies with Royal Icing are more than just a festive dessert—they’re a little celebration you can bake yourself anytime you want a bit of sweetness and color in your day. Whether you’re marking a holiday or just craving a classic treat, this recipe offers the perfect balance of flavor, texture, and visual appeal.
Feel free to experiment with the decorating steps and make them your own. It’s all part of the fun, and every batch can be a fresh take on a beloved tradition. Personally, these cookies remind me that even in busy moments, taking time to create something simple and beautiful is worth it.
If you try this recipe, I’d love to hear how your cookies turn out or any creative twists you put on them. Baking is always better when shared—so don’t hesitate to leave a comment or share your photos. Here’s to many sweet celebrations ahead!
Frequently Asked Questions
Can I make the dough ahead of time?
Yes! The dough can be made and refrigerated for up to 3 days before rolling and cutting. You can also freeze it for up to 3 months; just thaw overnight in the fridge before using.
Is royal icing safe to eat raw?
If using raw egg whites, make sure to use pasteurized eggs for safety. Alternatively, meringue powder is a safe substitute that eliminates the risk of raw eggs.
How do I prevent royal icing from cracking?
Keep the icing covered with a damp cloth when not piping, and avoid adding too much powdered sugar, which can make it dry out. Also, don’t apply too thick a layer all at once.
What if I don’t have star or stripes cookie cutters?
You can cut stars freehand with a knife and use rectangular cutters or even a knife to cut stripes. Alternatively, use any festive shapes you have for a personalized touch.
Can I use food coloring other than gel?
You can, but liquid food coloring may thin your icing and affect consistency. Gel food coloring is best for vibrant colors without changing texture.
Pin This Recipe!
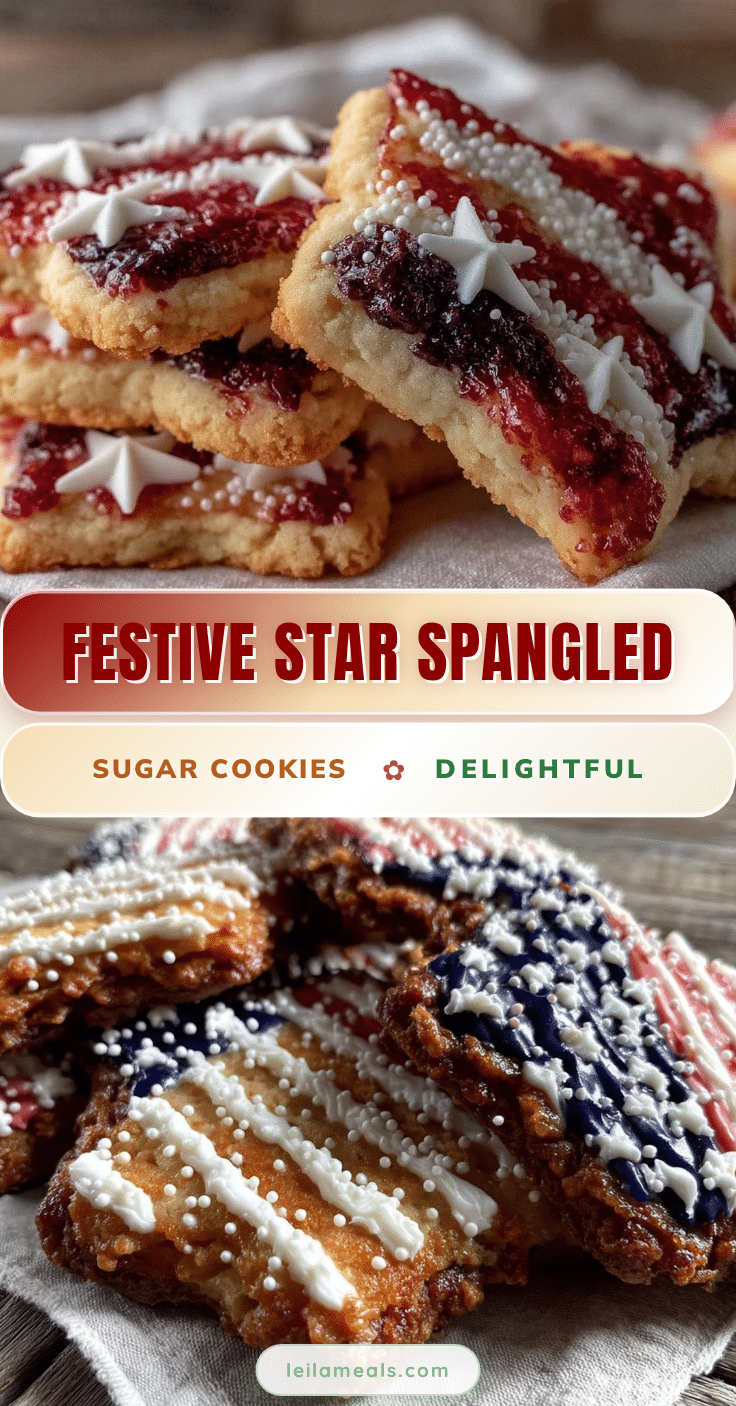
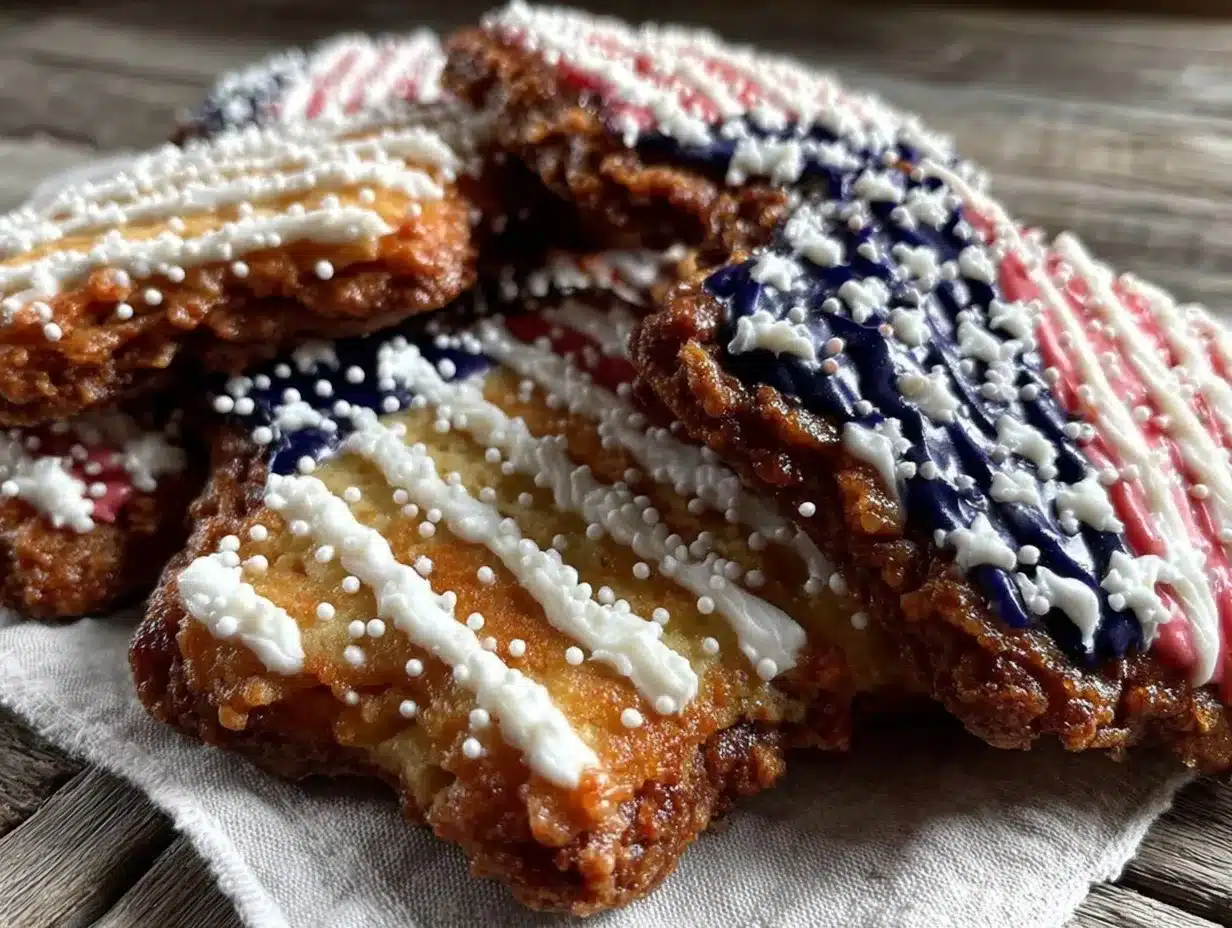
Perfect Stars and Stripes Sugar Cookies Recipe Easy Homemade Icing Tutorial

Festive sugar cookies decorated with royal icing in stars and stripes design, perfect for patriotic holidays. Soft yet crisp cookies with smooth, glossy icing that holds detailed piping beautifully.
- Prep Time: 25 minutes
- Cook Time: 10 minutes
- Total Time: 1 hour 35 minutes
- Yield: About 24 cookies 1x
- Category: Dessert
- Cuisine: American
Ingredients
- 2 ¾ cups (345g) all-purpose flour
- 1 teaspoon baking powder
- ½ teaspoon salt
- 1 cup (226g) unsalted butter, softened
- 1 ½ cups (300g) granulated sugar
- 1 large egg, room temperature
- 1 teaspoon pure vanilla extract
- 1 tablespoon milk (any kind or dairy-free alternative)
- 3 cups (360g) powdered sugar, sifted
- 2 large egg whites or 4 tablespoons meringue powder + 5 tablespoons water
- 1 teaspoon lemon juice or vanilla extract
- Gel food coloring in red and blue
Instructions
- Mix dry ingredients: whisk together flour, baking powder, and salt in a medium bowl; set aside.
- Cream butter and sugar: beat softened butter and granulated sugar with an electric mixer on medium speed until fluffy and pale, about 3-4 minutes.
- Add wet ingredients: beat in egg and vanilla extract until combined, then add milk and mix just until incorporated.
- Combine dry and wet: gradually add dry ingredients to wet, mixing on low speed until just combined; chill dough 10-15 minutes if too sticky.
- Chill dough: divide dough into two disks, wrap in plastic wrap, and chill at least 1 hour.
- Preheat oven to 350°F (175°C) and line baking sheets with parchment paper or silicone mats.
- Roll and cut: roll dough to ¼-inch thickness on floured surface; cut stars and stripes shapes and transfer to baking sheets, spacing 1 inch apart.
- Bake for 8-10 minutes until edges start to turn golden; avoid overbaking.
- Cool cookies on baking sheets 5 minutes, then transfer to wire racks to cool completely.
- Prepare royal icing: beat egg whites (or meringue powder and water) with powdered sugar and lemon juice until stiff peaks form; divide and tint with gel colors.
- Decorate: outline shapes with thicker icing, flood inside with thinner icing; use toothpicks to smooth and pop bubbles; let dry 4-6 hours or overnight.
Notes
Chill dough for at least 1 hour to prevent spreading and maintain sharp shapes. Sift powdered sugar for smooth royal icing. Use gel food coloring for vibrant colors without thinning icing. Let icing dry completely for best results. Store cookies in airtight container with parchment layers; freeze undecorated dough or cookies for longer storage.
Nutrition
- Serving Size: 1 cookie (about 2.5
- Calories: 150
- Sugar: 15
- Fat: 7
- Carbohydrates: 22
- Protein: 1
Keywords: sugar cookies, royal icing, patriotic cookies, stars and stripes, holiday cookies, easy sugar cookies, homemade icing, 4th of July cookies