“Wait—you can actually do that with a cookie?” My sister-in-law was staring at the spiderweb design on top of this Halloween cookie cake, and honestly, I felt a little proud. She had texted me a photo of some overpriced bakery version the week before, complaining that nothing ever looked as good as the pictures. So I did what any slightly competitive home baker would do—I told her I’d bring one to her Halloween party. No pressure, right?
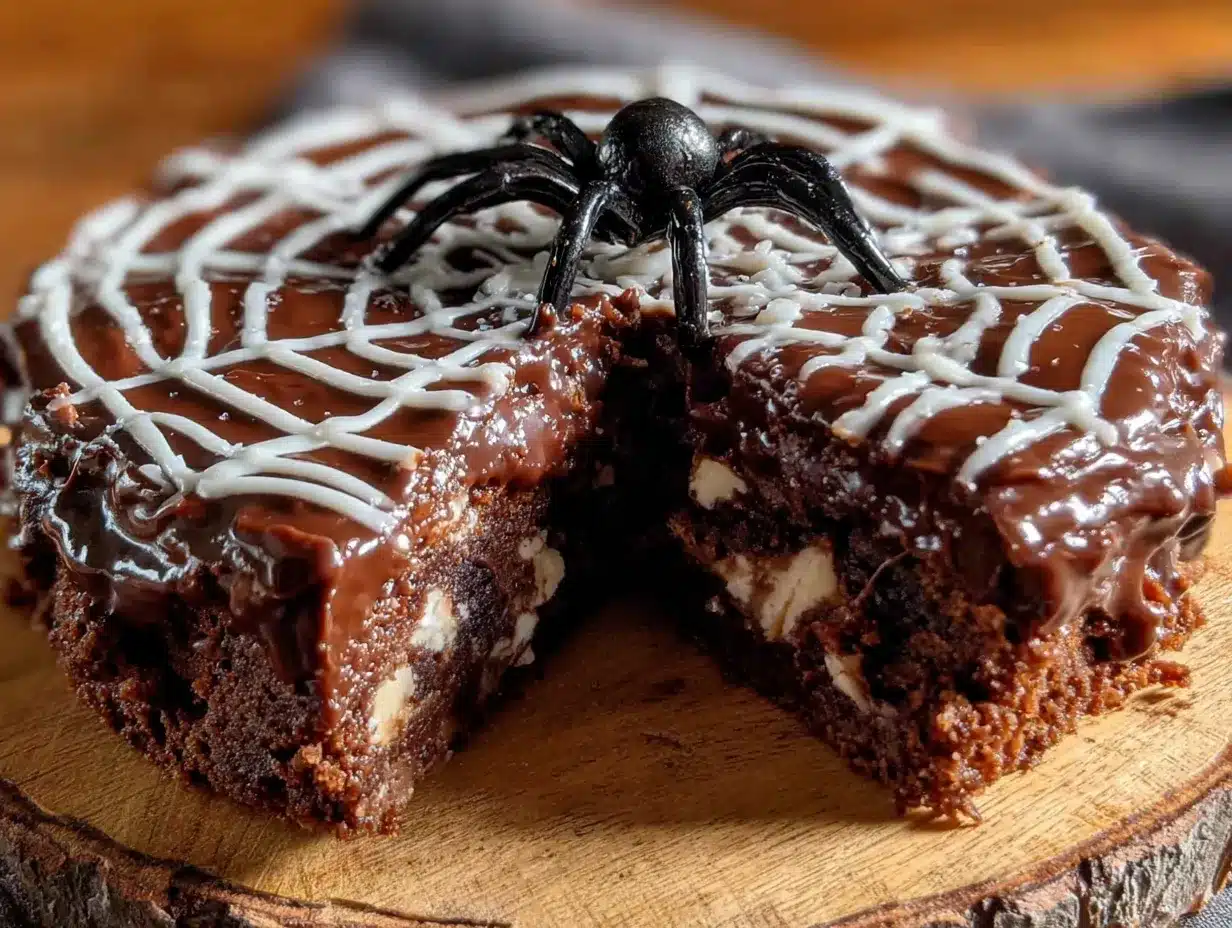
This Perfect Spiderweb Halloween Cookie Cake with Chocolate Ganache started as a challenge to myself. I wanted something that looked like it took hours of fussy piping work but actually came together with minimal stress. The kind of dessert that makes people say “you made that?” while they’re already cutting a second slice. And let me tell you, the first time I pulled this out of the oven, the chocolate ganache was still warm and glossy, and I just stood there in my kitchen grinning like an idiot. It worked. It actually worked.
The cookie base is thick, chewy, and almost brownie-like at the edges—exactly what a good cookie cake should be. And the spiderweb? It’s way easier than it looks. You don’t need a pastry degree or a steady hand. Just a little patience and the willingness to get a bit of chocolate on your fingers. Honestly, that’s the fun part.
Halloween desserts can be so hit or miss. Either they’re all decoration and no flavor, or they taste amazing but look like a toddler decorated them. This one hits that sweet spot where it’s both impressive and genuinely delicious. And isn’t that what we’re all really after?
Why You’ll Love This Recipe
This isn’t just another Halloween cookie recipe. I tested this thing four times before I got the texture exactly right—not too cakey, not too flat, with edges that stay slightly crisp while the center stays soft and almost fudgy. Here’s why this one’s a keeper:
- Looks Complicated, But It’s Not : That spiderweb design looks like something from a professional bakery, but I promise you can nail it on your first try. No special tools required.
- One Giant Cookie, Zero Fuss : No scooping individual cookies, no worrying about even spacing. You press the dough into one pan and you’re done.
- Rich Chocolate Ganache : The glossy topping is made with just two ingredients—cream and chocolate. It sets beautifully and tastes like pure indulgence.
- Perfect for Halloween Parties : This thing is a conversation starter. Kids love the spiderweb, adults love the flavor, and everyone loves that it’s served in slices like a cake.
- Make-Ahead Friendly : You can bake the cookie base a day ahead, add the ganache the day of, and still have it look fresh. Less stress on party day.
What makes this recipe different from all the other Halloween desserts out there is the texture. I’ve had cookie cakes that were dry and crumbly, or so soft they fell apart when you tried to cut them. This one hits that perfect middle ground—chewy, sturdy enough to hold the ganache, but tender enough that each bite just melts. And the ganache isn’t just a thin drizzle—it’s a proper layer that adds richness without being overwhelming.
I brought this to a friend’s Halloween get-together last year, and someone actually asked if I had ordered it from a bakery. I just smiled and said “maybe.” (I didn’t. But it felt good.)
What Ingredients You Will Need
This recipe uses simple, everyday ingredients to create something that feels special. No weird specialty items, no trips to three different stores. Here’s what you’ll need:
For the Cookie Cake Base
- 2 ¼ cups (280g) all-purpose flour — Spoon and level it; don’t scoop straight from the bag or you’ll end up with a dry cookie.
- 1 teaspoon baking soda — Helps the cookie spread just enough without puffing up like a cake.
- ½ teaspoon salt — Use fine sea salt. It balances the sweetness perfectly.
- 1 cup (226g) unsalted butter, softened — Make sure it’s actually at room temperature. Cold butter won’t cream properly, and melted butter changes the texture entirely.
- ¾ cup (150g) granulated sugar — For that slight crispness on the edges.
- ¾ cup (160g) packed light brown sugar — Adds moisture and that deep, almost caramel-like flavor.
- 2 large eggs, room temperature — If you forget to take them out of the fridge, place them in a bowl of warm water for 5 minutes.
- 2 teaspoons vanilla extract — Pure vanilla, not imitation. It really does make a difference here.
- 1 cup (170g) semi-sweet chocolate chips — I prefer Ghirardelli or Guittard for consistent melting and flavor.
For the Chocolate Ganache
- 1 cup (240ml) heavy cream — Don’t substitute with half-and-half or milk; the ganache won’t set properly.
- 8 oz (226g) semi-sweet or dark chocolate, finely chopped — Use a good-quality chocolate bar, not chocolate chips. Chips have stabilizers that can affect the texture. I like using 60% cacao for a balanced sweetness.
- 1 tablespoon unsalted butter, softened — This adds a beautiful shine to the finished ganache.
For the Spiderweb Decoration
- ¼ cup (60ml) white chocolate, melted — For the web design. You can also use store-bought white candy melts if you prefer.
- Optional: Candy spiders or edible eyes — For extra Halloween flair. I found some cute little plastic spiders at a party store that I clean and reuse every year.
Ingredient Tip: When choosing your chocolate for the ganache, avoid anything with added flavorings or fillings. Plain semi-sweet or dark chocolate is your best bet. And if you’re dairy-free, you can substitute the heavy cream with full-fat coconut cream (the kind from a can, not the refrigerated carton) and use a dairy-free butter. The texture will be slightly different but still delicious.
Equipment Needed
- 9-inch round cake pan — You can also use a springform pan for easier removal.
- Parchment paper — Essential for lifting the cookie cake out cleanly.
- Electric mixer — Handheld or stand mixer both work fine. You can do it by hand, but your arm will get a workout.
- Medium saucepan — For heating the cream. A microwave works too if you’re careful.
- Heatproof bowl — For making the ganache. Glass or stainless steel is best.
- Small piping bag or zip-top bag — For the spiderweb design. A squeeze bottle also works.
- Toothpick or skewer — For dragging the web pattern.
- Cooling rack — Lets air circulate so the cookie cools evenly.
I’ve made this using both a springform pan and a regular cake pan, and honestly, both work great. The springform pan makes it a little easier to remove the cookie cake without any edge damage. But if you line your regular pan well with parchment, you’ll be just fine. A tip from someone who learned the hard way: let the parchment hang over the edges like handles. It makes lifting the whole thing out so much easier.
Preparation Method
Step 1: Prep Your Pan and Preheat
Preheat your oven to 350°F (175°C). Grease your 9-inch round cake pan and line the bottom with a circle of parchment paper. Let the parchment extend up the sides a bit—this will be your lifeline later. Set the pan aside.
Step 2: Cream the Butter and Sugars
In a large mixing bowl, beat the softened butter, granulated sugar, and brown sugar together on medium speed until light and fluffy. This should take about 2 to 3 minutes. You’re looking for a pale, airy mixture that looks almost like whipped frosting. Scrape down the sides of the bowl halfway through. Don’t rush this step—proper creaming is what gives the cookie its tender texture.
Step 3: Add the Eggs and Vanilla
Add the eggs one at a time, beating well after each addition. Then mix in the vanilla extract. The mixture might look slightly curdled at this point, especially if your eggs were a little cold. That’s totally normal. Just keep mixing until it comes back together into a smooth batter.
Step 4: Combine the Dry Ingredients
In a separate bowl, whisk together the flour, baking soda, and salt. Gradually add the dry ingredients to the wet mixture, mixing on low speed just until combined. You don’t want to overmix here—stop as soon as you no longer see streaks of flour. Overmixing develops gluten, which can make your cookie cake tough instead of tender.
Step 5: Fold in the Chocolate Chips
Using a rubber spatula, fold in the chocolate chips by hand. Make sure they’re evenly distributed throughout the dough. The dough will be thick and slightly sticky—that’s exactly what you want.
Step 6: Press the Dough into the Pan
Transfer the dough to your prepared pan. Using slightly damp fingers (this prevents sticking), press the dough evenly into the pan. Try to make the surface as level as possible. If the dough is too sticky, you can chill it for 10 minutes before pressing.
Step 7: Bake
Bake for 22 to 28 minutes, or until the edges are golden brown and the center looks set but still soft. A toothpick inserted into the center should come out with a few moist crumbs—not wet batter. Every oven runs differently, so start checking at the 22-minute mark. The cookie will continue to set as it cools.
Step 8: Cool Completely
Let the cookie cake cool in the pan for 10 minutes, then carefully lift it out using the parchment paper and transfer to a cooling rack. Let it cool completely before adding the ganache. This is important—if the cookie is even slightly warm, the ganache will slide right off.
Step 9: Make the Ganache
Place the finely chopped chocolate in a heatproof bowl. In a small saucepan, heat the heavy cream over medium heat until it just begins to simmer—look for small bubbles around the edges, but don’t let it come to a full boil. Pour the hot cream over the chocolate and let it sit undisturbed for 2 minutes. Then gently stir in a circular motion, starting from the center and working outward, until the mixture is smooth and glossy. Stir in the softened butter for extra shine. Let the ganache cool for 10 to 15 minutes until it thickens slightly but is still pourable.
Step 10: Pour and Spread the Ganache
Place the cooled cookie cake on a serving plate or cake stand. Pour the ganache over the center and use an offset spatula or the back of a spoon to spread it evenly to the edges. Let some drip over the sides for that rustic, bakery-style look. Allow the ganache to set for about 15 minutes at room temperature.
Step 11: Create the Spiderweb
Melt the white chocolate in a small bowl in 20-second intervals in the microwave, stirring between each. Transfer to a small piping bag or a zip-top bag with a tiny corner snipped off. Pipe a spiral starting from the center of the cookie cake, working outward with about 1 inch between each ring. Then, using a toothpick or skewer, drag lines from the center outward through the white chocolate rings, creating the web effect. Wipe the toothpick clean between each drag line for the cleanest look.
If you want to add candy spiders or edible eyes, place them on the ganache while it’s still slightly soft so they stick.
Cooking Tips & Techniques
I’ve made this cookie cake enough times to know exactly where things can go wrong. Here’s what I’ve learned:
Don’t overbake. This is the number one mistake. The cookie will look slightly underdone in the center when you pull it out, but that’s exactly what you want. It continues to bake from residual heat as it cools. Overbaking gives you a dry, crumbly cookie that won’t hold the ganache properly.
Room temperature ingredients matter. I know, I know—every recipe says this. But with cookie cakes, it actually makes a difference. Cold eggs and cold butter don’t cream together properly, which affects the texture. If you forgot to plan ahead, cube your butter and let it sit on the counter for 15 minutes, and place your eggs in a bowl of warm water for 5 minutes.
The ganache patience test. Pouring the ganache while it’s too hot will make it run right off the cookie. Waiting too long and it becomes too thick to spread. The sweet spot is when it’s warm but not hot, and still flows like thick honey. About 10 minutes of cooling is usually perfect.
Clean toothpick technique. When you’re dragging the spiderweb pattern, wipe the toothpick clean between each line. If you don’t, the white chocolate smears and the web looks muddy instead of crisp. I learned this the hard way on my second attempt.
Chill the dough if needed. If your kitchen is warm and the dough feels too soft to press evenly, pop it in the fridge for 15 minutes. It’ll be much easier to work with.
Variations & Adaptations
One of the best things about this recipe is how easy it is to customize. Here are some variations I’ve tried and loved:
Pumpkin Spice Cookie Cake: Add 1 teaspoon of pumpkin pie spice to the dry ingredients and swap out ¼ cup of the flour for pumpkin puree. The texture will be slightly softer, but the fall flavor is incredible. This pairs beautifully with our cozy pumpkin cinnamon rolls for a full autumn dessert spread.
Peanut Butter Spiderweb: Replace ¼ cup of the butter with creamy peanut butter. Use milk chocolate for the ganache instead of semi-sweet. The salty-sweet combo is absolutely addictive.
Gluten-Free Version: Substitute the all-purpose flour with a 1:1 gluten-free baking flour blend that contains xanthan gum. I’ve tested this with Bob’s Red Mill 1-to-1 and it worked beautifully. The texture is slightly more cake-like but still delicious.
White Chocolate Web: Use white chocolate ganache (white chocolate + cream) instead of dark, and pipe the spiderweb in dark chocolate. The contrast is striking and feels more dramatic.
Mini Cookie Cakes: Press the dough into 4-inch mini cake pans or even a jumbo muffin tin. Reduce the baking time to 12 to 15 minutes. These are perfect for Halloween party favors or school treats.
If you’re looking for more crowd-pleasing party desserts, our salted caramel apple cheesecake bars are another favorite that always disappears fast.
Serving & Storage Suggestions
This cookie cake is best served at room temperature. The ganache is soft and fudgy, and the cookie has that perfect chewy texture. If you’ve refrigerated it, let it sit on the counter for about 20 minutes before slicing. Cold ganache gets firm and loses some of its lusciousness.
For serving, I like to cut it into wedges like a pizza. A sharp chef’s knife works best—wipe it clean between cuts for the neatest slices. You can serve it on its own, or with a scoop of vanilla ice cream for extra indulgence. A drizzle of caramel sauce over the top doesn’t hurt either.
Storage: Place any leftovers in an airtight container at room temperature for up to 3 days. If your kitchen is warm, you can refrigerate it, but let it come back to room temperature before serving. The cookie will stay soft and the ganache will remain glossy.
Freezer Instructions: You can freeze the baked cookie cake (without ganache) for up to 2 months. Wrap it tightly in plastic wrap, then foil. When you’re ready to serve, thaw it at room temperature, then make the ganache and decorate. This is actually a great make-ahead strategy for Halloween parties.
The flavors actually develop a bit overnight. The cookie absorbs some of the moisture from the ganache, and everything melds together into something even more delicious. So don’t stress about making it the same day—day-old cookie cake is honestly better.
Nutritional Information & Benefits
Let’s be real—this is a treat, not a health food. But here’s the estimated breakdown per serving (based on 12 servings):
- Calories: Approximately 420
- Fat: 24g
- Carbohydrates: 50g
- Protein: 5g
- Sugar: 32g
That said, there are a few redeeming qualities. Dark chocolate (especially 60% cacao or higher) contains antioxidants and can be part of a balanced diet. The butter and eggs provide some protein and healthy fats. And honestly, sharing this with friends and family has its own mental health benefits—there’s something about gathering around a homemade dessert that just feels good.
If you’re watching your sugar intake, you can reduce the sugar in the cookie base by ¼ cup without affecting the texture too much. The ganache is harder to adjust, but you can use a darker chocolate (70% or higher) to reduce sweetness.
This recipe contains gluten, dairy, and eggs. For a dairy-free version, use vegan butter and coconut cream in the ganache. For an egg-free version, you can try using a flax egg (1 tablespoon ground flaxseed + 3 tablespoons water per egg), but the texture will be slightly more dense.
Conclusion
This Perfect Spiderweb Halloween Cookie Cake with Chocolate Ganache is the kind of dessert that makes you look like a baking hero without the stress. It’s impressive enough for a Halloween party, simple enough for a casual family night, and delicious enough that people will ask for the recipe before the plate is empty.
What I love most about this recipe is how forgiving it is. The first time I made it, I forgot to let the ganache cool and it ran right off the cookie and pooled on the plate. I just called it “intentional chocolate sauce” and everyone loved it anyway. So don’t stress about perfection—the spiderweb doesn’t have to be symmetrical, the ganache doesn’t have to be perfectly smooth. It’s Halloween. A little imperfection makes it more authentic.
I’d love to hear how yours turns out. Did you add candy spiders? Try a different ganache flavor? Forget the white chocolate and just do a chocolate-on-chocolate situation? Drop a comment below and let me know. And if you’re looking for more easy Halloween treats, our pumpkin fall baby shower cake is another showstopper that’s easier than it looks.
Happy Halloween, and happy baking!
Frequently Asked Questions
Can I use chocolate chips instead of chopped chocolate for the ganache?
You can, but the texture won’t be as smooth. Chocolate chips contain stabilizers that prevent them from melting as evenly as chopped chocolate bars. If you’re in a pinch, use good-quality chips and stir vigorously until smooth.
How do I prevent the cookie cake from sticking to the pan?
Line the bottom of your pan with parchment paper and let it extend up the sides. Grease the pan before adding the parchment. The parchment acts like handles, letting you lift the entire cookie cake out cleanly.
Can I make this recipe ahead of time for a party?
Absolutely. Bake the cookie cake up to 2 days ahead and store it wrapped tightly at room temperature. Make the ganache and decorate the day of the party for the freshest look. The spiderweb design is best done within a few hours of serving.
Why did my ganache turn out grainy?
Grainy ganache usually happens when the cream is too hot or when moisture gets into the chocolate. Make sure your bowl and utensils are completely dry. If the ganache seizes, you can try whisking in a tablespoon of warm cream at a time until it smooths out.
Can I double this recipe for a larger crowd?
Yes! Double all the ingredients and bake in a 12-inch round cake pan or a 9×13 inch rectangular pan. Increase the baking time by 5 to 10 minutes, checking for doneness with a toothpick. You’ll need to double the ganache recipe as well.
Pin This Recipe!
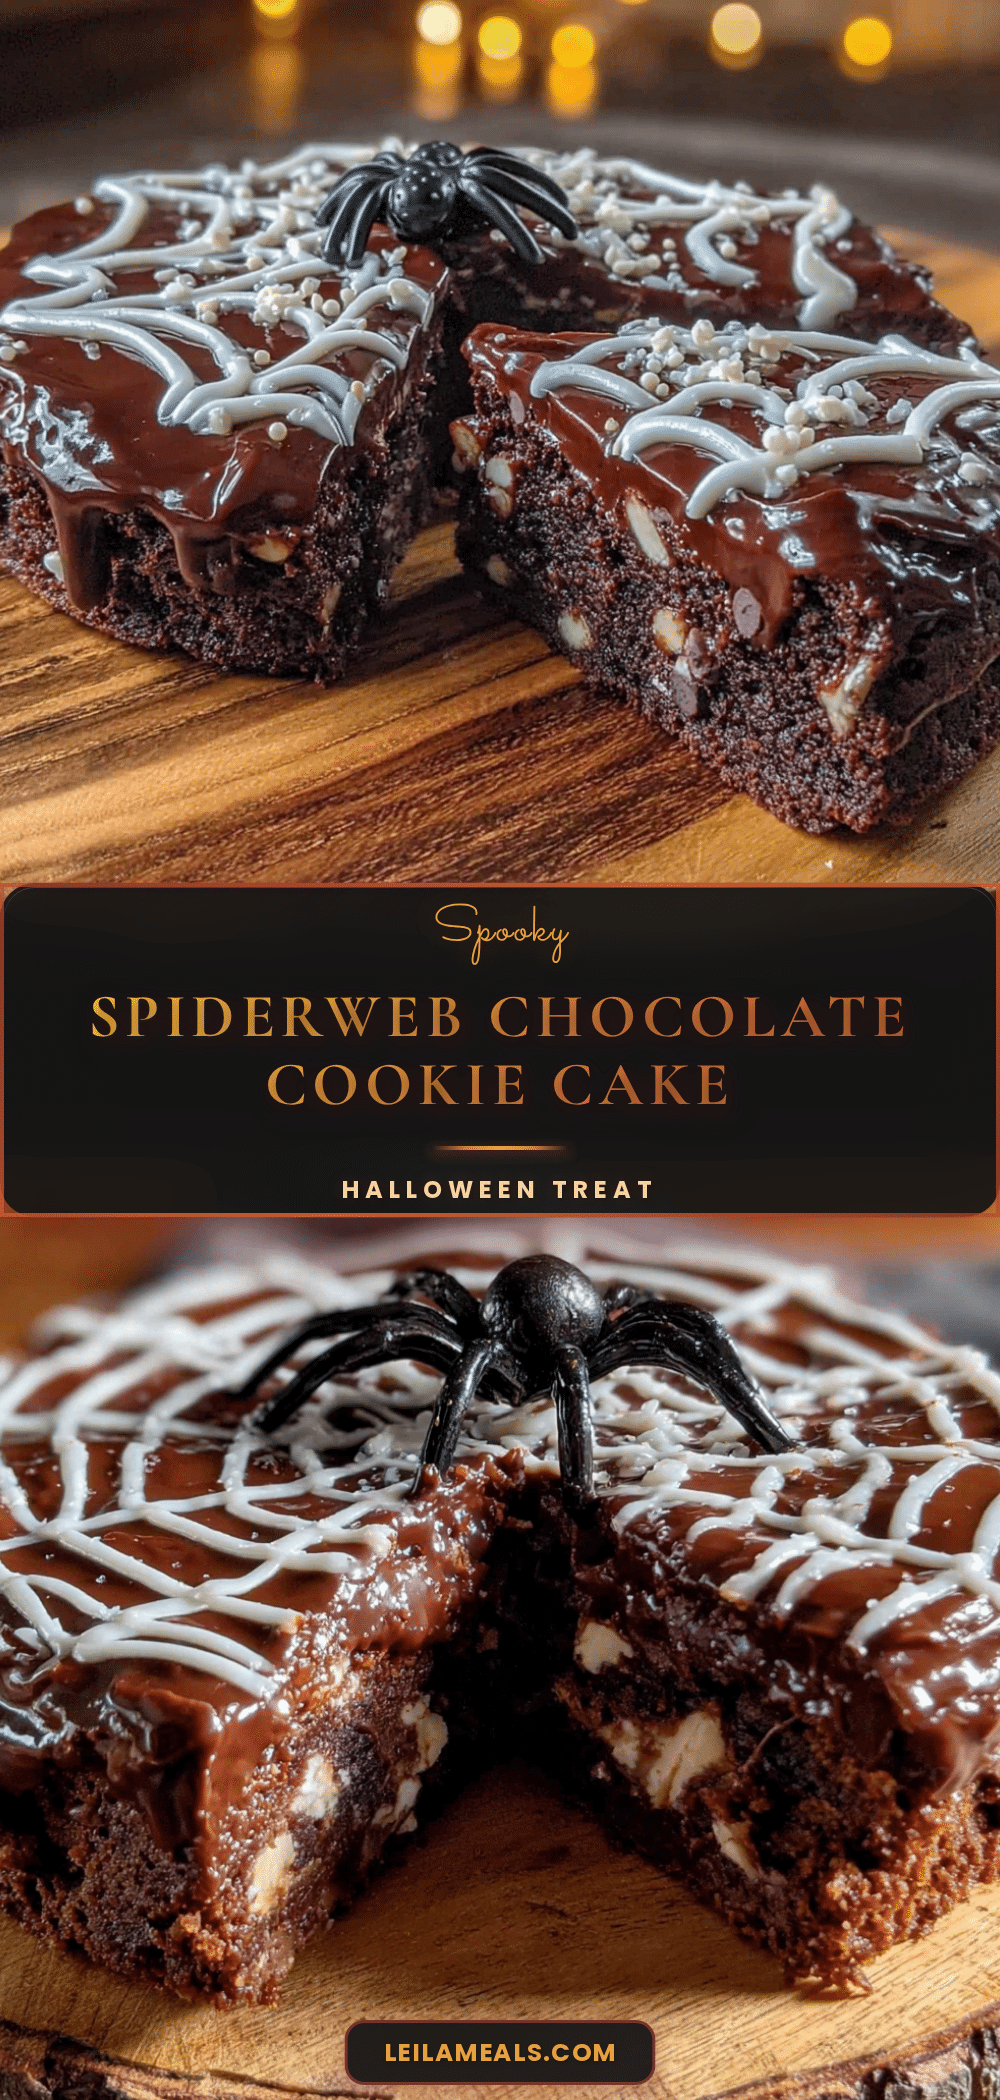
Perfect Spiderweb Halloween Cookie Cake with Easy Chocolate Ganache
A thick, chewy cookie cake topped with glossy chocolate ganache and an easy spiderweb design. This impressive Halloween dessert looks like it came from a bakery but comes together with minimal stress and simple ingredients.
- Prep Time: 20 minutes
- Cook Time: 25 minutes
- Total Time: 45 minutes
- Yield: 12 servings 1x
- Category: Dessert
- Cuisine: American
Ingredients
- 2 ¼ cups (280g) all-purpose flour
- 1 teaspoon baking soda
- ½ teaspoon fine sea salt
- 1 cup (226g) unsalted butter, softened
- ¾ cup (150g) granulated sugar
- ¾ cup (160g) packed light brown sugar
- 2 large eggs, room temperature
- 2 teaspoons pure vanilla extract
- 1 cup (170g) semi-sweet chocolate chips
- 1 cup (240ml) heavy cream
- 8 oz (226g) semi-sweet or dark chocolate, finely chopped (60% cacao recommended)
- 1 tablespoon unsalted butter, softened
- ¼ cup (60ml) white chocolate, melted
- Optional: candy spiders or edible eyes for decoration
Instructions
- Preheat oven to 350°F (175°C). Grease a 9-inch round cake pan and line the bottom with parchment paper, letting it extend up the sides.
- In a large mixing bowl, beat softened butter, granulated sugar, and brown sugar on medium speed until light and fluffy, about 2-3 minutes. Scrape down the sides halfway through.
- Add eggs one at a time, beating well after each addition. Mix in vanilla extract. The mixture may look slightly curdled; continue mixing until smooth.
- In a separate bowl, whisk together flour, baking soda, and salt. Gradually add dry ingredients to wet mixture, mixing on low speed just until combined. Do not overmix.
- Fold in chocolate chips with a rubber spatula until evenly distributed. Dough will be thick and slightly sticky.
- Transfer dough to prepared pan. Using slightly damp fingers, press dough evenly into the pan, making the surface as level as possible. Chill for 10 minutes if too sticky.
- Bake for 22-28 minutes, until edges are golden brown and center looks set but still soft. A toothpick inserted in center should come out with a few moist crumbs. Cool in pan for 10 minutes, then lift out using parchment and transfer to a cooling rack. Cool completely.
- Place finely chopped chocolate in a heatproof bowl. Heat heavy cream in a small saucepan over medium heat until it just begins to simmer (small bubbles around edges, not boiling). Pour hot cream over chocolate and let sit undisturbed for 2 minutes. Stir gently in a circular motion from center outward until smooth and glossy. Stir in softened butter. Let ganache cool for 10-15 minutes until thickened but still pourable.
- Place cooled cookie cake on a serving plate. Pour ganache over center and spread evenly to edges with an offset spatula or spoon. Let some drip over sides. Allow ganache to set for about 15 minutes at room temperature.
- Melt white chocolate in a small bowl in 20-second intervals in the microwave, stirring between each. Transfer to a small piping bag or zip-top bag with a tiny corner snipped off. Pipe a spiral starting from the center of the cookie cake, working outward with about 1 inch between each ring.
- Using a toothpick or skewer, drag lines from the center outward through the white chocolate rings to create the web effect. Wipe toothpick clean between each drag line. If adding candy spiders or edible eyes, place them on ganache while still slightly soft.
Notes
Don’t overbake—the cookie will look slightly underdone in the center when pulled out but continues to bake from residual heat. Room temperature ingredients matter for proper creaming. Pour ganache when warm but not hot (about 10 minutes cooling). Wipe toothpick clean between each drag line for crisp spiderweb. Chill dough if kitchen is warm. Cookie cake can be baked 2 days ahead; add ganache and decorate day of serving. Freeze baked cookie cake (without ganache) for up to 2 months.
Nutrition
- Serving Size: 1 slice (1/12 of cak
- Calories: 420
- Sugar: 32
- Sodium: 180
- Fat: 24
- Saturated Fat: 14
- Carbohydrates: 50
- Fiber: 2
- Protein: 5
Keywords: Halloween cookie cake, spiderweb cookie, chocolate ganache, Halloween dessert, cookie cake recipe, easy Halloween treat, spiderweb design