That first drag of a #2 pencil across thick paper—the scratch, the resistance, the way the graphite leaves a dark, satisfying line. It still takes me straight back to my grandmother’s kitchen table, a place where Halloween wasn’t just a holiday; it was a season of meticulous, joyful preparation. She’d slide a fresh batch of sugar cookies my way, still warm and smelling of vanilla, and I’d sketch out my plans—a ghost with a crooked smile, a pumpkin with triangle eyes, but always, without fail, a black cat. It was her simple, buttery dough that made those drawings real, and it’s that same feeling of bringing a sketch to life that makes these perfect black cat sugar cookies with royal icing so special. This isn’t just about baking; it’s about edible art, about holding a paintbrush loaded with glossy icing and watching a cookie turn into a tiny, charming creature. The best part? The recipe is forgiving enough for a beginner but precise enough for a pro who wants that flawless, glossy finish.
These cookies are the kind you can’t just eat one of. You have to admire them first, turning them over to see the clean lines of the icing, the perfectly placed eyes. They are a little piece of Halloween magic that tastes as good as it looks. And honestly, there’s a certain quiet pride in pulling a tray of these out at a party—they always get a second look before they get a first bite.
Why You’ll Love This Recipe
After years of testing and tweaking, I can confidently say this is the best sugar cookie recipe for cut-outs. It’s a recipe built on trust and a little bit of kitchen science. Here’s why it will become your go-to for every spooky celebration:
- Perfectly Sturdy for Icing: This dough holds its shape beautifully in the oven, meaning no distorted cat ears or stretched-out tails. You get a crisp, clean canvas for your royal icing.
- Buttery, Not Too Sweet: The cookie itself is rich with butter and vanilla, with a balanced sweetness that complements the sugary royal icing without being cloying. It’s the perfect base for a sweet art project.
- No Spreading, No Stress: The key is chilling the dough. I’ve had my fair share of Halloween blobs that were supposed to be bats, so trust me when I say this step is non-negotiable for perfect shapes.
- Royal Icing that Sets Hard: This icing dries to a beautiful, glossy, hard finish that won’t smudge or smear when you stack the cookies for a party or a gift. It’s the secret to professional-looking results at home.
- A Fun, Creative Activity: This is more than a recipe; it’s an experience. It’s perfect for a spooky baking afternoon with kids or a relaxing solo project on a crisp fall evening. I often pair this activity with a warm cozy pumpkin spice cold brew for the ultimate fall vibe.
This cookie is the kind that makes you close your eyes after the first bite. It’s the perfect combination of a crisp, buttery snap and a smooth, sweet icing. It’s a treat that feels special, looks impressive, and tastes like pure autumn.
What Ingredients You Will Need
This recipe uses simple, wholesome ingredients to deliver that classic sugar cookie flavor and perfect texture. Most of these are pantry staples, which makes this a great last-minute Halloween project.
For the Black Cat Sugar Cookies
- 3 cups (375g) all-purpose flour: The structure of our cookie. I prefer unbleached all-purpose flour for a clean flavor. (Pro-tip: Spoon and level your flour for the most accurate measurement—don’t scoop directly from the bag!)
- 1 teaspoon baking powder: For just a little lift, keeping the cookies tender but sturdy.
- ½ teaspoon salt: Balances the sweetness and enhances the buttery flavor.
- 1 cup (226g) unsalted butter, softened: The heart of the flavor. Make sure it’s truly softened to room temperature for a smooth, creamy dough. (I always use unsalted to control the salt level.)
- 1 cup (200g) granulated sugar: Adds sweetness and helps with the cookie’s structure.
- 1 large egg, room temperature: Binds the dough and adds richness.
- 2 teaspoons vanilla extract: Pure vanilla extract makes a world of difference. It gives the cookies that warm, nostalgic aroma.
- ½ teaspoon almond extract (optional): This is my secret ingredient. It adds a subtle, floral note that makes the cookie taste even more special. It’s not traditional, but it’s wonderful.
For the Royal Icing
- 4 cups (480g) powdered sugar, sifted: Sifting is key to a smooth, lump-free icing. Don’t skip this step!
- 3 tablespoons meringue powder: This is what gives royal icing its structure and hard, glossy finish. It’s a must for decorating cookies that you want to stack or ship. (You can find it at most craft stores or online.)
- 6-8 tablespoons warm water: You’ll add this slowly to achieve the perfect consistency.
- Black gel food coloring: Liquid food coloring will thin out your icing. Gel is concentrated and won’t affect the texture. (I like the Americolor brand for a deep, true black.)
- Orange gel food coloring (optional): For a fun Halloween accent, like a pumpkin or a moon.
- White sanding sugar or edible glitter (optional): For a little extra sparkle on the eyes or collar of your cat.
Equipment Needed
You don’t need a professional bakery setup, but a few key tools will make the process much smoother and more enjoyable.
- Electric Stand Mixer or Hand Mixer: For creaming the butter and sugar and beating the royal icing. A stand mixer is a huge help for the icing, as it needs to whip for a few minutes.
- Rolling Pin: A standard rolling pin works great, but I love my adjustable rolling pin because it has rings that guarantee an even thickness every time.
- Cat-Shaped Cookie Cutter: This is the star of the show! You can find a single cat cutter or a set of different poses. A simple, classic sitting cat silhouette is perfect.
- Parchment Paper or Silicone Baking Mats: For lining your baking sheets. This prevents sticking and ensures even baking.
- Piping Bags (Disposable or Reusable): You’ll need a few for the different icing colors.
- Small Round Piping Tips (Size #2 or #3): For outlining and flooding the cookies with precision.
- Offset Spatula: Great for spreading the flood icing if needed, though a piping bag is cleaner.
- Toothpicks or Scribe Tool: Essential for popping air bubbles in the wet icing and guiding it into the corners of the cookie.
Preparation Method
This is where the magic happens. Take your time, especially with the chilling steps—they are the secret to perfect cookies.
- Make the Cookie Dough: In a medium bowl, whisk together the flour, baking powder, and salt. Set aside. In the bowl of a stand mixer fitted with the paddle attachment, beat the softened butter and granulated sugar on medium speed until light and fluffy, about 2-3 minutes. Scrape down the sides of the bowl. Add the egg, vanilla extract, and almond extract (if using), and beat until combined. With the mixer on low, gradually add the dry ingredients, mixing just until the dough comes together. It will be soft and slightly crumbly.
- Chill the Dough: Divide the dough into two equal discs, wrap each tightly in plastic wrap, and flatten them into a disc shape. Refrigerate for at least 1 hour, or up to 2 days. This is the most important step. Chilling solidifies the butter, which prevents the cookies from spreading in the oven. I’ve learned this the hard way after making a batch of sad, flat ghosts.
- Roll and Cut: Preheat your oven to 350°F (175°C). Line your baking sheets with parchment paper. On a lightly floured surface, roll out one disc of dough to about ¼-inch (6mm) thickness. Use your cat-shaped cookie cutter to cut out the cookies. Place them on the prepared baking sheets, leaving about 1 inch (2.5 cm) of space between each. Gather the scraps, re-roll, and cut more cookies.
- Bake: Bake for 8-10 minutes, or until the edges are just barely set and the bottoms are lightly golden. The centers should look dry but not brown. Let the cookies cool on the baking sheet for 5 minutes before transferring them to a wire rack to cool completely. They must be 100% cool before you start icing them, or the icing will melt and slide right off.
- Make the Royal Icing: In the bowl of a stand mixer fitted with the whisk attachment, combine the sifted powdered sugar and meringue powder. With the mixer on low, add 6 tablespoons of warm water. Increase the speed to medium-high and beat for 5-7 minutes, until the icing is glossy, stiff, and forms a stiff peak when you lift the whisk. It should look like marshmallow fluff. If it’s too thick, add the remaining water, 1 teaspoon at a time.
- Color and Thin the Icing: Divide the icing into two bowls. Color one large portion with black gel food coloring until you reach your desired shade. Color a small portion orange if you like. You will need two consistencies of icing: a stiff consistency for outlining and a flood consistency for filling. For the flood consistency, take a small amount of the stiff black icing and add water, ¼ teaspoon at a time, stirring gently with a spatula. The goal is a consistency that flows like thick syrup and smooths out within 10 seconds after you stir it. You don’t want it to be watery.
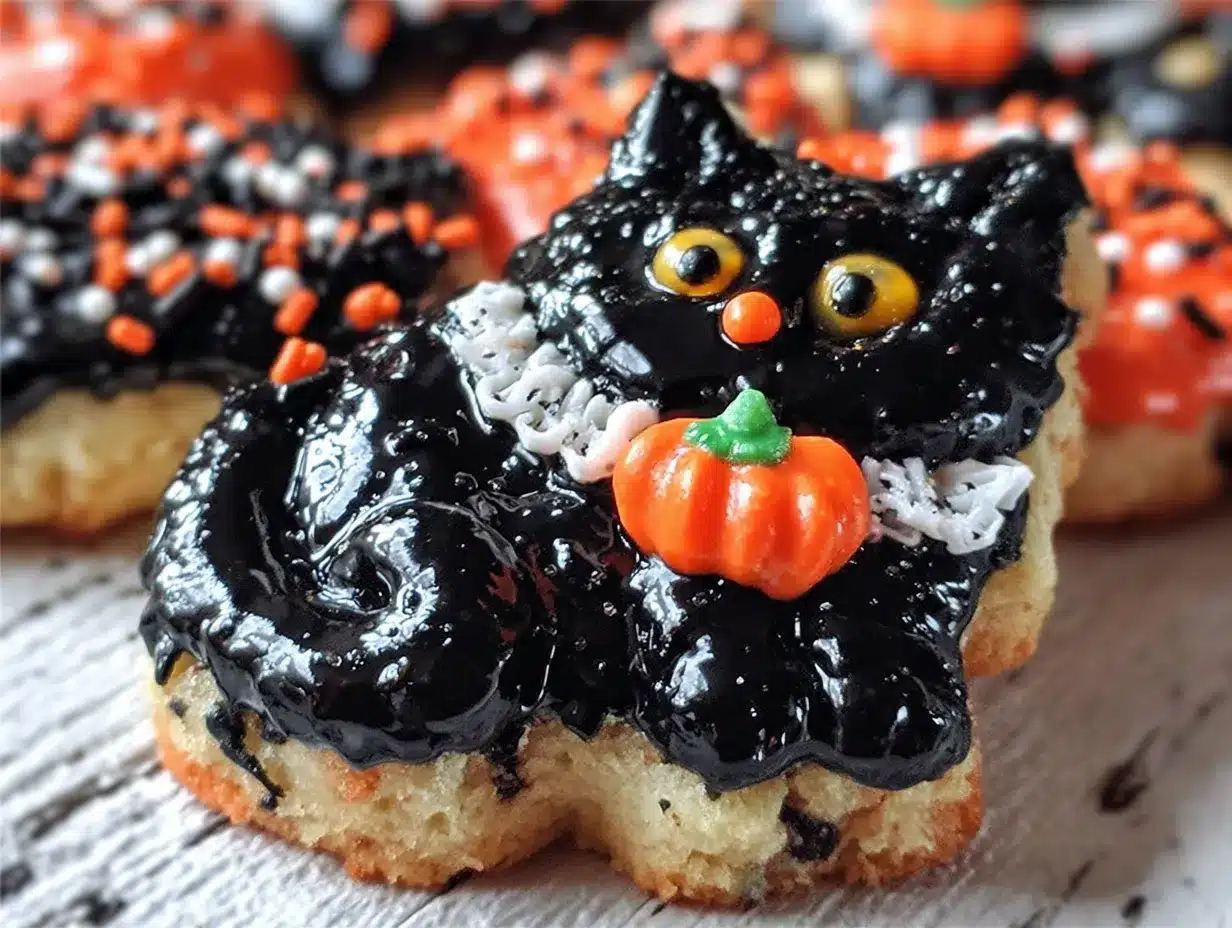
- Decorate the Cookies: This is the fun part. Fit a piping bag with a #2 tip and fill it with your stiff black icing. Outline the entire cat cookie. Let the outline dry for about 5 minutes. Then, fill a new piping bag with your flood-consistency black icing and snip off a tiny tip. Pipe the flood icing inside the outlines, using a toothpick to guide it into all the nooks and crannies (the tail, the ears). Pop any air bubbles with a toothpick. While the black icing is still wet, use the stiff orange icing to pipe a small pumpkin or a moon next to your cat. For the eyes, you can either pipe tiny white dots with stiff white icing or gently press white sanding sugar into the wet black icing for a sparkly effect.
- Let the Icing Set: This is the hardest part—the waiting. Allow the cookies to dry, uncovered, at room temperature for at least 6-8 hours, or overnight. The icing should be completely hard and smooth to the touch before you stack or store them.
Cooking Tips & Techniques
I’ve made a lot of mistakes over the years so you don’t have to. Here are my best tips for perfect black cat sugar cookies every time.
- The Dough Temperature is Everything: If your dough is too warm, it will stick to your rolling pin and the cookies will spread. Don’t be afraid to pop it back in the fridge for 10 minutes if it feels sticky. If your cut-out cookies are a little misshapen after transferring them to the baking sheet, you can gently re-shape them with your fingers. I once made a cat with a tail that looked more like a question mark—it was a happy accident, but I prefer a straight tail!
- How to Avoid Air Bubbles in Royal Icing: After you mix the royal icing, let it sit for 10-15 minutes to allow any air bubbles to rise to the surface. You can also gently tap the bowl on the counter to release them. When you’re flooding the cookies, use a toothpick to pop any bubbles that appear immediately.
- Mastering the Flood Consistency: The perfect flood icing is the key to a smooth, professional finish. It should be thick enough to hold its shape for a second or two but then melt back into itself. A good test is the “ribbon test”: when you lift a spoonful of icing, it should fall back into the bowl in a smooth, continuous ribbon that disappears into the surface in about 10 seconds. If it’s too thin, it will run off the cookie. If it’s too thick, it won’t smooth out.
- Timing is Key: Don’t try to do everything in one day. I like to make the dough and bake the cookies one day, then decorate them the next. This breaks up the work and ensures the cookies are completely cool. For a fun party idea, you could even bake the cookies ahead of time and set up a decorating station with pre-made icing bags. It’s a great activity alongside a savory pepperoni pizza dip in bread bowl for a balanced spread.
Variations & Adaptations
Don’t be afraid to make this recipe your own. The possibilities are endless, and that’s the real joy of cookie decorating.
- Spooky Cat Variations: Instead of a simple black cat, try a white ghost cat! Use white icing and pipe on a little orange pumpkin for a fun contrast. Or, make a pumpkin patch scene with a few orange pumpkin-shaped cookies alongside your black cats. You can also use a different cookie cutter shape, like a bat or a ghost, and use the same royal icing technique.
- Flavor Twists: Swap the vanilla and almond extracts for 1 teaspoon of pumpkin pie spice and 1 teaspoon of vanilla for a fall-spiced cookie. Or, add ½ cup of finely chopped dark chocolate to the dough for a chocolate black cat cookie. For a citrusy kick, replace the vanilla with the zest of one lemon and 1 tablespoon of lemon juice.
- Dietary Adaptations: For a gluten-free version, use a high-quality 1:1 gluten-free baking flour blend. Make sure it contains xanthan gum. For a dairy-free version, substitute the butter with a high-quality vegan butter stick (like Earth Balance). The texture might be slightly different, but it will still be delicious.
- Different Icing Techniques: You don’t have to use royal icing! A simple powdered sugar glaze (powdered sugar + milk + vanilla) is much easier and has a softer, matte finish. You can also use melted dark chocolate or candy melts for a quicker, shinier coating. For a rustic look, skip the icing altogether and just sprinkle the cookies with black sanding sugar before baking.
Serving & Storage Suggestions
These cookies are perfect for any Halloween gathering, from a school party to a spooky movie night. Here’s how to serve and store them like a pro.
- Serving: Serve the cookies at room temperature on a beautiful platter or cake stand. They are a fantastic addition to a Halloween dessert table alongside other treats like soft pumpkin chocolate chip cookies with sea salt flakes. The contrast of the crisp, decorated cat cookies with a soft, chewy pumpkin cookie is a crowd-pleaser. They are also wonderful as a favor to send home with guests, wrapped in a clear cellophane bag tied with a festive ribbon.
- Storing: Store the decorated cookies in an airtight container at room temperature. They will stay fresh and the icing will remain hard for up to 2 weeks. To prevent the cookies from sliding around, you can layer them between sheets of parchment or wax paper. The flavors actually meld together and become even more delicious after a day or two.
- Freezing: You can freeze the undecorated, baked cookies for up to 3 months. Just let them cool completely, then place them in a single layer in a freezer-safe bag or container. When you’re ready to decorate, let them thaw at room temperature. Do not freeze decorated cookies, as the icing can become sticky or crack when thawed.
Nutritional Information & Benefits
While these are a treat, it’s always good to know what you’re working with. This information is an estimate and will vary based on the specific ingredients and decorations used.
- Estimated per cookie (based on a 3-inch cookie with royal icing): Calories: 180-220, Fat: 8g, Carbohydrates: 28g, Protein: 2g, Sugar: 20g.
- Ingredient Benefits: The butter provides a source of Vitamin A, and the egg adds a small amount of protein. The simple ingredients mean you can control what goes into your treat, avoiding artificial preservatives and stabilizers.
- Dietary Considerations: This recipe contains gluten, dairy, and eggs. For gluten-free or dairy-free adaptations, see the “Variations & Adaptations” section above. The royal icing is egg-free, which is a bonus for those with egg allergies.
- A Personal Note: I believe in balance. These cookies are a celebration, a special treat for a fun holiday. They are not an everyday snack, and that’s what makes them so wonderful. Enjoying them mindfully, with a glass of milk or a hot apple cider, is the perfect way to appreciate the craft and the flavor.
Conclusion
So there you have it—a complete guide to making the most charming, delicious black cat sugar cookies for Halloween. This recipe is more than just a list of steps; it’s an invitation to create, to play, and to share a little bit of edible art. I encourage you to not just follow the recipe to the letter, but to make it your own. Change the face, add a witch’s hat, or pipe on a little spider web—the only limit is your imagination. For me, these cookies are a little piece of that childhood kitchen table magic, a way to keep a tradition alive and share it with the people I love. I genuinely hope they become a part of your Halloween traditions, too. Now, go get your bake on and create something spooktacular! If you do, please come back and let me know how they turned out in the comments—I’d love to see your beautiful black cats.
Frequently Asked Questions
Can I use a different type of icing for these cookies?
Absolutely! Royal icing is the classic choice for a hard, glossy finish, but it’s not the only option. A simple powdered sugar glaze (just powdered sugar and milk) is much quicker and has a soft, matte look. You can also use melted chocolate or candy melts for a super easy, delicious coating.
Why did my sugar cookies spread in the oven?
This is the most common issue! It almost always comes down to the dough being too warm. Make sure you chill the dough for at least 1 hour before rolling and cutting. If the dough feels sticky at any point, pop it back in the fridge for 10-15 minutes. Also, make sure your butter is softened, not melted.
How do I get my royal icing to be perfectly smooth?
The secret is the flood consistency. Your icing needs to be thin enough to flow and smooth out on its own, but thick enough to hold its shape. The “ribbon test” is your best friend. Also, don’t forget to pop any air bubbles with a toothpick while the icing is still wet.
How far in advance can I make these cookies?
You can make them well in advance! The undecorated, baked cookies can be frozen for up to 3 months. Once decorated, the cookies will stay fresh in an airtight container at room temperature for up to 2 weeks. This makes them perfect for planning ahead for a party.
Can I make these cookies vegan or dairy-free?
Yes, you can! For a dairy-free version, substitute the butter with a high-quality vegan butter stick. For a vegan version, use a flax egg (1 tablespoon ground flaxseed mixed with 3 tablespoons water) instead of a chicken egg. For the royal icing, you can use a vegan meringue powder or aquafaba (the liquid from a can of chickpeas) as a substitute. The texture may be slightly different, but they will still be delicious and beautiful.
Pin This Recipe!
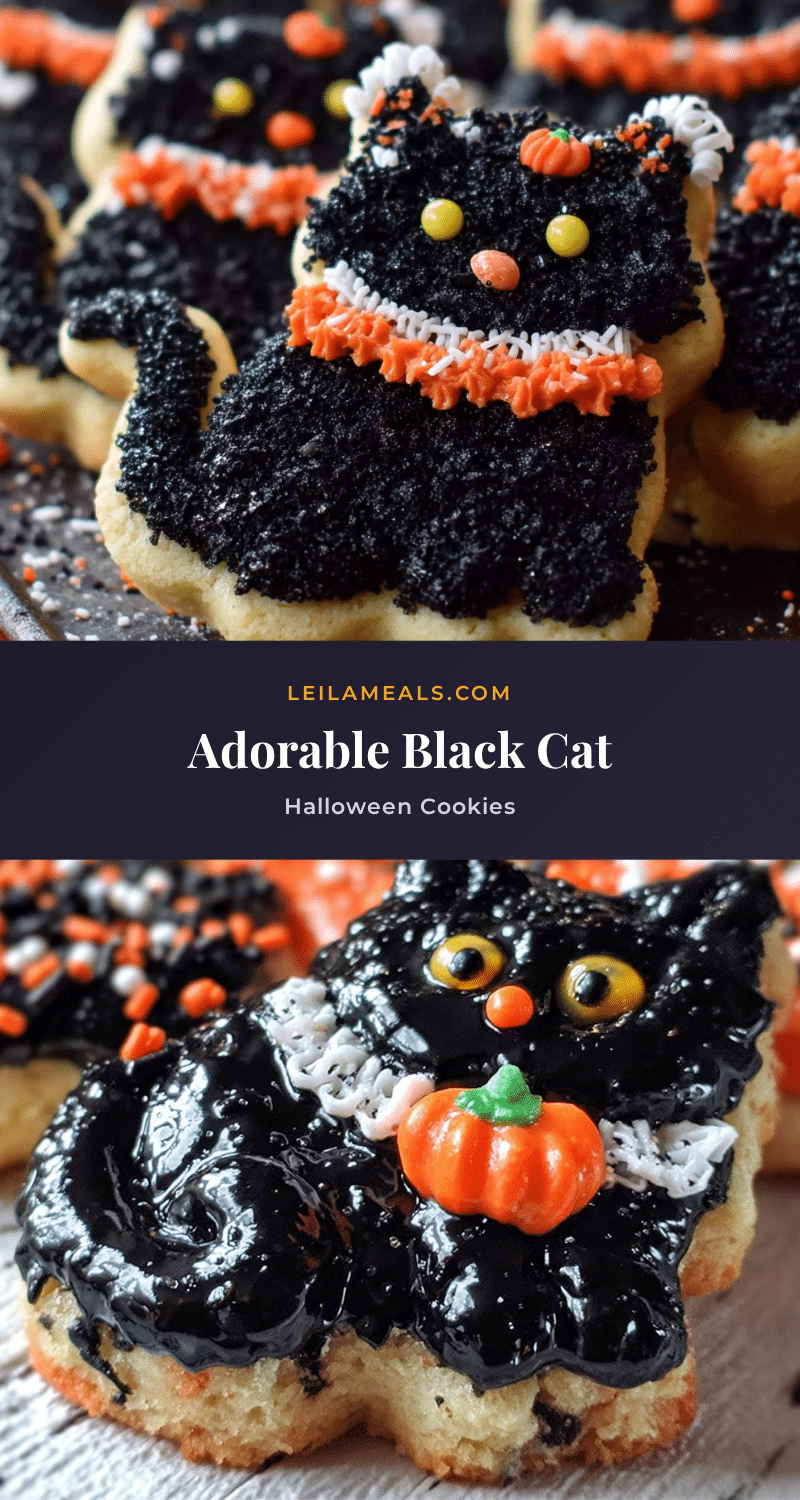
Perfect Black Cat Sugar Cookies Easy Halloween Treat
These black cat sugar cookies are a delightful Halloween treat, combining a buttery, not-too-sweet cookie with a glossy royal icing. They are perfect for decorating and make a charming addition to any spooky celebration.
- Prep Time: 1 hour 30 minutes
- Cook Time: 10 minutes
- Total Time: 2 hours 40 minutes
- Yield: 24 servings 1x
- Category: Dessert
- Cuisine: American
Ingredients
- 3 cups (375g) all-purpose flour
- 1 teaspoon baking powder
- ½ teaspoon salt
- 1 cup (226g) unsalted butter, softened
- 1 cup (200g) granulated sugar
- 1 large egg, room temperature
- 2 teaspoons vanilla extract
- ½ teaspoon almond extract (optional)
- 4 cups (480g) powdered sugar, sifted
- 3 tablespoons meringue powder
- 6–8 tablespoons warm water
- Black gel food coloring
- Orange gel food coloring (optional)
- White sanding sugar or edible glitter (optional)
Instructions
- Make the Cookie Dough: In a medium bowl, whisk together the flour, baking powder, and salt. Set aside. In the bowl of a stand mixer fitted with the paddle attachment, beat the softened butter and granulated sugar on medium speed until light and fluffy, about 2-3 minutes. Scrape down the sides of the bowl. Add the egg, vanilla extract, and almond extract (if using), and beat until combined. With the mixer on low, gradually add the dry ingredients, mixing just until the dough comes together. It wi…
- Chill the Dough: Divide the dough into two equal discs, wrap each tightly in plastic wrap, and flatten them into a disc shape. Refrigerate for at least 1 hour, or up to 2 days.
- Roll and Cut: Preheat your oven to 350°F (175°C). Line your baking sheets with parchment paper. On a lightly floured surface, roll out one disc of dough to about ¼-inch (6mm) thickness. Use your cat-shaped cookie cutter to cut out the cookies. Place them on the prepared baking sheets, leaving about 1 inch (2.5 cm) of space between each. Gather the scraps, re-roll, and cut more cookies.
- Bake: Bake for 8-10 minutes, or until the edges are just barely set and the bottoms are lightly golden. The centers should look dry but not brown. Let the cookies cool on the baking sheet for 5 minutes before transferring them to a wire rack to cool completely.
- Make the Royal Icing: In the bowl of a stand mixer fitted with the whisk attachment, combine the sifted powdered sugar and meringue powder. With the mixer on low, add 6 tablespoons of warm water. Increase the speed to medium-high and beat for 5-7 minutes, until the icing is glossy, stiff, and forms a stiff peak when you lift the whisk. If it’s too thick, add the remaining water, 1 teaspoon at a time.
- Color and Thin the Icing: Divide the icing into two bowls. Color one large portion with black gel food coloring until you reach your desired shade. Color a small portion orange if you like. For the flood consistency, take a small amount of the stiff black icing and add water, ¼ teaspoon at a time, stirring gently with a spatula. The goal is a consistency that flows like thick syrup and smooths out within 10 seconds after you stir it.
- Decorate the Cookies: Fit a piping bag with a #2 tip and fill it with your stiff black icing. Outline the entire cat cookie. Let the outline dry for about 5 minutes. Then, fill a new piping bag with your flood-consistency black icing and snip off a tiny tip. Pipe the flood icing inside the outlines, using a toothpick to guide it into all the nooks and crannies. Pop any air bubbles with a toothpick. While the black icing is still wet, use the stiff orange icing to pipe a small pumpkin or a moon n…
- Let the Icing Set: Allow the cookies to dry, uncovered, at room temperature for at least 6-8 hours, or overnight. The icing should be completely hard and smooth to the touch before you stack or store them.
Notes
Chilling the dough is crucial to prevent spreading. For the royal icing, ensure the cookies are completely cool before decorating. The icing sets hard, making these cookies stackable and giftable.
Nutrition
- Serving Size: 1 cookie
- Calories: 200
- Sugar: 20
- Sodium: 80
- Fat: 8
- Saturated Fat: 5
- Carbohydrates: 28
- Protein: 2
Keywords: black cat sugar cookies, Halloween cookies, sugar cookies, royal icing cookies, easy Halloween treat, decorated cookies