Frantically digging through the fridge at 11:47 PM on a Tuesday, three flour tortillas staring back at me from the back of the drawer, half a pack of turkey slices that needed using up, and a block of cream cheese that was somehow still within its expiration date. That’s when these little spirals of pure lunchbox magic were born. I had a kid who was suddenly “too cool” for sandwich bread and a lunch-packing routine that had completely fallen apart.
Honestly, I wasn’t trying to create anything special. I was just tired of the morning scramble, you know? The one where you’re standing there with peanut butter on your finger and the dog is circling your feet and you realize you forgot to buy bread. Again. So I grabbed what I had and started rolling. And rolling. And then slicing. And then my kid actually ate the whole thing without complaint—which, let’s face it, is basically winning the parenting lottery.
These Easy Turkey and Cheese Pinwheel Lunch Wraps became our go-to for a reason. They look like you actually tried (bonus points for that fancy spiral effect), but they take ten minutes flat to throw together. Ten minutes. That’s less time than it takes to argue about why we can’t have cookies for breakfast. The first time I packed them in a lunchbox next to some grapes and those easy no-bake peanut butter oat energy bites, I got a note back that just said “more please.” So yeah. These stuck.
Why You’ll Love This Recipe
Let me tell you why these little spirals have completely taken over our lunch rotation. I’ve tested this recipe about seventeen times (yes, really) across different tortilla brands, cheese types, and even gluten-free options. Here’s what makes them work:
- Ready in 10 Minutes : No cooking, no heating, no complicated steps. Just spread, layer, roll, and slice. Perfect for those mornings when you hit snooze one too many times.
- Pantry-Friendly Ingredients : You probably already have everything you need. Turkey, cheese, tortillas, cream cheese—these are staples in most kitchens. No special grocery run required.
- Perfect for Lunchboxes : They hold up beautifully in a lunchbox for hours without getting soggy (if you follow my little trick below). Great for school, work, picnics, or road trips.
- Crowd-Pleasing Magic : Kids love the fun spiral shape, adults appreciate the satisfying protein-packed bite. I’ve brought these to playdates, potlucks, and even a book club meeting where they disappeared in minutes.
- Endlessly Customizable : Swap the turkey for ham, roast beef, or even this healthy protein-packed turkey avocado bento box filling. Change up the cheese, add veggies, make it spicy—the possibilities are endless.
What makes this version different from all the other pinwheel recipes out there? It’s the cream cheese base. Most recipes use plain cream cheese or mayo, but I’ve found that mixing it with a tiny splash of ranch seasoning (or just salt and pepper and garlic powder) creates this savory, creamy layer that holds everything together perfectly. No sliding ingredients. No dry bites. Every single pinwheel is evenly filled and delicious from edge to edge.
These wraps are the kind of recipe that makes you feel like you’ve got your act together, even on the chaotic days. They’re simple enough for a five-year-old to help assemble (my youngest loves “helping” with the spreading part) but impressive enough that adults will ask for the recipe. And honestly? That first bite where the cool cream cheese hits your tongue and the salty turkey and cheese follow—it’s just pure comfort.
What Ingredients You Will Need
This recipe uses simple, wholesome ingredients that come together to create something surprisingly satisfying. No fancy gourmet items, no weird specialty products. Just real food that tastes great.
- Large flour tortillas (10-inch) : Burrito-sized works best for getting a nice, tight roll with plenty of filling. I prefer Mission or Guerrero brand for their flexibility—they roll without cracking. If you’re gluten-free, look for large gluten-free tortillas from brands like Siete or BFree.
- 8 ounces cream cheese, softened : Full-fat gives the best flavor and texture, but reduced-fat works fine too. Let it sit on the counter for 20 minutes before starting so it spreads easily. Philadelphia is my go-to, but store brands work perfectly.
- 1/2 teaspoon garlic powder : Adds a subtle savory depth without being overpowering. You can also use onion powder or a pinch of smoked paprika for a different vibe.
- 1/4 teaspoon salt : Just a little to enhance all the flavors. If using salted butter or salty turkey, you might want to reduce this slightly.
- 1/4 teaspoon black pepper : Freshly ground if you have it, but pre-ground works too.
- 8-10 slices deli turkey breast : Oven-roasted or honey turkey both work beautifully. I like Boar’s Head or Hillshire Farm for clean ingredients and good flavor. You can also use leftover roasted turkey from a holiday meal—just slice it thin.
- 8-10 slices provolone cheese : Provolone melts beautifully and has a mild, creamy flavor that pairs perfectly with turkey. Swiss, cheddar, mozzarella, or pepper jack all work great too. Use deli-sliced for easy layering.
- Optional: 1/4 cup shredded lettuce or fresh spinach : Adds a nice crunch and color. Pat it completely dry before adding to prevent soggy pinwheels.
- Optional: 2 tablespoons ranch dressing or honey mustard : For extra flavor, spread a thin layer over the cream cheese before adding the turkey. This is completely optional but adds a nice tang.
Ingredient Selection Tips: Look for turkey that’s sliced thin but not paper-thin—you want it to hold together when rolled. For the cheese, I recommend provolone because it’s flexible enough to roll without cracking, but Swiss is a close second. If you’re using cheddar, go for the thin-sliced variety so it doesn’t break when you roll.
Substitution Guidance: Need dairy-free? Use dairy-free cream cheese (Kite Hill or Violife work well) and dairy-free cheese slices. Want to boost protein? Add a layer of thinly sliced hard-boiled egg or some extra turkey from this bento box recipe. Vegetarian? Skip the turkey and load up on roasted veggies, hummus, and extra cheese.
Equipment Needed
You don’t need much for these wraps, which is part of the beauty. Here’s what you’ll need:
- A sharp knife : This is the most important tool. A serrated bread knife works best for slicing through the tortilla without squishing the filling. A chef’s knife works too, but make sure it’s sharp so you get clean cuts.
- A cutting board : Any size works, but a larger board gives you room to work. I prefer a wooden board because it doesn’t slide around as much as plastic.
- A butter knife or offset spatula : For spreading the cream cheese mixture evenly across the tortilla. An offset spatula gives you the smoothest, thinnest layer.
- Plastic wrap or parchment paper : For wrapping the rolled tortillas tightly before chilling. This helps them hold their shape and makes slicing much easier.
- A small mixing bowl : For combining the cream cheese with seasonings. Any small bowl works.
- A plate or baking sheet : To hold the wrapped rolls in the fridge. A small baking sheet is ideal for keeping them flat.
Budget-Friendly Options: Don’t have an offset spatula? A regular butter knife works fine—just go slow and spread gently. No plastic wrap? You can use a clean kitchen towel or beeswax wrap instead. The key is just keeping the roll tight and secure while it chills.
Personal Note: I used to skip the chilling step and just slice right away. Big mistake. The filling would ooze out, the tortilla would tear, and I’d end up with a messy pile of ingredients instead of neat little spirals. Trust me on this one—twenty minutes in the fridge makes all the difference. I learned this the hard way after about five failed attempts.
Preparation Method
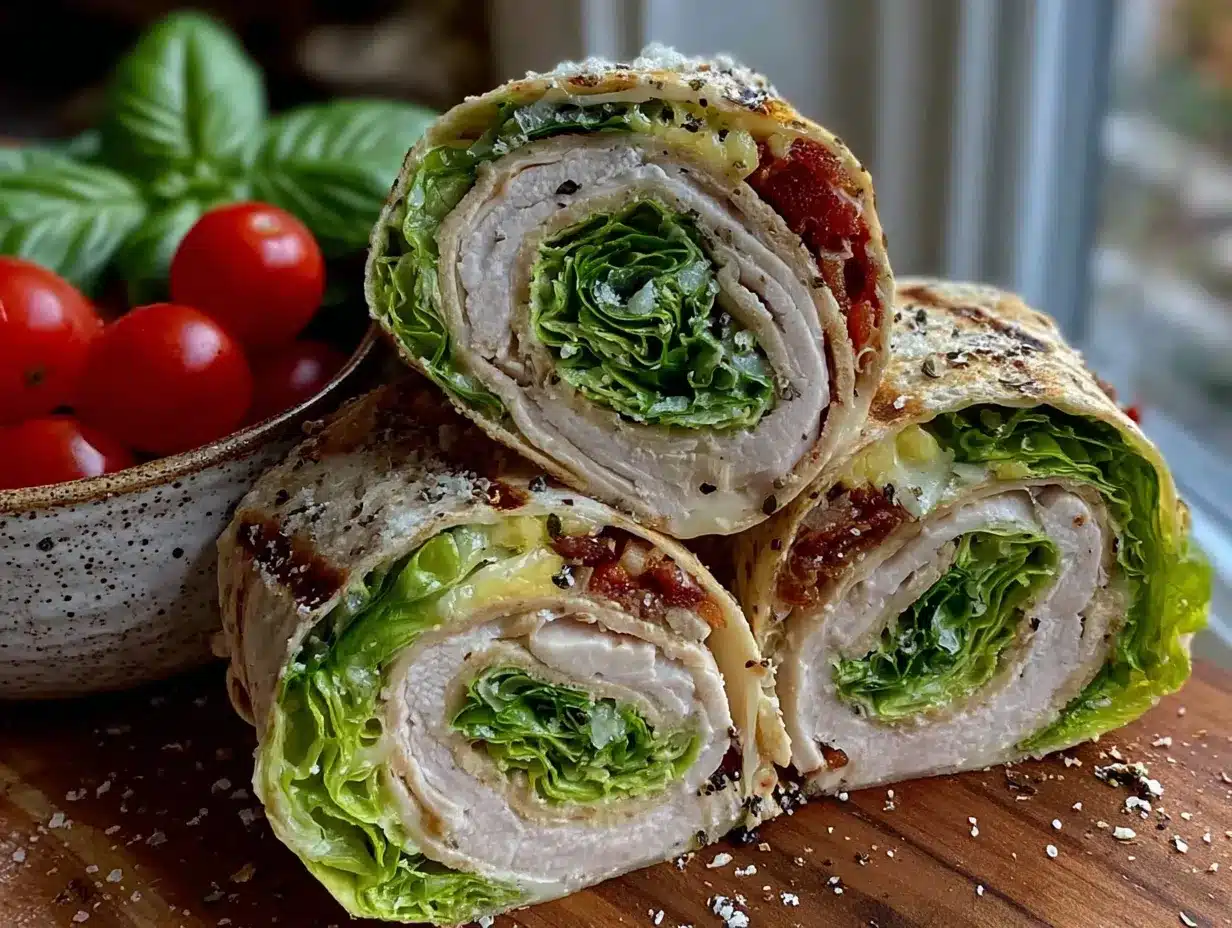
Let’s get rolling! This comes together faster than you’d think once you get the hang of it.
- Soften the cream cheese : Take your cream cheese out of the fridge about 20 minutes before you start. You want it soft enough to spread easily but not so warm that it’s runny. If you forget (I do all the time), microwave it for 10-15 seconds in a bowl—just watch it carefully so it doesn’t melt.
- Mix the spread : In a small bowl, combine the softened cream cheese with garlic powder, salt, and pepper. Stir until smooth and evenly mixed. Taste it—you want it to be flavorful but not overpowering. Add a little more salt or garlic if needed.
- Prepare your work surface : Lay a large flour tortilla flat on your cutting board. Make sure it’s at room temperature—cold tortillas crack when you roll them. If yours are straight from the fridge, microwave them for 10 seconds wrapped in a damp paper towel to make them pliable.
- Spread the cream cheese : Using your butter knife or offset spatula, spread about 2 tablespoons of the cream cheese mixture evenly over the entire surface of the tortilla. Go all the way to the edges—this helps everything stick together. You want a thin, even layer, not a thick glob. Think of it like buttering a piece of toast.
- Layer the turkey : Place 3-4 slices of turkey over the cream cheese, overlapping them slightly. Cover about 90% of the tortilla surface, leaving a small border at the far edge (about an inch) so the filling doesn’t squeeze out when you roll. If you’re using lettuce or spinach, add it now in a thin, even layer.
- Add the cheese : Lay 3-4 slices of provolone over the turkey, again overlapping slightly. Make sure the cheese covers the turkey evenly. If you’re using a harder cheese like cheddar, you might need to press it down gently so it stays in place.
- Roll it tight : Starting from the edge closest to you, begin rolling the tortilla away from you into a tight log. Use your fingers to tuck the filling in as you go, keeping even pressure. Think of it like rolling a sleeping bag—you want it snug but not so tight that the filling squishes out the ends. When you reach the far edge, press down gently to seal.
- Wrap and chill : Place the rolled tortilla seam-side down on a piece of plastic wrap or parchment paper. Wrap it tightly, twisting the ends to secure. Repeat with remaining tortillas. Place the wrapped rolls on a plate or baking sheet and refrigerate for at least 20 minutes (30 is even better). This step is non-negotiable for clean slices.
- Slice into pinwheels : Once chilled, unwrap the rolls and place them on your cutting board. Using a sharp serrated knife, slice each roll into 1-inch thick rounds. Use a gentle sawing motion rather than pressing down—this prevents squishing. You should get about 8-10 pinwheels per tortilla, depending on how thick you slice them.
- Arrange and serve : Place the pinwheels on a serving platter or pack them directly into lunchboxes. They’re ready to eat immediately or can be stored for later. The spiral pattern should be visible and beautiful—that’s the payoff for all that careful rolling!
Sensory Cues: When you’re spreading the cream cheese, it should glide smoothly without dragging the tortilla. When you roll, you should feel the tortilla stretch slightly but not tear. When you slice, the layers should be visible and distinct—turkey, cheese, cream cheese, tortilla—in a beautiful spiral pattern. If the filling oozes out, your roll was too loose or the cream cheese was too warm.
Cooking Tips & Techniques
After making these wraps at least fifty times (I’m not exaggerating), I’ve collected a few tricks that make the difference between okay pinwheels and amazing ones.
The Chilling Trick: I know I mentioned this already, but it’s worth repeating. Chilling the rolled tortillas for 20-30 minutes firms up the cream cheese and makes the tortilla slightly less flexible, which means you get clean, sharp slices instead of messy, squished ones. I’ve tried slicing immediately out of desperation, and I ended up with a pile of filling and torn tortilla. Not cute.
The Knife Technique: Use a serrated knife and a gentle sawing motion. Don’t press straight down—that squishes the roll and pushes the filling out. Think of it like slicing a baguette: back and forth, gently, letting the knife do the work. I ruined my first three batches by using a dull chef’s knife and pressing too hard. Live and learn.
The Moisture Barrier: If you’re adding lettuce, spinach, or any fresh veggies, pat them completely dry with paper towels before adding them to the wrap. Wet ingredients make the tortilla soggy and the pinwheels fall apart. I learned this when I added wet shredded lettuce and ended up with a sad, slimy mess by lunchtime.
Make-Ahead Strategy: You can assemble these up to 24 hours in advance. Just keep them tightly wrapped in the fridge and slice right before serving or packing. The flavors actually meld together better overnight—the garlic and seasonings infuse the cream cheese and everything gets more cohesive. I often make a double batch on Sunday night and we eat them all week.
The Even Roll: To get a perfectly round pinwheel, make sure your filling is distributed evenly across the entire tortilla. If one side has more turkey or cheese than the other, your roll will be lopsided and the pinwheels will look uneven. Take an extra 30 seconds to check that everything is spread evenly before rolling.
My Biggest Failure: I once tried to make these with whole wheat tortillas that were way too dry. They cracked, the filling leaked out, and I ended up with a plate of sad, broken spirals. Now I always check my tortillas for flexibility before starting—if they crack when bent, they’re not going to work for pinwheels.
Variations & Adaptations
One of the best things about this recipe is how easy it is to switch things up. Here are some of my favorite variations:
- Spicy Southwest Pinwheels : Swap the provolone for pepper jack cheese, add a layer of sliced jalapeños or pickled jalapeños, and mix a teaspoon of taco seasoning into the cream cheese. These are amazing for game day or a spicy lunch. My husband requests these constantly.
- Everything Bagel Pinwheels : Mix everything bagel seasoning into the cream cheese (about 1 tablespoon), use smoked salmon instead of turkey, and add a thin layer of capers. These feel fancy but take the same 10 minutes. Perfect for brunch or a special lunch treat.
- Veggie-Packed Pinwheels : Skip the turkey and load up on roasted red peppers, thinly sliced cucumber, shredded carrots, and fresh basil. Use a garlic-herb cream cheese spread. These are great for Meatless Monday or when you’re craving something lighter.
- Gluten-Free Version : Use large gluten-free tortillas (Siete brand works great). They’re a bit more delicate, so spread the cream cheese gently and roll carefully. Chill them a bit longer—30 minutes minimum—to help them hold their shape.
- Low-Carb/Keto Option : Use low-carb tortillas or large lettuce leaves (romaine or butter lettuce work best). Fill with extra turkey, cheese, and cream cheese. These are satisfying and keep you full for hours without the carbs.
- Breakfast Pinwheels : Swap the turkey for crispy bacon or breakfast sausage, use cheddar cheese, and add a thin layer of scrambled egg. These are amazing for breakfast meal prep—just grab and go in the morning.
I once made a batch with leftover roasted turkey from Thanksgiving and cranberry sauce mixed into the cream cheese. It was incredible—sweet, savory, and totally unexpected. Don’t be afraid to experiment with whatever you have in the fridge. That’s how the best recipes are born!
Serving & Storage Suggestions
These pinwheels are incredibly versatile when it comes to serving. Here’s how to get the most out of them:
Serving Temperature: They’re best served cold or at room temperature. If you’re packing them for lunch, they’ll be perfect by the time lunch rolls around. For parties, arrange them on a platter with the cut side facing up so everyone can see the beautiful spiral pattern.
Presentation Ideas: Arrange the pinwheels in concentric circles on a large plate for parties. Garnish with fresh herbs like parsley or dill, or add a small bowl of ranch dressing or honey mustard for dipping. For lunchboxes, pack them next to some grapes, carrot sticks, or fresh apple nachos for a complete meal that kids actually eat.
Complementary Dishes: Serve these alongside a simple green salad, some crispy cheddar ranch chickpea snack mix, or a bowl of tomato soup for a cozy lunch. They also pair beautifully with fresh fruit skewers or a cup of vegetable soup.
Storage Instructions: Store the uncut rolls (wrapped tightly in plastic wrap) in the refrigerator for up to 3 days. Once sliced, store them in an airtight container with a slightly damp paper towel on top to prevent drying out. They’ll stay fresh for 2-3 days. Do not freeze these—the cream cheese gets grainy and the texture suffers.
Reheating: These are meant to be served cold, so no reheating needed! If you’ve stored them in the fridge, just let them sit at room temperature for 5-10 minutes before serving to take the chill off.
Flavor Development: Honestly, these taste even better the next day. The flavors meld together overnight—the garlic and seasonings infuse the cream cheese, the turkey and cheese become more cohesive, and everything just comes together. I always make them a day ahead if I’m serving them for a party or special lunch.
Nutritional Information & Benefits
Here’s a rough estimate for one pinwheel (based on 8 pinwheels per wrap):
- Calories: Approximately 120-140
- Protein: 8-10 grams
- Fat: 7-9 grams
- Carbohydrates: 8-10 grams
- Fiber: 1-2 grams
- Sugar: 1-2 grams
- Sodium: 300-400 mg
Health Benefits: Turkey is a lean protein source that’s rich in B vitamins, selenium, and tryptophan (which helps with mood and sleep). Provolone cheese provides calcium for bone health and protein for muscle maintenance. Cream cheese adds a small amount of vitamin A and healthy fats that help keep you full. If you add spinach or lettuce, you’re getting extra fiber, vitamin K, and antioxidants.
Dietary Considerations: This recipe is naturally low-carb if you use low-carb tortillas. To make it gluten-free, use gluten-free tortillas. To reduce sodium, choose low-sodium turkey and cheese. For a lower-fat version, use reduced-fat cream cheese and turkey breast with no added fat.
Allergen Note: This recipe contains dairy (cream cheese, provolone) and gluten (tortillas). It’s nut-free, egg-free, and soy-free as written. Always check your specific ingredient labels if you have allergies.
Personal Wellness Perspective: I love that these pinwheels give me a way to pack in protein and veggies without a fight. My kids eat them happily, and I feel good knowing they’re getting real food instead of processed snacks. It’s not about being perfect—it’s about finding easy, delicious options that work for real life.
Conclusion
These Easy Turkey and Cheese Pinwheel Lunch Wraps have genuinely changed our lunch-packing game. They’re fast, flexible, and somehow always feel like a treat even though they’re made from basic ingredients. The cream cheese spread keeps everything moist and flavorful, the spiral shape makes them fun to eat, and the whole thing comes together in less time than it takes to decide what to order for delivery.
What I love most about this recipe is how forgiving it is. You don’t need perfect knife skills or fancy equipment. You just need a few ingredients, a little patience for the chilling step, and the willingness to experiment with different fillings. Maybe you’ll discover your own favorite combination—like adding a smear of pesto or swapping in ham and Swiss. That’s the beauty of a simple recipe: it leaves room for your own creativity.
I’d love to hear how yours turn out! Did you try a fun variation? Did your kids actually eat them without complaint? Drop a comment below and let me know. And if you’re looking for more easy lunch ideas, check out those energy bites or the turkey avocado bento box—they’re both lifesavers on busy mornings. Happy rolling, friends!
Frequently Asked Questions
Can I make these turkey and cheese pinwheels ahead of time?
Absolutely! You can assemble the rolls up to 24 hours in advance. Keep them tightly wrapped in plastic wrap in the refrigerator, and slice them right before serving or packing. The flavors actually get better overnight.
How do I prevent my pinwheels from getting soggy?
The key is patting any wet ingredients (like lettuce or spinach) completely dry before adding them. Also, make sure your cream cheese is spread in an even layer—it acts as a moisture barrier. Chilling the rolls before slicing also helps them hold their shape.
What’s the best cheese to use for pinwheels?
Provolone is my top pick because it’s flexible, mild, and melts beautifully. Swiss, cheddar, mozzarella, and pepper jack all work great too. Just make sure it’s sliced thin enough to roll easily without cracking.
Can I freeze turkey and cheese pinwheels?
I don’t recommend freezing these. The cream cheese gets grainy and watery when thawed, and the tortilla becomes soggy. They’re best made fresh and stored in the fridge for up to 3 days.
How many pinwheels does one tortilla make?
You’ll get about 8-10 pinwheels per large (10-inch) tortilla, depending on how thick you slice them. I aim for 1-inch slices, which gives me a nice, satisfying bite without being too big or too small.
Pin This Recipe!
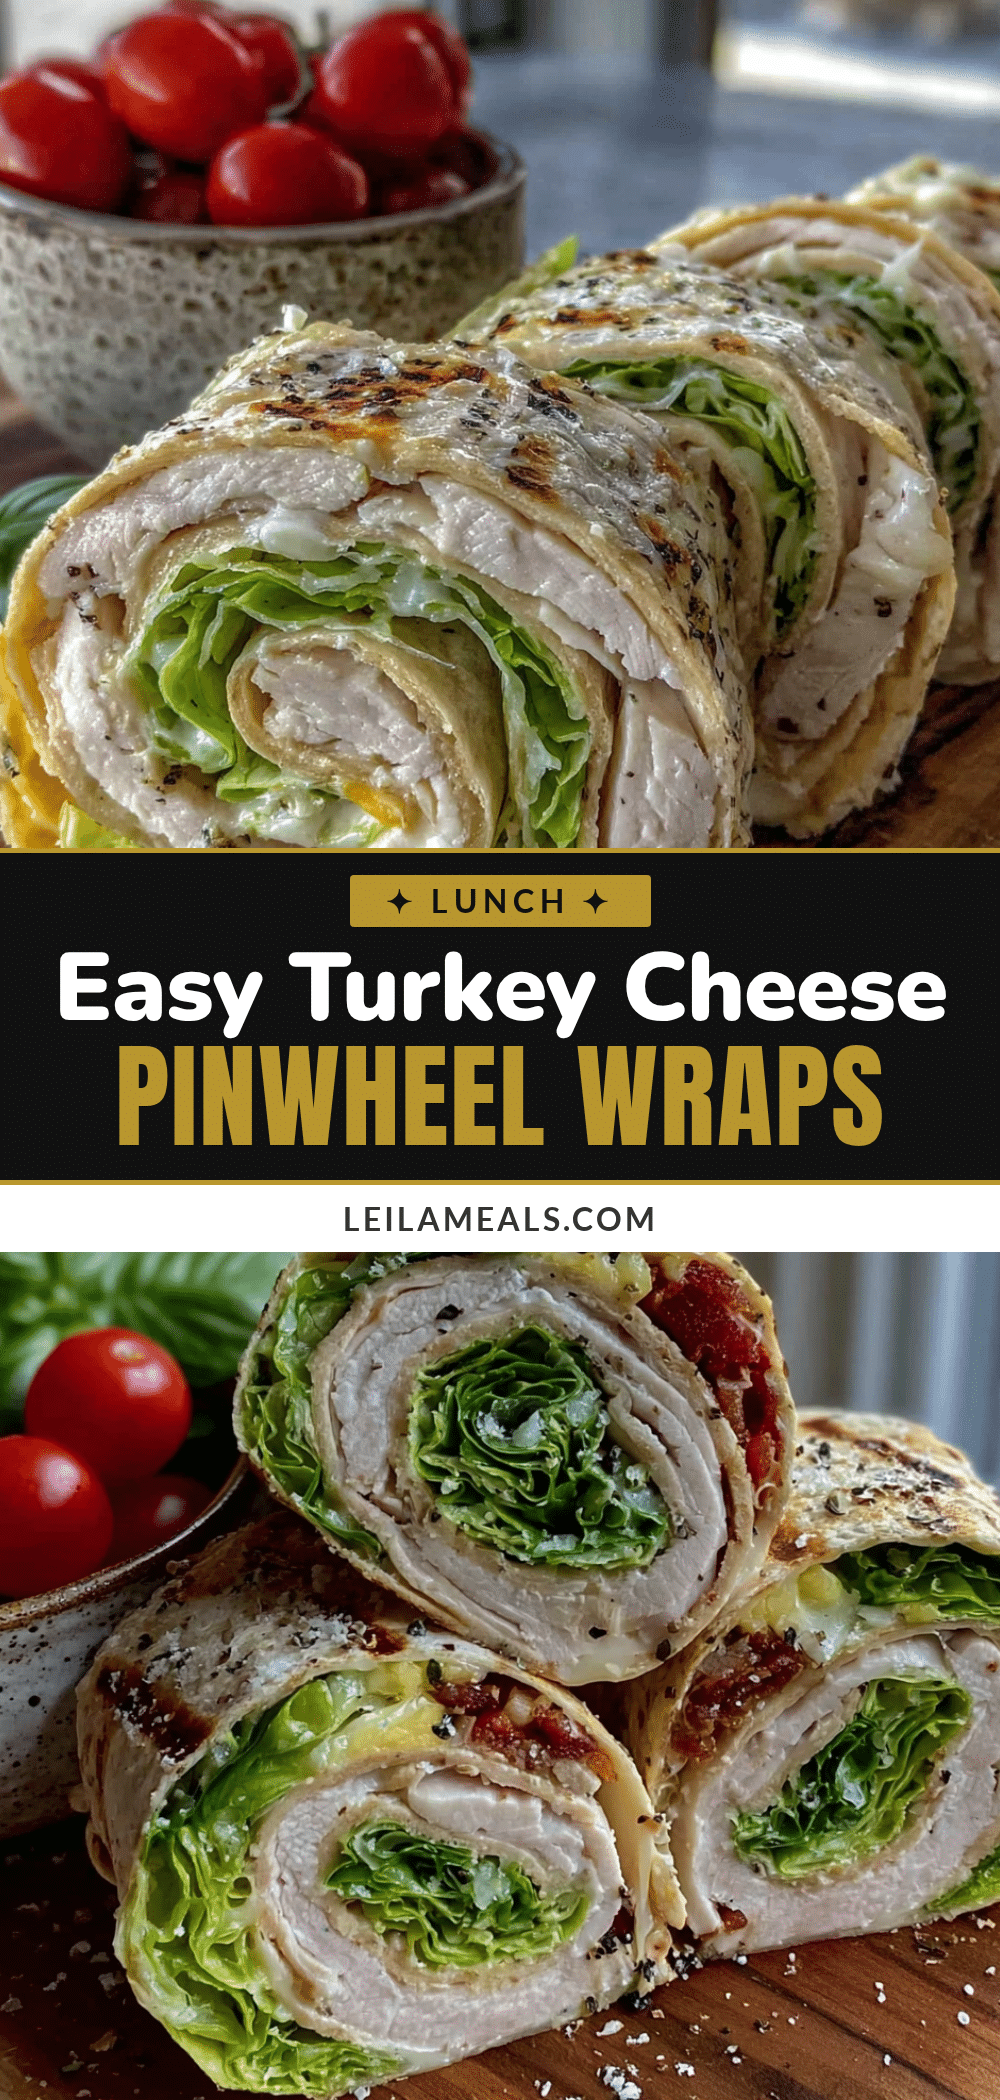
Easy Turkey and Cheese Pinwheel Lunch Wraps: Best 10-Minute Recipe

These Easy Turkey and Cheese Pinwheel Lunch Wraps are ready in 10 minutes and perfect for lunchboxes. Made with simple ingredients like turkey, provolone, and a seasoned cream cheese spread, they’re a crowd-pleasing, customizable meal that looks impressive but comes together in no time.
- Prep Time: 10 minutes
- Cook Time: 0 minutes
- Total Time: 30 minutes (includes 20 minutes chilling)
- Yield: 4 servings (32-40 pinwheels) 1x
- Category: Lunch
- Cuisine: American
Ingredients
- 4 large flour tortillas (10-inch)
- 8 ounces cream cheese, softened
- 1/2 teaspoon garlic powder
- 1/4 teaspoon salt
- 1/4 teaspoon black pepper
- 8–10 slices deli turkey breast
- 8–10 slices provolone cheese
- Optional: 1/4 cup shredded lettuce or fresh spinach
- Optional: 2 tablespoons ranch dressing or honey mustard
Instructions
- Soften the cream cheese: Take your cream cheese out of the fridge about 20 minutes before you start. If you forget, microwave it for 10-15 seconds in a bowl—just watch it carefully so it doesn’t melt.
- Mix the spread: In a small bowl, combine the softened cream cheese with garlic powder, salt, and pepper. Stir until smooth and evenly mixed. Taste it—you want it to be flavorful but not overpowering.
- Prepare your work surface: Lay a large flour tortilla flat on your cutting board. Make sure it’s at room temperature—cold tortillas crack when you roll them. If yours are straight from the fridge, microwave them for 10 seconds wrapped in a damp paper towel to make them pliable.
- Spread the cream cheese: Using your butter knife or offset spatula, spread about 2 tablespoons of the cream cheese mixture evenly over the entire surface of the tortilla. Go all the way to the edges—this helps everything stick together.
- Layer the turkey: Place 3-4 slices of turkey over the cream cheese, overlapping them slightly. Cover about 90% of the tortilla surface, leaving a small border at the far edge (about an inch) so the filling doesn’t squeeze out when you roll. If you’re using lettuce or spinach, add it now in a thin, even layer.
- Add the cheese: Lay 3-4 slices of provolone over the turkey, again overlapping slightly. Make sure the cheese covers the turkey evenly.
- Roll it tight: Starting from the edge closest to you, begin rolling the tortilla away from you into a tight log. Use your fingers to tuck the filling in as you go, keeping even pressure. When you reach the far edge, press down gently to seal.
- Wrap and chill: Place the rolled tortilla seam-side down on a piece of plastic wrap or parchment paper. Wrap it tightly, twisting the ends to secure. Repeat with remaining tortillas. Place the wrapped rolls on a plate or baking sheet and refrigerate for at least 20 minutes (30 is even better).
- Slice into pinwheels: Once chilled, unwrap the rolls and place them on your cutting board. Using a sharp serrated knife, slice each roll into 1-inch thick rounds. Use a gentle sawing motion rather than pressing down—this prevents squishing. You should get about 8-10 pinwheels per tortilla.
- Arrange and serve: Place the pinwheels on a serving platter or pack them directly into lunchboxes. They’re ready to eat immediately or can be stored for later.
Notes
Chilling the rolled tortillas for 20-30 minutes is essential for clean slices. Use a serrated knife with a gentle sawing motion to avoid squishing. Pat any wet ingredients (like lettuce or spinach) completely dry to prevent sogginess. These can be assembled up to 24 hours in advance; slice right before serving. Do not freeze—cream cheese gets grainy when thawed.
Nutrition
- Serving Size: 1 pinwheel
- Calories: 130
- Sugar: 1
- Sodium: 350
- Fat: 8
- Saturated Fat: 4
- Carbohydrates: 9
- Fiber: 1
- Protein: 9
Keywords: turkey pinwheels, cheese pinwheels, lunch wraps, easy lunch, 10-minute recipe, lunchbox ideas, no-cook lunch, kid-friendly lunch, meal prep, turkey and cheese wraps


