I was standing in the baking aisle of our local grocery store last October when a kid walked past me clutching one of those plastic pumpkin pails. You know the ones—the bright orange ones with the green wire handle that always snaps off before Halloween even arrives. And that little plastic bucket, it smelled like… well, like new plastic and cheap candy, but it hit me anyway. Suddenly I was seven years old at my Aunt Rita’s kitchen table, her flour-dusted fingers pressing a cookie cutter into pale dough while the radio played something twangy from the 70s. She’d let me sprinkle the orange sugar crystals on top, and I always made a mess. She never cared. That feeling—warm kitchen, sticky fingers, the promise of something sweet and a little bit spooky—I’ve been chasing it ever since. These Easy Pumpkin Spice Witches’ Hat Cookies are my way of getting it back.
Honestly, I didn’t set out to make a cookie that looks like a hat. I was just trying to use up a half-empty can of pumpkin puree and a bag of chocolate chips that had been sitting in my pantry since… well, probably last Halloween. But then I saw a picture of a witch hat cookie online, and something clicked. I mean, I’m not the most artistic baker—my frosting swirls always look a little lopsided, and don’t even get me started on my piping skills. But these cookies? They’re forgiving. They’re meant to look a little imperfect, a little handmade. That’s part of their charm.
I tested these cookies on a Tuesday afternoon, which meant my kitchen looked like a flour bomb had gone off by the time I was done. There was pumpkin puree on the cabinet door, chocolate on my elbow, and a suspicious amount of cinnamon in my hair. But when I pulled that first tray out of the oven and saw the little hats cooling on the rack—dark chocolate brims, orange sugar-sprinkled cones—I actually let out a little gasp. They looked exactly like the ones from my memory. And when I bit into one, warm and soft with that cozy pumpkin spice flavor, I knew I had to share them with you. Because these cookies aren’t just cute. They’re the kind of treat that makes a Halloween party feel special without making you want to pull your hair out. And maybe, just maybe, they’ll help you catch a little bit of that feeling too.
Why You’ll Love This Recipe
Let me tell you why these Easy Pumpkin Spice Witches’ Hat Cookies have become my go-to for every Halloween gathering, potluck, and spooky movie night. I’ve made these for four different parties now, and I’ve learned a few things along the way that I think you’ll really appreciate.
- Quick & Easy: These cookies come together in about 45 minutes from start to finish. The dough chills for just 20 minutes, which means you’re not waiting around all afternoon. For a Halloween party where you’re already juggling decorations and costumes, that’s a lifesaver.
- Simple Ingredients: You probably have most of these in your kitchen right now. No fancy extracts, no hard-to-find decorations. Just basic baking staples plus a can of pumpkin puree and some chocolate. I tested this with both store-brand and name-brand ingredients, and honestly, it works beautifully either way.
- Perfect for Halloween Parties: These cookies are designed to impress. They look like you spent hours on them—but between us, the “hat” shape comes together in about 30 seconds per cookie. Your guests will think you’re a baking genius, and I’m not going to tell them otherwise.
- Crowd-Pleaser: I brought these to a neighborhood potluck last year, and they were gone within the first hour. Kids love the witch hat shape, and adults love that they’re not overwhelmingly sweet. The pumpkin spice flavor is cozy without being cloying.
- Unbelievably Delicious: The texture is what gets me every time. The cookie itself is soft and cakey from the pumpkin, with a slight chewiness around the edges. Then you’ve got that dark chocolate brim that adds a rich, slightly bitter contrast to the sweet cookie. And the orange sugar on top? It adds a little crunch that makes every bite interesting.
What makes this recipe different from all the other witch hat cookies out there? I’ve tried a dozen versions, and most of them are either too dry (pumpkin can be tricky that way) or too complicated (who has time to hand-pipe chocolate details?). My version uses a specific ratio of pumpkin to flour that keeps the cookies soft without making them gummy. And instead of fussing with royal icing, I use melted chocolate chips for the brims—it’s faster, more forgiving, and honestly tastes better.
These cookies aren’t just good—they’re the kind that makes you close your eyes after the first bite. The pumpkin spice hits you first, warm and familiar, like a sweater you’ve had for years. Then the chocolate kicks in, rich and dark, the perfect partner. And through it all, there’s that soft, tender crumb that feels like a hug. It’s comfort food reimagined for Halloween—faster, easier, but with the same soul-soothing satisfaction. Perfect for impressing guests without stress, or turning a simple Tuesday into something memorable.
What Ingredients You Will Need
This recipe uses simple, wholesome ingredients to deliver bold pumpkin spice flavor and satisfying texture without the fuss. Most of these are pantry staples, which is exactly what you want when you’re baking for a crowd.
For the Cookie Dough
- 1/2 cup (113g) unsalted butter, softened – Make sure it’s at room temperature. Cold butter won’t cream properly with the sugar, and you’ll end up with dense cookies. I like using Land O’Lakes, but any brand works fine.
- 3/4 cup (150g) granulated sugar – Regular white sugar gives these cookies the right structure. Don’t substitute brown sugar here—it changes the texture too much.
- 1/4 cup (50g) packed light brown sugar – This adds a touch of moisture and a hint of molasses flavor that plays nicely with the pumpkin spice.
- 1/2 cup (120g) pumpkin puree – Not pumpkin pie filling! Make sure you grab pure pumpkin puree. I recommend Libby’s for consistent results. If you have leftover puree, freeze it in 1/2 cup portions for later.
- 1 large egg, room temperature – A room-temperature egg incorporates more evenly into the batter. If you forgot to take it out of the fridge, place it in a bowl of warm water for 5 minutes.
- 1 teaspoon vanilla extract – Pure vanilla extract is worth the splurge here. The artificial stuff has a chemical aftertaste that really stands out in simple cookies.
- 2 cups (250g) all-purpose flour – Spoon and level your flour for the most accurate measurement. Scooping directly from the bag can pack in too much flour and make your cookies dry.
- 1 teaspoon baking powder – This gives the cookies their lift. Make sure it’s not expired—test it by dropping a little into hot water; if it fizzes, it’s good.
- 1/2 teaspoon baking soda – Works with the acid in the pumpkin to help the cookies spread just right.
- 1/2 teaspoon salt – Don’t skip this! Salt balances the sweetness and enhances the pumpkin spice flavors.
- 2 teaspoons pumpkin pie spice – You can use store-bought or make your own with 1 teaspoon cinnamon, 1/2 teaspoon ginger, 1/4 teaspoon nutmeg, 1/4 teaspoon cloves, and a pinch of allspice. I actually prefer making my own blend—it’s fresher and you can adjust it to your taste.
- 1/2 teaspoon ground cinnamon – Extra cinnamon because, honestly, can you ever have too much?
For the Witch Hat Decorations
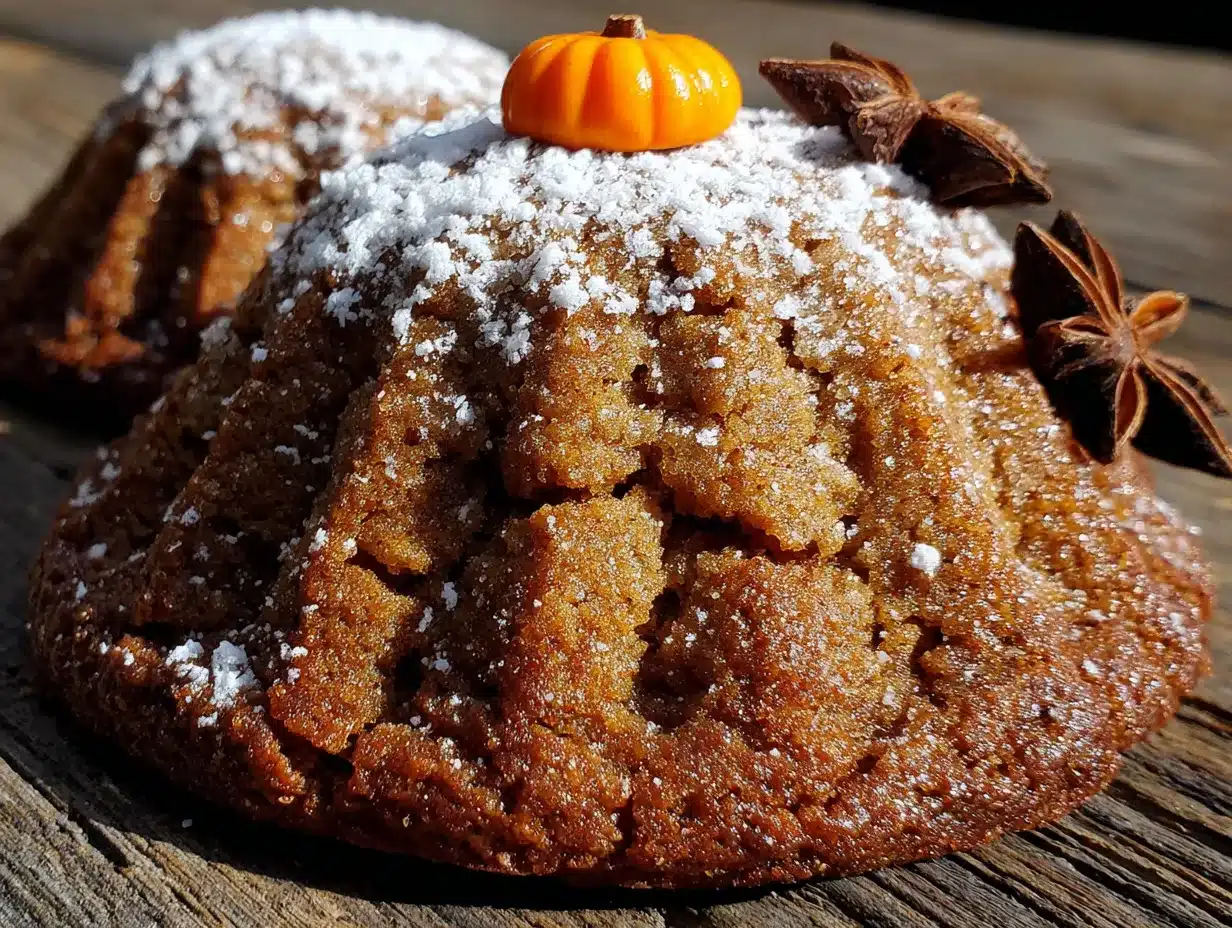
- 1 cup (170g) semi-sweet chocolate chips – I use Ghirardelli because they melt smoothly and have a rich flavor. But any good-quality chocolate chip will work. Avoid chocolate melts or candy coating—they don’t have the same taste.
- 1 tablespoon coconut oil or vegetable shortening – This helps thin the chocolate just enough for dipping without making it greasy. Coconut oil adds a subtle flavor that I actually really like with the pumpkin.
- Orange sanding sugar or sparkling sugar – This is what gives the hats their magical, witchy sparkle. You can find it in the baking aisle, usually near the sprinkles. If you can’t find orange, white sanding sugar works too—it still looks like stars on a dark night.
- 24 Hershey’s Kisses or Hugs, unwrapped – These form the pointy top of the witch hat. I’ve tried using chocolate bells and other cone-shaped candies, but the Kisses work best. They’re the perfect size and shape.
Ingredient Substitutions
If you’re baking for someone with dietary restrictions, here are a few swaps I’ve tested. For a dairy-free version, use plant-based butter and dairy-free chocolate chips. The texture will be slightly less tender, but still delicious. For a gluten-free option, substitute a 1:1 gluten-free baking flour blend—I’ve had good luck with Bob’s Red Mill. Just know the cookies will spread a tiny bit more, so you might need to adjust the chilling time. And if you’re out of pumpkin puree, you can use sweet potato puree in a pinch. It changes the flavor subtly, but the texture stays the same.
Equipment Needed
You don’t need a lot of fancy equipment for these cookies, which is part of why I love making them. Here’s what you’ll need:
- Large mixing bowl and electric mixer – A stand mixer with the paddle attachment is ideal, but a hand mixer works perfectly too. I’ve even made these by hand with a wooden spoon—it just takes a little more elbow grease.
- Medium mixing bowl – For whisking together the dry ingredients.
- Baking sheets – Two standard-sized sheets work best so you can bake one batch while the other chills. I recommend light-colored aluminum sheets—dark ones can cause the bottoms to brown too quickly.
- Parchment paper or silicone baking mats – Parchment paper is my go-to because it makes cleanup a breeze. Silicone mats work too, but the cookies might spread a tiny bit more.
- 2-inch round cookie cutter – This is for cutting the chocolate brims. If you don’t have one, you can use a small glass or jar lid. I actually lost my cookie cutter once and used a shot glass—it worked surprisingly well.
- Small microwave-safe bowl – For melting the chocolate. Glass or ceramic works best.
- Cooling rack – Essential for letting the cookies cool completely before decorating. If you don’t have one, you can use a clean kitchen towel laid flat on the counter.
- Piping bag or small zip-top bag – For drizzling the chocolate. A zip-top bag with the corner snipped off works just as well as a fancy piping bag. I’ve used both, and honestly, the zip-top bag is less fussy.
One thing I learned the hard way: make sure your baking sheets are completely cool before placing new cookie dough on them. If you put dough on a hot sheet, it’ll start melting before it even hits the oven, and your cookies will spread into sad, flat puddles. I keep two sheets in rotation so one is always cooling while the other is baking.
Preparation Method
Alright, let’s make some witches’ hats! I’ve broken this down into clear steps so you can follow along without any confusion. Take your time, and don’t stress if things aren’t perfect—they’re supposed to look handmade.
Step 1: Make the Cookie Dough (10 minutes)
In your large mixing bowl, beat the softened butter, granulated sugar, and brown sugar together until light and fluffy. This takes about 2-3 minutes with an electric mixer on medium speed. You’re looking for a pale, creamy texture—it should look like soft ice cream. Scrape down the sides of the bowl with a spatula halfway through.
Add the pumpkin puree, egg, and vanilla extract. Beat on low speed until just combined. Don’t overmix here—you just want everything incorporated. The mixture will look a little curdled at this point, and that’s totally normal. Pumpkin and butter don’t always emulsify perfectly, but the flour will bring it all together.
In your medium bowl, whisk together the flour, baking powder, baking soda, salt, pumpkin pie spice, and cinnamon. Whisking ensures everything is evenly distributed—you don’t want one cookie to get all the cinnamon while another gets none.
Gradually add the dry ingredients to the wet ingredients, mixing on low speed. I add mine in three additions, mixing just until the flour disappears each time. When the last streak of flour is gone, stop mixing. Overworking the dough will make the cookies tough.
Step 2: Chill the Dough (20 minutes)
Cover the bowl with plastic wrap and pop it in the refrigerator for at least 20 minutes. This step is non-negotiable. Chilling the dough solidifies the butter, which means the cookies will spread less in the oven. If you skip this, your hats will come out flat and shapeless. I once tried to rush this step because I was running late for a party, and I ended up with cookies that looked more like flattened pancakes than hats. Learn from my mistake!
While the dough chills, preheat your oven to 350°F (175°C) and line your baking sheets with parchment paper.
Step 3: Shape and Bake the Cookies (12-14 minutes per batch)
Scoop rounded tablespoons of dough (about 1.5 tablespoons each) and roll them into balls. Place them on the prepared baking sheets about 2 inches apart—they’ll spread a little. I fit 8 cookies per standard sheet.
Bake for 12-14 minutes, or until the edges are set and lightly golden. The centers will look slightly underdone and puffy—that’s what you want. They’ll continue to set as they cool. Overbaking will give you dry cookies, so err on the side of underdone.
Let the cookies cool on the baking sheet for 5 minutes, then transfer them to a cooling rack to cool completely. Don’t skip this rest time—the cookies are too fragile to move right out of the oven.
Step 4: Make the Chocolate Brims (10 minutes)
While the cookies cool, line a small baking sheet with parchment paper. Place the unwrapped Hershey’s Kisses on a plate nearby—you’ll need them soon.
In a small microwave-safe bowl, combine the chocolate chips and coconut oil. Microwave in 30-second intervals, stirring well after each, until completely smooth. This usually takes about 1-2 minutes total. Be careful not to overheat the chocolate—if it seizes (turns grainy and stiff), you’ll have to start over.
Pour the melted chocolate onto the prepared parchment paper and spread it into a rough rectangle about 1/4 inch thick. Place another piece of parchment on top and gently press down to create an even layer. Refrigerate for 5-7 minutes, until firm but not rock hard.
Once the chocolate is set, use your 2-inch round cookie cutter to cut out circles. You should get about 24 circles from the chocolate. If the chocolate starts to soften as you work, pop it back in the fridge for a few minutes. I usually cut half the circles, refrigerate the scraps, re-melt them, and repeat to get all 24.
Step 5: Assemble the Witches’ Hats (5 minutes per cookie)
This is the fun part! Take a cooled cookie and place a chocolate circle on top, pressing gently so it adheres. The circle should be centered on the cookie—it forms the brim of the hat.
Place a small dab of melted chocolate (you can reheat your leftover chocolate or melt a few extra chips) on top of the chocolate circle. Press a Hershey’s Kiss into the dab, pointy side up, so it stands upright. The dab of chocolate acts like glue, holding the Kiss in place.
Here’s the trick: while the chocolate is still wet, sprinkle orange sanding sugar over the Hershey’s Kiss and the exposed chocolate brim. The sugar sticks to the wet chocolate and creates that magical, sparkly effect. Work in batches of 4-5 cookies at a time so the chocolate doesn’t set before you add the sugar.
Let the assembled cookies sit at room temperature for about 15 minutes to allow the chocolate to fully set. Or, if you’re impatient like me, pop them in the fridge for 5 minutes.
Cooking Tips & Techniques
I’ve made these Easy Pumpkin Spice Witches’ Hat Cookies at least a dozen times now, and I’ve picked up a few tricks that make the process smoother and the results more reliable.
Don’t overmix the dough. This is the number one mistake I see bakers make with pumpkin cookies. Pumpkin has a lot of moisture, and overmixing develops the gluten too much, resulting in tough, rubbery cookies. Mix until the flour just disappears, then stop. I promise, those last few streaks of flour will incorporate as you scoop and roll the dough.
Use a cookie scoop for uniform sizes. I use a 1.5-tablespoon scoop, and it makes a huge difference. Uniform cookies bake evenly, which means they’ll all be done at the same time. No more pulling out half-burnt cookies while others are still raw in the middle. If you don’t have a scoop, use a measuring spoon and level it off.
Chill the chocolate brims properly. I learned this one the hard way. The first time I made these, I didn’t chill the chocolate long enough, and when I tried to cut out the circles, the chocolate just squished into a mess. You want the chocolate to be firm but still pliable—like a chocolate bar at room temperature. If it cracks when you press the cutter, it’s too cold. Let it sit for a minute or two and try again.
Work in small batches for decorating. Melted chocolate sets fast, especially if your kitchen is cool. I like to decorate 4-5 cookies at a time. I place the chocolate circles on the cookies, add the Kisses, sprinkle the sugar, and then move on to the next batch. This way, the chocolate is still tacky when the sugar hits it, and everything sticks properly.
If the Hershey’s Kisses won’t stand up straight, don’t panic. Sometimes they’re a little lopsided. Just use a bit more melted chocolate as “glue” and hold the Kiss in place for a few seconds until it sets. I’ve had a few hats that lean to one side, and honestly, they look kind of charming—like they’re tipping their hat to someone.
Make ahead tip: You can prepare the cookie dough up to 3 days in advance and keep it in the refrigerator. You can also bake the cookies and store them in an airtight container for up to 2 days before decorating. Just wait to add the chocolate brims and Kisses until you’re ready to serve—the chocolate can soften or bloom if stored too long.
Variations & Adaptations
One of the best things about this recipe is how easily it adapts to different tastes and dietary needs. Here are some variations I’ve tried and loved.
Gluten-Free Witches’ Hats: I made these for a friend with celiac disease, and they turned out beautifully. Substitute the all-purpose flour with a 1:1 gluten-free baking blend that contains xanthan gum. Bob’s Red Mill and King Arthur both make excellent blends. The cookies will spread slightly more, so you might need to chill the dough for an extra 10 minutes. Also, check that your pumpkin pie spice is gluten-free—some blends contain wheat starch as a filler.
Dairy-Free Version: Use plant-based butter (I like Miyoko’s or Country Crock Plant Butter) and dairy-free chocolate chips. Enjoy Life makes a good semi-sweet chip that melts smoothly. For the Hershey’s Kisses, you can find dairy-free chocolate cones or use chocolate-covered almonds shaped like cones. The texture will be slightly less tender, but the flavor is still spot-on.
Spiced-Up Version: If you like things a little more adventurous, add 1/4 teaspoon of cayenne pepper or chipotle powder to the dry ingredients. The heat pairs beautifully with the pumpkin and chocolate, giving the cookies a subtle kick that surprises and delights. I made these for a Halloween party with a “spooky spicy” theme, and they were a hit.
White Chocolate Witches’ Hats: Swap the semi-sweet chocolate chips for white chocolate chips, and use white chocolate Hershey’s Kisses. The white chocolate gives the hats a ghostly, ethereal look that’s perfect for a more elegant Halloween party. Just be careful when melting white chocolate—it’s more prone to seizing than dark chocolate. Use low heat and stir constantly.
Mini Witches’ Hats: For bite-sized treats, use a teaspoon-sized scoop for the dough and bake for 8-10 minutes. Use a 1-inch round cutter for the chocolate brims and mini Hershey’s Kisses. These are perfect for party platters where you want guests to be able to grab a few without committing to a full-sized cookie.
Pumpkin Spice Latte Version: Add 1 tablespoon of instant espresso powder to the dry ingredients for a coffee-flavored twist. The espresso enhances the pumpkin spice flavors without making the cookies taste like coffee. It’s subtle but noticeable—especially if you’re a PSL fan.
Serving & Storage Suggestions
These cookies are best served at room temperature, which allows the chocolate to be firm but not hard and the cookie to be soft and tender. I like to arrange them on a black or dark purple platter to make the orange sugar pop. If you’re serving them at a Halloween party, place them on a cake stand for a dramatic, centerpiece-worthy display.
What to serve alongside: These cookies pair beautifully with a warm cup of spiced apple cider or a pumpkin spice latte. For a dessert spread, I like to serve them with other Halloween treats like ghost-shaped meringues, caramel apples, and chocolate-dipped pretzel broomsticks. If you’re doing a full dinner party, they’re the perfect finish to a hearty autumn meal like roasted chicken with root vegetables or a creamy pumpkin soup.
Storage instructions: Store the assembled cookies in an airtight container at room temperature for up to 3 days. Place parchment paper between layers to prevent the chocolate from sticking. Do not refrigerate—the cookies can absorb fridge odors, and the chocolate may develop a white bloom (it’s still safe to eat, just not as pretty).
Freezer instructions: You can freeze the undecorated cookies for up to 2 months. Place them in a single layer on a baking sheet and freeze until solid, then transfer to a freezer-safe bag or container. To thaw, let them sit at room temperature for about 30 minutes, then decorate as directed. I’ve also frozen the assembled cookies, but the chocolate can sometimes crack during thawing, so I don’t recommend it.
Reheating: These cookies are best enjoyed at room temperature, but if you want a warm, gooey treat, microwave one for 5-7 seconds. The chocolate will soften slightly, and the cookie will become almost cake-like. Just don’t overdo it—10 seconds can turn a perfect cookie into a melty mess.
Flavor development: Here’s a little secret: these cookies actually taste better the next day. The pumpkin spice flavors have time to meld and deepen, and the texture becomes even softer. So if you’re making them for a party, bake the cookies a day ahead and decorate them the morning of. Your future self will thank you.
Nutritional Information & Benefits
Let’s be real—these are cookies, not health food. But if you’re curious about what’s in them, here’s the breakdown per cookie (based on 24 cookies):
- Calories: 165
- Total Fat: 8g
- Saturated Fat: 5g
- Cholesterol: 18mg
- Sodium: 95mg
- Total Carbohydrates: 22g
- Dietary Fiber: 1g
- Sugars: 14g
- Protein: 2g
Now, here’s the good news: pumpkin is actually packed with vitamin A (in the form of beta-carotene), which supports eye health and immune function. The pumpkin also adds moisture and a little fiber, which means these cookies are slightly more filling than your average sugar cookie. And the pumpkin pie spice? Cinnamon has anti-inflammatory properties, and ginger can aid digestion. So while I wouldn’t call these a health food, they’re certainly not the worst thing you could eat.
Dietary considerations: This recipe contains gluten, dairy, and eggs. For gluten-free and dairy-free adaptations, see the Variations section above. The cookies are nut-free as written, but always check your chocolate labels if you’re serving someone with a severe nut allergy.
My personal philosophy? Baking is about joy, not guilt. These cookies are a treat for Halloween—a celebration of autumn, creativity, and togetherness. One cookie isn’t going to derail anyone’s wellness journey. So enjoy them, share them, and don’t stress about the numbers.
Conclusion
These Easy Pumpkin Spice Witches’ Hat Cookies have become a Halloween tradition in my house, and I hope they become one in yours too. They’re fun to make, stunning to look at, and absolutely delicious to eat. Whether you’re hosting a costume party, attending a potluck, or just looking for a cozy afternoon baking project, these cookies deliver every time.
The best part? They’re completely customizable. Use white chocolate for a ghostly look, add a pinch of cayenne for a spicy kick, or swap the pumpkin for sweet potato—the recipe is forgiving enough to handle your creativity. I’d love to hear how you make them your own.
So here’s my challenge to you: make a batch of these cookies this Halloween. Invite a friend over to help decorate. Play some spooky music. Spill a little flour on the counter. And when you take that first bite of a warm, chocolatey, pumpkin-spiced witch’s hat, close your eyes and let yourself be seven years old again for just a moment. Because that feeling—the one I was chasing in the baking aisle—it’s still there. You just have to bake it back to life.
If you try these, drop a comment below and let me know how they turned out. Did you make any fun variations? Did your kids love decorating them? I read every comment, and your stories honestly make my day. Happy Halloween, friends—now go make some magic.
Frequently Asked Questions
Can I use pumpkin pie filling instead of pumpkin puree?
No, please don’t. Pumpkin pie filling is pre-sweetened and spiced, and it contains thickeners that will completely change the texture of these cookies. Stick with 100% pure pumpkin puree for the best results. If you accidentally bought pie filling, you can still use it, but reduce the sugar in the recipe by half and skip the added spices—the cookies will be denser and sweeter, but still edible.
My cookies spread too much. What went wrong?
This usually happens for one of three reasons: the dough wasn’t chilled long enough, the butter was too soft, or the baking sheet was too warm. Make sure you chill the dough for the full 20 minutes (or longer if your kitchen is warm). Also, let your baking sheets cool completely between batches. If you’re still having trouble, try adding an extra tablespoon of flour to the dough.
Can I make these cookies ahead of time for a party?
Absolutely! I recommend baking the cookies up to 2 days in advance and storing them in an airtight container at room temperature. Then, decorate them the morning of your party. The chocolate brims and Hershey’s Kisses are best added close to serving time so they stay looking fresh and beautiful.
My chocolate seized while melting. How do I fix it?
If your chocolate turns grainy and stiff, it’s seized—this happens when a tiny amount of water gets into the chocolate. Unfortunately, there’s no way to fully fix seized chocolate. But you can try adding a tablespoon of warm coconut oil or butter and stirring vigorously. Sometimes this smooths it out enough to use as a drizzle or dip, even if it’s not perfectly silky. For next time, make sure all your utensils are completely dry, and never cover the bowl while microwaving (condensation can drip in).
Can I use a different candy for the hat top?
Yes! Hershey’s Kisses are the classic choice, but you can also use chocolate bells, chocolate-covered caramel candies shaped into cones, or even sugar cones cut to size. For a nutty twist, try using chocolate-covered almonds or hazelnuts. Just make sure whatever you use is cone-shaped and sturdy enough to stand upright on the cookie.
Pin This Recipe!
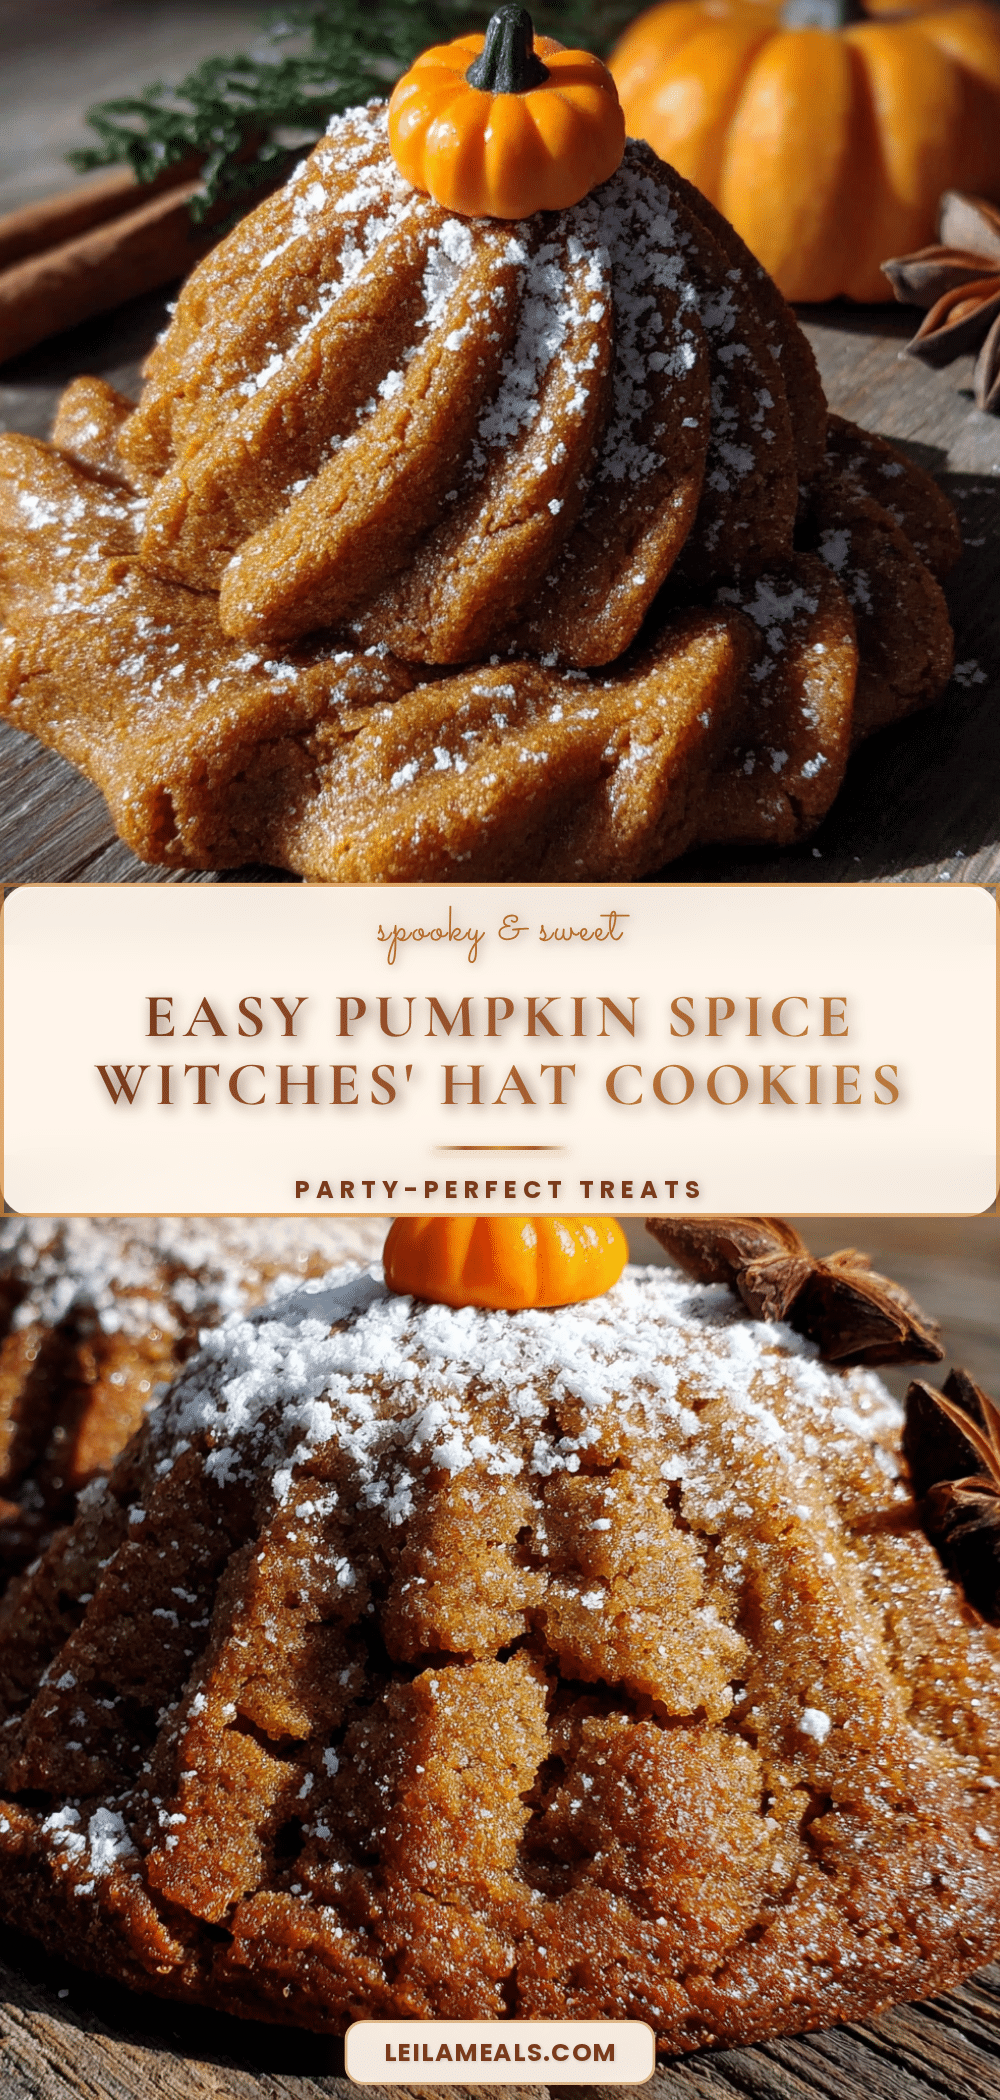
Easy Pumpkin Spice Witches Hat Cookies
These Easy Pumpkin Spice Witches’ Hat Cookies are soft, cakey pumpkin spice cookies topped with a dark chocolate brim and a Hershey’s Kiss, sprinkled with orange sanding sugar. They’re the perfect Halloween treat that looks impressive but is surprisingly simple to make.
- Prep Time: 20 minutes
- Cook Time: 12-14 minutes per batch
- Total Time: 45 minutes
- Yield: 24 cookies 1x
- Category: Dessert
- Cuisine: American
Ingredients
- 1/2 cup (113g) unsalted butter, softened
- 3/4 cup (150g) granulated sugar
- 1/4 cup (50g) packed light brown sugar
- 1/2 cup (120g) pumpkin puree
- 1 large egg, room temperature
- 1 teaspoon vanilla extract
- 2 cups (250g) all-purpose flour
- 1 teaspoon baking powder
- 1/2 teaspoon baking soda
- 1/2 teaspoon salt
- 2 teaspoons pumpkin pie spice
- 1/2 teaspoon ground cinnamon
- 1 cup (170g) semi-sweet chocolate chips
- 1 tablespoon coconut oil or vegetable shortening
- Orange sanding sugar or sparkling sugar
- 24 Hershey’s Kisses or Hugs, unwrapped
Instructions
- Make the Cookie Dough: In a large mixing bowl, beat the softened butter, granulated sugar, and brown sugar together until light and fluffy, about 2-3 minutes. Add the pumpkin puree, egg, and vanilla extract; beat on low until just combined.
- In a medium bowl, whisk together the flour, baking powder, baking soda, salt, pumpkin pie spice, and cinnamon. Gradually add the dry ingredients to the wet ingredients, mixing on low speed until just combined. Do not overmix.
- Chill the Dough: Cover the bowl with plastic wrap and refrigerate for at least 20 minutes. Preheat oven to 350°F (175°C) and line baking sheets with parchment paper.
- Shape and Bake: Scoop rounded tablespoons of dough (about 1.5 tablespoons each) and roll into balls. Place on prepared baking sheets about 2 inches apart. Bake for 12-14 minutes, until edges are set and lightly golden. Cool on baking sheet for 5 minutes, then transfer to a cooling rack to cool completely.
- Make the Chocolate Brims: Line a small baking sheet with parchment paper. In a small microwave-safe bowl, combine chocolate chips and coconut oil. Microwave in 30-second intervals, stirring well after each, until smooth. Pour onto prepared parchment and spread into a 1/4-inch thick rectangle. Place another piece of parchment on top and press gently. Refrigerate for 5-7 minutes until firm. Use a 2-inch round cookie cutter to cut out circles. You should get about 24 circles.
- Assemble the Witches’ Hats: Place a chocolate circle on each cooled cookie, pressing gently. Dab a small amount of melted chocolate on top of the circle and press a Hershey’s Kiss into it, pointy side up. While the chocolate is still wet, sprinkle orange sanding sugar over the Kiss and exposed chocolate brim. Let set at room temperature for about 15 minutes.
Notes
Chill the dough for at least 20 minutes to prevent spreading. Work in small batches when decorating to keep the chocolate tacky for the sugar. Cookies can be baked up to 2 days ahead and decorated the day of serving. Store assembled cookies in an airtight container at room temperature for up to 3 days.
Nutrition
- Serving Size: 1 cookie
- Calories: 165
- Sugar: 14
- Sodium: 95
- Fat: 8
- Saturated Fat: 5
- Carbohydrates: 22
- Fiber: 1
- Protein: 2
Keywords: pumpkin spice, witches hat cookies, Halloween cookies, pumpkin cookies, chocolate, Hershey's Kisses, easy Halloween treat


