The plate was empty in under ten minutes. Not a single piggy survived. My nephew, who usually picks at food like he’s inspecting it for flaws, had three before I even sat down. That’s when I knew this little Halloween appetizer was a keeper.
I wasn’t trying to create something viral or even particularly clever. I just had a pack of crescent rolls, some mini hot dogs, and a vague memory of making something similar for a school party years ago. Halloween snacking always feels like an afterthought, you know? You spend all this energy on costumes and candy, and suddenly it’s 5 PM and everyone’s starving and you’re staring at a bag of baby carrots like that’s going to cut it. So I grabbed the dough and started wrapping. And honestly? The mummy look was kind of an accident. I was just trying to use up the dough.
But the way the little eyes stared up from the baking sheet—those tiny mustard dots looking all sleepy and ridiculous—I cracked up. And when I pulled them out of the oven, golden and a little crispy on the edges, they looked exactly like a platter of tiny wrapped-up Halloween guests. It was one of those moments where the recipe just works. No fuss. No fancy ingredients. Just a fun idea that actually delivers.
These Easy Mummy Pigs in a Blanket have become our official Halloween party staple. They’re the appetizer that disappears before the candy bowl gets touched. And the best part? You can make them in the time it takes to hand out the first round of candy to trick-or-treaters.
Why You’ll Love This Recipe
I’ve tested this recipe more times than I care to admit. I’ve used different doughs, different hot dog sizes, different eye placements. I’ve burned them, undercooked them, and accidentally made them look like angry mummies instead of cute ones. So trust me when I say this version is the one.
- Quick & Easy: From fridge to table in under 25 minutes. That’s faster than most delivery.
- Simple Ingredients: You need exactly four things. Maybe five if you count the mustard for eyes. Nothing weird.
- Perfect for Halloween Parties: They look themed without being fussy. Kids love them. Adults eat them like they’re kids.
- Crowd-Pleaser: I’ve brought these to three different gatherings now. Every single time, someone asks for the recipe.
- Unbelievably Delicious: The crescent dough gets all flaky and buttery. The hot dog gets a little crispy at the ends. It’s simple done right.
What makes this different from just wrapping hot dogs in dough? It’s the technique. The way you leave a tiny gap for the face. The way you tuck the ends under so they don’t unravel. The way the mustard eyes bake into little golden spots. It’s not a recipe you have to think about. It’s a recipe you can make while helping a kid glue a fake spider to their shirt.
This is the kind of food that makes Halloween feel like Halloween. It’s silly. It’s warm. It’s gone before you know it.
What Ingredients You Will Need
This recipe keeps things simple. You don’t need a specialty store or a trip to three different markets. Everything here is a standard pantry or grocery run item. Here’s what you need and why each ingredient matters.
- 1 can (8 oz) refrigerated crescent roll dough — This is your mummy wrapping. I prefer Pillsbury for consistency, but any brand works. The dough is buttery, flaky, and easy to cut into strips. If your dough is cold from the fridge, let it sit on the counter for 5 minutes so it doesn’t crack when you unroll it.
- 12 mini hot dogs or cocktail sausages — These are your mummies. I use beef mini hot dogs for flavor, but turkey or chicken versions work too. Look for cocktail-sized sausages that are about 2 inches long. If you can only find regular hot dogs, just cut them into thirds.
- 1 large egg — For the egg wash. This gives the dough that beautiful golden-brown color when it bakes. You can skip it if you’re in a rush, but the color won’t be as nice. Beat it with a splash of water (about a teaspoon) until smooth.
- Yellow mustard — For the mummy eyes. You only need a tiny amount. I use classic yellow mustard because the color pops against the golden dough. Dijon or honey mustard work too, but the color is less dramatic.
- Optional: Everything bagel seasoning or sesame seeds — For extra texture on top. I sometimes sprinkle a little on before baking. It’s not necessary, but it adds a nice crunch.
That’s it. Four ingredients for the base recipe. Five if you count the seasoning. No cream cheese. No weird sauces. No complicated steps. This is the kind of recipe you can make on a Tuesday night when you suddenly remember Halloween is tomorrow.
For the mustard eyes, I recommend using a toothpick or a small piping tip to apply them after baking. If you put them on before baking, they tend to spread and look less like eyes and more like yellow blobs. Trust me on this one—I learned the hard way.
Equipment Needed
You don’t need much for this recipe, which is part of the charm. Here’s what you’ll need to have on hand.
- Baking sheet — A standard half-sheet pan works perfectly. Line it with parchment paper for easy cleanup. I’ve used foil in a pinch, but parchment gives better browning.
- Sharp knife or pizza cutter — For cutting the crescent dough into strips. A pizza cutter makes it faster and cleaner. A sharp knife works just as well.
- Small bowl — For beating the egg wash. Any small bowl works.
- Pastry brush — For applying the egg wash. A silicone brush is easiest to clean. If you don’t have one, you can use a paper towel to dab it on gently.
- Toothpick or small piping tip — For applying the mustard eyes. A toothpick is actually the easiest tool here. Just dip and dot.
- Cooling rack — Optional, but helpful for letting the mummies cool without getting soggy on the bottom.
I’ve made these without a pastry brush before. I just used my fingers to spread the egg wash. It works, but it’s messier. A brush is worth the minimal investment if you bake often. If you’re looking for a budget-friendly option, dollar stores usually carry silicone pastry brushes for a couple of bucks.
Preparation Method

This is where the magic happens. Follow these steps, and you’ll have a tray of adorable mummies in no time. I’ve included time estimates and sensory cues so you know exactly what to look for.
- Preheat your oven to 375°F (190°C). Line a baking sheet with parchment paper. This takes about 10 minutes, so do it first. While the oven heats, prep everything else.
- Unroll the crescent dough. Open the can carefully—it tends to pop. Unroll the dough onto a clean cutting board. Press the perforated seams together gently with your fingers so you have one solid sheet of dough. You don’t need to be perfect here. Just smooth it out enough to cut clean strips.
- Cut the dough into strips. Using a sharp knife or pizza cutter, slice the dough lengthwise into 12 thin strips. Each strip should be about 1/2 inch wide. Don’t worry if they’re not perfectly even. Mummies aren’t supposed to look perfect anyway. If the dough feels too sticky, dust your knife with a little flour.
- Wrap the hot dogs. Take one mini hot dog and one strip of dough. Starting at one end, wrap the dough around the hot dog at a slight angle, leaving a small gap near the top for the face. The gap should be about 1/2 inch wide. Tuck the end of the dough strip under the hot dog to secure it. Repeat with all 12 hot dogs. This takes about 5 minutes once you get into a rhythm.
- Place on the baking sheet. Arrange the wrapped mummies on the prepared baking sheet, leaving about 1 inch of space between each one. They won’t spread much, but a little room helps them brown evenly.
- Apply the egg wash. In a small bowl, beat the egg with 1 teaspoon of water until smooth. Using a pastry brush, gently brush the tops and sides of each mummy with the egg wash. Don’t soak them—just a light coat. You’ll see the dough start to look glossy immediately.
- Bake for 10-12 minutes. Place the baking sheet on the middle rack of your preheated oven. Bake until the dough is golden brown and puffed. At 10 minutes, check them. The edges should be lightly browned, and the dough should look flaky. If they’re still pale, give them 2 more minutes. Your kitchen will smell like buttery crescent rolls and warm hot dogs—that’s how you know it’s working.
- Cool slightly. Remove the baking sheet from the oven and let the mummies cool on the pan for 2-3 minutes. They’ll be hot, so don’t try to eat them right away. Transfer them to a cooling rack if you want to speed things up.
- Add the eyes. Dip a toothpick into yellow mustard and dot two small eyes onto the exposed hot dog area on each mummy. Don’t use too much—a tiny dab is enough. The mustard will stick to the warm surface easily. This is the fun part. You can make them look surprised, sleepy, or slightly confused. I prefer the slightly confused look.
- Serve immediately. These are best served warm, right after the eyes go on. Arrange them on a platter and watch them disappear.
One thing I learned the hard way: don’t over-wrap the hot dogs. If you cover the entire surface, there’s no room for the face, and it just looks like a dough blob. Leave that gap. It makes all the difference.
Cooking Tips & Techniques
I’ve made these mummies at least a dozen times now. Here’s what I’ve learned along the way—including the mistakes that taught me.
Don’t overwork the dough. Crescent dough is delicate. If you handle it too much, it gets tough and doesn’t puff up as nicely. Cut the strips quickly and wrap gently. The less you touch it, the flakier it bakes.
Keep the dough cold. If your kitchen is warm, the dough can get sticky and hard to work with. If that happens, pop the wrapped mummies in the fridge for 5 minutes before baking. It helps the dough hold its shape and gives you better layers.
Space them out. I once crammed all 12 mummies onto one small baking sheet. They baked into one giant blob of dough and hot dogs. Not cute. Give them room to breathe. A standard half-sheet pan fits 12 comfortably with space between.
Check at 10 minutes. Ovens vary. My old oven took exactly 11 minutes. My current one takes 10. Start checking at the 10-minute mark. You’re looking for golden-brown edges and puffed dough. If the bottoms are browning too fast but the tops are still pale, move the pan to a higher rack for the last 2 minutes.
Make the eyes after baking. I cannot stress this enough. If you put the mustard on before baking, it bakes into weird yellow crusts. The eyes look better and stay clean when you add them after. Plus, it gives you something fun to do right before serving.
Double the batch. Seriously. These go fast. If you’re serving more than four people, make two cans of dough and two packs of hot dogs. You’ll thank me later.
One of my biggest failures: I tried using puff pastry once instead of crescent dough. It was too puffy. The mummies looked like they’d been in a gym. Stick with crescent rolls. They’re the right texture and flavor for this.
Variations & Adaptations
This recipe is flexible. Here are some ways to make it your own, depending on what you have or who you’re feeding.
Dairy-Free Version: Most crescent roll dough is dairy-free, but check the label to be sure. Use a dairy-free egg wash substitute like a splash of plant-based milk. The color won’t be as golden, but it still works.
Gluten-Free Option: You can find gluten-free crescent roll dough at some specialty stores. The texture is a little different—it’s denser and less flaky—but it still makes cute mummies. Just handle it gently because gluten-free dough tends to crack more easily.
Spicy Mummies: Use spicy mini hot dogs or add a tiny smear of sriracha under the dough before wrapping. The heat cuts through the buttery dough nicely. My brother-in-law loves these.
Cheesy Mummies: Add a thin strip of cheddar cheese under the dough before wrapping. It melts into the hot dog and adds a gooey, savory layer. Just don’t use too much cheese or it’ll leak out while baking.
Vegetarian Version: Use vegetarian cocktail sausages instead of hot dogs. The texture is slightly different, but the wrapping and baking process is the same. I’ve tried this with plant-based sausages, and they work well—just check the cooking time since some brands cook faster.
Different Eye Colors: If you don’t have yellow mustard, use ketchup, sriracha, or even a tiny dot of cream cheese. Ketchup eyes look a little creepy, which honestly works for Halloween. Cream cheese eyes look more like bandages, which is also fun.
I once made a batch with sriracha eyes and called them “angry mummies.” My nephew refused to eat them because he said they looked mad. Kids are weird. But the adults finished them off.
Serving & Storage Suggestions
These mummies are best served warm, right out of the oven. The dough is flaky, the hot dog is juicy, and the mustard eyes are still fresh. Arrange them on a Halloween-themed platter or a simple white plate. They look great on their own, but you can add a small bowl of ketchup or mustard for dipping.
What to serve with them: These pair well with other Halloween finger foods. I like to serve them alongside a bowl of creamy corn dip for dipping or a tray of witch finger shortbread cookies for dessert. If you’re hosting a party, a smoky blackberry bourbon sangria on the side makes everything feel festive.
Storage: Leftover mummies (if you have any) can be stored in an airtight container in the refrigerator for up to 3 days. The dough will soften over time, so they won’t be as crispy as fresh ones.
Reheating: The best way to reheat these is in the oven or air fryer. Pop them on a baking sheet at 350°F (175°C) for 5-7 minutes. The microwave works in a pinch, but the dough gets soggy. I don’t recommend it unless you’re in a hurry.
Freezing: You can freeze the unbaked mummies. Arrange them on a baking sheet and freeze until solid (about 1 hour). Transfer them to a freezer bag. When you’re ready to bake, add 2-3 minutes to the baking time. No need to thaw first.
The flavors actually hold up well over time. The mustard eyes might bleed a little into the dough after a day, but they still taste great. I’ve packed these for Halloween parties the next day, and no one complained.
Nutritional Information & Benefits
Let’s be real—this is a treat. It’s not health food. But here’s what you’re looking at per serving (2 mummies, based on standard ingredients).
| Nutrient | Amount per Serving (2 mummies) |
|---|---|
| Calories | 280-320 |
| Total Fat | 18-22g |
| Saturated Fat | 6-8g |
| Cholesterol | 45-55mg |
| Sodium | 650-750mg |
| Total Carbohydrates | 22-26g |
| Protein | 8-10g |
Health Highlights: Mini hot dogs do provide some protein and iron. The egg wash adds a small amount of vitamin A and B vitamins. The crescent dough is mostly refined flour, so it’s not a fiber powerhouse. But for a once-a-year Halloween treat? It’s fine. Balance it out with a veggie platter on the side.
Dietary Considerations: This recipe contains gluten (crescent dough), dairy (butter in the dough), and eggs (egg wash). It’s not suitable for vegan or gluten-free diets without substitutions. Check the crescent roll label for specific allergen info—some brands use milk, others don’t.
Potential Allergens: Wheat, milk, eggs. If you’re serving a crowd, label the platter so guests with allergies know what’s in them.
My personal take: Halloween is one night. Let yourself enjoy the fun food. These mummies aren’t a daily habit, and that’s okay. They’re a celebration. A delicious, silly, buttery celebration.
Conclusion
These Easy Mummy Pigs in a Blanket are exactly what Halloween appetizers should be: fun, fast, and impossible to resist. They look like you put in effort (but you didn’t). They taste like comfort food. And they disappear faster than any candy bowl I’ve ever seen.
I love this recipe because it brings people together. There’s something about a plate of little wrapped-up hot dogs with mustard eyes that makes everyone smile. Kids light up. Adults get nostalgic. It’s simple food with a silly twist, and that’s the best kind of Halloween cooking.
Don’t be afraid to make them your own. Use different sausages. Try different eye colors. Double the batch because trust me, you’ll need it. And if you come up with a fun variation, I’d love to hear about it. Drop a comment below or tag me in your photos. Seeing other people’s mummy faces is honestly my favorite part of this recipe.
Go make some mummies. Your Halloween table will thank you.
Frequently Asked Questions
Can I make these ahead of time?
Yes. You can assemble the mummies up to 24 hours in advance and keep them in the fridge on the baking sheet. Add the egg wash right before baking. Don’t add the eyes until after they come out of the oven.
Can I use regular-sized hot dogs instead of mini ones?
Absolutely. Just cut each hot dog into three equal pieces. You’ll get more mummies from one pack. Adjust the baking time by 1-2 minutes if the pieces are thicker than cocktail sausages.
Why did my dough unravel during baking?
This usually happens if the dough wasn’t tucked under the hot dog securely. Make sure the end of the strip is pressed firmly underneath the sausage before baking. If your dough is too warm, it can also shrink and pull apart. Chill the wrapped mummies for 5 minutes before baking to prevent this.
What can I use instead of crescent roll dough?
Puff pastry works but gives a much flakier, puffier result. Pizza dough is another option—it’s chewier and less buttery. Canned biscuit dough can be rolled out and cut into strips, but it’s thicker and takes longer to bake. Crescent rolls are still the best choice for this recipe.
Can I make these in an air fryer?
Yes. Preheat your air fryer to 350°F (175°C). Place the mummies in a single layer in the basket (you may need to work in batches). Cook for 6-8 minutes, flipping halfway through. Check at 6 minutes and add time if needed. The air fryer gives them a nice crispy exterior.
Pin This Recipe!
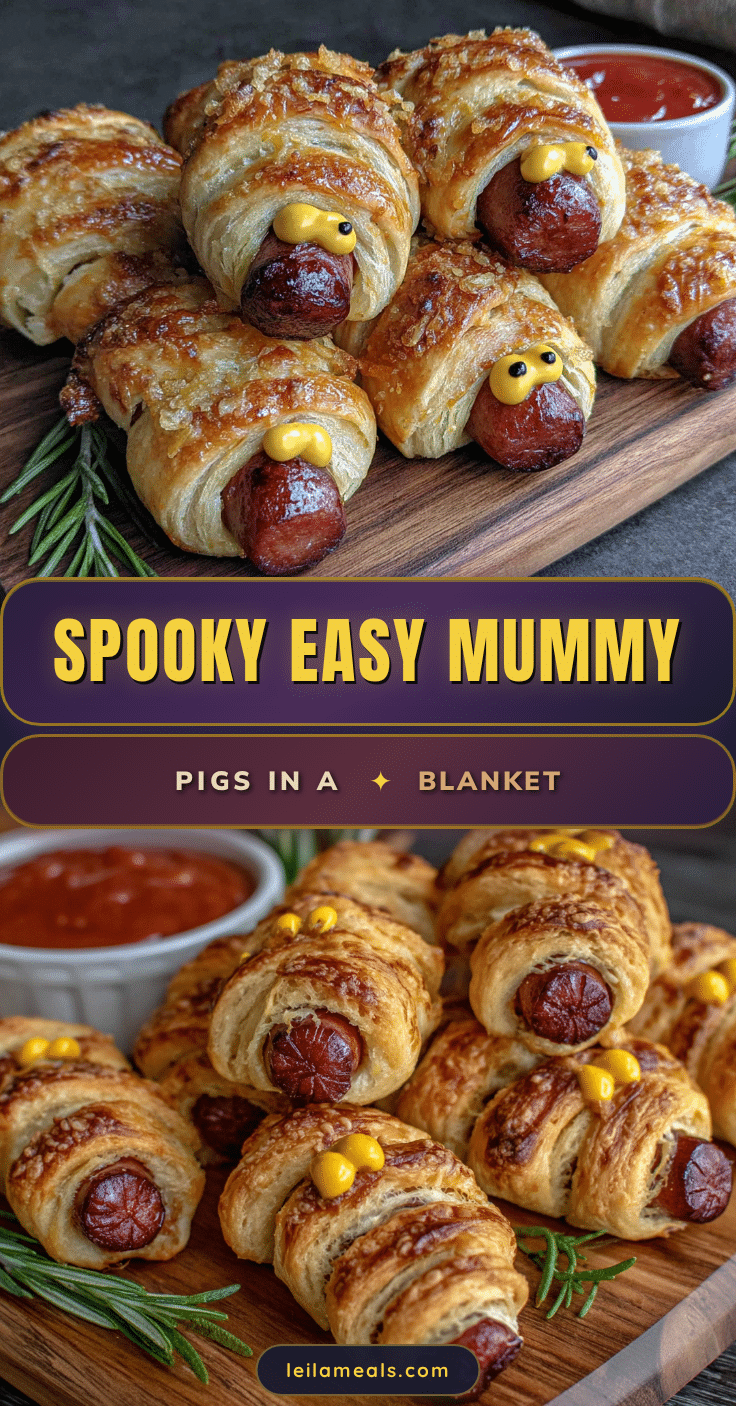
Easy Mummy Pigs in a Blanket: Best Halloween Appetizer
These Easy Mummy Pigs in a Blanket are a fun, fast, and irresistible Halloween appetizer made with crescent roll dough, mini hot dogs, and mustard eyes. Perfect for parties, they disappear faster than candy!
- Prep Time: 10 minutes
- Cook Time: 12 minutes
- Total Time: 22 minutes
- Yield: 6 servings (2 mummies per serving) 1x
- Category: Appetizer
- Cuisine: American
Ingredients
- 1 can (8 oz) refrigerated crescent roll dough
- 12 mini hot dogs or cocktail sausages
- 1 large egg
- Yellow mustard
- Optional: Everything bagel seasoning or sesame seeds
Instructions
- Preheat your oven to 375°F (190°C). Line a baking sheet with parchment paper.
- Unroll the crescent dough onto a clean cutting board. Press the perforated seams together gently to form one solid sheet.
- Cut the dough lengthwise into 12 thin strips, each about 1/2 inch wide.
- Take one mini hot dog and one strip of dough. Starting at one end, wrap the dough around the hot dog at a slight angle, leaving a small gap near the top for the face (about 1/2 inch wide). Tuck the end of the dough strip under the hot dog to secure it. Repeat with all 12 hot dogs.
- Arrange the wrapped mummies on the prepared baking sheet, leaving about 1 inch of space between each one.
- In a small bowl, beat the egg with 1 teaspoon of water until smooth. Using a pastry brush, gently brush the tops and sides of each mummy with the egg wash.
- Bake for 10-12 minutes, until the dough is golden brown and puffed.
- Remove from the oven and let cool on the pan for 2-3 minutes.
- Dip a toothpick into yellow mustard and dot two small eyes onto the exposed hot dog area on each mummy.
- Serve immediately.
Notes
Don’t over-wrap the hot dogs; leave a gap for the face. Add mustard eyes after baking to prevent spreading. For best results, keep dough cold and space mummies apart on the baking sheet. Double the batch for larger crowds.
Nutrition
- Serving Size: 2 mummies
- Calories: 300
- Sugar: 4
- Sodium: 700
- Fat: 20
- Saturated Fat: 7
- Carbohydrates: 24
- Protein: 9
Keywords: Halloween appetizer, mummy pigs in a blanket, easy Halloween recipe, crescent roll hot dogs, party snack


