The kitchen was quiet except for the soft hum of the mixer, and the only thing I wanted was to make a cake that felt like a hug for a friend who needed one. It was late September, and my best friend—a textbook Virgo—had just gone through a brutal breakup. I knew she wouldn’t ask for help, but I also knew that a homemade cake, one that looked like it belonged in a dream, might say what words couldn’t. I wanted something that felt as meticulous and thoughtful as she is, but also soft and whimsical. That’s how this Dreamy Virgo Birthday Cake with Buttercream Stars was born.
I spent the whole afternoon in the kitchen, measuring flour twice, testing the buttercream consistency on my finger, and carefully piping little stars onto parchment paper. (I may have eaten a few. For quality control, obviously.) There’s something about the act of making a cake for someone else that strips away the noise. You’re not thinking about your to-do list or that email you forgot to reply to. You’re just focused on creating something beautiful and delicious for one person. And that, honestly, is a kind of meditation.
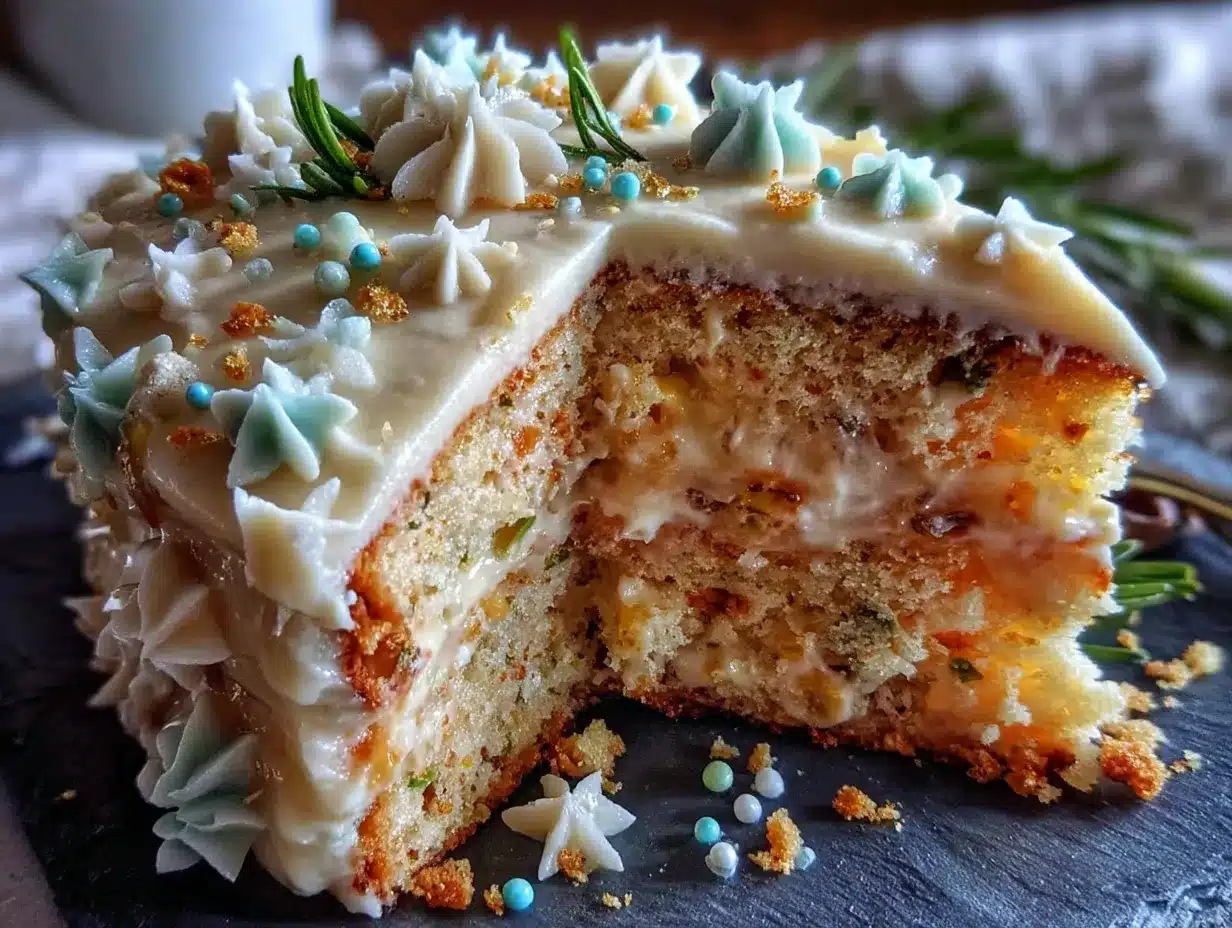
This cake is vanilla-based, but not just any vanilla. It’s tender, moist, and has that subtle richness from using both butter and a touch of oil. The buttercream is silky and not too sweet—just the right canvas for those little stars. I decorated it with a simple ombre effect, using a pale lavender that felt calming and celestial. When I finally brought it over, my friend just stared at it for a second. Then she laughed, which was better than tears. This recipe stuck because it proved that sometimes, the most practical thing you can do is make something impractical and beautiful. Trust me, you’ll want to make this for the Virgo in your life—or for yourself, because you deserve a little dreaminess too.
Why You’ll Love This Recipe
This isn’t just another vanilla cake recipe. I’ve tested this version more times than I care to admit, tweaking the fat-to-flour ratio and the mixing method until the crumb was exactly right. The result is a cake that’s sturdy enough to stack and decorate, but so tender it practically melts on your tongue. Here’s why it’s earned a permanent spot in my recipe binder:
- Simple Ingredients: You likely have everything in your pantry right now. No weird extracts or hard-to-find flours.
- Perfect for Birthdays: The buttercream stars make it feel special without requiring a pastry degree. It’s impressive but totally doable.
- Crowd-Pleaser: I’ve made this for gatherings and it always gets that “who made this?” reaction. Kids love the stars, adults love the flavor.
- Unbelievably Delicious: The combination of cake flour and a secret ingredient (a spoonful of sour cream) gives it a texture that’s next-level comfort food.
- Customizable: Swap the vanilla for almond or lemon extract, change the star colors to match any party theme—it’s a blank canvas for your creativity.
What makes this recipe different from the rest? It’s the technique of reverse-creaming the butter into the flour mixture. It sounds fancy, but it’s actually easier than the traditional method and gives you a more tender, velvety crumb. No over-mixing, no dense cake. I learned this trick from a pastry chef friend and it changed my baking life. This cake isn’t just good—it’s the kind that makes you close your eyes after the first bite. It’s comfort food reimagined: a little bit fancy, a whole lot of heart, and perfect for turning a simple Tuesday into something memorable.
What Ingredients You Will Need
This recipe uses simple, wholesome ingredients to deliver bold vanilla flavor and a satisfyingly tender texture. Most of these are pantry staples, which makes this cake perfect for last-minute celebrations or when you just need a baking project on a rainy afternoon.
For the Cake
- 2 ¾ cups (345g) cake flour — I recommend Swans Down or King Arthur for the best texture. Cake flour is non-negotiable here; it gives the cake its delicate crumb. (All-purpose flour will make it tougher.)
- 2 ½ teaspoons baking powder — Make sure it’s fresh! Test it by dropping a little into hot water; if it fizzes, you’re good.
- ½ teaspoon baking soda — Helps with browning and tenderness.
- 1 teaspoon fine sea salt — Balances the sweetness and enhances the vanilla flavor.
- 1 cup (226g) unsalted butter, softened to cool room temperature — I use Plugrá or Kerrygold for their higher butterfat content. It makes a difference.
- 1 ½ cups (300g) granulated sugar — Regular white sugar is perfect. Don’t substitute with brown sugar here; it will change the texture.
- 3 large eggs, room temperature — Cold eggs will seize the butter. Place them in a bowl of warm water for 5 minutes if you forgot to take them out.
- 2 teaspoons vanilla bean paste or pure vanilla extract — I prefer vanilla bean paste for those gorgeous little flecks, but extract works beautifully too. (Try Nielsen-Massey for a floral, high-quality flavor.)
- 1 cup (240ml) whole milk, room temperature — Whole milk adds richness. You can use 2% in a pinch, but don’t use skim.
- ¼ cup (60g) sour cream, room temperature — This is my secret ingredient. It adds moisture and a slight tang that makes the vanilla pop. (Full-fat Greek yogurt works as a substitute.)
For the Buttercream Stars & Frosting
- 2 cups (452g) unsalted butter, softened to cool room temperature — Again, use a good quality brand. The butter is the star here, so don’t skimp.
- 5 cups (625g) powdered sugar, sifted — Sifting is important to avoid lumps. If you’re in a hurry, whisk it vigorously with a fork.
- 2 teaspoons vanilla extract — Or vanilla bean paste for extra visual appeal.
- ¼ cup (60ml) heavy cream — Adjust the amount to reach your desired consistency. For piping stars, you want it stiff but not dry.
- Pinch of fine sea salt — Essential for cutting the sweetness.
- Gel food coloring — I recommend Americolor or Wilton. For this cake, I used a mix of violet and a tiny drop of pink to create a soft lavender. (Gel is better than liquid because it doesn’t thin out the buttercream.)
Equipment Needed
You don’t need a professional bakery setup to make this cake look stunning. Here’s what you’ll need:
- Two 8-inch round cake pans — I prefer Fat Daddio’s anodized aluminum pans. They conduct heat evenly and give you straight sides.
- Stand mixer or hand mixer — A stand mixer makes the reverse-creaming method easier, but a hand mixer works just fine. I’ve made this with both.
- Piping bags and tips — For the stars, you’ll need a closed star tip (like Wilton 1M or 2D). I also use a small open star tip (Wilton 18) for the tiny stars. If you don’t have piping bags, a sturdy zip-top bag with the corner snipped off can work in a pinch.
- Offset spatula — A small one is perfect for smoothing buttercream. I have a cheap one from a baking supply store that I’ve had for years.
- Parchment paper rounds — Cut them to fit your pans. It’s the best insurance against stuck cake layers.
- Cooling rack — Essential for even cooling. If you don’t have one, you can use the inverted pans, but a rack is better.
- Turntable (optional but helpful) — Makes frosting and decorating so much easier. I use a simple plastic one from Amazon.
Preparation Method
Take your time with this one. The magic is in the details. I usually set aside a lazy Sunday afternoon for this cake, but you can absolutely split it over two days—bake the layers one day and decorate the next.
- Preheat and Prep: Preheat your oven to 350°F (175°C). Grease two 8-inch round cake pans and line the bottoms with parchment paper rounds. Dust the sides with a little flour, tapping out the excess. This step is non-negotiable for clean release.
- Whisk Dry Ingredients: In a medium bowl, whisk together the cake flour, baking powder, baking soda, and salt. Set aside. (I whisk for a full 30 seconds to aerate the flour.)
- Reverse-Cream the Butter and Sugar: In the bowl of your stand mixer fitted with the paddle attachment, beat the softened butter and granulated sugar on medium speed for about 3-4 minutes, until it’s light and fluffy. Don’t rush this—you want it to look pale and almost creamy. Scrape the bowl down halfway through.
- Add Dry Ingredients in Stages: With the mixer on low speed, add the flour mixture in three additions, alternating with the milk. Start and end with the flour. So: flour, milk, flour, milk, flour. Mix just until combined after each addition. The batter will look thick and a little bit like cookie dough—that’s perfect.
- Incorporate Eggs and Vanilla: In a small bowl, whisk the eggs, vanilla bean paste, and sour cream together until smooth. With the mixer on low, add this mixture in a slow, steady stream. Mix for about 30 seconds, just until everything is incorporated. Scrape the bowl and mix for another 10 seconds. Don’t overmix! Overmixing will develop the gluten and make the cake tough.
- Divide and Bake: Divide the batter evenly between the two prepared pans. I use a kitchen scale for accuracy—about 540g per pan. Smooth the tops with a spatula. Bake for 28-32 minutes, or until a toothpick inserted in the center comes out with a few moist crumbs. The tops should be lightly golden and spring back when touched.
- Cool Completely: Let the cakes cool in the pans on a wire rack for 10 minutes. Then, run a thin knife around the edges and invert them onto the rack. Peel off the parchment paper and let them cool completely. I mean completely—warm cake will melt your buttercream into a sad puddle. I usually wait at least 2 hours.
- Make the Buttercream: While the cakes cool, make the buttercream. In the bowl of your stand mixer fitted with the paddle attachment, beat the softened butter on medium-high speed for 5-7 minutes, until it’s very pale and fluffy. This is called “whipping the butter” and it’s key to a silky, non-greasy buttercream. Scrape the bowl down. With the mixer on low, gradually add the sifted powdered sugar, one cup at a time. Add the vanilla, salt, and 2 tablespoons of heavy cream. Mix on low until combined, then increase to medium-high and beat for another 2-3 minutes, until light and fluffy. If the buttercream is too stiff, add the remaining 2 tablespoons of heavy cream. If it’s too soft, add a little more powdered sugar.
- Color the Buttercream: Divide the buttercream into two bowls. Leave one bowl white (or a very pale lavender if you want a solid color). Add gel food coloring to the second bowl to achieve your desired shade. I used a toothpick to add a tiny amount of violet gel and a dab of pink. Mix well. Transfer the colored buttercream to a piping bag fitted with your star tip.
- Assemble the Cake: Place one cake layer on your serving plate or cake board. Spread a generous layer of white buttercream on top (about ½ cup). Place the second layer on top, pressing down gently. Apply a thin crumb coat of white buttercream over the entire cake. Refrigerate for 15 minutes to set the crumb coat.
- Pipe the Stars: Remove the cake from the fridge. Starting at the bottom edge of the cake, pipe rows of stars using the colored buttercream. Overlap them slightly for a full, textured look. Work your way up the cake, covering the entire surface. For the top, pipe stars in a spiral pattern starting from the outer edge and working inward. If you want, you can add a few tiny stars on top using a smaller tip. (I always add a few extra stars on a parchment-lined baking sheet to place on top as decoration.)
- Chill and Serve: Refrigerate the finished cake for at least 30 minutes to let the buttercream firm up. This makes slicing much cleaner. Let it sit at room temperature for 15-20 minutes before serving.
Cooking Tips & Techniques
I’ve made this cake at least a dozen times, and I’ve learned a few things the hard way. Here are my best tips for success:
- Room temperature ingredients are not a suggestion. I know, I know—it’s annoying. But cold eggs and milk will seize the butter in the reverse-creaming method, and you’ll end up with a lumpy batter. Trust me, I’ve been there. Set everything out an hour before you start.
- Don’t overmix the batter. The reverse-creaming method is forgiving, but once you add the egg mixture, you want to mix just until it comes together. Overmixing at this stage will give you a tough, dense cake. Stop when you don’t see any more streaks of flour.
- Use a kitchen scale for the flour. Measuring flour by volume is notoriously inaccurate. A cup of flour can weigh anywhere from 120g to 150g depending on how you scoop it. For a delicate cake like this, precision matters. I use a scale every single time.
- Chill the cake before piping. A crumb coat that’s been refrigerated for 15 minutes creates a stable base for piping. If you pipe stars onto a warm cake, the buttercream will slide right off. I learned this when I tried to rush the process and ended up with a lopsided mess.
- Practice piping on parchment. Before you start on the cake, pipe a few stars onto a piece of parchment paper. This helps you get a feel for the pressure and consistency. You can scrape them back into the bag if you’re not happy with them. No waste!
- Keep the buttercream at the right temperature. If your buttercream gets too soft while you’re piping, pop the piping bag in the fridge for 5-10 minutes. If it’s too stiff, microwave it for 5 seconds and squeeze the bag to redistribute the heat. Perfect buttercream should hold its shape but be smooth and easy to pipe.
Variations & Adaptations
One of the best things about this cake is how easily it adapts to different tastes and occasions. Here are a few variations I’ve tried and loved:
- Lemon Lavender Dream: Add the zest of two lemons to the sugar and rub it in with your fingers before creaming the butter. Replace 1 teaspoon of vanilla with 1 teaspoon of lemon extract. For the buttercream, add a few drops of lavender essential oil (food-grade!) and a tiny bit of purple gel color. It’s floral, bright, and utterly dreamy.
- Chocolate Starry Night: Replace ¼ cup (30g) of cake flour with ¼ cup (25g) of unsweetened cocoa powder. Add 1 teaspoon of instant espresso powder to the milk for a deeper chocolate flavor. Use the same buttercream, but add 2 tablespoons of cocoa powder (sifted) to half of it. Pipe alternating white and chocolate stars for a gorgeous contrast.
- Vegan & Dairy-Free Option: Substitute the butter with a high-quality vegan butter stick (I like Miyoko’s or Country Crock Plant Butter). Use unsweetened oat milk or almond milk in place of whole milk. Replace the eggs with a flax egg (1 tablespoon ground flaxseed + 3 tablespoons water per egg, let sit for 5 minutes). Use a vegan cream cheese or coconut cream in place of sour cream. The texture will be slightly denser but still delicious.
- Gluten-Free Adaptation: Use a high-quality 1:1 gluten-free flour blend that contains xanthan gum (like Bob’s Red Mill or King Arthur). Add 1 tablespoon of apple cider vinegar to the milk and let it sit for 5 minutes to create a homemade buttermilk. The cake will be a bit more delicate, so handle it gently.
- Mini Cupcakes Version: This batter makes about 24 standard cupcakes. Bake at 350°F (175°C) for 18-20 minutes. Pipe a single star on top of each cupcake for a party-perfect treat. I did this for a friend’s baby shower and they disappeared in minutes.
Serving & Storage Suggestions
This cake is best served at room temperature, so take it out of the fridge about 20 minutes before you plan to slice it. The buttercream will soften slightly, making it perfectly creamy, while the cake stays moist and tender.
For presentation, I like to place the cake on a simple white pedestal stand. The stars create enough visual interest on their own, so you don’t need much else. A few fresh edible flowers around the base—like violas or borage blossoms—add a lovely, organic touch. If you’re serving it for a Virgo birthday, consider adding a small “Happy Birthday” banner or a single candle shaped like a star.
This cake pairs beautifully with a cup of Earl Grey tea or a creamy latte. For a more indulgent experience, serve it alongside a scoop of vanilla bean ice cream or a drizzle of warm caramel sauce. I once served it with a side of fresh raspberries, and the tartness cut through the sweetness perfectly.
Storage Instructions: Store any leftover cake in an airtight container in the refrigerator for up to 5 days. The buttercream will firm up, but the cake will stay moist. Let slices come to room temperature before eating for the best flavor and texture.
Freezing Instructions: You can freeze the unfrosted cake layers for up to 3 months. Wrap them tightly in plastic wrap, then a layer of aluminum foil. Thaw overnight in the refrigerator before frosting. You can also freeze the frosted cake (without the stars) for up to 2 months. Thaw in the fridge overnight, then pipe the stars fresh before serving.
Reheating Tip: If you want a warm slice, microwave it for about 10-15 seconds. The buttercream will get a little melty, but it’s honestly delicious that way. (Don’t judge me.)
Nutritional Information & Benefits
Let’s be real—this is a celebration cake, not a health food. But I believe in knowing what’s in your food, even if it’s a treat. Here’s the estimated nutritional breakdown per slice (based on 12 servings):
- Calories: 580
- Fat: 36g
- Saturated Fat: 22g
- Carbohydrates: 64g
- Sugar: 48g
- Protein: 5g
- Fiber: 1g
Health benefits of key ingredients: The butter provides fat-soluble vitamins like A, D, and E. The eggs are a great source of high-quality protein and choline, which is important for brain health. And while I wouldn’t call it a health food, there’s something to be said for the mental health benefits of baking and sharing a beautiful cake. (That’s my story and I’m sticking to it.)
Dietary considerations: This recipe contains dairy, eggs, and gluten. See the Variations section above for vegan and gluten-free adaptations. It is nut-free as written (but check your specific brands if you have allergies).
Conclusion
This Dreamy Virgo Birthday Cake with Buttercream Stars is more than just a dessert—it’s a little piece of thoughtfulness you can hold in your hands. It’s for the friend who always remembers your birthday, the partner who notices the small things, or the Virgo in your life who deserves something as meticulous and beautiful as they are. (Or, you know, for yourself on a Tuesday. I don’t judge.)
I love this recipe because it proves that you don’t need complicated techniques or fancy ingredients to make something truly special. A simple vanilla cake, a silky buttercream, and a piping bag full of stars—that’s all it takes to create a little bit of magic. And honestly, isn’t that what baking is all about?
I’d love to see your version of this cake! Tag me when you make it, and tell me who you baked it for. Did you change the colors? Add a different flavor? I want to hear all about it. Drop a comment below or share your photos—I read every single one. And if you loved this recipe, you might also enjoy my Perfect Pumpkin Fall Baby Shower Cake or my Decadent Salted Caramel Apple Cheesecake Bars for another show-stopping dessert. Happy baking, friend. You’ve got this.
Frequently Asked Questions
Can I use all-purpose flour instead of cake flour?
You can, but the cake won’t be as tender. Cake flour has a lower protein content, which means less gluten development and a softer crumb. If you’re in a pinch, you can make a substitute: for every cup of all-purpose flour, remove 2 tablespoons and replace them with 2 tablespoons of cornstarch. Sift it together three times to combine. It’s not perfect, but it works in a bind.
How do I get my buttercream stars to look uniform?
Consistency comes from practice, but there are a few tricks. Use the same amount of pressure on the piping bag for each star. Start squeezing before you touch the cake, then release pressure as you pull away. This creates a clean, defined tip. If you’re nervous, practice on a piece of parchment paper first. You can always scrape the buttercream back into the bag and try again.
Can I make this cake ahead of time?
Absolutely. You can bake the cake layers up to 2 days in advance. Wrap them tightly in plastic wrap and store them at room temperature. You can make the buttercream up to a week in advance and store it in the refrigerator. When you’re ready to use it, let it come to room temperature and re-whip it in the mixer for a minute or two to bring back its fluffy texture.
Why did my cake sink in the middle?
This usually happens for one of three reasons: the oven temperature was too low, the baking powder was old, or the cake was underbaked. Make sure your oven is properly calibrated (an oven thermometer is a cheap investment). Check the expiration date on your baking powder. And always do the toothpick test—if it comes out with wet batter, it needs more time.
How do I transport this cake without ruining the stars?
Chill the cake thoroughly before transporting—at least an hour in the fridge, or 30 minutes in the freezer. Place it on a non-slip mat in the car, and keep it level. If you’re driving a long distance, consider packing the cake in a box that’s slightly larger than the cake itself. I once transported this cake on the subway (don’t ask), and the stars survived surprisingly well. The key is a well-chilled cake and a steady hand.
Pin This Recipe!
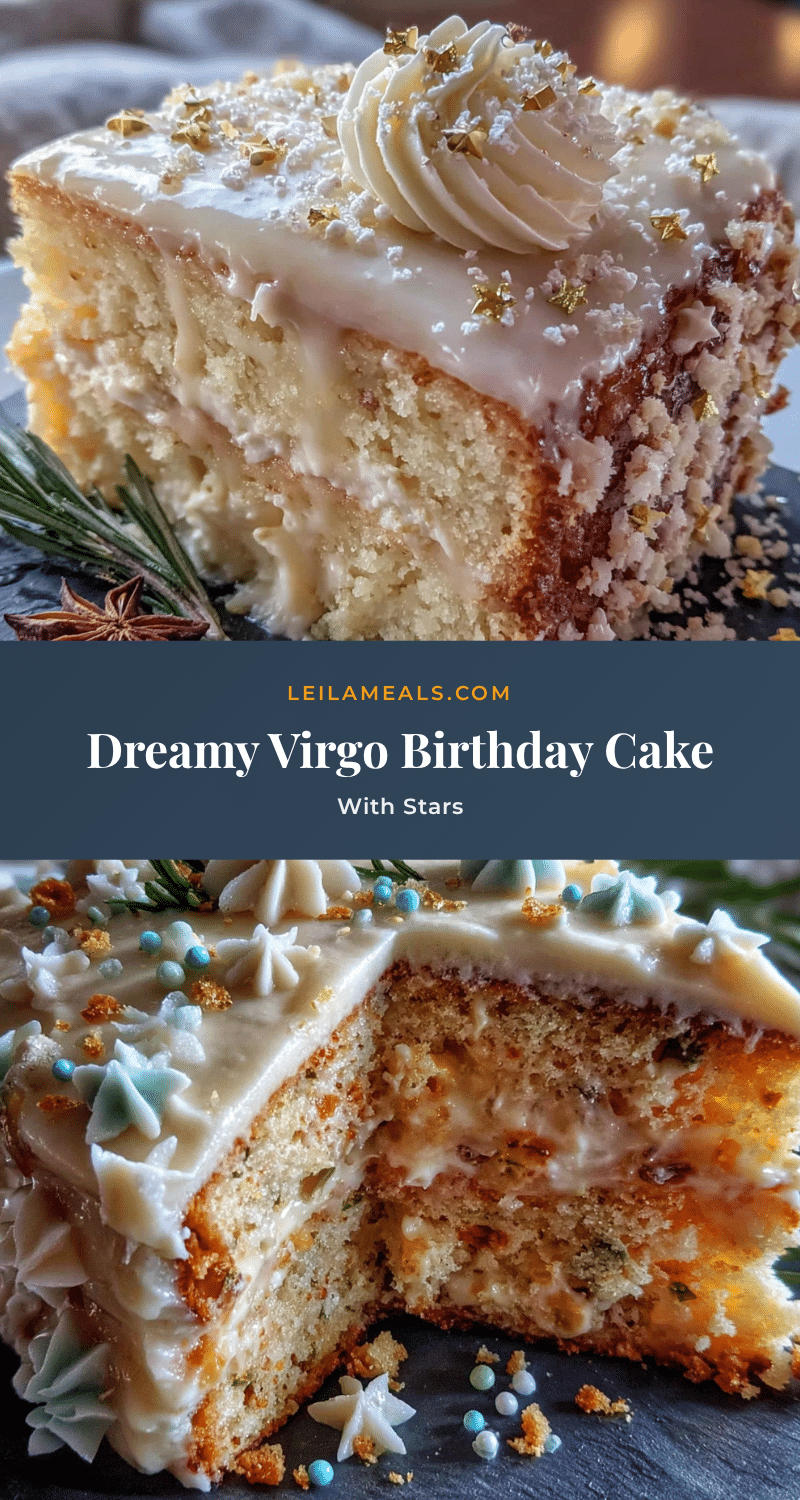
Dreamy Virgo Birthday Cake with Easy Buttercream Stars
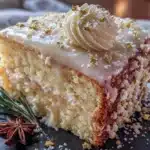
A tender vanilla cake with silky buttercream stars, perfect for celebrating the meticulous and thoughtful Virgo in your life. This recipe uses a reverse-creaming method for a velvety crumb and is decorated with a dreamy ombre effect.
- Prep Time: 30 minutes
- Cook Time: 30 minutes
- Total Time: 2 hours 30 minutes (plus cooling and chilling time)
- Yield: 12 servings 1x
- Category: Dessert
- Cuisine: American
Ingredients
- 2 ¾ cups (345g) cake flour
- 2 ½ teaspoons baking powder
- ½ teaspoon baking soda
- 1 teaspoon fine sea salt
- 1 cup (226g) unsalted butter, softened to cool room temperature
- 1 ½ cups (300g) granulated sugar
- 3 large eggs, room temperature
- 2 teaspoons vanilla bean paste or pure vanilla extract
- 1 cup (240ml) whole milk, room temperature
- ¼ cup (60g) sour cream, room temperature
- 2 cups (452g) unsalted butter, softened to cool room temperature (for buttercream)
- 5 cups (625g) powdered sugar, sifted
- 2 teaspoons vanilla extract (for buttercream)
- ¼ cup (60ml) heavy cream
- Pinch of fine sea salt
- Gel food coloring (violet and pink for lavender)
Instructions
- Preheat oven to 350°F (175°C). Grease two 8-inch round cake pans and line bottoms with parchment paper rounds. Dust sides with flour.
- In a medium bowl, whisk together cake flour, baking powder, baking soda, and salt for 30 seconds.
- In a stand mixer with paddle attachment, beat softened butter and granulated sugar on medium speed for 3-4 minutes until light and fluffy. Scrape bowl halfway through.
- With mixer on low, add flour mixture in three additions, alternating with milk (flour, milk, flour, milk, flour). Mix just until combined after each addition.
- In a small bowl, whisk eggs, vanilla bean paste, and sour cream until smooth. With mixer on low, add this mixture in a slow, steady stream. Mix for 30 seconds, scrape bowl, then mix 10 seconds more. Do not overmix.
- Divide batter evenly between prepared pans (about 540g per pan). Smooth tops. Bake for 28-32 minutes until a toothpick inserted in center comes out with a few moist crumbs.
- Cool cakes in pans on wire rack for 10 minutes. Run a thin knife around edges, invert onto rack, peel off parchment, and cool completely (at least 2 hours).
- For buttercream: In stand mixer with paddle attachment, beat softened butter on medium-high for 5-7 minutes until very pale and fluffy. Scrape bowl.
- With mixer on low, gradually add sifted powdered sugar, one cup at a time. Add vanilla, salt, and 2 tablespoons heavy cream. Mix on low until combined, then beat on medium-high for 2-3 minutes until light and fluffy. Adjust consistency with remaining cream or more powdered sugar as needed.
- Divide buttercream into two bowls. Leave one white. Add gel food coloring to the second bowl to achieve desired shade. Transfer colored buttercream to a piping bag fitted with a star tip (Wilton 1M or 2D).
- Place one cake layer on serving plate. Spread a generous layer of white buttercream on top (about ½ cup). Place second layer on top, pressing gently. Apply a thin crumb coat of white buttercream over entire cake. Refrigerate for 15 minutes.
- Remove cake from fridge. Starting at bottom edge, pipe rows of stars using colored buttercream, overlapping slightly. Work up the cake, covering entire surface. For top, pipe stars in a spiral pattern from outer edge inward. Add tiny stars with a smaller tip if desired.
- Refrigerate finished cake for at least 30 minutes to firm up buttercream. Let sit at room temperature for 15-20 minutes before serving.
Notes
Room temperature ingredients are crucial for the reverse-creaming method. Use a kitchen scale for accurate flour measurement. Chill the cake before piping stars to prevent buttercream from sliding. Practice piping on parchment paper first. Store leftover cake in an airtight container in the refrigerator for up to 5 days. Unfrosted cake layers can be frozen for up to 3 months.
Nutrition
- Serving Size: 1 slice
- Calories: 580
- Sugar: 48
- Sodium: 280
- Fat: 36
- Saturated Fat: 22
- Carbohydrates: 64
- Fiber: 1
- Protein: 5
Keywords: vanilla cake, birthday cake, buttercream stars, Virgo cake, homemade cake, reverse-creaming, vanilla buttercream