Introduction
The bars vanished before I even grabbed a fork. Third time that week. Texts pinged in the evening, “Can you send that key lime pie bars recipe?” Honestly, I was a bit surprised myself—just whipped these up on a whim one afternoon when we had a heatwave rolling in, and suddenly they were the star of every gathering. The zingy tang of lime, the cool creaminess, and that unexpected coconut crust made everyone pause and ask for more. It started as a simple idea to blend key lime’s bright flavor with a crunchy base that wasn’t your usual graham cracker crust. I wanted something lighter, a bit more tropical. After a few trial runs with different crust combos, the coconut won hands down—not too sweet, just right, and with that subtle chewiness that made the bars feel special.
What stuck with me was how this recipe didn’t just satisfy a craving; it created those quiet moments where everyone lingered over dessert, the kind where you almost forget the heat outside. It’s one of those rare recipes that feels effortless to make but leaves a lasting impression. So here we are, sharing the recipe that’s become a little secret weapon for summer get-togethers and anytime you want a cool, creamy treat that surprises without fuss.
Why You’ll Love This Recipe
Having tested this recipe through many summer afternoons and casual dinners, I can confidently say it’s a keeper for several reasons:
- Quick & Easy: Ready in under 30 minutes, plus freezing time. Perfect for last-minute dessert cravings or busy weekend plans.
- Simple Ingredients: No hunting down specialty items. Most are pantry staples, with the coconut crust adding a fun twist.
- Perfect for Summer Parties: The cool, refreshing lime filling makes it an ideal treat for backyard BBQs or potlucks.
- Crowd-Pleaser: Kids, adults, and even the pickiest eaters love these bars. They strike a balance between sweet, tart, and creamy that’s hard to beat.
- Unbelievably Delicious: The silky texture of the lime filling combined with the crunchy, chewy coconut crust is a little slice of tropical heaven.
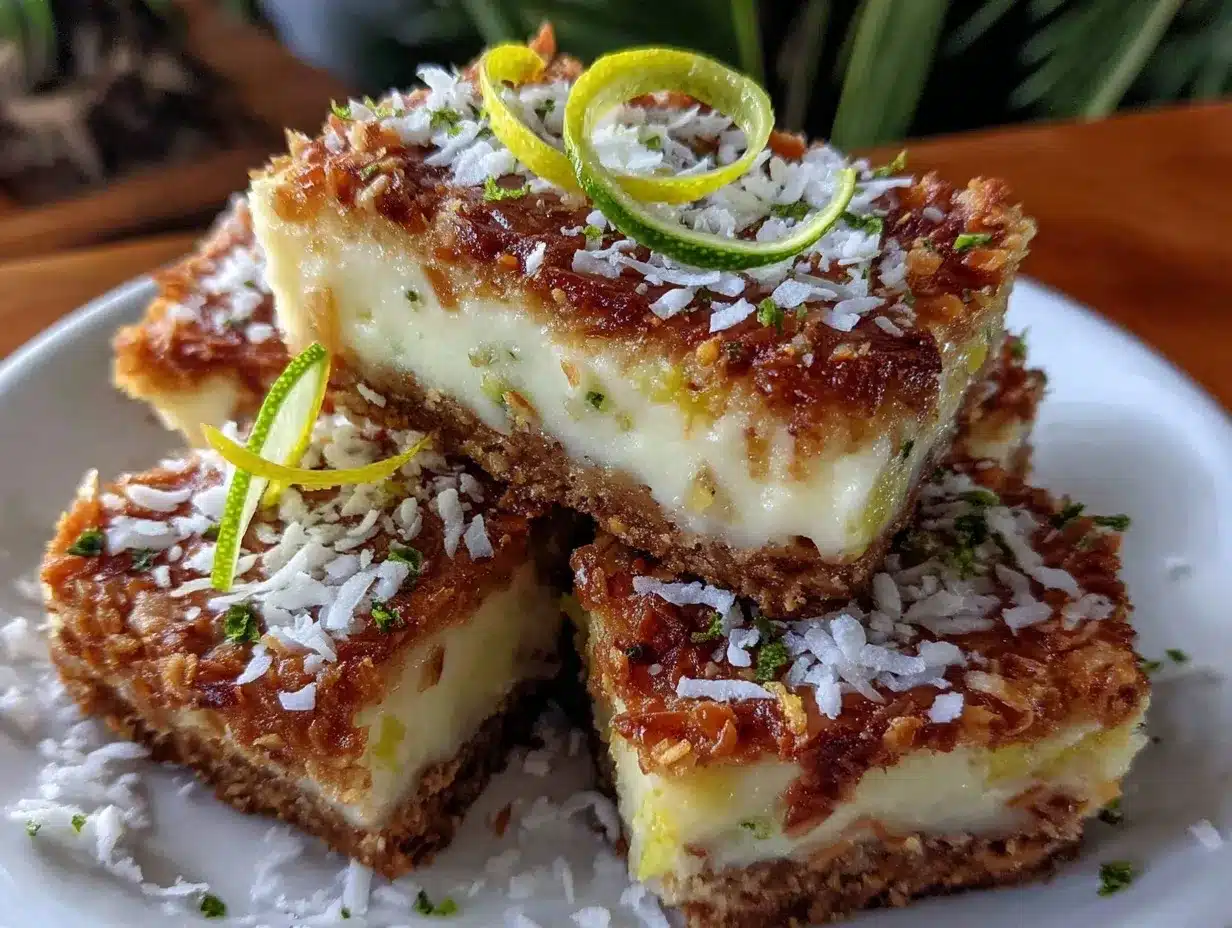
This isn’t just another key lime pie bar recipe. The coconut crust gives it a unique texture and flavor that sings alongside the zesty lime. I’ve tried versions with graham cracker crusts, but honestly, this one feels fresher and lighter. Plus, freezing the bars makes them incredibly creamy and refreshing, almost like a frozen custard with a tropical twist. It’s the kind of dessert that makes you close your eyes on the first bite, savoring that perfect hit of lime and coconut. Whether you’re impressing guests or treating yourself, these bars deliver that quiet satisfaction every time.
What Ingredients You Will Need
This recipe uses straightforward, wholesome ingredients to bring out the best in every bite. The coconut crust offers a chewy, slightly nutty base, while the filling is creamy, tangy, and just sweet enough.
- For the Coconut Crust:
- 1 1/2 cups shredded unsweetened coconut (toasted for extra flavor)
- 1 cup almond flour (adds a subtle nuttiness and binds the crust)
- 1/4 cup coconut oil, melted (helps hold the crust together and enhances coconut flavor)
- 3 tablespoons maple syrup or honey (for natural sweetness)
- Pinch of sea salt (balances the sweetness)
- For the Key Lime Filling:
- 1 can (14 oz / 400g) sweetened condensed milk (this is the creamy, sweet base)
- 1/2 cup freshly squeezed key lime juice (about 4-5 key limes, or regular lime juice as a substitute)
- 1 tablespoon lime zest (adds bright, fresh aroma)
- 1 cup heavy cream, chilled (whipped to soft peaks for light, airy texture)
- 1 teaspoon vanilla extract (optional, rounds out the flavors)
Ingredient Tips: Look for fine shredded coconut to help the crust stick together better. I often use Bob’s Red Mill almond flour for its fine texture. Fresh key lime juice is the gold standard here, but regular limes work well too if key limes aren’t available. For a dairy-free version, swap heavy cream with coconut cream and use a dairy-free sweetened condensed milk alternative.
Equipment Needed
Gathering the right tools helps keep this recipe smooth and stress-free. Here’s what I use:
- 8×8-inch (20×20 cm) square baking pan – perfect size for these bars and easy to slice.
- Mixing bowls – one large for the crust and another for the filling.
- Electric mixer or stand mixer – helps whip the heavy cream to the right consistency quickly.
- Spatula – for folding whipped cream gently into the lime mixture.
- Zester or microplane – to get fresh lime zest.
- Measuring cups and spoons – accuracy is key, especially for the lime juice and zest.
If you don’t have an electric mixer, a sturdy whisk will work for whipping cream, but be prepared for a bit of an arm workout! When toasting the coconut for the crust, I prefer using a dry skillet on medium heat, stirring frequently to avoid burning. This method really brings out the coconut’s flavor without heating up the whole kitchen like an oven would.
Preparation Method
- Toast the Coconut: Place shredded coconut in a dry skillet over medium heat. Stir constantly for 3-5 minutes until golden and fragrant. Remove from heat and set aside to cool. (Watch closely—coconut can go from toasted to burnt quickly!)
- Make the Coconut Crust: In a medium bowl, combine toasted coconut, almond flour, melted coconut oil, maple syrup, and a pinch of sea salt. Mix well until everything sticks together like coarse sand. Press the mixture firmly into the bottom of the 8×8 baking pan, creating an even layer. Place the pan in the freezer to set while you prepare the filling. (Pressing firmly here is key to a crust that holds together when sliced.)
- Prepare the Key Lime Filling: In a large mixing bowl, whisk together sweetened condensed milk, key lime juice, and lime zest until smooth. (The mixture should thicken slightly and smell bright and citrusy.)
- Whip the Cream: Using your electric mixer, beat the chilled heavy cream and vanilla extract until soft peaks form. (Soft peaks mean the cream holds shape but still folds easily—avoid overwhipping!)
- Combine Filling and Cream: Gently fold the whipped cream into the lime mixture using a spatula. Be careful not to deflate the cream; you want the filling light and airy.
- Assemble the Bars: Pour the filling over the frozen crust, smoothing the top with a spatula. Return the pan to the freezer and chill for at least 4 hours or overnight until firm.
- Serve: Once fully set, remove bars from the pan by lifting the parchment paper (optional but recommended for easy removal). Cut into 12 squares with a sharp knife warmed under hot water for clean edges. (Rinse the knife between cuts to avoid crumbly slices.)
These bars freeze well, so if you’re planning ahead, you can prepare them a day or two in advance without losing that creamy texture. For a fun finishing touch, sprinkle extra lime zest or toasted coconut flakes on top before serving.
Cooking Tips & Techniques
Making creamy frozen key lime pie bars is straightforward, but a few tricks can really make them shine:
- Toast the Coconut Just Right: It’s tempting to speed this up over high heat, but low and slow ensures the coconut crisps without burning, which would add bitterness.
- Fresh Lime Juice Matters: Bottled juice lacks the brightness and complexity fresh lime juice brings. If key limes aren’t available, regular limes are fine, but fresh is best.
- Whip the Cream Properly: Stop whipping as soon as you hit soft peaks. Overwhipped cream turns grainy and loses that dreamy texture.
- Press the Crust Firmly: Don’t skimp on this step. A loosely packed crust will crumble when cutting. I sometimes use the bottom of a measuring cup to press it evenly.
- Patience with Freezing: The filling needs time to set firmly. Rushing this can result in a soft, runny bar that doesn’t hold shape.
- Slicing Tips: Warm your knife under hot water and wipe it dry before slicing. This helps you get smooth, clean cuts without dragging crumbs.
From personal experience, I once didn’t toast the coconut and the crust was a bit too soft and bland. After switching to toasted, it added that subtle crunch and aroma that made people actually comment on the crust, not just the filling. Also, trying to skip the freezing time once backfired horribly—bars fell apart and the texture was off. So trust the chill time for best results.
Variations & Adaptations
These creamy frozen key lime pie bars are versatile and can be adjusted to suit different tastes or dietary needs:
- Dairy-Free Version: Use coconut cream whipped until fluffy instead of heavy cream, and swap sweetened condensed milk for a coconut condensed milk alternative. The coconut crust already aligns well with this option.
- Nut-Free Crust: Replace almond flour with oat flour or finely ground gluten-free breadcrumbs to keep the crust safe for nut allergies.
- Flavor Twist: Add a teaspoon of ginger zest or a few tablespoons of crushed pineapple to the filling for an extra tropical kick.
- Chocolate Drizzle: Melt dark chocolate and drizzle over the frozen bars just before serving for a touch of indulgence.
- Single-Serve Options: Make these in mini muffin tins lined with paper cups for easy portion control and party-friendly presentation.
One variation I personally tried was swapping half the key lime juice with fresh orange juice. It gave a sweeter citrus note, which some of my non-lime-loving friends appreciated. It’s worth experimenting to find your favorite twist!
Serving & Storage Suggestions
These bars are best served straight from the freezer when they’re firm and creamy. If they’re too hard, let them sit at room temperature for 5-10 minutes to soften slightly—this makes for easier bites without melting into a puddle.
They pair wonderfully with a cold cup of iced tea or a sparkling lime soda. For a fresh contrast, consider serving alongside a simple fresh fruit salad or a scoop of vanilla bean ice cream. If you’re putting together a full summer spread, these bars would fit right in with a light brown butter corn salad or a creamy loaded potato salad for a balanced menu.
Store leftover bars in an airtight container in the freezer for up to 2 weeks. To reheat, simply let them thaw in the fridge for several hours or overnight. Flavors tend to meld and deepen after a day, so sometimes I make these a day ahead for parties. Just keep in mind the crust is best fresh—if it softens too much, a quick toast in a dry skillet can revive its texture before assembling the crust again.
Nutritional Information & Benefits
Each bar offers a satisfying blend of healthy fats from coconut oil and almond flour, balanced by the zing of fresh lime juice which is rich in vitamin C. The recipe isn’t heavy on sugar compared to traditional pies since it relies on sweetened condensed milk and natural sweeteners like maple syrup.
Approximate nutrition per bar (1 of 12): 220 calories, 15g fat, 18g carbohydrates, 2g protein.
This treat fits well into gluten-free diets, thanks to the almond flour crust, and can be adapted for dairy-free or nut-free needs as mentioned earlier. From a wellness perspective, the natural ingredients and fresh lime juice provide antioxidants and a refreshing dose of vitamin C, making it feel like a smarter indulgence.
Conclusion
These creamy frozen key lime pie bars with coconut crust have quietly become one of my favorite go-to recipes for summer. They’re simple, refreshing, and deliver a little bit of tropical sunshine in every bite. What makes them stand out is how easy they are to make without sacrificing that special homemade touch. Whether you’re feeding a crowd or just craving a cool treat, this recipe adapts well and invites your own favorite tweaks.
I love how these bars bring people together—there’s something about the creamy lime and coconut combo that sparks conversation and second helpings. If you give them a try, I’d be thrilled to hear how you made them your own or what variations you explored. Enjoy the little moments of joy these bars bring, one slice at a time.
FAQs
Can I use regular limes instead of key limes?
Yes, regular limes work just fine if key limes aren’t available. The flavor will be slightly less floral but still deliciously tangy.
How long can I store these bars in the freezer?
Store them in an airtight container in the freezer for up to 2 weeks. For best texture and flavor, enjoy within that timeframe.
Can I make the coconut crust without almond flour?
Absolutely! Oat flour or gluten-free breadcrumbs can replace almond flour if you need a nut-free option.
Is it necessary to toast the coconut for the crust?
While not absolutely required, toasting the coconut adds a deeper flavor and crunch that really improves the crust’s texture and taste.
Can I prepare these bars ahead of time?
Yes, they actually taste better after sitting in the freezer overnight, allowing the flavors to meld and the texture to firm up perfectly.
Pin This Recipe!
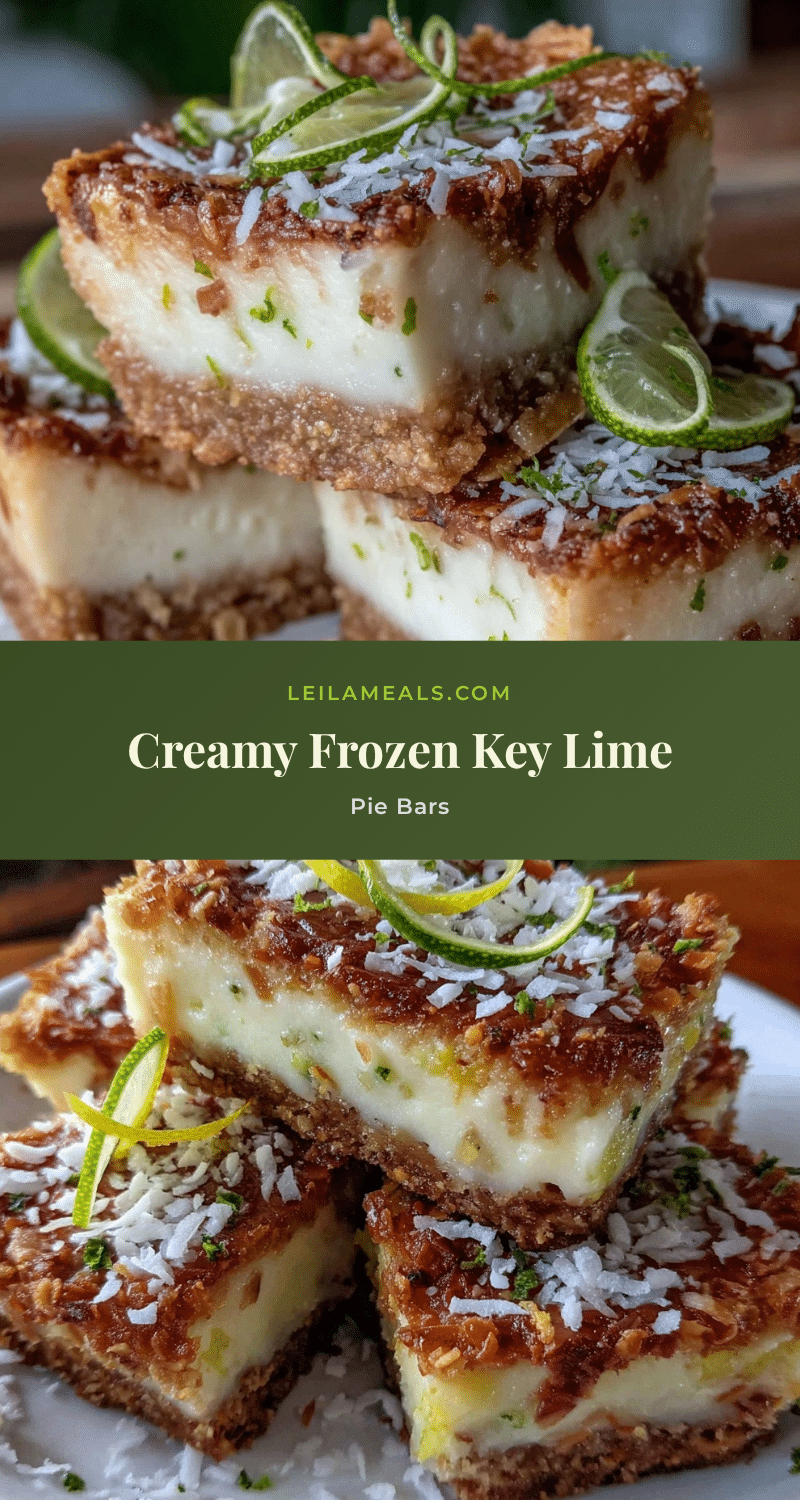
Creamy Frozen Key Lime Pie Bars Recipe with Easy Coconut Crust
These creamy frozen key lime pie bars feature a tangy lime filling and a chewy, toasted coconut crust, making them a refreshing and tropical treat perfect for summer gatherings.
- Prep Time: 15 minutes
- Cook Time: 5 minutes
- Total Time: 4 hours 20 minutes
- Yield: 12 servings 1x
- Category: Dessert
- Cuisine: American
Ingredients
- 1 1/2 cups shredded unsweetened coconut (toasted for extra flavor)
- 1 cup almond flour
- 1/4 cup coconut oil, melted
- 3 tablespoons maple syrup or honey
- Pinch of sea salt
- 1 can (14 oz / 400g) sweetened condensed milk
- 1/2 cup freshly squeezed key lime juice (about 4–5 key limes or regular lime juice as substitute)
- 1 tablespoon lime zest
- 1 cup heavy cream, chilled
- 1 teaspoon vanilla extract (optional)
Instructions
- Toast the shredded coconut in a dry skillet over medium heat, stirring constantly for 3-5 minutes until golden and fragrant. Remove from heat and let cool.
- In a medium bowl, combine toasted coconut, almond flour, melted coconut oil, maple syrup, and a pinch of sea salt. Mix until the mixture sticks together like coarse sand.
- Press the coconut crust mixture firmly into the bottom of an 8×8-inch baking pan to form an even layer. Place the pan in the freezer to set while preparing the filling.
- In a large mixing bowl, whisk together sweetened condensed milk, key lime juice, and lime zest until smooth and slightly thickened.
- Using an electric mixer, beat the chilled heavy cream and vanilla extract until soft peaks form.
- Gently fold the whipped cream into the lime mixture using a spatula, being careful not to deflate the cream.
- Pour the filling over the frozen crust and smooth the top with a spatula. Return the pan to the freezer and chill for at least 4 hours or overnight until firm.
- Once set, remove bars from the pan by lifting the parchment paper (optional). Cut into 12 squares using a sharp knife warmed under hot water for clean edges, rinsing the knife between cuts.
Notes
Toast the coconut slowly over medium heat to avoid burning and achieve a crunchy texture. Press the crust firmly to ensure it holds together when sliced. Use fresh lime juice for best flavor. Freeze bars for at least 4 hours or overnight for firm texture. Warm knife under hot water before slicing for clean cuts. For dairy-free version, substitute heavy cream with coconut cream and use dairy-free sweetened condensed milk. Nut-free crust option: replace almond flour with oat flour or gluten-free breadcrumbs.
Nutrition
- Serving Size: 1 bar (1 of 12)
- Calories: 220
- Fat: 15
- Carbohydrates: 18
- Protein: 2
Keywords: key lime pie bars, frozen dessert, coconut crust, summer dessert, easy key lime bars, tropical dessert, gluten-free dessert