There used to be a tiny bakery tucked between a vintage bookstore and a dusty secondhand shop on Elm Street called “The Whimsy Kitchen.” They made these black cat sugar cookies that were nothing short of magical—perfectly crisp edges, soft centers, and faces so expressive you almost expected them to blink. When they closed their doors three years ago after the owner retired, I honestly felt a little lost. No other bakery’s version came close. After twelve attempts—including one batch that looked more like angry raccoons than cats—I finally cracked the code. The secret? A tiny bit of almond extract in the dough and letting the royal icing sit for exactly ten minutes before piping the faces. Let me tell you, when I pulled that first perfect batch out of the oven, I may have actually teared up a little. Maybe you’ve been there—that feeling of chasing a food memory until you finally catch it.
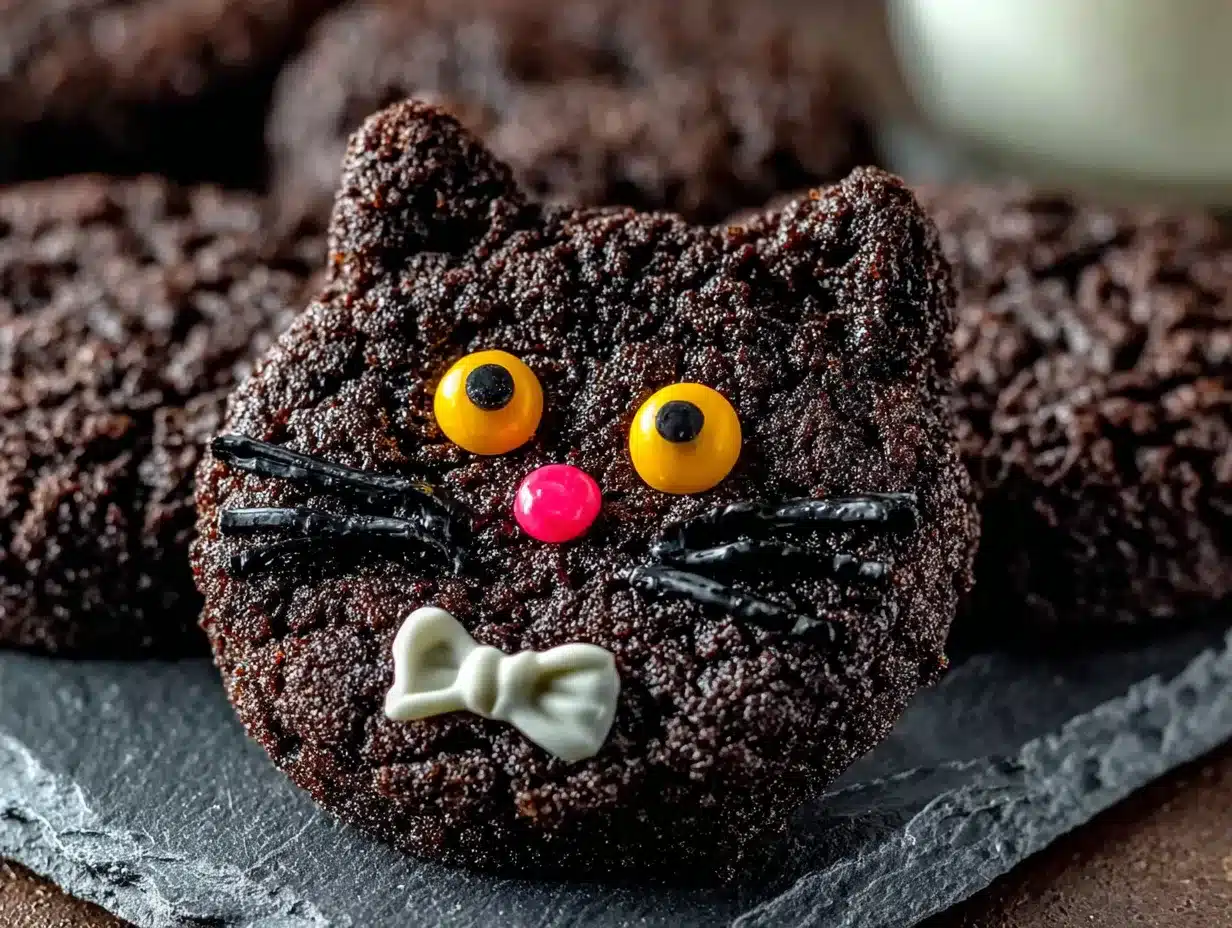
These adorable black cat sugar cookies are everything you want in a Halloween treat. They’re buttery, slightly crisp, and just sweet enough without being overwhelming. The black cocoa powder gives them that deep, dark color without tasting artificial, and the royal icing faces are surprisingly forgiving—even if your piping hand shakes a little (mine definitely does). I’ve been making these for three Halloweens now, and they’ve become the thing friends request before I even ask what I should bring to the party. There’s something about a cookie that looks like a little cat that makes everyone smile, even the grown-ups who pretend they’re too cool for Halloween.
The best part? The dough comes together in about fifteen minutes, and you can chill it overnight if you want to break the work into chunks. I’ve tested this recipe with three different types of black cocoa powder, two brands of butter, and even a gluten-free flour blend (that worked surprisingly well), so I can confidently say this version is the one. No weird aftertaste, no spreading in the oven, no cracked faces. Just perfect little black cats that taste as good as they look.
Why You’ll Love This Recipe
I’ve tested this recipe more times than I care to admit, and here’s why it keeps winning over everyone who tries it:
- Quick & Easy: From start to finish, these cookies come together in under an hour. The dough needs just 30 minutes of chilling, and the decorating goes fast once you get the hang of it.
- Simple Ingredients: You probably already have most of these in your pantry. No weird specialty items—just butter, sugar, flour, and a little black cocoa powder.
- Perfect for Halloween: These cookies steal the show at parties, make fantastic favors, and are way more fun than handing out candy you don’t even like.
- Crowd-Pleaser: Kids love the cat faces, adults love the subtle almond flavor, and everyone loves that they’re not sickeningly sweet.
- Unbelievably Delicious: The texture is spot-on—crisp edges with a tender, almost melt-in-your-mouth center. The black cocoa adds a gentle chocolate note that pairs beautifully with the vanilla-almond base.
What makes this recipe different from every other sugar cookie out there? It’s the combination of black cocoa powder and a touch of almond extract that gives these cookies their signature flavor and color. I’ve tried making them with regular cocoa powder, and they just don’t have the same depth. The black cocoa is what makes them look truly black (not grayish-brown like my first few batches), and it adds this subtle Oreo-like taste that’s absolutely addictive. Plus, the royal icing recipe I’m sharing is foolproof—no raw egg whites, no guessing games. It dries hard enough to stack cookies without smudging, but stays soft enough to bite through easily.
This recipe is the kind that makes you close your eyes after the first bite. It’s comfort food reimagined for Halloween—fun, festive, but with the same soul-soothing satisfaction as a classic sugar cookie. Perfect for impressing guests without stress, or turning a simple Tuesday afternoon into something memorable.
What Ingredients You Will Need
This recipe uses simple, wholesome ingredients that come together to create something truly special. Most of these are pantry staples, which means you can whip up a batch whenever the Halloween spirit strikes.
For the Cookies
- Unsalted butter, softened (1 cup / 226g) — I use Land O’Lakes for consistent results. Make sure it’s truly softened, not melted, or your cookies will spread.
- Granulated sugar (1 cup / 200g) — Regular white sugar works perfectly here. No need for organic or special types.
- Large egg, room temperature (1) — Cold eggs can make the dough seize up. Leave it on the counter for 30 minutes before starting.
- Vanilla extract (1 teaspoon) — Pure vanilla makes a difference, but imitation works fine in a pinch.
- Almond extract (½ teaspoon) — This is my secret weapon. It adds a subtle, almost floral note that makes these cookies unforgettable. Don’t skip it.
- All-purpose flour (2½ cups / 312g) — Spoon and level your flour for accuracy. Scooping directly can pack in too much and make dry cookies.
- Black cocoa powder (¼ cup / 22g) — This is the key to the dark color. I recommend Rodelle or King Arthur brands. Regular Dutch-process cocoa will give you a dark brown, not true black.
- Baking powder (1 teaspoon) — Make sure it’s fresh. Test by dropping a bit in hot water—it should bubble immediately.
- Salt (½ teaspoon) — Fine sea salt or table salt both work. It balances the sweetness and enhances the chocolate flavor.
For the Royal Icing
- Powdered sugar (2 cups / 240g) — Sift it first to avoid lumps. No shortcuts here.
- Meringue powder (2 tablespoons) — This replaces raw egg whites and gives the icing the perfect consistency. Wilton brand is widely available.
- Warm water (3-4 tablespoons) — Add slowly. You might need a little more or less depending on humidity.
- Black gel food coloring (1-2 teaspoons) — Liquid coloring won’t give you the same intensity. Americolor Super Black is my go-to.
- White gel food coloring (a tiny dab) — This is optional, but it helps create a true black instead of a dark gray.
For the Faces (Optional but Adorable)
- White royal icing (a small batch) — For eyes and whiskers. You can tint a portion of your black icing white instead.
- Pink or green gel food coloring — For colored eyes if you want variety. I’ve done green eyes for a witchy vibe.
- Edible glitter or luster dust — For a magical shimmer. Totally optional but very fun.
Equipment Needed
You don’t need a professional bakery setup for these cookies, but a few specific tools make the process much smoother.
- Cat-shaped cookie cutter (2-3 inch size) — I found mine on Amazon for $8. Wilton makes a good one, but any brand works as long as the face details are clear.
- Stand mixer or hand mixer — A stand mixer is easier for creaming butter and sugar, but a hand mixer works fine. I’ve made these with both.
- Rolling pin with thickness guides — These are game-changers. They ensure even thickness so cookies bake uniformly. I use a wooden one with removable rings.
- Parchment paper or silicone baking mats — Silpat mats are my preference because they prevent spreading and clean up easily.
- Cooling rack — Essential for letting cookies cool completely before decorating. Stacking warm cookies is a recipe for disaster.
- Piping bags or squeeze bottles — I prefer squeeze bottles for flooding and piping bags with a #2 tip for details. Disposable bags are fine.
- Small offset spatula — Helpful for transferring cut cookies to the baking sheet without distorting their shape.
- Baking sheets — Heavy-duty aluminum sheets distribute heat best. Avoid dark non-stick pans—they can over-brown the bottoms.
If you don’t have a cat cutter, you can use any Halloween shape and adapt the decorating. I’ve made these as bats and pumpkins in a pinch. Also, a toothpick is your best friend for fixing icing mistakes—keep a few handy.
Preparation Method
Let’s get to the fun part. I’ve broken this down into clear steps so you can follow along without any guesswork.
Step 1: Make the Dough
In a large bowl, cream together the softened butter and granulated sugar until light and fluffy—about 3 minutes with a stand mixer on medium speed. You want it to look pale and almost doubled in volume. Add the egg, vanilla extract, and almond extract, then beat until fully combined. Scrape down the sides of the bowl at least once.
In a separate bowl, whisk together the flour, black cocoa powder, baking powder, and salt. Make sure the cocoa powder is fully incorporated—I’ve had streaks of unmixed cocoa ruin a batch before. Gradually add the dry ingredients to the wet mixture, mixing on low speed until just combined. The dough will look crumbly at first, but keep mixing and it will come together. Don’t overmix, or the cookies will be tough.
Step 2: Chill the Dough
Divide the dough into two disks, wrap each tightly in plastic wrap, and refrigerate for at least 30 minutes. I’ve left it overnight and it works beautifully. Chilling is non-negotiable—warm dough spreads in the oven and your cats will end up looking like blobs. Trust me, I learned this the hard way with batch number three.
Step 3: Preheat and Prep
Preheat your oven to 350°F (175°C). Line two baking sheets with parchment paper or silicone mats. While the oven heats, take one disk of dough out of the fridge. Let it sit for 5 minutes if it feels too hard to roll.
Step 4: Roll and Cut
On a lightly floured surface, roll the dough to about ¼-inch thickness. I use my rolling pin with guide rings to keep it even. Dip the cat cutter in flour between cuts to prevent sticking. Place cookies about 2 inches apart on the prepared baking sheets. Gather the scraps, re-roll, and cut again. You should get about 24-30 cookies depending on your cutter size.
Step 5: Bake
Bake for 8-10 minutes, rotating the pan halfway through. The cookies are done when the edges look set and the centers are just barely firm to the touch. They shouldn’t be brown at all—black cocoa makes it hard to judge by color, so use the time and touch method. Let them cool on the baking sheet for 5 minutes, then transfer to a cooling rack. They’ll firm up as they cool.
Step 6: Make the Royal Icing
In a medium bowl, whisk together the powdered sugar and meringue powder. Add 3 tablespoons of warm water and stir until smooth. The consistency should be like thick honey—it should drizzle off a spoon but hold its shape briefly. Add more water a teaspoon at a time if needed. Stir in the black gel coloring until you reach your desired darkness. Add a tiny dab of white coloring to neutralize any brown tones. Transfer to a squeeze bottle or piping bag fitted with a #2 tip.
Step 7: Decorate the Cookies
Once cookies are completely cool, outline each cat with the black icing. Let the outlines dry for 10 minutes, then flood the centers with thinned icing (add a few drops of water to reach a runnier consistency). Use a toothpick to spread the icing into corners and pop any air bubbles. Let the flooded cookies dry for at least 2 hours—or overnight for best results.
For the faces, use white icing to pipe two eyes and a small nose. Add whiskers with a steady hand—three on each side. If you mess up, use a damp toothpick to wipe away the icing before it dries. I’ve fixed countless lopsided faces this way.
Cooking Tips & Techniques
After making these cookies more times than I can count, I’ve collected a few tricks that make a real difference.
Don’t skip the chill. I know it’s tempting to rush, but warm dough is the enemy of cute cookies. If your dough feels sticky at any point, pop it back in the fridge for 15 minutes. I once tried to cut corners and ended up with cookies that spread into amorphous blobs—my cats looked more like potatoes.
Use a light hand with flour. Too much flour on your rolling surface can dry out the dough and create white streaks on your black cookies. Dust lightly and brush off excess before cutting.
Check your oven temperature. Ovens run hot or cold more often than you’d think. I use an inexpensive oven thermometer to make sure mine is actually at 350°F. Burnt bottoms are heartbreaking after all that effort.
Let the icing rest. After mixing, let the royal icing sit for 10 minutes before using. This allows air bubbles to rise to the surface so you can pop them. Bubbles in your icing create holes in the finished surface, and fixing those is a pain.
Work in batches. Decorate only as many cookies as you can finish in 15 minutes. Royal icing dries fast, and you want the outline to be wet when you flood the center. If you’re slow like me, cover the icing bowl with a damp paper towel to keep it from crusting.
Practice on parchment first. Before piping on actual cookies, practice the cat faces on a piece of parchment paper. It sounds silly, but it saves you from ruining a perfect cookie with a wonky eye.
Variations & Adaptations
One of the best things about this recipe is how flexible it is. Here are some variations I’ve tried and loved.
Gluten-Free Version: Substitute the all-purpose flour with a 1:1 gluten-free baking blend. I’ve used King Arthur Measure for Measure with excellent results. Add an extra tablespoon of milk to the dough if it seems too dry. The texture is slightly more tender, but the flavor is spot-on.
Vegan Adaptation: Use vegan butter (I like Miyoko’s) and a flax egg (1 tablespoon ground flaxseed mixed with 3 tablespoons water, let sit for 5 minutes). For the icing, use aquafaba (chickpea water) instead of meringue powder—3 tablespoons whipped until frothy works perfectly.
Flavor Twists: Add ½ teaspoon of peppermint extract for a thin mint vibe, or swap the almond extract for orange extract for a chocolate-orange combination. I made a batch with cinnamon and cayenne last year that was unexpectedly amazing—like Mexican hot chocolate in cookie form.
Different Shapes: Use the same dough with bat, pumpkin, or ghost cutters. The black cocoa works beautifully for any Halloween shape. For ghosts, skip the black icing and use white with black faces.
No-Icing Option: Press candy eyes into the dough before baking for a super simple version. I’ve also used black sanding sugar sprinkled on top for a sparkly, low-effort look.
Serving & Storage Suggestions
These cookies are best served at room temperature, and they actually taste even better the day after baking—the flavors meld and deepen overnight. Arrange them on a platter with some orange and purple candies for a festive display. They’re perfect for Halloween parties, classroom treats, or just making your kitchen feel magical.
For storage, keep decorated cookies in a single layer in an airtight container at room temperature. Place parchment paper between layers if you need to stack them. They’ll stay fresh for up to a week, though the icing might soften slightly after day four. I’ve never had a batch last that long, honestly—they disappear fast.
You can freeze undecorated cookies for up to three months. Bake and cool them completely, then layer between parchment in a freezer-safe container. Thaw at room temperature before decorating. The icing doesn’t freeze well, so always add that after thawing.
If you’re making these ahead for a party, bake the cookies and store them undecorated. Decorate the day before serving—the icing needs a full 8 hours to dry completely. I’ve learned that rushing the drying time leads to smudged faces and sad cats.
These cookies also make fantastic gifts. Package them in clear cellophane bags tied with orange ribbon, or arrange them in a cute tin. Everyone loves receiving homemade Halloween treats, and these are special enough to feel like a real present.
Nutritional Information & Benefits
While these are definitely a treat, there are a few bright spots worth noting. Each cookie (based on a 2-inch cutter and using the full icing recipe) contains approximately 120 calories, 6g of fat, 16g of carbohydrates, and 1g of protein. The black cocoa powder is rich in antioxidants—more so than regular cocoa—so you’re getting a tiny health boost with your indulgence.
These cookies are nut-free if you use imitation almond extract (which is typically synthetic and nut-free), making them safe for school parties. The recipe contains dairy and gluten, but as mentioned above, both can be substituted. The royal icing uses meringue powder, which is pasteurized and safe for anyone avoiding raw eggs.
From a wellness perspective, I believe in balance. These cookies aren’t health food, and they shouldn’t be. They’re joy food—the kind that makes you smile and connects you to the people you share them with. A couple of these with a glass of milk is a perfectly reasonable way to celebrate Halloween.
Conclusion
These adorable black cat sugar cookies are more than just a Halloween treat—they’re a little piece of edible happiness. They bring back that feeling of walking into The Whimsy Kitchen and seeing those perfect little faces staring up at me from the display case. Now I get to create that feeling in my own kitchen, and I get to share it with you.
I honestly believe anyone can make these. You don’t need to be a professional baker or a decorating wizard. The recipe is forgiving, the instructions are straightforward, and even imperfect cats are still cats—and cats are always cute. So grab your ingredients, put on your favorite Halloween playlist, and spend an afternoon making something that will make people smile.
When you make these, I’d love to hear about it. Leave a comment below and tell me how your cats turned out—did they have personality? Did anyone try to eat one before you finished decorating? Share your photos on Pinterest and tag me so I can see your creations. Happy Halloween, and happy baking!
Frequently Asked Questions
Can I make the dough ahead of time?
Absolutely. The dough can be refrigerated for up to 3 days or frozen for up to 3 months. Just wrap it tightly in plastic wrap and then foil. Thaw overnight in the fridge before rolling and cutting.
Why did my cookies spread in the oven?
This usually happens when the dough wasn’t chilled long enough, or the butter was too soft when you mixed it. Make sure your butter is softened but still cool to the touch, and always chill the shaped cookies for 10 minutes before baking if your kitchen is warm.
Can I use regular cocoa powder instead of black cocoa?
You can, but the cookies won’t be black—they’ll be a dark brown. The flavor will also be more like traditional chocolate rather than the subtle Oreo-like taste of black cocoa. If you’re going for the full effect, I recommend tracking down black cocoa powder.
How long does the royal icing take to dry?
Flooded icing needs at least 2 hours to set, but I recommend letting it dry overnight for the hardest finish. Humidity affects drying time significantly—on rainy days, it can take twice as long.
My icing is too thick/thin. How do I fix it?
If it’s too thick, add water a drop at a time until it reaches a slow-drizzling consistency. If it’s too thin, add more sifted powdered sugar a tablespoon at a time. The perfect consistency is when the icing holds a ribbon on the surface for about 5 seconds before disappearing.
Pin This Recipe!
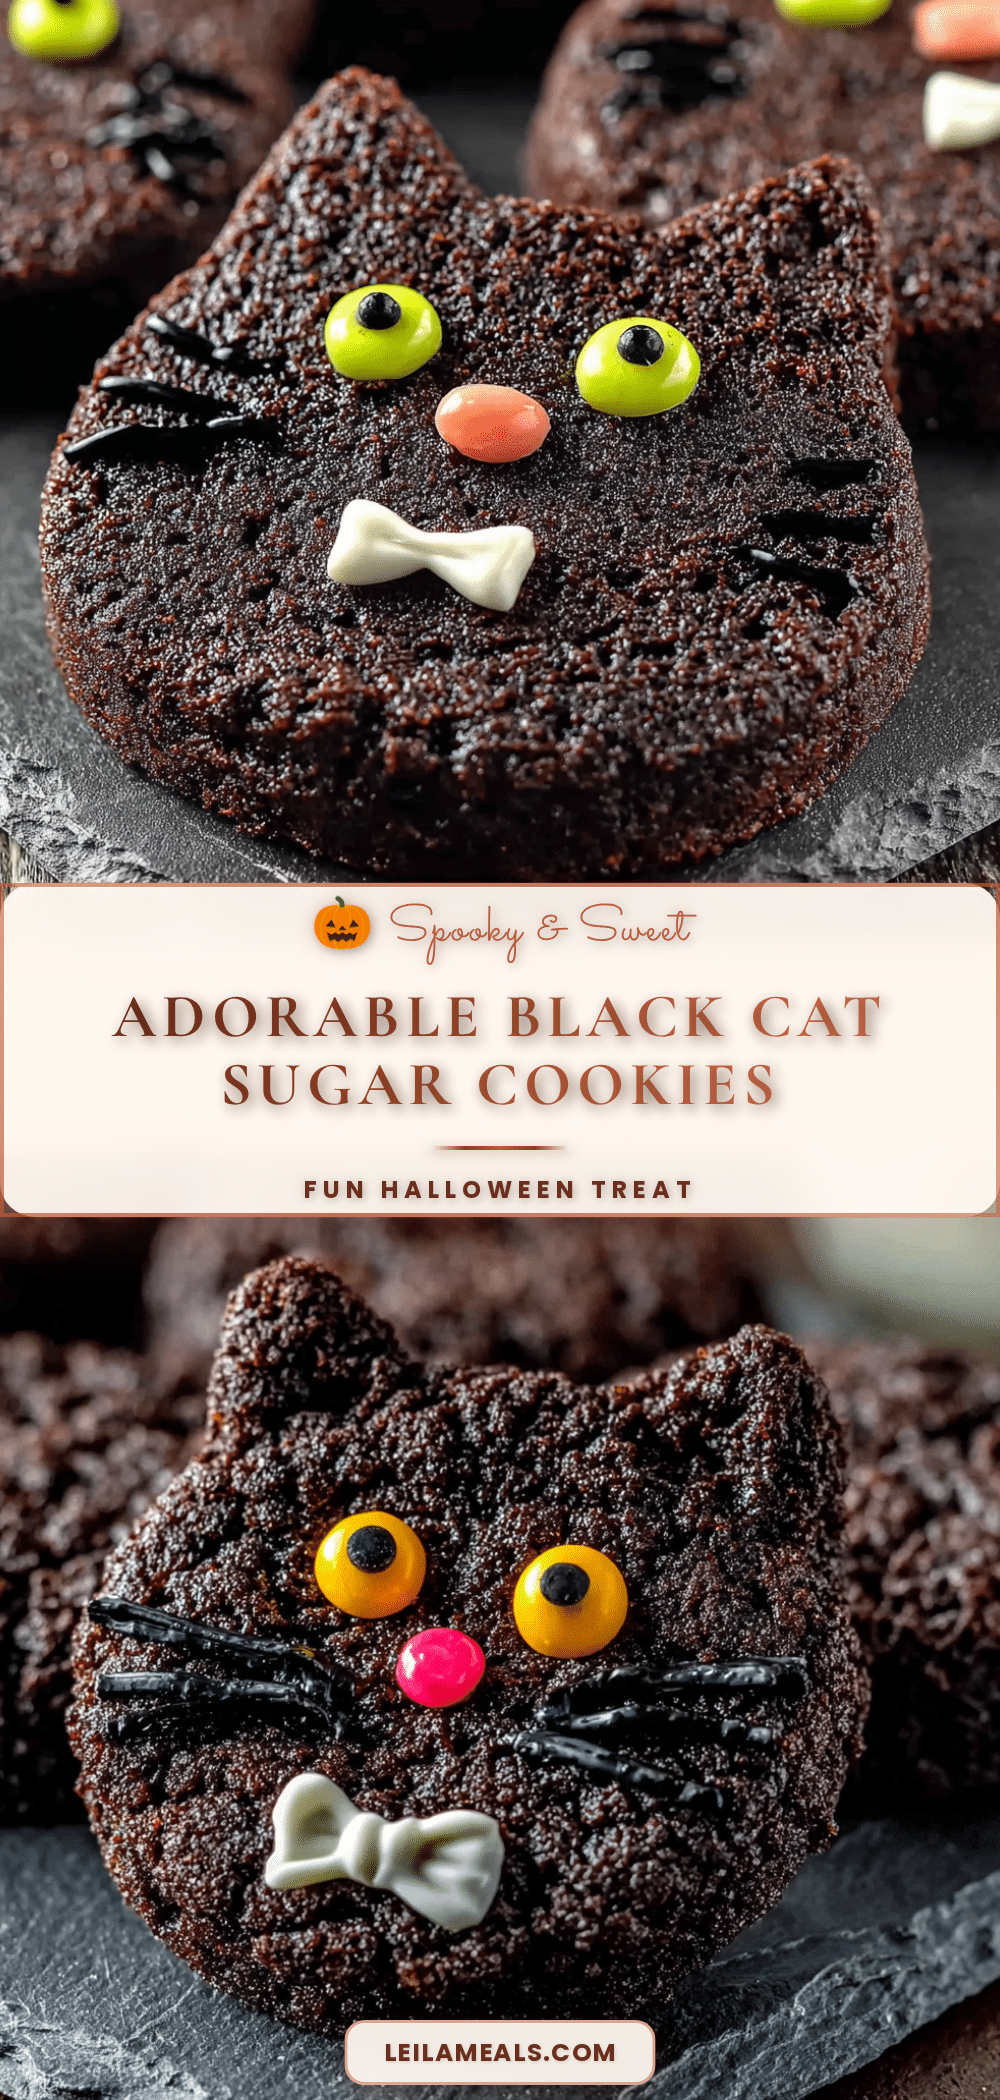
Adorable Black Cat Sugar Cookies: Easy Halloween Treat

These adorable black cat sugar cookies are buttery, slightly crisp, and just sweet enough without being overwhelming. The black cocoa powder gives them a deep, dark color without tasting artificial, and the royal icing faces are surprisingly forgiving.
- Prep Time: 15 minutes
- Cook Time: 10 minutes
- Total Time: 55 minutes (includes 30 minutes chilling)
- Yield: 24-30 cookies 1x
- Category: Dessert
- Cuisine: American
Ingredients
- 1 cup (226g) unsalted butter, softened
- 1 cup (200g) granulated sugar
- 1 large egg, room temperature
- 1 teaspoon vanilla extract
- ½ teaspoon almond extract
- 2½ cups (312g) all-purpose flour
- ¼ cup (22g) black cocoa powder
- 1 teaspoon baking powder
- ½ teaspoon salt
- 2 cups (240g) powdered sugar
- 2 tablespoons meringue powder
- 3–4 tablespoons warm water
- 1–2 teaspoons black gel food coloring
- a tiny dab white gel food coloring (optional)
- white royal icing (for faces)
- pink or green gel food coloring (optional)
- edible glitter or luster dust (optional)
Instructions
- In a large bowl, cream together the softened butter and granulated sugar until light and fluffy—about 3 minutes with a stand mixer on medium speed. Add the egg, vanilla extract, and almond extract, then beat until fully combined. Scrape down the sides of the bowl at least once.
- In a separate bowl, whisk together the flour, black cocoa powder, baking powder, and salt. Gradually add the dry ingredients to the wet mixture, mixing on low speed until just combined. Do not overmix.
- Divide the dough into two disks, wrap each tightly in plastic wrap, and refrigerate for at least 30 minutes (or up to overnight).
- Preheat oven to 350°F (175°C). Line two baking sheets with parchment paper or silicone mats.
- On a lightly floured surface, roll the dough to about ¼-inch thickness. Cut with a cat-shaped cookie cutter, dipping the cutter in flour between cuts. Place cookies about 2 inches apart on prepared baking sheets.
- Bake for 8-10 minutes, rotating the pan halfway through. Cookies are done when edges look set and centers are just barely firm. Let cool on baking sheet for 5 minutes, then transfer to a cooling rack.
- For the royal icing: In a medium bowl, whisk together powdered sugar and meringue powder. Add 3 tablespoons warm water and stir until smooth (consistency like thick honey). Stir in black gel coloring until desired darkness. Add a tiny dab of white coloring to neutralize brown tones. Transfer to a squeeze bottle or piping bag fitted with a #2 tip.
- Once cookies are completely cool, outline each cat with black icing. Let outlines dry for 10 minutes, then flood centers with thinned icing (add a few drops of water to reach runnier consistency). Use a toothpick to spread icing and pop air bubbles. Let flooded cookies dry for at least 2 hours or overnight.
- For faces, use white icing to pipe two eyes and a small nose. Add whiskers (three on each side). If you mess up, use a damp toothpick to wipe away icing before it dries.
Notes
Chilling the dough is non-negotiable to prevent spreading. Let royal icing rest for 10 minutes before using to allow air bubbles to rise. Decorate only as many cookies as you can finish in 15 minutes to keep icing from drying. Practice piping on parchment first.
Nutrition
- Serving Size: 1 cookie
- Calories: 120
- Sugar: 10
- Sodium: 75
- Fat: 6
- Saturated Fat: 3.5
- Carbohydrates: 16
- Fiber: 0.5
- Protein: 1
Keywords: black cat sugar cookies, Halloween cookies, sugar cookies, black cocoa cookies, royal icing cookies, easy Halloween treat


