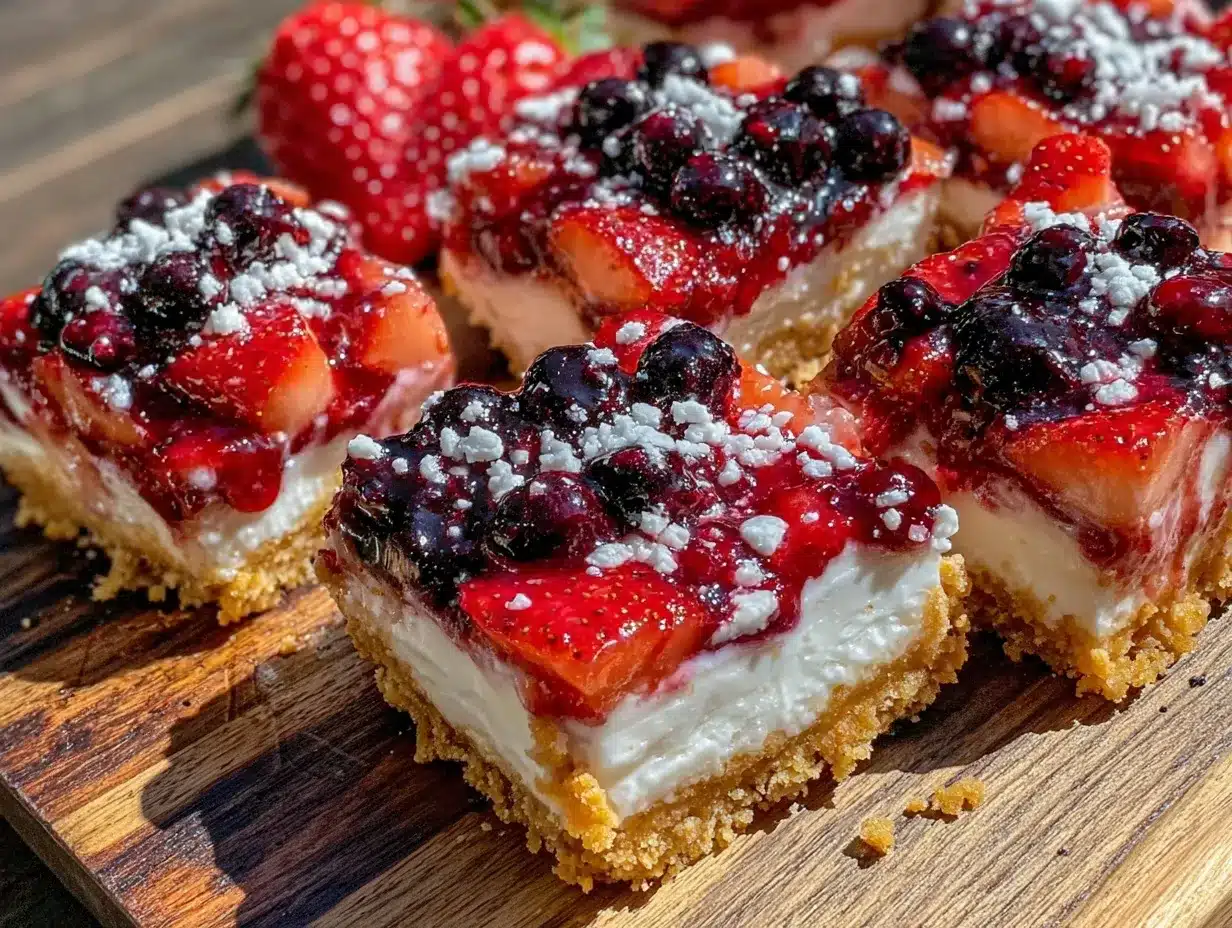
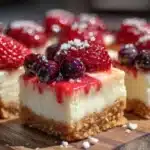
Red, white, and blue. Those colors don’t just spell out a holiday—they spark a craving for something sweet and celebratory. I want a dessert that feels festive but isn’t a fuss to make, something that carries that classic summer vibe on a plate. I’ve got most ingredients handy, except for that perfect balance of creamy, tangy cheesecake with a patriotic twist. It’s funny how a simple craving can turn a lazy afternoon into a mini baking adventure. The idea of Perfect Red White and Blue Flag Cheesecake Bars for Summer Celebrations pops into my head. It’s not just about the colors or the holiday—it’s about nailing that texture that’s smooth but still sturdy enough to pick up with your fingers. And yeah, it has to look as good as it tastes, with those crisp layers of berry and cream cheese that invite you to dig in.
There’s a quiet satisfaction in pulling these bars out of the oven, the smell mingling with the summer breeze. The fresh blueberries and strawberries like little fireworks on top, and the cream cheese filling holds everything together with that perfect touch of tang. Honestly, this recipe stuck with me because it’s one of those desserts that becomes a low-key tradition, the kind of treat you bring to backyard BBQs that somehow tastes like summer itself. It’s a little celebration in every bite, and that’s why I keep coming back to it—year after year, no matter how many desserts I try.
Why You’ll Love This Recipe
This recipe isn’t just a pretty face with patriotic colors—it’s tried and true, tested with plenty of eager taste testers (including my picky neighbors). I’ve tweaked it over time to get that ideal balance between creamy and crumbly, sweet and tangy. Here’s why it might just become your go-to summer dessert:
- Quick & Easy: These bars come together in under an hour, perfect for those last-minute summer get-togethers or when you need a dessert fast.
- Simple Ingredients: No hunting for fancy stuff here. I usually grab ingredients from my pantry and fridge—cream cheese, fresh berries, and a basic graham cracker crust.
- Perfect for Summer Celebrations: Whether it’s Independence Day, Memorial Day, or a casual BBQ, these bars scream summer with their red, white, and blue layers.
- Crowd-Pleaser: Kids and adults alike love them. The fruity freshness cuts through the richness, making everyone ask for seconds.
- Unbelievably Delicious: The texture is spot-on—creamy cheesecake with a buttery crust and juicy berries that pop with sweetness.
This isn’t just another cheesecake bar recipe. What makes it stand out is the way the berries are layered to mimic the American flag, creating a visual impact that’s both charming and mouthwatering. I blend the cream cheese filling until it’s silky smooth, which gives it a luxurious feel without being heavy. Plus, I’ve swapped the usual heavy sour cream for a touch of Greek yogurt, which adds a subtle tang and lightness that keeps these bars from feeling too dense. Honestly, this dessert has become my secret weapon for impressing guests without spending hours in the kitchen. It’s comfort food with a splash of summer spirit.
What Ingredients You Will Need
This recipe calls for straightforward, wholesome ingredients that come together effortlessly to create those bold red, white, and blue flavors and a satisfyingly creamy texture. Most of these are pantry staples or easy-to-find fresh produce, which makes it perfect for last-minute celebrations or casual summer afternoons.
- For the Crust:
- 1 ½ cups graham cracker crumbs (about 10 full sheets; I prefer Honey Maid for consistent flavor)
- 6 tablespoons unsalted butter, melted (adds richness and helps hold the crust)
- 2 tablespoons granulated sugar (balances the buttery crust)
- For the Cheesecake Filling:
- 16 oz (450 g) cream cheese, softened (use full-fat for best texture)
- ½ cup Greek yogurt (adds tang and lightness; Fage works well here)
- ¾ cup granulated sugar
- 2 large eggs, room temperature
- 1 teaspoon pure vanilla extract
- 1 tablespoon all-purpose flour (helps set the filling)
- For the Topping:
- 1 cup fresh strawberries, sliced (washed and hulled)
- 1 cup fresh blueberries
- Optional: powdered sugar for dusting after baking
Substitution tips: For a gluten-free version, swap graham cracker crumbs with gluten-free cookies or almond flour. If dairy’s an issue, cream cheese alternatives like vegan cream cheese can work, but expect a slightly different texture. In summer, I sometimes swap the strawberries with fresh raspberries or blackberries for a different berry twist, which keeps the dessert vibrant and fresh.
Equipment Needed
- 9×9-inch square baking pan (preferably metal for even heat distribution; glass works but adjust baking time slightly)
- Mixing bowls (one large for the crust, one medium for the filling)
- Electric mixer or stand mixer (to get the cream cheese filling smooth and lump-free)
- Measuring cups and spoons (precise measurements keep the cheesecake perfect)
- Rubber spatula (great for scraping every last bit of batter)
- Wire rack (for cooling the bars evenly)
- Optional: parchment paper to line the pan for easy removal
I’ve tried making these bars in disposable aluminum pans for picnics, but a sturdy metal pan made the crust come out more evenly browned. If you don’t have a mixer, whisking vigorously by hand works but expect a bit more elbow grease. Also, keeping your cream cheese at room temperature is key—the smoother the filling, the better the final texture.
Preparation Method
- Prepare the Crust: Preheat your oven to 325°F (160°C). In a medium bowl, combine 1 ½ cups graham cracker crumbs, 6 tablespoons melted butter, and 2 tablespoons sugar. Stir until the mixture resembles wet sand. Press this evenly into the bottom of your greased or parchment-lined 9×9-inch pan. Use the back of a spoon or a flat-bottomed cup to firmly pack it down. Bake for 10 minutes, then remove and let cool slightly while you prepare the filling.
- Make the Cheesecake Filling: In a large mixing bowl, beat 16 oz softened cream cheese with ½ cup Greek yogurt until smooth and creamy. Add ¾ cup sugar and continue mixing until fully blended. Beat in 2 room-temperature eggs, one at a time, mixing well after each. Stir in 1 teaspoon vanilla extract and 1 tablespoon flour until just combined. Avoid overmixing to prevent cracks during baking.
- Assemble the Bars: Pour the cheesecake filling over the cooled crust, spreading evenly with a spatula. Arrange sliced strawberries on one third of the top, and blueberries on the other third, leaving the middle white cheesecake visible to create a flag effect. You want the berry layers to be neat but casual—perfectly rustic.
- Bake: Place the pan in the oven and bake at 325°F (160°C) for 35-40 minutes. The center should be mostly set but still slightly jiggly—kind of like a firm pudding. Overbaking can lead to cracks and dryness, so keep an eye on it starting at 30 minutes.
- Cool and Chill: Remove from the oven and allow bars to cool completely at room temperature (about 1 hour). Then refrigerate for at least 3 hours or overnight to let the cheesecake set fully and develop flavor.
- Serve: Once chilled, cut into bars with a sharp knife, wiping the blade clean between cuts for neat edges. Optionally dust with powdered sugar for a little extra flair before serving.
Tip: If your berries release too much juice while baking, try gently patting them dry before arranging, or lightly toss with a tablespoon of cornstarch to absorb excess moisture. When I first made these, I ignored that step and ended up with soggy bars—lesson learned the hard way!
Cooking Tips & Techniques
One of the trickiest parts of cheesecake bars is getting that creamy texture without cracking or dryness. Here’s what I’ve learned over many batches:
- Room Temperature Ingredients: Let your cream cheese and eggs come to room temp. Cold cream cheese lumps up and makes the batter uneven.
- Mix Gently: Overmixing incorporates air that can cause cracks. Beat just until smooth and combined.
- Watch the Oven Temperature: Baking too hot will dry the cheesecake or crack the surface. I always use an oven thermometer because my oven runs a bit hot.
- Don’t Overbake: The center should still wobble slightly when you take it out—remember it firms up while chilling.
- Berry Prep: Pat berries dry and don’t pile too thickly or the juices can make the crust soggy.
- Chill Thoroughly: These bars need at least 3 hours in the fridge. I sometimes leave them overnight, which makes them slice cleaner and taste even better.
I once tried to rush the chilling step and ended up with sloppy squares that didn’t hold shape. Patience is key here. Also, if you want a smoother crust, pulse your graham crackers a little finer before mixing with butter. For a fun twist, I’ve added a thin layer of homemade blueberry jam under the berries to boost flavor without extra fuss.
Variations & Adaptations
This base recipe is a great canvas for personal touches or dietary needs. Here are some ways to mix it up:
- Seasonal Berry Swap: Use fresh raspberries or blackberries in place of strawberries or blueberries depending on what’s ripe and local.
- Gluten-Free Crust: Use almond flour or gluten-free cookie crumbs instead of graham crackers. The texture is slightly different but still delicious.
- Vegan-Friendly: Substitute cream cheese with a plant-based alternative and use flax eggs instead of chicken eggs. Baking time might vary.
- Flag-Free Berry Cheesecake Bars: If you want a simpler look, just swirl the berries into the filling for a marbled effect that’s still beautiful and tasty.
- Extra Crunch: Add chopped pecans or walnuts to the crust mix for a nutty bite. I’ve done this for a friend who loves texture contrast.
Once, I tried layering a thin spread of homemade berry jam under the cream cheese filling to amp up the flavor. It was a hit, especially with guests who like a little extra tartness. Feel free to experiment and make these bars your own—it’s summer, after all!
Serving & Storage Suggestions
These bars are best served chilled, straight from the fridge. The creamy texture and fresh berries really shine when cool. For presentation, I like to plate them with a small sprig of mint or a few extra fresh berries on the side—simple but effective. They pair beautifully with a glass of iced tea or lemonade for a refreshing summer vibe.
For gatherings, I’ve found these bars travel well, making them great for potlucks or picnics. Store any leftovers in an airtight container in the refrigerator for up to 4 days. They keep their texture nicely, though the berries might soften over time. If you want to freeze them, wrap tightly and freeze for up to 2 months; thaw overnight in the fridge before serving.
Reheating isn’t really recommended here—these bars are meant to be enjoyed cold. However, letting them sit out for 10 minutes before serving softens the texture just a bit, making each bite melt in your mouth. The flavors meld and deepen after chilling, so they often taste better the next day.
If you love summer desserts, you might also appreciate the fresh flavors in this Red White and Blue Caprese Skewers or the creamy goodness of the Loaded Potato Salad with Bacon and Cheddar for a full summer spread.
Nutritional Information & Benefits
Each cheesecake bar (assuming 12 servings) contains approximately 280 calories, 18g fat, 22g carbohydrates, and 4g protein. The use of Greek yogurt adds a modest protein boost and reduces overall fat content compared to traditional sour cream-based cheesecakes.
The fresh strawberries and blueberries provide antioxidants, vitamin C, and fiber, making this dessert a little more than just empty indulgence. It’s not a health food, but it’s a treat with some nutritional perks, especially when balanced with fresh fruit.
For those watching gluten intake, swapping the crust for gluten-free options keeps this recipe accessible without sacrificing flavor. Be mindful that cream cheese and yogurt contain dairy, so those with allergies will want to consider alternatives.
From my wellness perspective, this dessert fits perfectly into a balanced summer diet—satisfying cravings without overdoing it, and bringing a little joy to the table, which is just as important.
Conclusion
This Perfect Red White and Blue Flag Cheesecake Bars for Summer Celebrations recipe is one of those rare desserts that’s as easy as it is stunning. It’s a reliable crowd-pleaser that doesn’t require fancy skills or obscure ingredients, just a little love and patience. I love how customizable it is—whether you stick to the classic flag design or put your own spin on it, these bars bring a bit of festive cheer to any table.
Give this recipe a try next time you want to impress with minimal stress. I’m always excited to hear how you’ve made it your own or what twists you’ve added, so feel free to share your experience or questions. Trust me, once you master these bars, you’ll find yourself reaching for them every summer.
Happy baking, and here’s to sweet summer moments!
FAQs
- Can I use frozen berries instead of fresh? Yes, but thaw and drain them well to prevent excess moisture from making the crust soggy.
- How do I prevent cracks in my cheesecake bars? Avoid overmixing the batter and don’t overbake. The center should still jiggle slightly when done.
- Can I make these bars ahead of time? Absolutely! They actually taste better after chilling overnight in the fridge.
- What can I use instead of graham cracker crumbs? Crushed digestive biscuits, gluten-free cookies, or almond flour can work as crust substitutes.
- Is it necessary to chill the cream cheese before mixing? It’s best to soften cream cheese to room temperature for a smooth, lump-free filling.
Pin This Recipe!
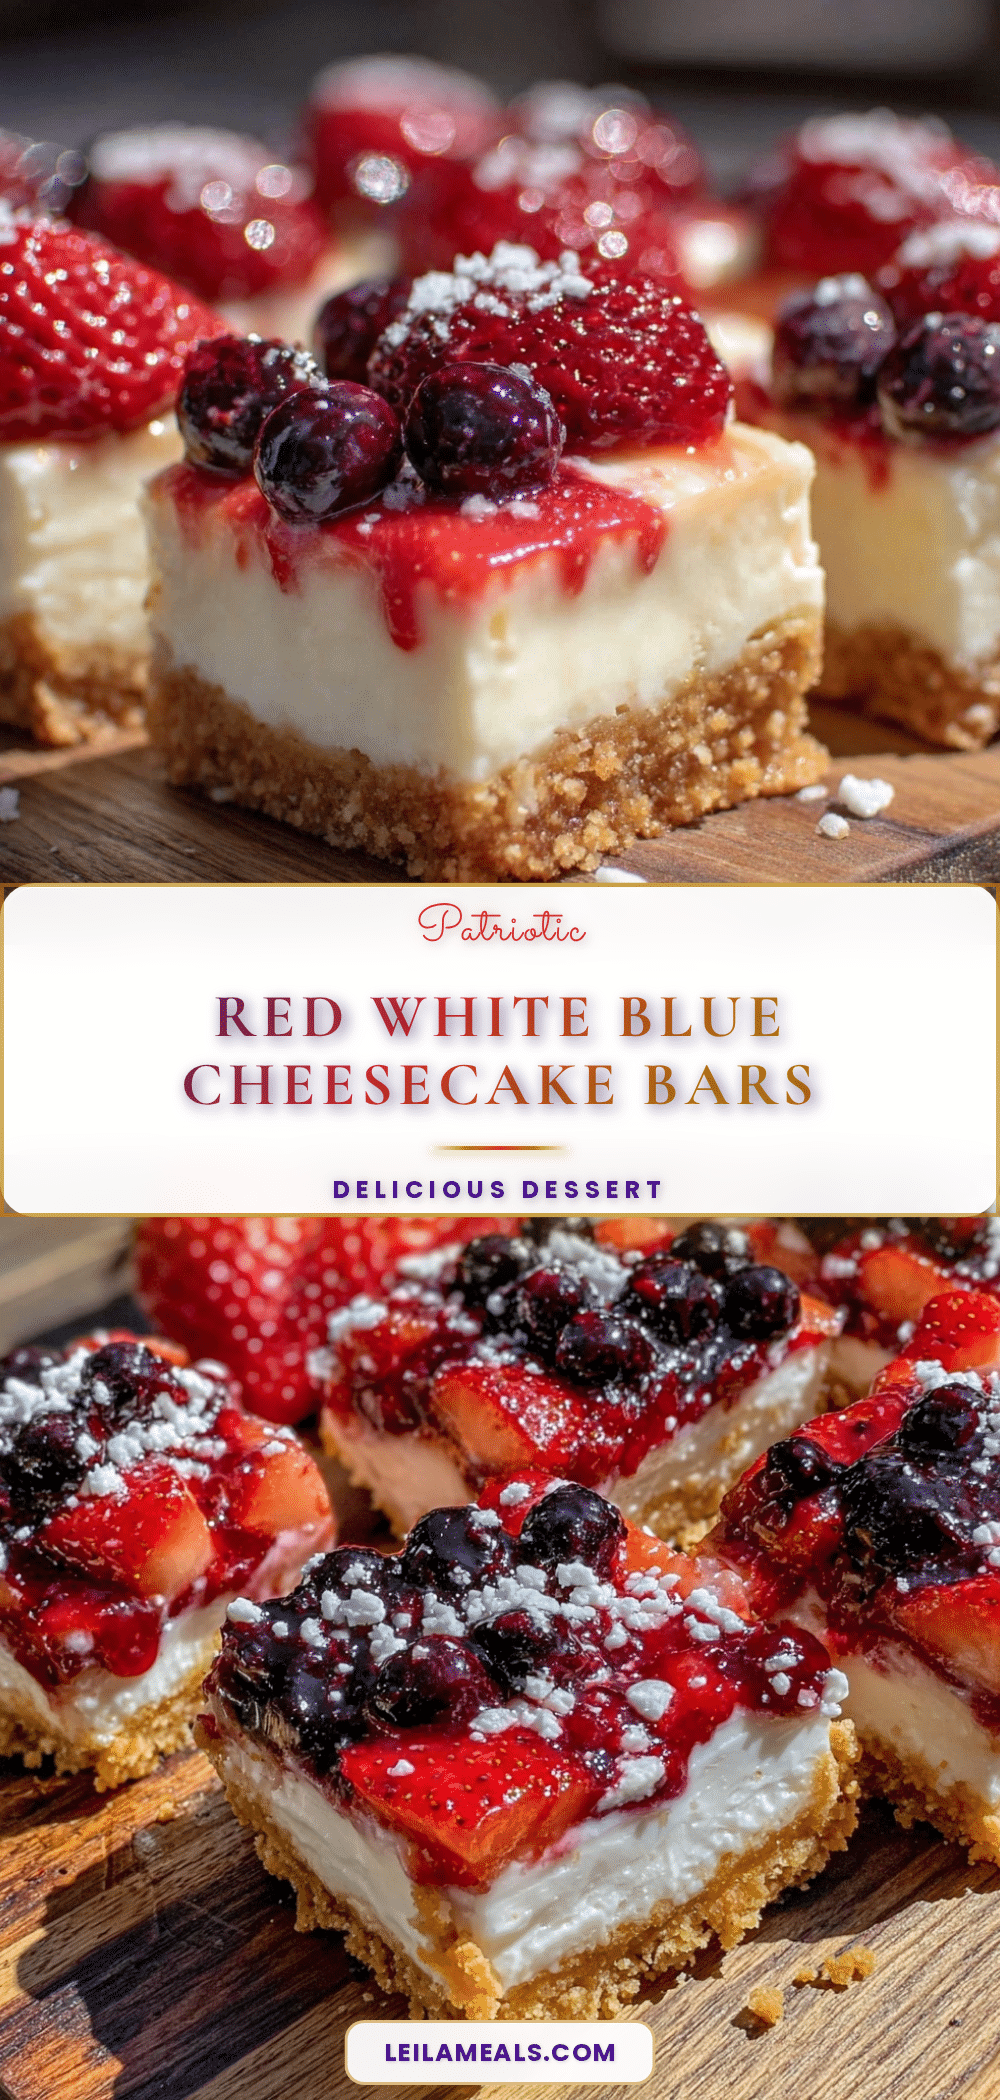
Perfect Red White and Blue Flag Cheesecake Bars
A festive and easy summer dessert featuring creamy cheesecake bars topped with fresh strawberries and blueberries arranged to mimic the American flag. Perfect for summer celebrations and backyard BBQs.
- Prep Time: 15 minutes
- Cook Time: 45 minutes
- Total Time: 4 hours
- Yield: 12 servings 1x
- Category: Dessert
- Cuisine: American
Ingredients
- 1 ½ cups graham cracker crumbs (about 10 full sheets)
- 6 tablespoons unsalted butter, melted
- 2 tablespoons granulated sugar
- 16 oz (450 g) cream cheese, softened
- ½ cup Greek yogurt
- ¾ cup granulated sugar
- 2 large eggs, room temperature
- 1 teaspoon pure vanilla extract
- 1 tablespoon all-purpose flour
- 1 cup fresh strawberries, sliced
- 1 cup fresh blueberries
- Optional: powdered sugar for dusting after baking
Instructions
- Preheat oven to 325°F (160°C). In a medium bowl, combine graham cracker crumbs, melted butter, and sugar. Stir until mixture resembles wet sand. Press evenly into the bottom of a greased or parchment-lined 9×9-inch pan. Bake for 10 minutes, then remove and let cool slightly.
- In a large mixing bowl, beat softened cream cheese with Greek yogurt until smooth and creamy. Add sugar and mix until fully blended. Beat in eggs one at a time, mixing well after each. Stir in vanilla extract and flour until just combined. Avoid overmixing.
- Pour cheesecake filling over cooled crust, spreading evenly. Arrange sliced strawberries on one third of the top, blueberries on another third, leaving the middle white cheesecake visible to create a flag effect.
- Bake at 325°F (160°C) for 35-40 minutes until center is mostly set but slightly jiggly. Avoid overbaking to prevent cracks and dryness.
- Remove from oven and cool completely at room temperature (about 1 hour). Refrigerate for at least 3 hours or overnight to set fully.
- Cut into bars with a sharp knife, wiping blade clean between cuts. Optionally dust with powdered sugar before serving.
Notes
Use room temperature cream cheese and eggs for smooth batter. Avoid overmixing to prevent cracks. Pat berries dry or toss with cornstarch to reduce moisture and soggy crust. Chill bars thoroughly for best texture and flavor. Optional: add a thin layer of homemade blueberry jam under berries for extra flavor.
Nutrition
- Serving Size: 1 bar (1/12th of rec
- Calories: 280
- Fat: 18
- Carbohydrates: 22
- Protein: 4
Keywords: cheesecake bars, summer dessert, patriotic dessert, red white and blue, berry cheesecake, easy dessert, 4th of July dessert