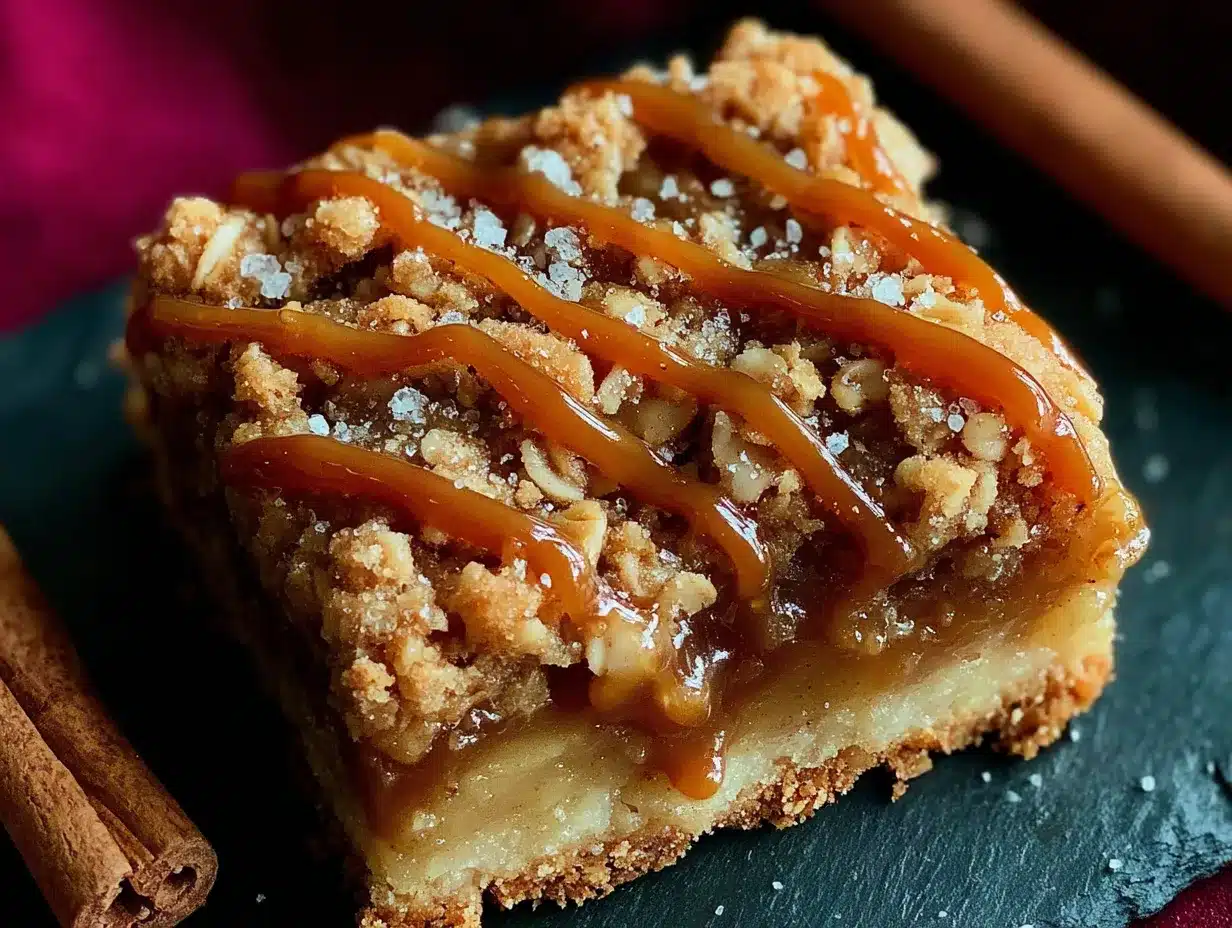
My neighbor, Mrs. Gable, watched me struggling to carry a half-baked apple pie and a bottle of wine to a potluck last fall. She didn’t say anything at first. Then she just shook her head, laughed, and said, “Come here. I’m going to show you something that won’t fall apart on you.” She pulled out a well-worn baking dish from her pantry and handed me a bar that looked like it belonged in a bakery window. The crumble was golden, the apples were soft and jammy, and there was this ribbon of caramel running through the middle that made me close my eyes on the spot. I mean, honestly, I had been overcomplicating desserts for years. She taught me that afternoon that the best party desserts don’t need to be fussy—they just need to taste like you spent all day in the kitchen when you really didn’t. These Caramel Apple Crumble Bars have been my secret weapon for every gathering since. They travel well, they slice cleanly, and they disappear faster than anything else on the table. Maybe you’ve been there—standing at a party with a dessert that looks sad after being jostled in the car. These bars are the fix. The recipe came from a casual kitchen chat, not a formal lesson, and that’s exactly why it works. It’s practical, forgiving, and absolutely delicious.
Why You’ll Love This Recipe
I have tested this recipe at least a dozen times across different ovens and gatherings. Let me tell you, it never fails. These bars are the kind of dessert that makes you look like a hero without the stress.
- Perfect for a Crowd : This recipe makes a full 9×13 pan, giving you 24 generous bars. No more running out of dessert halfway through the party.
- Make-Ahead Magic : You can prepare these bars a full day before your party. The flavors actually get better overnight as the caramel soaks into the crumble.
- No Fancy Equipment : You don’t need a stand mixer or a food processor. Just a bowl, a spatula, and your hands. I mean it.
- Foolproof Crumble : The topping stays crispy even after a day on the counter. I’ve brought these to picnics in the park and they held up beautifully.
- That Caramel Factor : The homemade caramel sauce (yes, it’s easy) seeps into the apple layer and creates this gooey, buttery ribbon that makes every bite unforgettable.
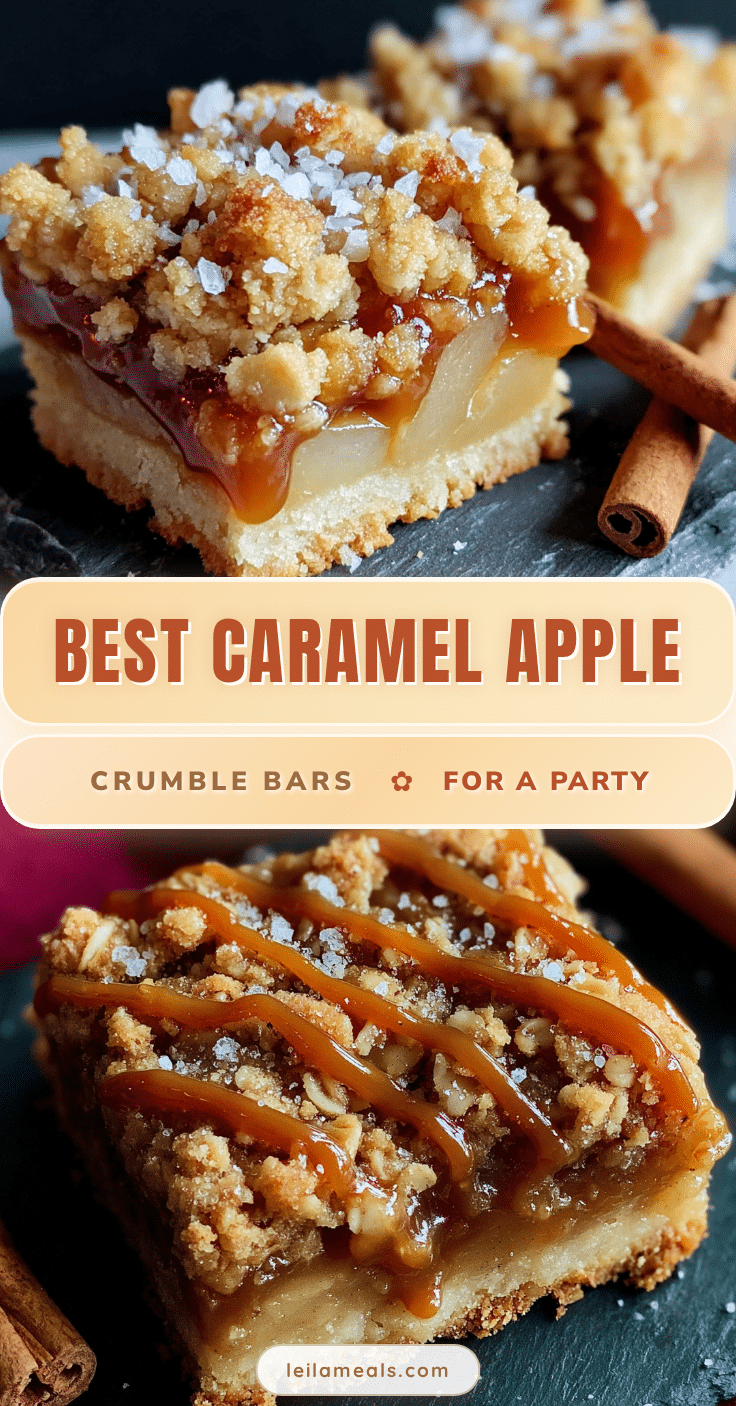
What sets these bars apart from every other apple dessert out there? It’s the texture. You get a buttery shortbread crust, a layer of spiced apples that are soft but not mushy, a crunchy oat crumble, and that ribbon of salted caramel running through it all. It’s not just another apple bar—it’s the one that makes people ask for the recipe before they finish their first bite.
These bars are perfect for when you want to impress your friends and family without spending your whole day in the kitchen. They feel special, they look impressive on a platter, and they taste like a warm hug on a crisp fall afternoon. Honestly, I’ve brought them to summer barbecues too, and they were just as loved. It’s comfort food reimagined—simpler, faster, but with the same soul-soothing satisfaction.
What Ingredients You Will Need
This recipe uses simple, wholesome ingredients that you probably already have in your kitchen. The magic happens when they come together, so let me walk you through what you need and why each one matters.
For the Shortbread Crust
- 2 cups all-purpose flour (I use Gold Medal for consistent results)
- 1/2 cup granulated sugar
- 3/4 cup unsalted butter, cold and cubed (this is key for a flaky crust)
- 1/4 teaspoon salt
For the Apple Filling
- 4 large apples, peeled and thinly sliced (about 5 cups, I recommend Granny Smith or Honeycrisp—they hold their shape well)
- 1/4 cup granulated sugar
- 1 tablespoon lemon juice (fresh is best, it keeps the apples from browning)
- 1 teaspoon ground cinnamon
- 1/4 teaspoon ground nutmeg
- 2 tablespoons all-purpose flour
For the Oat Crumble Topping
- 1 cup rolled oats (not quick oats, they get mushy)
- 1 cup all-purpose flour
- 3/4 cup brown sugar, packed
- 1/2 teaspoon cinnamon
- 1/2 cup unsalted butter, melted
For the Caramel Sauce
- 1/2 cup unsalted butter
- 1 cup brown sugar, packed
- 1/2 cup heavy cream
- 1 teaspoon vanilla extract
- 1/2 teaspoon sea salt (trust me on this—it balances the sweetness)
A few notes on ingredients. For the apples, you want something that won’t turn into applesauce during baking. Granny Smith is my go-to because it’s tart and firm. If you prefer sweeter bars, use Honeycrisp or Fuji. For the butter, always use unsalted so you control the salt level. I’ve tried this with salted butter and it worked, but the caramel became too salty for my taste.
For the caramel sauce, I recommend using a heavy cream with at least 35% milk fat. It makes the sauce richer and prevents it from separating. If you’re dairy-free, you can substitute coconut cream, but the texture will be slightly different. Honestly, I’ve made this with oat milk in a pinch and it worked, but the caramel was thinner.
You can find good-quality rolled oats at any grocery store. I prefer Bob’s Red Mill for their texture. For the brown sugar, light or dark both work. Dark brown sugar gives a deeper molasses flavor that pairs beautifully with the apples.
Equipment Needed
You don’t need a fancy kitchen to make these bars. Here’s what you’ll need:
- 9×13-inch baking pan (glass or metal both work, but glass gives a more even bake)
- Parchment paper (for easy lifting—don’t skip this)
- Large mixing bowls (one for crust, one for filling, one for crumble)
- Medium saucepan (for the caramel)
- Sharp knife or mandoline (for slicing apples evenly)
- Spatula
- Whisk
- Measuring cups and spoons
If you don’t have a mandoline, just use a sharp knife and try to slice the apples about 1/4 inch thick. Even slices mean even baking. I’ve used both glass and metal pans, and honestly, glass gives you a softer, more even crust. Metal pans tend to brown the edges faster, so keep an eye on it if you use one.
Parchment paper is non-negotiable here. I learned this the hard way when my first batch stuck to the pan and I had to scrape it out. Leave an overhang on two sides so you can lift the whole thing out after baking.
Preparation Method
Let me walk you through this step by step. I’ve made these bars so many times that I’ve got the process down to a science. Follow along and you’ll have a perfect pan every time.
Step 1: Preheat and Prep
Preheat your oven to 350°F (175°C). Line your 9×13-inch baking pan with parchment paper, leaving a 2-inch overhang on the long sides. This will help you lift the bars out later. Lightly grease the parchment with butter or cooking spray.
Step 2: Make the Shortbread Crust
In a large bowl, whisk together the flour, sugar, and salt. Add the cold, cubed butter. Using your fingertips or a pastry cutter, work the butter into the flour mixture until it resembles coarse sand with a few pea-sized butter pieces remaining. Don’t overwork it—you want the crust to be tender, not tough. Press the mixture evenly into the bottom of your prepared pan. Bake for 15 minutes, until the edges are just starting to turn golden. Set aside to cool slightly while you prepare the filling.
Step 3: Prepare the Apple Filling
In a medium bowl, toss the sliced apples with lemon juice, sugar, cinnamon, nutmeg, and flour. Make sure every slice is coated. The flour helps thicken the juices so your bars aren’t soggy. Let the apples sit for about 5 minutes. You’ll notice they start releasing some liquid—that’s normal. Just give them another toss before adding them to the crust.
Step 4: Make the Crumble Topping
In another bowl, combine the rolled oats, flour, brown sugar, and cinnamon. Pour the melted butter over the mixture and stir with a fork until it forms clumps. Don’t overmix—you want those irregular crumbles. Set aside.
Step 5: Make the Caramel Sauce
In a medium saucepan over medium heat, melt the butter. Add the brown sugar and whisk until combined. Cook for 2 minutes, stirring constantly. Slowly pour in the heavy cream while whisking. Bring the mixture to a gentle boil, then reduce the heat to low. Let it simmer for 3-4 minutes, stirring occasionally, until it thickens slightly. Remove from heat and stir in the vanilla and sea salt. Let it cool for 5 minutes—it will thicken more as it cools.
Step 6: Assemble the Bars
Spread the apple mixture evenly over the pre-baked crust. Drizzle about half of the caramel sauce over the apples—you want ribbons, not a pool. Sprinkle the crumble topping evenly over the apples and caramel. Don’t press it down; let it sit loosely for those crunchy bits.
Step 7: Bake
Bake for 35-40 minutes, until the crumble is golden brown and the apples are bubbling around the edges. If the top is browning too quickly, tent loosely with foil for the last 10 minutes. Let the bars cool in the pan on a wire rack for at least 30 minutes.
Step 8: Add Final Caramel Drizzle
While the bars are still warm, drizzle the remaining caramel sauce over the top. Let them cool completely—at least 2 hours—before slicing. This is the hardest part, I know, but it’s crucial. Warm bars will fall apart. Use the parchment overhang to lift the entire block out, then slice into squares with a sharp knife.
Cooking Tips & Techniques
I’ve made every mistake you can imagine with these bars, so let me save you some trouble.
Don’t overwork the crust. I learned this the hard way. If you mix the butter into the flour until it’s completely smooth, your crust will be tough. You want visible butter pieces—they create steam pockets that make the crust flaky.
Slice your apples evenly. This matters more than you think. Thin slices cook faster and more evenly. If some slices are thick and others thin, you’ll end up with undercooked apples in some bites and mushy ones in others. I use a mandoline set to 1/4 inch, but a sharp knife works just fine.
Let the bars cool completely. I know it’s tempting to cut into them while they’re warm, but trust me—they need time to set. The caramel needs to firm up, and the apple juices need to thicken. I’ve ruined a whole pan by cutting too early. The bars were delicious but they looked like a mess. For parties, you want those clean, beautiful squares.
Toast your oats for extra flavor. This is a pro tip I picked up from a baker friend. Spread the rolled oats on a baking sheet and toast them at 350°F for 5-7 minutes before adding them to the crumble. It adds a nutty depth that takes these bars to another level.
Make the caramel ahead of time. You can prepare the caramel sauce up to a week in advance and store it in the fridge. Just reheat it gently before using. This makes party prep even easier.
Watch your oven. Every oven runs differently. Mine runs a little hot, so I start checking at the 30-minute mark. The bars are done when the crumble is golden and you can see the apple filling bubbling at the edges. If you see burnt edges, your oven is too hot.
Variations & Adaptations
These bars are incredibly forgiving, so feel free to make them your own. Here are some variations I’ve tried and loved.
Gluten-Free Version
Substitute the all-purpose flour with a 1:1 gluten-free baking flour blend. I’ve used Bob’s Red Mill Gluten-Free 1-to-1 Baking Flour with great results. Make sure your oats are certified gluten-free as well. The texture is slightly more delicate, but the flavor is just as good.
Vegan Adaptation
Use vegan butter sticks (not spreadable margarine) and substitute the heavy cream with full-fat coconut cream. For the caramel, use coconut cream and vegan butter. The crumble topping works perfectly with vegan butter. I’ve served this at a party with vegan friends and no one could tell the difference.
Seasonal Fruit Swap
In summer, swap the apples with sliced peaches or nectarines. Reduce the sugar in the filling to 2 tablespoons since stone fruits are naturally sweeter. In winter, try pears with a pinch of cardamom. The caramel pairs beautifully with all of them.
Nutty Crumble
Add 1/2 cup of chopped pecans or walnuts to the crumble topping. Toast them first for extra flavor. This adds a lovely crunch and makes the bars feel even more special for a party.
Spice It Up
Add 1/4 teaspoon of ground ginger and a pinch of cloves to the apple filling. It gives the bars a chai-like warmth that’s perfect for fall gatherings. I did this for a Halloween party and people couldn’t stop talking about it.
Serving & Storage Suggestions
These bars are designed for parties, so let me share how to serve them like a pro.
Serving Temperature: These bars are best at room temperature. The caramel softens slightly, the crumble stays crunchy, and the apples are perfectly tender. If you’ve refrigerated them, let them sit out for 20 minutes before serving.
Presentation Tips: Arrange the bars on a large wooden board or a white platter for contrast. Drizzle a little extra caramel on top and sprinkle with flaky sea salt. Add a few fresh apple slices and cinnamon sticks for a rustic look. For a dinner party, serve each bar with a small scoop of vanilla ice cream or a dollop of whipped cream.
What to Serve Alongside: These bars pair beautifully with a hot cup of coffee, spiced apple cider, or a glass of bourbon. For a dessert table, place them next to a batch of salted caramel brownies and some pumpkin spice cookies for a full fall spread.
Storage Instructions: Store the bars in an airtight container at room temperature for up to 3 days. If you need to keep them longer, refrigerate them for up to a week. The crumble will soften slightly in the fridge, but they’ll still be delicious.
Freezing: These bars freeze beautifully. Wrap individual bars in plastic wrap, then place them in a freezer-safe bag. They’ll keep for up to 3 months. Thaw at room temperature for 30 minutes before serving. I always keep a stash in my freezer for unexpected guests.
Reheating: Pop a bar in the microwave for 10-15 seconds if you want that warm, fresh-from-the-oven experience. For a crowd, warm them in a 300°F oven for 5-7 minutes.
Flavor Development: Honestly, these bars taste even better the next day. The caramel seeps into the crust and the apples, and the flavors meld together beautifully. Make them a day ahead for the best results.
Nutritional Information & Benefits
While these bars are definitely a treat, they do have some redeeming qualities. Here’s the estimated nutritional breakdown per bar (based on 24 servings):
| Nutrient | Amount per Bar |
|---|---|
| Calories | 285 |
| Total Fat | 14g |
| Saturated Fat | 8g |
| Cholesterol | 35mg |
| Sodium | 120mg |
| Total Carbohydrates | 39g |
| Dietary Fiber | 2g |
| Sugars | 24g |
| Protein | 3g |
The apples provide a good source of fiber and vitamin C. Oats offer beta-glucan, which supports heart health. The cinnamon adds antioxidants and may help regulate blood sugar. Of course, the butter and sugar make this an indulgence, but it’s one you can feel good about serving at a celebration.
If you’re watching your sugar intake, you can reduce the sugar in the apple filling by half. The caramel is harder to modify, but you can use a sugar-free caramel alternative. I’ve tried it with a monk fruit sweetener blend and it worked reasonably well, though the texture was slightly different.
These bars contain gluten, dairy, and nuts (if you add the pecan variation). For allergen-free options, see the variations section above.
Conclusion
These Caramel Apple Crumble Bars have become my go-to party dessert for good reason. They’re forgiving, they travel well, and they make people happy. Every time I bring them to a gathering, someone asks for the recipe. Mrs. Gable would be proud, I think.
The beauty of this recipe is that it leaves room for your own touch. Maybe you prefer extra cinnamon, or you want to add a handful of pecans. Maybe you serve them warm with ice cream, or you pack them for a picnic. Whatever you do, they’ll be delicious. That’s the kind of recipe worth keeping.
I’d love to hear how these turn out for you. Drop a comment below and tell me about your party—what did you serve alongside the bars? Did you make any fun variations? Your ideas might inspire someone else in our community. And if you snap a photo, tag me so I can see your beautiful creation. Happy baking, friends!
Frequently Asked Questions
Can I use store-bought caramel sauce instead of making my own?
You absolutely can. Use about 1 cup of high-quality store-bought caramel sauce. Just make sure it’s thick enough to hold its shape. Thin caramel sauces will soak into the crust and make it soggy. I recommend a jarred caramel from the baking aisle, not the ice cream topping kind.
Why did my crust turn out soggy?
This usually happens when the apples release too much liquid. Make sure you’re using firm apples like Granny Smith, and don’t skip the flour in the apple filling. Also, pre-baking the crust for the full 15 minutes creates a barrier that prevents sogginess. If your crust is still soggy, try baking it for 2-3 minutes longer next time.
Can I make these bars ahead of time for a party?
Yes, and I actually recommend it. These bars taste even better the next day. Make them a day ahead, let them cool completely, and store them in an airtight container at room temperature. Add the final caramel drizzle just before serving for the prettiest presentation.
How do I get clean, perfect slices?
Patience is key. Let the bars cool completely—at least 2 hours at room temperature or 1 hour in the fridge. Use a sharp knife and wipe it clean between each cut. For the cleanest slices, chill the bars in the fridge for 30 minutes before cutting. Then let them come back to room temperature before serving.
Can I double this recipe for a larger crowd?
Absolutely. Double all the ingredients and use a half-sheet pan (18×13 inches). You’ll need to increase the baking time by about 10-15 minutes. Keep an eye on the crumble—if it’s browning too quickly, tent with foil. This makes about 48 bars, perfect for a big party or potluck.
Pin This Recipe!
Best Caramel Apple Crumble Bars – Easy Party Dessert
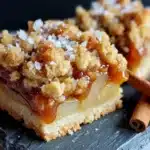
These Caramel Apple Crumble Bars feature a buttery shortbread crust, spiced apple filling, crunchy oat crumble, and a ribbon of homemade salted caramel. They’re perfect for parties, travel well, and taste even better the next day.
- Prep Time: 30 minutes
- Cook Time: 40 minutes
- Total Time: 3 hours 10 minutes (includes cooling)
- Yield: 24 bars 1x
- Category: Dessert
- Cuisine: American
Ingredients
- 2 cups all-purpose flour
- 1/2 cup granulated sugar
- 3/4 cup unsalted butter, cold and cubed
- 1/4 teaspoon salt
- 4 large apples, peeled and thinly sliced (about 5 cups, Granny Smith or Honeycrisp)
- 1/4 cup granulated sugar
- 1 tablespoon lemon juice
- 1 teaspoon ground cinnamon
- 1/4 teaspoon ground nutmeg
- 2 tablespoons all-purpose flour
- 1 cup rolled oats (not quick oats)
- 1 cup all-purpose flour
- 3/4 cup brown sugar, packed
- 1/2 teaspoon cinnamon
- 1/2 cup unsalted butter, melted
- 1/2 cup unsalted butter
- 1 cup brown sugar, packed
- 1/2 cup heavy cream
- 1 teaspoon vanilla extract
- 1/2 teaspoon sea salt
Instructions
- Preheat oven to 350°F (175°C). Line a 9×13-inch baking pan with parchment paper, leaving a 2-inch overhang on the long sides. Lightly grease the parchment with butter or cooking spray.
- Make the shortbread crust: In a large bowl, whisk together 2 cups flour, 1/2 cup granulated sugar, and 1/4 teaspoon salt. Add cold cubed butter. Using fingertips or a pastry cutter, work butter into flour mixture until it resembles coarse sand with a few pea-sized butter pieces. Press evenly into prepared pan. Bake for 15 minutes until edges are just golden. Set aside to cool slightly.
- Prepare the apple filling: In a medium bowl, toss sliced apples with lemon juice, 1/4 cup granulated sugar, 1 teaspoon cinnamon, nutmeg, and 2 tablespoons flour. Let sit for 5 minutes, then toss again.
- Make the crumble topping: In another bowl, combine rolled oats, 1 cup flour, 3/4 cup packed brown sugar, and 1/2 teaspoon cinnamon. Pour melted butter over and stir with a fork until clumps form. Set aside.
- Make the caramel sauce: In a medium saucepan over medium heat, melt 1/2 cup butter. Add 1 cup packed brown sugar and whisk until combined. Cook for 2 minutes, stirring constantly. Slowly pour in heavy cream while whisking. Bring to a gentle boil, then reduce heat to low. Simmer for 3-4 minutes, stirring occasionally, until slightly thickened. Remove from heat and stir in vanilla and sea salt. Let cool for 5 minutes.
- Assemble the bars: Spread apple mixture evenly over pre-baked crust. Drizzle about half of the caramel sauce over the apples. Sprinkle crumble topping evenly over apples and caramel. Do not press down.
- Bake for 35-40 minutes, until crumble is golden brown and apples are bubbling around edges. If top browns too quickly, tent loosely with foil for last 10 minutes. Let cool in pan on wire rack for at least 30 minutes.
- While bars are still warm, drizzle remaining caramel sauce over top. Let cool completely (at least 2 hours) before slicing. Use parchment overhang to lift entire block out, then slice into squares with a sharp knife.
Notes
For best results, let bars cool completely before slicing. The bars taste even better the next day as the caramel soaks into the crust. To toast oats for extra flavor, spread rolled oats on a baking sheet and toast at 350°F for 5-7 minutes before adding to crumble. Caramel sauce can be made up to a week ahead and stored in the fridge.
Nutrition
- Serving Size: 1 bar
- Calories: 285
- Sugar: 24
- Sodium: 120
- Fat: 14
- Saturated Fat: 8
- Carbohydrates: 39
- Fiber: 2
- Protein: 3
Keywords: caramel apple crumble bars, apple dessert, party dessert, fall dessert, apple bars, crumble bars, easy dessert