I ruined three batches of brown butter before I finally understood what the recipe was actually asking me to do. Not ruined in the way that they were inedible, but ruined in the way that the brown butter never turned into anything special, and the cookies just tasted like regular chocolate chip cookies with extra steps and a faint nutty smell that disappeared after five minutes. The first batch, I got impatient and just melted the butter without watching it. The second batch, I burned it so badly the kitchen smelled like a campfire that had gone wrong. The third batch, I gave up halfway through and poured it over popcorn instead, which was honestly delicious, but not the point.
Here is what nobody tells you about browning butter for cookies. It is not hard, but it is specific. The butter goes from pale yellow to golden to brown in what feels like thirty seconds, and if you blink, you miss the sweet spot. That first moment when the milk solids separate and turn amber and the whole thing smells like toasted hazelnuts and caramel and something almost like butterscotch. That is the moment you are chasing. And once you catch it, you will never go back to regular melted butter in a cookie recipe again. Not because regular butter is bad, but because brown butter is a whole different thing. It is deeper, richer, and it makes chocolate chip cookies taste like you spent hours on them, even though the actual work is maybe ten minutes of active time.
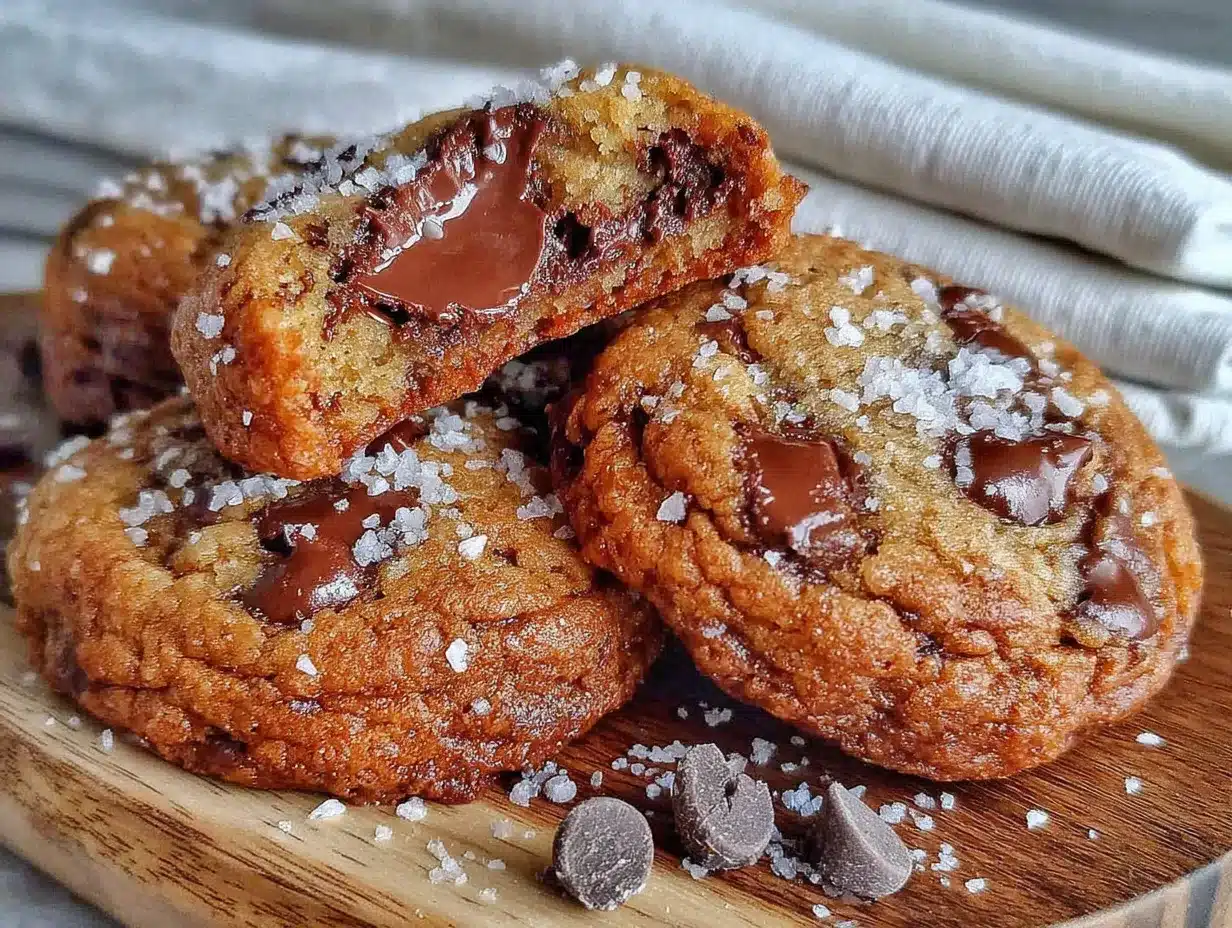
These Perfect Brown Butter Chocolate Chip Cookies with Sea Salt have become my go-to for everything. Last-minute dinner invites, lazy Sunday afternoons, and those evenings when you just need something warm and sweet and a little bit salty to make the world feel right. They are the kind of cookies that people ask for by name, and they never last more than a day in my house.
Why You Will Love This Recipe
I have tested this recipe more times than I care to admit. There was a phase where I was making a batch every weekend just to tweak one small thing, and my neighbors started leaving notes on my door asking if I was okay. But all that testing paid off, because these cookies are genuinely the best version of themselves. Here is why they work.
- Deep, Nutty Flavor: Browning the butter changes everything. It adds a toasty, caramelized depth that regular butter just cannot match. The flavor carries through the entire cookie, not just the first bite.
- Perfect Texture: These cookies are crispy around the edges and soft and chewy in the center. No cakey cookies here. The brown butter helps create that ideal structure.
- Salty-Sweet Balance: The flaky sea salt on top is not just for decoration. It cuts through the sweetness and makes the chocolate taste more chocolatey. Trust me, do not skip this step.
- Simple Ingredients: You probably have everything you need already. Butter, sugar, eggs, flour, vanilla, chocolate chips, and salt. That is it.
- No Chilling Required: Most brown butter cookie recipes make you chill the dough for hours. These come together fast, and you can bake them right away if you are impatient, which I usually am.
- Crowd-Pleaser: I have brought these to potlucks, family dinners, and casual hangouts, and they disappear every single time. Kids love them. Adults love them. Even people who claim they do not like sweets will reach for a second one.
There is something about biting into a warm cookie that has that little crunch of salt on top. It is comfort food, but better. It is the kind of cookie that makes you close your eyes after the first bite, and that is not an exaggeration.
What Ingredients You Will Need
This recipe uses straightforward ingredients, but each one plays an important role. Here is what you need and why it matters.
- 1 cup (226 grams) unsalted butter: This is the star of the show. Use unsalted butter so you can control the salt level. I prefer using a high-quality European-style butter like Kerrygold for browning because it has a higher fat content and less water, which means it browns more evenly and tastes richer. But any unsalted butter will work fine.
- 1 cup (200 grams) packed light brown sugar: Brown sugar adds moisture and that deep molasses flavor that pairs so well with brown butter. Do not substitute dark brown sugar here unless you want a stronger molasses taste, which can overpower the delicate nuttiness.
- 1/2 cup (100 grams) granulated sugar: White sugar helps with spreading and gives the cookies those crispy edges. The combination of both sugars is key.
- 2 large eggs, room temperature: Room temperature eggs incorporate more easily into the butter mixture and create a smoother dough. If you forget to take them out ahead of time, place them in a bowl of warm water for five minutes.
- 2 teaspoons vanilla extract: Use real vanilla extract, not imitation. It adds warmth and rounds out the flavors. I like Nielsen-Massey or simply organic vanilla.
- 2 1/4 cups (281 grams) all-purpose flour: Spoon and level your flour. Scooping directly from the bag packs in too much flour and makes the cookies dry. This is the most common mistake people make with cookies.
- 1 teaspoon baking soda: This helps the cookies spread and gives them a slightly chewy texture. Make sure your baking soda is fresh, or the cookies will not spread properly.
- 1/2 teaspoon salt: A little salt in the dough balances the sweetness and enhances the chocolate flavor. I use fine sea salt for the dough and reserve flaky sea salt for topping.
- 2 cups (340 grams) semi-sweet chocolate chips or chopped chocolate: I prefer using a mix of semi-sweet chocolate chips and a chopped dark chocolate bar for variety. The chips hold their shape, while the chopped chocolate creates melty puddles throughout the cookie. Ghirardelli and Guittard are my go-to brands.
- Flaky sea salt for topping: Maldon sea salt is my favorite. It has a delicate crunch and dissolves just slightly on your tongue. Do not use table salt here, it will be too intense and salty.
If you want to swap the semi-sweet chips for milk chocolate or dark chocolate, go for it. Just know that milk chocolate will make the cookies sweeter, and dark chocolate will make them more intense. I have also used white chocolate chips mixed with dried cranberries for a completely different cookie, and it worked beautifully.
Equipment Needed
You do not need fancy equipment for these cookies, but a few key tools make the process smoother.
- Light-colored saucepan or skillet: This is important. A dark pan makes it hard to see the color of the browning butter, and you will end up burning it. Use a stainless steel or light-colored nonstick pan.
- Stand mixer or hand mixer: You can cream the butter and sugar by hand if you are determined, but a mixer makes it much easier and faster. I use my KitchenAid for most batches.
- Rubber spatula: For scraping down the sides of the bowl and folding in the chocolate chips. A good spatula is worth its weight in gold.
- Baking sheets: I prefer light-colored baking sheets for even browning. Dark sheets can cause the bottoms of the cookies to burn before the tops are done.
- Parchment paper or silicone baking mats: These prevent sticking and make cleanup a breeze. Silicone mats also help with even heat distribution.
- Cookie scoop: A 1.5-tablespoon scoop gives you uniform cookies that bake evenly. If you do not have one, use two spoons to portion the dough.
- Cooling rack: Letting the cookies cool on a rack prevents the bottoms from getting soggy.
If you do not have a stand mixer, a hand mixer works perfectly fine. I have also made these cookies using just a whisk and a strong arm when I was camping, and they turned out great. The key is to be patient and mix thoroughly.
Preparation Method
Let us walk through this step by step. I promise it is easier than it sounds.
- Brown the butter: Place the butter in a light-colored saucepan over medium heat. Stir occasionally with a rubber spatula or wooden spoon as it melts. The butter will foam and bubble, and that is normal. Keep stirring and watching. After a few minutes, you will see brown specks forming at the bottom of the pan, and the butter will smell nutty and toasty. This happens fast, so do not walk away. Once the butter is a deep amber color and smells like toasted nuts, remove it from the heat immediately. Pour it into a heatproof bowl and let it cool for 10 to 15 minutes. It should be warm but not hot when you add it to the sugars.
- Mix the sugars and butter: In a large mixing bowl, combine the cooled brown butter with the brown sugar and granulated sugar. Beat with a hand mixer or stand mixer on medium speed for 2 to 3 minutes until the mixture looks like wet sand and is slightly lighter in color. This step is important because it helps dissolve the sugar and creates a smoother texture.
- Add the eggs and vanilla: Add the eggs one at a time, beating well after each addition. Then add the vanilla extract and beat until everything is combined. The mixture should look thick and glossy. Scrape down the sides and bottom of the bowl with a spatula.
- Combine the dry ingredients: In a separate bowl, whisk together the flour, baking soda, and salt. This ensures the baking soda and salt are evenly distributed throughout the flour.
- Add the dry ingredients to the wet ingredients: Gradually add the flour mixture to the butter mixture, mixing on low speed. Stop as soon as the flour disappears. Overmixing at this stage will make the cookies tough. You want to see a few streaks of flour remaining.
- Fold in the chocolate chips: Use a rubber spatula to fold in the chocolate chips. Fold gently until the chips are evenly distributed. The dough will be thick and slightly sticky, which is exactly what you want.
- Portion the dough: Using a cookie scoop or two spoons, drop rounded tablespoons of dough onto a parchment-lined baking sheet, spacing them about 2 inches apart. I usually get about 24 cookies from this recipe.
- Bake: Preheat your oven to 350°F (175°C). Bake the cookies for 10 to 12 minutes, rotating the baking sheet halfway through. The edges should be golden brown and the centers should look slightly underdone and puffy. Do not overbake them. They will continue to set on the baking sheet as they cool.
- Add sea salt: As soon as the cookies come out of the oven, sprinkle a pinch of flaky sea salt on top of each one. This is the moment where the magic happens. The salt melts slightly into the warm cookie and creates that perfect salty-sweet contrast.
- Cool: Let the cookies cool on the baking sheet for 5 minutes, then transfer them to a cooling rack. If you can wait that long, they are even better after they have cooled completely because the flavors settle and the texture firms up.
One thing I learned the hard way: do not skip the cooling step on the baking sheet. If you try to move them right away, they will fall apart because they are still soft. Give them those five minutes, and they will hold together beautifully.
Cooking Tips and Techniques
These cookies are forgiving, but a few tips will help you nail them every time.
Watch the butter like a hawk. I cannot stress this enough. Brown butter goes from perfect to burnt in seconds. When you see the milk solids turn amber and the butter smells nutty, pull it off the heat immediately. I once got distracted by a phone call and ended up with black butter that smelled like burnt popcorn. Not good.
Cool the butter before mixing. If you add hot brown butter to the sugars, it will melt the sugar instead of creaming with it, and your cookies will spread into flat puddles. Let it cool until it is warm but not hot, about 10 to 15 minutes. You should be able to touch the bowl comfortably.
Do not overmix the dough. Once you add the flour, mix just until it disappears. Overmixing develops gluten, which makes cookies tough and cakey. You want them tender and chewy.
Use a cookie scoop for even baking. Uniform cookies bake evenly. If some are bigger than others, the small ones will burn before the big ones are done. A scoop makes life easier and gives you consistent results.
Rotate your baking sheet halfway through. Ovens have hot spots, and rotating ensures even browning. I have a convection oven, and I still rotate because the back corner always runs hotter.
Underbake slightly. Pull the cookies out when the edges are golden and the centers look slightly underdone and puffy. They will continue to cook on the hot baking sheet. If you wait until the centers look fully baked, they will be overdone and dry.
I ruined an entire batch once by overbaking because I thought they looked too soft. They came out like hockey pucks. My dog loved them, but I was not happy. Learn from my mistake.
Variations and Adaptations
This recipe is a great base, and you can change it up in so many ways.
Gluten-Free Version: Substitute the all-purpose flour with a 1-to-1 gluten-free baking flour blend that contains xanthan gum. I have used King Arthur Measure for Measure with great results. The texture is slightly more delicate, but the flavor is still amazing.
Dark Chocolate Lovers: Swap the semi-sweet chips for dark chocolate chunks or a chopped dark chocolate bar with 70% cocoa content. The bitterness of the dark chocolate pairs beautifully with the nutty brown butter and salty finish.
Add Nuts: Fold in 1 cup of toasted pecans or walnuts along with the chocolate chips. Toast them in a dry skillet for a few minutes until fragrant, then chop them roughly. The crunch adds a lovely texture.
Double Chocolate: Replace 1/4 cup of the flour with 1/4 cup of unsweetened cocoa powder. Use white chocolate chips instead of semi-sweet for a cookies-and-cream vibe, or keep the semi-sweet for a double-chocolate experience.
Spiced Brown Butter Cookies: Add 1 teaspoon of cinnamon and 1/4 teaspoon of nutmeg to the flour mixture. This version tastes like fall in a cookie, and it is perfect alongside a cup of coffee or a cozy spiced pumpkin chai latte.
I tried the spiced version last Thanksgiving, and it was a hit. The cinnamon and nutmeg complement the nuttiness of the brown butter in a way I did not expect. It is now my go-to for holiday baking.
Serving and Storage Suggestions
These cookies are best served warm, straight from the oven, with a glass of cold milk or a hot cup of coffee. The combination of warm, melty chocolate and crunchy sea salt is unbeatable.
If you are serving them at a party or gathering, arrange them on a pretty platter and sprinkle a little extra flaky salt on top right before serving. It makes them look fancy without any extra work.
Storage: Store the cookies in an airtight container at room temperature for up to 5 days. Place a slice of bread in the container to keep them soft. The bread absorbs excess air and releases moisture, which keeps the cookies from drying out. Replace the bread every day or two.
Freezing: You can freeze the baked cookies for up to 3 months. Place them in a single layer in a freezer-safe bag or container. Thaw at room temperature for about 30 minutes, or pop them in a 300°F oven for 5 minutes to warm them up. You can also freeze the unbaked dough. Scoop the dough into balls, place them on a baking sheet, and freeze until solid. Transfer the frozen dough balls to a freezer bag. Bake directly from frozen, adding 2 to 3 minutes to the baking time.
The flavors actually develop and deepen after a day or two. The brown butter taste becomes more pronounced, and the cookies get slightly chewier. They are still delicious on day one, but day two is where they really shine.
Nutritional Information and Benefits
Here is the estimated nutritional information for one cookie, based on a batch of 24.
| Nutrient | Amount Per Cookie |
|---|---|
| Calories | 210 |
| Total Fat | 12g |
| Saturated Fat | 7g |
| Cholesterol | 35mg |
| Sodium | 150mg |
| Total Carbohydrates | 26g |
| Dietary Fiber | 1g |
| Sugars | 17g |
| Protein | 3g |
These cookies are obviously a treat, but they do have some redeeming qualities. The brown butter adds a small amount of vitamin A and healthy fats. Dark chocolate contains antioxidants and magnesium, which can support heart health and mood. The sea salt provides trace minerals like potassium and magnesium.
If you are looking for a slightly healthier option, you can reduce the sugar by 1/4 cup without affecting the texture too much. The cookies will be less sweet, but the brown butter and chocolate will still shine.
I do not pretend these are health food, but they are made from real ingredients with no preservatives or artificial flavors. Sometimes that is enough.
Conclusion
These Perfect Brown Butter Chocolate Chip Cookies with Sea Salt are the kind of recipe that becomes a staple in your kitchen. They are simple enough for a Tuesday afternoon but impressive enough for a holiday cookie swap. The brown butter adds a depth of flavor that makes people ask what your secret is, and the sea salt on top keeps them coming back for one more.
I love that this recipe is forgiving. You can tweak the chocolate, add nuts, or spice it up, and it still works. It is a base for creativity, not a rigid set of rules. That is the kind of recipe I want in my back pocket.
If you try these cookies, let me know how they turn out. Leave a comment below or tag me in your photos. I love seeing your baking adventures, and I always respond. And if you are in the mood for more cozy treats, check out these brown butter pumpkin chocolate chip cookies for a seasonal twist that is just as good.
Happy baking, friends. Go make something delicious.
Frequently Asked Questions
Can I use salted butter instead of unsalted?
You can, but reduce the added salt in the dough to 1/4 teaspoon. The final cookies will be slightly saltier, which some people love. Just keep an eye on the salt level so it does not overpower the chocolate.
Why did my cookies spread too much?
Several things can cause excessive spreading. The butter was too warm when you mixed it, the dough was not chilled, or you used too much sugar. Make sure your brown butter is cooled to room temperature before mixing. If your kitchen is warm, chill the dough for 30 minutes before baking.
Can I make the dough ahead of time?
Absolutely. You can refrigerate the dough for up to 3 days. Let it sit at room temperature for 10 minutes before scooping and baking. The flavor actually improves after a day in the fridge because the brown butter has time to meld with the other ingredients.
What is the best way to reheat leftover cookies?
Pop them in a 300°F oven for 3 to 5 minutes, or microwave them for 10 to 15 seconds. The microwave will make them soft and gooey, while the oven will crisp up the edges again. Both methods work great.
Can I use margarine or plant-based butter?
You can, but the results will be different. Plant-based butters have different fat and water content, which affects browning and texture. If you use a vegan butter, look for one with a high fat content and low water content. The cookies may not brown as deeply, but they will still be tasty.
Pin This Recipe!

Perfect Brown Butter Chocolate Chip Cookies with Sea Salt

These brown butter chocolate chip cookies are crispy around the edges, soft and chewy in the center, and topped with flaky sea salt for the perfect salty-sweet balance. No chilling required, and they come together in under 30 minutes.
- Prep Time: 15 minutes
- Cook Time: 12 minutes
- Total Time: 27 minutes
- Yield: 24 cookies 1x
- Category: Dessert
- Cuisine: American
Ingredients
- 1 cup (226 grams) unsalted butter
- 1 cup (200 grams) packed light brown sugar
- 1/2 cup (100 grams) granulated sugar
- 2 large eggs, room temperature
- 2 teaspoons vanilla extract
- 2 1/4 cups (281 grams) all-purpose flour
- 1 teaspoon baking soda
- 1/2 teaspoon salt
- 2 cups (340 grams) semi-sweet chocolate chips or chopped chocolate
- Flaky sea salt for topping
Instructions
- Brown the butter: Place the butter in a light-colored saucepan over medium heat. Stir occasionally as it melts. The butter will foam and bubble. Keep stirring until brown specks form and the butter smells nutty and toasty. Remove from heat immediately and pour into a heatproof bowl. Let cool for 10 to 15 minutes until warm but not hot.
- Mix the sugars and butter: In a large mixing bowl, combine the cooled brown butter with brown sugar and granulated sugar. Beat with a hand mixer or stand mixer on medium speed for 2 to 3 minutes until the mixture looks like wet sand and is slightly lighter in color.
- Add the eggs and vanilla: Add the eggs one at a time, beating well after each addition. Add the vanilla extract and beat until combined. The mixture should be thick and glossy. Scrape down the sides and bottom of the bowl.
- Combine the dry ingredients: In a separate bowl, whisk together the flour, baking soda, and salt.
- Add the dry ingredients to the wet ingredients: Gradually add the flour mixture to the butter mixture, mixing on low speed. Stop as soon as the flour disappears. Do not overmix.
- Fold in the chocolate chips: Use a rubber spatula to fold in the chocolate chips until evenly distributed. The dough will be thick and slightly sticky.
- Portion the dough: Using a cookie scoop or two spoons, drop rounded tablespoons of dough onto a parchment-lined baking sheet, spacing them about 2 inches apart. You should get about 24 cookies.
- Bake: Preheat oven to 350°F (175°C). Bake for 10 to 12 minutes, rotating the baking sheet halfway through. The edges should be golden brown and the centers should look slightly underdone and puffy.
- Add sea salt: As soon as the cookies come out of the oven, sprinkle a pinch of flaky sea salt on top of each one.
- Cool: Let the cookies cool on the baking sheet for 5 minutes, then transfer to a cooling rack.
Notes
Watch the butter carefully as it browns; it goes from perfect to burnt in seconds. Cool the butter before mixing to prevent cookies from spreading too much. Do not overmix the dough. Underbake slightly for chewy cookies. Store in an airtight container at room temperature for up to 5 days. Freeze baked cookies for up to 3 months or unbaked dough balls for up to 3 months.
Nutrition
- Serving Size: 1 cookie
- Calories: 210
- Sugar: 17
- Sodium: 150
- Fat: 12
- Saturated Fat: 7
- Carbohydrates: 26
- Fiber: 1
- Protein: 3
Keywords: brown butter chocolate chip cookies, sea salt cookies, easy cookie recipe, no chill cookies, chewy chocolate chip cookies


