My husband took one bite of this cake last weekend, set his fork down, and just stared at the plate for a solid five seconds. I thought something was wrong — maybe the glaze was too runny or I’d overdone the brown butter again. But then he looked up and said, “This is the best thing you’ve made all year.” And honestly? I kind of agreed with him.
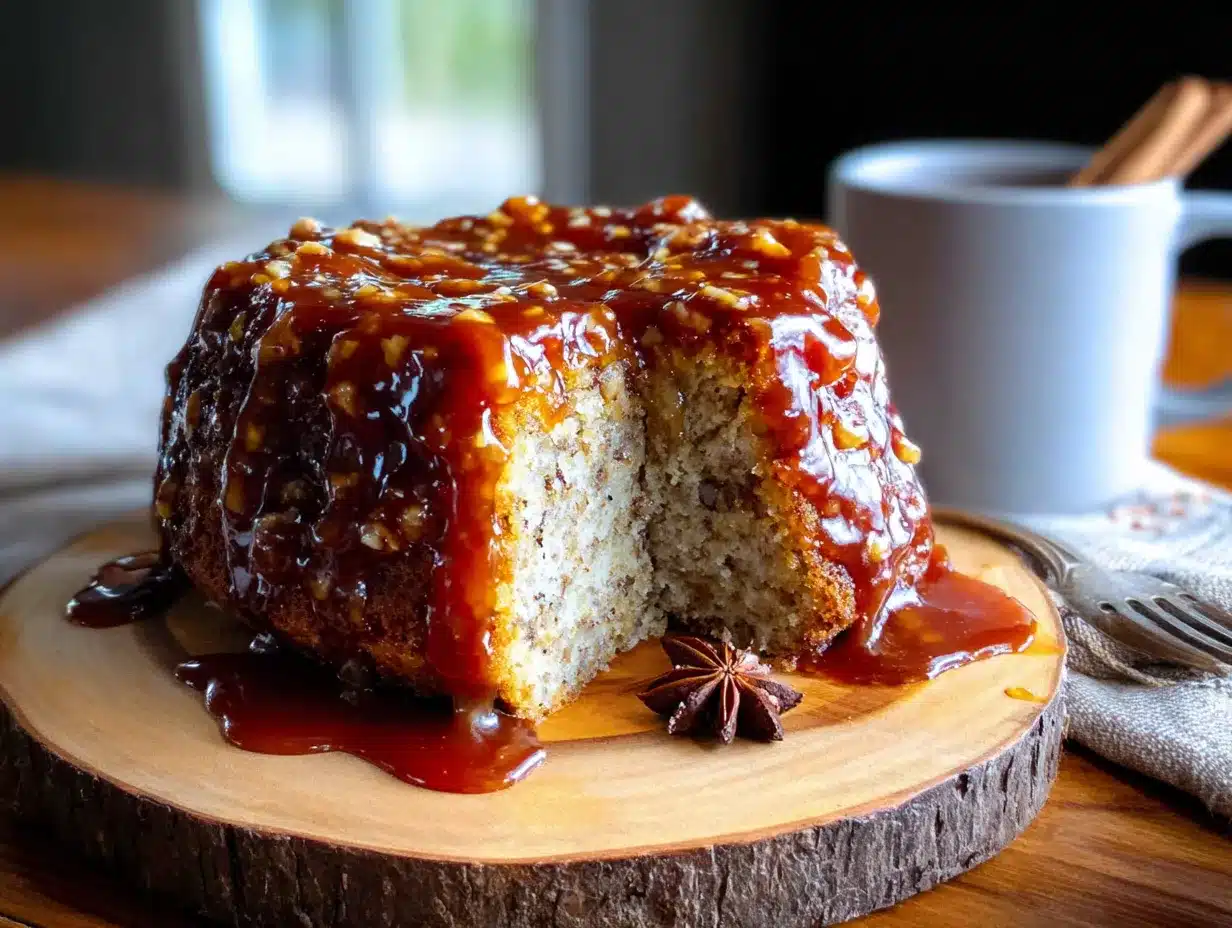
That’s the thing about this brown butter apple cider cake. It doesn’t scream for attention. It doesn’t have fancy layers or complicated decorations. It just shows up, fills your kitchen with the kind of smell that makes everyone wander in asking what’s for dessert, and delivers slice after slice of pure, cozy perfection. The brown butter gives it this nutty, almost toasty depth, while the apple cider keeps every bite incredibly moist and tender. And that caramel glaze on top? Let’s just say it’s the kind of situation where you’ll be licking the spoon before it even hits the cake.
I developed this recipe after a particularly chaotic apple-picking trip where we came home with way more cider than we could drink. I wanted something that felt like a warm hug on a chilly afternoon — something that would make my kitchen smell like autumn itself. After a few trials (and one very sad, dry cake that went straight to the compost), this version stuck. It’s the one I keep coming back to, and the one my family now requests for every fall gathering.
So if you’re looking for a dessert that feels special without being fussy, you’re in the right place. This cake delivers every single time.
Why You’ll Love This Recipe
I’ve tested this cake more times than I care to admit, and each batch taught me something new. Here’s why this version is the one worth making:
- Quick & Easy: From start to finish, this cake comes together in about an hour. No stand mixer required, no complicated techniques — just a bowl, a whisk, and a little patience while it bakes.
- Simple Ingredients: You probably already have most of these in your pantry. The only “special” item is apple cider, and that’s easy to find this time of year. No fancy extracts or hard-to-find flours here.
- Perfect for Fall Gatherings: This cake is made for Thanksgiving, Friendsgiving, cozy weekend brunches, or just a Tuesday night when you need something warm and sweet. It travels well, too, which makes it a great potluck option.
- Crowd-Pleaser: I’ve served this to kids, adults, and even my notoriously picky mother-in-law. Every single person went back for seconds. The brown butter flavor is familiar enough to feel comforting but unique enough to feel special.
- Unbelievably Delicious: The texture is what gets me every time. It’s tender and moist with a slight crumb, and the caramel glaze soaks in just enough to make each bite melt on your tongue. It’s the kind of cake that makes you close your eyes after the first bite.
What sets this recipe apart is the brown butter technique. It’s not just melted butter — it’s butter that’s been cooked until the milk solids turn golden and nutty, unlocking a depth of flavor that regular butter simply can’t match. Combined with the natural sweetness of apple cider, you get a cake that tastes like it took hours of effort when really, it’s surprisingly straightforward.
This isn’t just another apple cake. It’s the one you’ll come back to year after year.
What Ingredients You Will Need
This recipe uses simple, wholesome ingredients to deliver bold flavor and satisfying texture without the fuss. Most of these are pantry staples, which makes this cake perfect for spontaneous baking sessions.
For the Cake
- 1 cup (2 sticks) unsalted butter — You’ll be browning this, so don’t substitute salted butter here. The control over salt levels matters.
- 1 ½ cups all-purpose flour — Spoon and level it for the most accurate measurement. Too much flour will make the cake dense.
- 1 teaspoon baking soda — This helps the cake rise and stay tender.
- ½ teaspoon baking powder — Adds a little extra lift.
- ½ teaspoon salt — Balances the sweetness and enhances the apple cider flavor.
- 1 teaspoon ground cinnamon — I use Ceylon cinnamon for its milder, sweeter profile, but regular works fine too.
- ½ teaspoon ground nutmeg — Freshly grated is best if you have it. The difference is subtle but real.
- ¼ teaspoon ground cloves — Just a pinch for warmth.
- 1 cup granulated sugar — Adds sweetness and helps create that tender crumb.
- ½ cup packed light brown sugar — Adds moisture and a hint of molasses flavor.
- 2 large eggs — Room temperature, so they emulsify better into the batter.
- 1 teaspoon vanilla extract — Pure, not imitation, for the best flavor.
- 1 cup apple cider — Not apple juice! Cider has more concentrated flavor and natural acidity. Look for fresh, unfiltered cider if possible.
For the Caramel Glaze
- ¼ cup unsalted butter — Cut into pieces so it melts evenly.
- ½ cup packed light brown sugar — This is the base of the caramel.
- ¼ cup heavy cream — Gives the glaze its silky texture. Half-and-half works in a pinch but won’t be as rich.
- ¼ teaspoon salt — Flaky sea salt is lovely here for a salted caramel vibe.
- ½ teaspoon vanilla extract — Added at the end for maximum flavor.
- ½ cup powdered sugar — Sifted to avoid lumps.
Equipment Needed
You don’t need a fancy kitchen to make this cake. Here’s what you’ll want on hand:
- 9-inch round cake pan — I prefer a light-colored metal pan for even baking. Dark pans can cause the edges to brown too quickly.
- Parchment paper — Cut a circle for the bottom of the pan and grease the sides. This guarantees the cake releases cleanly every time.
- Medium saucepan — For browning the butter. A light-colored pan helps you see the color change.
- Large mixing bowl — Any bowl will do, but a wide one makes whisking easier.
- Whisk — For combining dry and wet ingredients.
- Rubber spatula — For folding and scraping every last bit of batter.
- Cooling rack — Essential for even cooling. A wire rack lets air circulate so the bottom doesn’t get soggy.
- Small saucepan — For the caramel glaze.
- Measuring cups and spoons — Accurate measurements matter in baking.
If you don’t have a 9-inch round pan, an 8-inch square pan works too — just adjust the baking time by about 5 minutes. I’ve also used a 10-inch cast iron skillet with great results, though the cake will be slightly thinner.
Preparation Method
Step 1: Brown the Butter
Place the 1 cup of unsalted butter in a medium saucepan over medium heat. Let it melt completely, then continue cooking, swirling the pan occasionally. You’ll hear it sizzle and pop — that’s the water evaporating. After about 5-7 minutes, the butter will turn a deep golden color and smell nutty and toasty. Watch closely! It can go from perfect to burnt in seconds. Once you see brown specks forming at the bottom and the butter smells like toasted hazelnuts, remove it from the heat immediately.
Pour the browned butter into a heatproof measuring cup or bowl (including all those brown bits — that’s where the flavor lives). Let it cool for about 10-15 minutes until it’s warm but not hot.
Step 2: Preheat and Prep
Preheat your oven to 350°F (175°C). Grease a 9-inch round cake pan and line the bottom with a parchment paper circle. Grease the parchment too, just to be safe.
Step 3: Mix the Dry Ingredients
In a large bowl, whisk together the flour, baking soda, baking powder, salt, cinnamon, nutmeg, and cloves. Make sure everything is evenly distributed — nobody wants a pocket of baking soda in their slice.
Step 4: Combine the Wet Ingredients
In a separate bowl (or the same saucepan you used for the butter, to save dishes), whisk together the browned butter, granulated sugar, and brown sugar until well combined. It will look a bit grainy — that’s normal. Add the eggs one at a time, whisking well after each addition. Stir in the vanilla extract.
Now add the apple cider and whisk until smooth. The mixture will look slightly separated at first, but keep whisking and it’ll come together beautifully.
Step 5: Combine Wet and Dry
Pour the wet ingredients into the dry ingredients. Use a rubber spatula to fold everything together gently. Stop as soon as you no longer see streaks of flour. Overmixing will make the cake tough, so be gentle here. The batter will be fairly thin — that’s exactly what you want.
Step 6: Bake
Pour the batter into the prepared pan and smooth the top. Bake for 35-40 minutes, or until a toothpick inserted into the center comes out clean or with just a few moist crumbs. The top should be golden brown and spring back when lightly touched.
Let the cake cool in the pan for 10 minutes, then run a knife around the edges and invert it onto a cooling rack. Remove the parchment paper and let it cool completely — about 1 hour. Don’t rush this step. A warm cake will turn the glaze into a puddle.
Step 7: Make the Caramel Glaze
While the cake cools, make the glaze. In a small saucepan over medium heat, melt the ¼ cup butter. Add the brown sugar and heavy cream, then stir constantly until the sugar dissolves and the mixture comes to a gentle simmer. Let it cook for 2-3 minutes, stirring occasionally, until it thickens slightly.
Remove from heat and stir in the salt and vanilla. Let it cool for about 5 minutes, then whisk in the powdered sugar until smooth. If the glaze is too thick, add a teaspoon of milk or cream. If it’s too thin, let it cool a bit longer — it will thicken as it cools.
Step 8: Glaze and Serve
Place the completely cooled cake on a serving plate. Pour the caramel glaze over the top, letting it drip down the sides naturally. Use a spatula to spread it if needed, but I prefer the rustic look of letting it flow on its own. Let the glaze set for about 15 minutes before slicing.
Cooking Tips & Techniques
I’ve made this cake more times than I can count, and I’ve learned a few things along the way. Here are my best tips:
- Don’t walk away from the browning butter. I learned this the hard way. It takes about 5-7 minutes, but the last 30 seconds are critical. Once you see those brown specks form, remove it immediately. Burnt butter tastes bitter and will ruin the cake.
- Use room temperature eggs. Cold eggs can seize the brown butter and make the batter lumpy. If you forgot to take them out ahead of time, place them in a bowl of warm water for 5 minutes.
- Measure your flour correctly. Spoon it into the measuring cup and level it off with a knife. Scooping directly from the bag can pack in up to 25% more flour, which makes the cake dry.
- Let the cake cool completely. I know it’s tempting to pour that warm glaze over a warm cake, but it will slide right off and pool at the bottom. Patience pays off here.
- Make the glaze while the cake cools. This saves time and ensures the glaze is ready when you need it. Plus, the glaze thickens as it sits, so you can control the consistency.
- Toast the spices if you have time. Gently toast the cinnamon, nutmeg, and cloves in a dry pan for 30 seconds before adding them to the flour. It deepens the flavor beautifully.
Variations & Adaptations
This recipe is wonderfully flexible. Here are some ways to make it your own:
- Gluten-Free: Substitute the all-purpose flour with a 1:1 gluten-free baking blend. I’ve used Bob’s Red Mill with great results. Add ¼ teaspoon of xanthan gum if your blend doesn’t already include it.
- Dairy-Free: Use vegan butter for browning (Miyoko’s works well) and substitute the heavy cream with full-fat coconut cream. The texture will be slightly different but still delicious.
- Add-ins: Fold in ½ cup of chopped pecans or walnuts for crunch. Diced fresh apples (about 1 cup) also work beautifully — just toss them in a little flour first to prevent sinking.
- Spice it Up: Add a pinch of cardamom or ginger for a more complex spice profile. I sometimes add ½ teaspoon of apple pie spice blend for extra warmth.
- Bundt Cake Version: Double the recipe and bake in a greased bundt pan for 45-50 minutes. The glaze can be thinned slightly and poured over the top for a beautiful presentation.
- Cupcakes: This batter makes about 18 cupcakes. Bake at 350°F for 18-20 minutes. Top with the caramel glaze or a cream cheese frosting for a different twist.
Serving & Storage Suggestions
This cake is wonderful at room temperature, but I actually prefer it slightly warm. Pop a slice in the microwave for about 10 seconds — it softens the glaze and makes the cake taste freshly baked.
For serving, I love pairing it with a dollop of lightly sweetened whipped cream or a scoop of vanilla bean ice cream. The cold creaminess against the warm, spiced cake is pure magic. A drizzle of extra caramel or a sprinkle of flaky sea salt takes it over the top.
This cake also pairs beautifully with warm drinks. A cup of cozy spiced pumpkin chai latte with oat milk or a homemade pumpkin spice latte makes for the perfect fall afternoon treat.
For storage, keep the cake in an airtight container at room temperature for up to 3 days. The glaze will stay soft and luscious. If your kitchen is warm, you can refrigerate it, but let it come to room temperature before serving — the texture is much better.
This cake also freezes beautifully. Wrap the unglazed cake tightly in plastic wrap, then foil, and freeze for up to 3 months. Thaw overnight in the refrigerator, then make the glaze fresh and pour it over the cake before serving. The glaze doesn’t freeze well, so always make it fresh.
The flavors actually deepen after a day or two. The apple cider and spices meld together, and the brown butter flavor becomes even more pronounced. If you can resist eating it all on day one, day two is even better.
Nutritional Information & Benefits
Here’s the estimated nutritional breakdown per slice (based on 10 servings):
- Calories: 410
- Fat: 22g
- Carbohydrates: 52g
- Protein: 4g
- Fiber: 1g
- Sugar: 38g
- Sodium: 280mg
While this is definitely a treat (and I’m not here to pretend otherwise), there are some redeeming qualities. Apple cider contains antioxidants called polyphenols, which help fight inflammation. Cinnamon has been shown to help regulate blood sugar levels, and nutmeg offers small amounts of manganese and copper. The brown butter adds a touch of vitamin A and healthy fats.
For those with dietary restrictions, this recipe can be adapted to be gluten-free or dairy-free as noted above. It’s not suitable for vegan diets in its current form, but I’m working on a plant-based version.
My personal philosophy? Dessert doesn’t need to be “healthy” to be worthwhile. This cake is made with real, recognizable ingredients, and that’s something I can feel good about serving to my family. It’s a celebration of fall flavors, and sometimes that’s exactly what we need.
Conclusion
This brown butter apple cider cake with caramel glaze has become my go-to fall dessert for a reason. It’s simple enough for a weeknight baking session but impressive enough to serve at Thanksgiving dinner. The brown butter adds a nutty depth that elevates the apple cider, and that caramel glaze is just the cherry on top — or, well, the glaze on top.
I love how forgiving this recipe is. It doesn’t demand perfection. It just asks for good ingredients, a little patience, and a willingness to enjoy the process. The smell alone is worth the effort — your whole house will smell like autumn, and everyone who walks through the door will ask what you’re baking.
If you make this cake, I’d love to hear about it. Leave a comment below and tell me how it turned out. Did you add any variations? Did your family love it as much as mine did? Share your photos on Pinterest and tag me — I love seeing your creations. And if you’re looking for more cozy fall recipes, don’t miss my cozy small batch pumpkin muffins with maple glaze or my brown butter pumpkin chocolate chip cookies for more seasonal sweetness.
Happy baking, friends. May your kitchen smell like butter and cider, and may every slice be just a little bit better than the last.
Frequently Asked Questions
Can I use apple juice instead of apple cider?
You can, but the flavor won’t be as robust. Apple cider is unfiltered and has a more concentrated, tangy apple flavor. Apple juice is sweeter and thinner, so the cake may be slightly less flavorful. If you only have apple juice, consider reducing it on the stove for 10 minutes to concentrate the flavor before using.
Can I make this cake ahead of time?
Absolutely! This cake actually tastes better the next day. Bake the cake, let it cool completely, and store it tightly wrapped at room temperature. Make the glaze fresh on the day you plan to serve it. The cake itself stays moist for 2-3 days.
Why did my brown butter burn?
Brown butter burns easily because it goes from perfect to burnt in seconds. Use a light-colored pan so you can see the color change, keep the heat at medium (not high), and watch closely during the last minute. Once you see brown specks and smell that nutty aroma, remove it immediately.
Can I freeze this cake?
Yes! Freeze the unglazed cake for up to 3 months. Wrap it tightly in plastic wrap, then a layer of foil. Thaw overnight in the refrigerator, bring to room temperature, and add the fresh glaze before serving. The glaze doesn’t freeze well, so always make it fresh.
How do I know when the cake is done baking?
Insert a toothpick into the center of the cake. If it comes out clean or with just a few moist crumbs, it’s done. The top should be golden brown and spring back when lightly touched. If the toothpick comes out wet with batter, bake for another 3-5 minutes and check again.
Pin This Recipe!
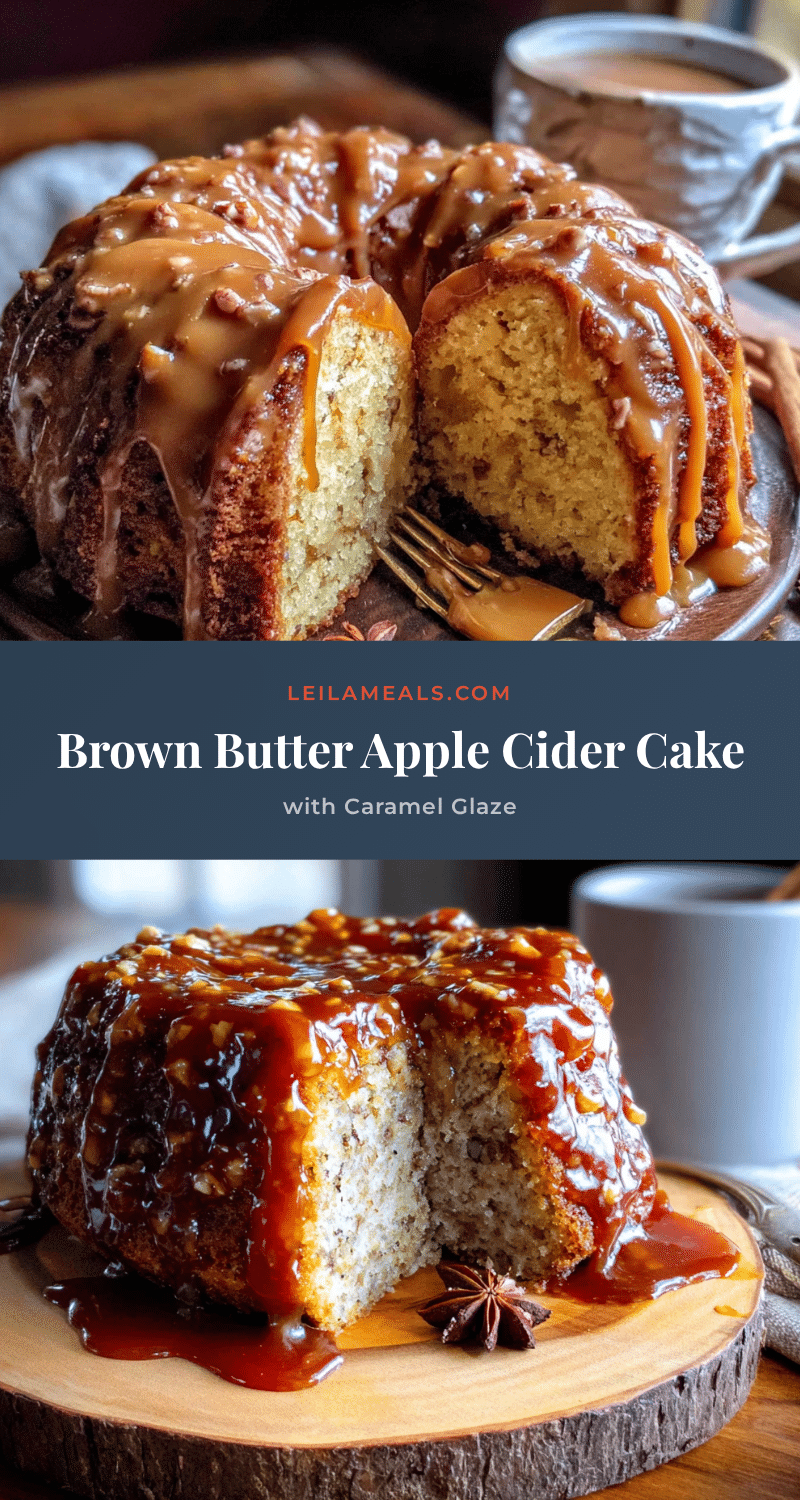
Easy Brown Butter Apple Cider Cake with Caramel Glaze
This brown butter apple cider cake is tender, moist, and packed with nutty, spiced flavor. Topped with a silky caramel glaze, it’s the perfect cozy fall dessert that comes together in about an hour.
- Prep Time: 15 minutes
- Cook Time: 35-40 minutes
- Total Time: 1 hour 10 minutes
- Yield: 10 servings 1x
- Category: Dessert
- Cuisine: American
Ingredients
- 1 cup (2 sticks) unsalted butter
- 1 ½ cups all-purpose flour
- 1 teaspoon baking soda
- ½ teaspoon baking powder
- ½ teaspoon salt
- 1 teaspoon ground cinnamon
- ½ teaspoon ground nutmeg
- ¼ teaspoon ground cloves
- 1 cup granulated sugar
- ½ cup packed light brown sugar
- 2 large eggs, room temperature
- 1 teaspoon vanilla extract
- 1 cup apple cider
- ¼ cup unsalted butter
- ½ cup packed light brown sugar
- ¼ cup heavy cream
- ¼ teaspoon salt
- ½ teaspoon vanilla extract
- ½ cup powdered sugar, sifted
Instructions
- Brown the butter: Place 1 cup unsalted butter in a medium saucepan over medium heat. Cook, swirling occasionally, until it turns deep golden and smells nutty, about 5-7 minutes. Remove from heat immediately and pour into a heatproof bowl. Let cool for 10-15 minutes.
- Preheat oven to 350°F (175°C). Grease a 9-inch round cake pan and line the bottom with parchment paper.
- In a large bowl, whisk together flour, baking soda, baking powder, salt, cinnamon, nutmeg, and cloves.
- In a separate bowl, whisk together browned butter, granulated sugar, and brown sugar until combined. Add eggs one at a time, whisking well after each. Stir in vanilla extract and apple cider until smooth.
- Pour wet ingredients into dry ingredients. Fold gently with a rubber spatula until just combined. Do not overmix.
- Pour batter into prepared pan and smooth the top. Bake for 35-40 minutes, or until a toothpick inserted in the center comes out clean. Let cool in pan for 10 minutes, then invert onto a cooling rack. Remove parchment and cool completely (about 1 hour).
- Make the caramel glaze: In a small saucepan over medium heat, melt ¼ cup butter. Add brown sugar and heavy cream, stirring constantly until sugar dissolves and mixture simmers. Cook for 2-3 minutes until slightly thickened. Remove from heat, stir in salt and vanilla. Let cool 5 minutes, then whisk in powdered sugar until smooth.
- Place cooled cake on a serving plate. Pour caramel glaze over the top, letting it drip down the sides. Let set for 15 minutes before slicing.
Notes
Don’t walk away from the browning butter; it can burn quickly. Use room temperature eggs for best results. Let the cake cool completely before glazing to prevent the glaze from sliding off. The cake tastes even better the next day. Freeze unglazed cake for up to 3 months.
Nutrition
- Serving Size: 1 slice
- Calories: 410
- Sugar: 38
- Sodium: 280
- Fat: 22
- Saturated Fat: 13
- Carbohydrates: 52
- Fiber: 1
- Protein: 4
Keywords: brown butter, apple cider, cake, caramel glaze, fall dessert, easy cake recipe


