My neighbor’s kid asked for this s’mores icebox cake four days in a row without being prompted. Not because I offered it, not because his mom suggested it. He just kept showing up at the door asking, “Can I have some more of that chocolate cracker thing?” That’s when I knew I had accidentally made something special.
I was just trying to use up a box of graham crackers that had been sitting in my pantry since last summer’s camping trip. You know how it goes—you buy all the s’mores supplies, use half, and the rest sits there staring at you every time you open the cabinet. So I threw together this no-bake version on a whim, and honestly? It turned out better than any campfire s’more I’ve ever made.
This Easy No-Bake S’mores Icebox Cake is the kind of dessert that makes people close their eyes after the first bite. It’s got that familiar campfire flavor—toasted marshmallow, rich chocolate, crunchy graham—but without the smoke smell, the burned fingers, or the unevenly melted marshmallows. It’s all the nostalgia with none of the hassle. And let’s face it, on a hot summer day when turning on the oven feels like a personal attack, a dessert that sets itself in the fridge is basically a miracle.
Why You’ll Love This Recipe
- Quick & Easy: Comes together in under 20 minutes of active prep time. No oven, no stove, no sweat.
- Simple Ingredients: You probably already have graham crackers, chocolate, and marshmallows in your pantry. If not, they’re at every grocery store.
- Perfect for Summer: Great for barbecues, pool parties, picnics, or lazy afternoons when you want dessert without heating up the kitchen.
- Crowd-Pleaser: Kids go crazy for it, adults sneak seconds when they think no one’s looking, and it’s always the first thing to disappear from the dessert table.
- Unbelievably Delicious: The layers soften overnight into this incredible cake-like texture that’s somehow both creamy and crunchy at the same time.
This isn’t just another no-bake dessert. The secret is in the layering technique and letting it rest long enough for the graham crackers to absorb the cream and soften into a cake-like texture. It’s comfort food reimagined—faster, cooler, and with the same soul-soothing satisfaction as the real thing.
What Ingredients You Will Need
This recipe uses simple, honest ingredients to create something that tastes way more complicated than it actually is. Here’s what you’ll need:
- Graham crackers – 1 full box (about 14-16 whole sheets). You’ll need them for the layers. I prefer Honey Maid for their sturdy texture, but any brand works.
- Heavy whipping cream – 2 cups (480 ml). This is what creates that luscious, creamy filling. Don’t substitute with milk or half-and-half—you need the fat content for structure.
- Powdered sugar – 1/2 cup (60 g). Sweetens the cream without making it grainy.
- Vanilla extract – 1 teaspoon. Pure vanilla adds warmth and depth.
- Marshmallow fluff – 1 jar (7 oz or 200 g). This is the shortcut that makes the filling taste like toasted marshmallows without actually toasting anything. I like Jet-Puffed.
- Milk chocolate bars – 4 regular-sized bars (about 1.5 oz each). You’ll chop them into chunks for layering. Hershey’s is classic, but use whatever you like.
- Semi-sweet chocolate chips – 1 cup (175 g). For the ganache topping. Balances the sweetness of the marshmallow.
- Butter – 2 tablespoons (28 g). Adds richness to the ganache and helps it set beautifully.
- Mini marshmallows – 1 cup (about 50 g). For garnish on top. Optional but highly recommended for that classic s’mores look.
Ingredient Tips: For the best texture, make sure your heavy cream is very cold straight from the fridge. If you’re dairy-free, you can use a full-fat coconut cream (chilled overnight) and dairy-free chocolate—just know the texture will be slightly different but still delicious. I’ve tested this with gluten-free graham crackers too, and it works perfectly.
Equipment Needed
You don’t need any fancy equipment for this one. Here’s what you’ll need:
- 9×5 inch loaf pan – This is the perfect size for building the layers. A 9-inch square baking dish works too, but you’ll get shorter layers.
- Electric hand mixer or stand mixer – For whipping the cream. You can do it by hand with a whisk, but your arm will get a workout (I’ve done it—it’s possible, just tiring).
- Large mixing bowl – For the whipped cream mixture.
- Medium bowl – For making the ganache.
- Spatula – For spreading layers evenly.
- Plastic wrap – To cover the pan while it sets in the fridge.
- Sharp knife – For chopping the chocolate bars into chunks.
If you don’t have a loaf pan, you can use a 8×8 inch square dish or even a round cake pan. Just adjust the layering accordingly. I’ve made this in a disposable aluminum pan for picnics before—works like a charm and zero cleanup.
Preparation Method
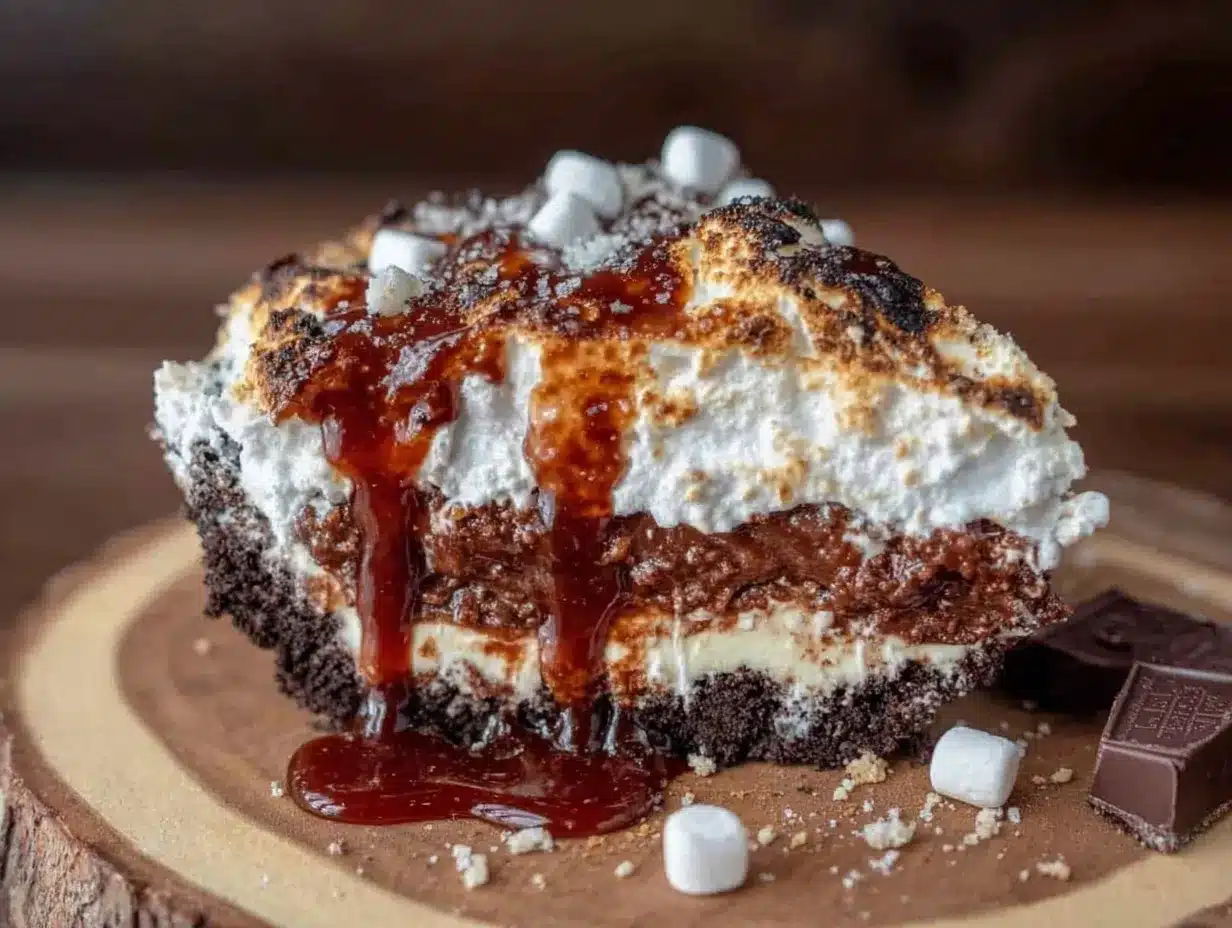
- Make the marshmallow cream filling. In a large mixing bowl, pour in 2 cups of cold heavy whipping cream. Beat on medium-high speed until soft peaks form—about 3-4 minutes. Add 1/2 cup powdered sugar and 1 teaspoon vanilla extract, then continue beating until stiff peaks form. Gently fold in the entire jar of marshmallow fluff using a spatula. Don’t overmix—you want it light and airy, not deflated. The mixture should look like clouds.
- Prepare the graham crackers. Open your box of graham crackers and gently break each sheet into pieces that will fit your loaf pan. You don’t need to be precise—just break them so they cover the bottom of the pan in a single layer. Some pieces will overlap slightly, and that’s fine. Set them aside.
- Chop the chocolate. Take your milk chocolate bars and chop them into rough chunks—some small, some bigger. You want variety in texture. Set aside about 1/4 cup for topping later.
- Layer the cake. Spread a thin layer of the marshmallow cream mixture (about 1/4 cup) on the bottom of your loaf pan. This helps the first layer of graham crackers stick. Arrange a single layer of graham crackers over the cream, breaking pieces to fill gaps. Spread about 1/2 cup of the cream mixture evenly over the crackers. Sprinkle about 1/3 of the chopped chocolate chunks over the cream. Repeat this process: graham crackers, cream, chocolate chunks—until you’ve used all the ingredients. You should get about 4-5 layers. End with a layer of cream on top.
- Make the ganache. In a microwave-safe bowl, combine 1 cup semi-sweet chocolate chips and 2 tablespoons butter. Microwave in 30-second intervals, stirring between each, until smooth and glossy. This usually takes about 1-2 minutes total. Let it cool for 5 minutes—you don’t want it hot enough to melt the cream underneath.
- Top the cake. Pour the ganache over the top layer of cream, spreading it gently with a spatula to cover evenly. Sprinkle the reserved chocolate chunks and mini marshmallows on top. Press them in slightly so they stick.
- Chill overnight. Cover the pan tightly with plastic wrap and refrigerate for at least 8 hours, but ideally 12-24 hours. This is the most important step—the graham crackers need time to absorb the cream and soften into a cake-like texture. Don’t rush it. I know it’s hard to wait, but trust me, it’s worth it.
- Serve. When ready to serve, run a knife around the edges of the pan. Slice directly in the pan, or carefully lift the whole cake out using the plastic wrap as handles. Cut into thick slices—about 1-2 inches wide. Serve cold straight from the fridge.
Cooking Tips & Techniques
I learned some of these the hard way, so you don’t have to. First time I made this, I used light cream instead of heavy whipping cream. Big mistake. The filling was runny and the graham crackers turned into complete mush instead of that perfect soft-yet-structured texture. Stick with heavy cream—it’s non-negotiable here.
Another thing I messed up: I didn’t let the ganache cool before pouring it on top. It melted the top layer of cream and created this weird separated mess. Let it sit for 5 minutes after microwaving—you want it warm but not hot.
For the best results, make this the day before you plan to serve it. The flavors meld together overnight and the texture becomes absolutely perfect. I’ve tried cutting into it after just 4 hours, and while it’s still good, it’s nowhere near as amazing as after a full 12 hours.
If you’re short on time, you can speed up the chilling process by placing the pan in the freezer for 3-4 hours instead of the fridge overnight. Just know the texture will be slightly firmer and more ice-cream-like than cake-like. Still delicious, just different.
One pro tip: use a serrated knife to slice through the graham cracker layers. A regular knife tends to push the layers around and make a mess. A gentle sawing motion gives you clean, beautiful slices every time.
Variations & Adaptations
This recipe is super flexible. Here are some ways I’ve adapted it:
- Peanut Butter S’mores: Swirl 1/2 cup of creamy peanut butter into the marshmallow cream mixture before layering. The salty peanut flavor with chocolate is incredible.
- Berry S’mores: Add a layer of fresh raspberries or sliced strawberries between the cream layers. The tartness cuts through the sweetness beautifully.
- Vegan Option: Use coconut cream (chilled overnight) instead of heavy cream, dairy-free chocolate, and vegan marshmallows or marshmallow fluff. It works—I’ve tested it for a friend’s birthday party.
- Gluten-Free: Simply swap regular graham crackers for gluten-free ones. The texture is slightly different but still delicious.
- Spiced Version: Add 1/2 teaspoon of cinnamon and a pinch of cayenne pepper to the cream mixture for a Mexican hot chocolate vibe. It’s unexpected but so good.
My personal favorite variation is the peanut butter one. I made it for a smash burger tacos party last summer, and everyone kept going back for “just one more bite” until the whole thing was gone. The combination of salty peanut butter and sweet marshmallow is just unbeatable.
Serving & Storage Suggestions
Serve this cake cold, straight from the fridge. It’s best sliced into thick pieces—about 1.5 inches wide—and placed on small plates. The texture is soft and creamy, almost like a frozen mousse, with little pockets of chocolate in every bite.
For presentation, I like to dust the top with a little cocoa powder or crushed graham crackers right before serving. It adds a nice visual contrast and makes it look extra fancy.
This cake pairs beautifully with a cold glass of milk, a hot cup of coffee, or even a smoky blackberry bourbon sangria for an adult twist. The richness of the cake balances out the tartness of the sangria perfectly.
Storage: Cover the pan tightly with plastic wrap and keep in the refrigerator for up to 5 days. The texture actually improves after the first day as the flavors continue to meld. After day 3, the graham crackers start to soften a bit more, but it’s still delicious.
Freezing: You can freeze this cake for up to 2 months. Wrap the entire pan (or individual slices) tightly in plastic wrap, then foil. Thaw in the refrigerator overnight before serving. The texture will be slightly firmer but still excellent.
One thing I’ve noticed: the flavors develop over time. On day one, it tastes like a really good s’mores dessert. On day two, it tastes like something you’d pay $12 for at a fancy bakery. So if you can wait, wait.
Nutritional Information & Benefits
Let’s be real—this is a treat, not a health food. But here’s the estimated nutritional breakdown per slice (based on 8 servings):
| Nutrient | Amount per Serving |
|---|---|
| Calories | 385 |
| Total Fat | 22g |
| Saturated Fat | 13g |
| Carbohydrates | 44g |
| Protein | 4g |
| Sugar | 32g |
That said, there are some redeeming qualities. The heavy cream provides calcium and vitamin D, and dark chocolate (if you use it) contains antioxidants. The graham crackers offer a bit of fiber. But honestly? This is a dessert you make because it makes you happy, not because it’s nutritious. And that’s okay.
For those with dietary concerns: this recipe contains dairy, gluten, and sugar. It can be adapted for vegan and gluten-free diets as mentioned in the variations section. Always check labels if you’re serving someone with allergies.
Conclusion
This Easy No-Bake S’mores Icebox Cake is the kind of dessert that makes summer feel like summer. It’s nostalgic without being fussy, impressive without being complicated, and delicious without requiring any oven time. Honestly, I don’t think I’ll ever make traditional s’mores again—this version is just better in every way.
I love that I can make it the night before a party and not stress about timing. I love that kids can help with the layering. And I really love that every single time I serve it, someone asks for the recipe. That never gets old.
Try it and let me know what you think! Did you add a twist? Did your kids ask for it four days in a row too? Drop a comment below—I genuinely love hearing how these recipes work out in your kitchen. And if you’re looking for more easy summer desserts, check out this fresh peach upside-down cake with bourbon caramel—it’s another no-oven winner!
Frequently Asked Questions
Can I use Cool Whip instead of whipped cream?
You can, but the texture won’t be as rich. Homemade whipped cream has a much better flavor and structure. If you’re in a hurry, thawed Cool Whip mixed with marshmallow fluff works in a pinch.
How long does this cake need to set?
At least 8 hours, but 12-24 hours is ideal. The graham crackers need time to soften and absorb the cream. Don’t rush it—the texture difference is noticeable.
Can I make this in a different size pan?
Absolutely. A 9-inch square pan works great for a thinner, wider cake. An 8×8 inch pan gives you thicker layers. Just adjust the layering accordingly and watch the chilling time—thicker layers may need a bit longer to set.
Why did my graham crackers turn into mush?
This usually happens if you used too much cream or didn’t chill it long enough. The crackers need time to soften gradually, not get oversaturated. Also, make sure your cream is whipped to stiff peaks—runny cream will soak the crackers too fast.
Can I toast the marshmallows on top?
Yes! If you want that toasted marshmallow flavor, you can use a kitchen torch to lightly toast the mini marshmallows on top just before serving. You can also broil it for 30-60 seconds, but watch it carefully—it can go from toasted to burned really fast.
Pin This Recipe!
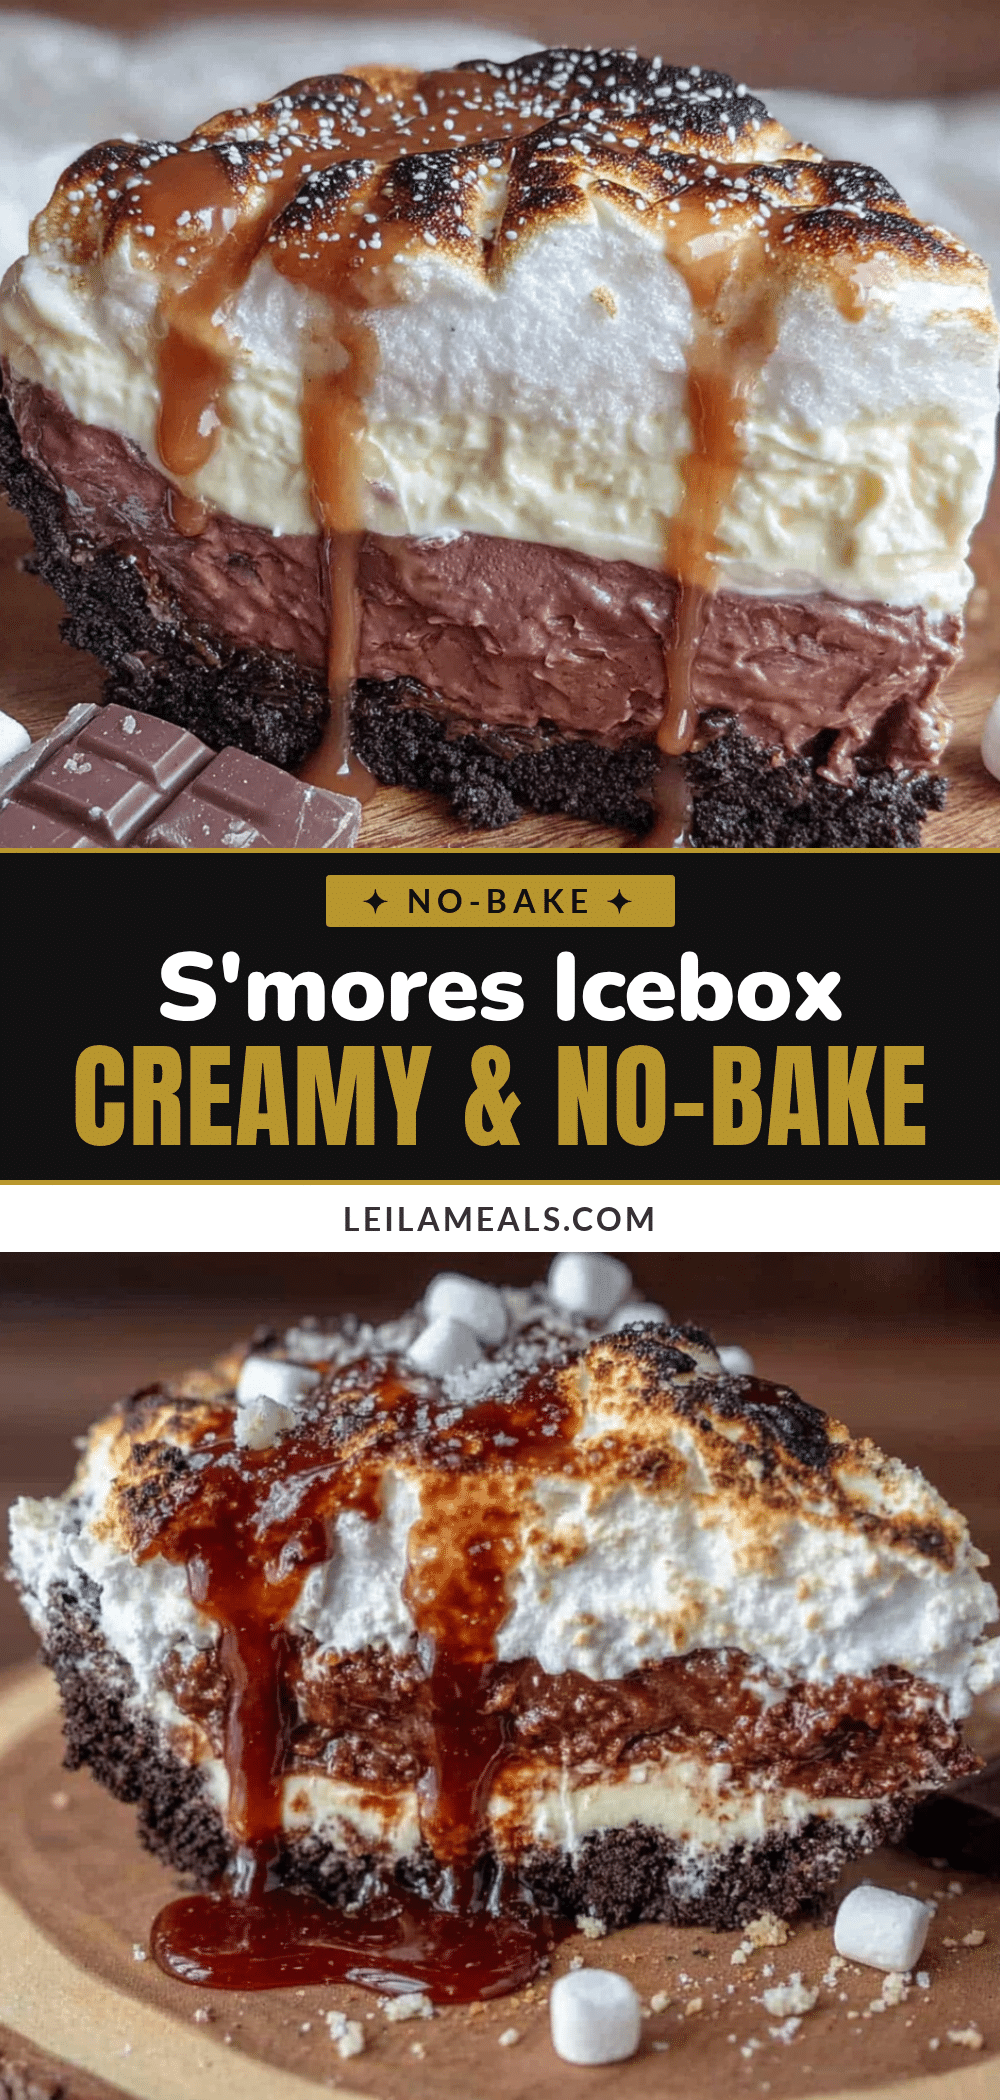
Easy No-Bake Smores Icebox Cake: The Best Summer Dessert
This Easy No-Bake S’mores Icebox Cake is the kind of dessert that makes people close their eyes after the first bite. It’s got that familiar campfire flavor—toasted marshmallow, rich chocolate, crunchy graham—but without the smoke smell, the burned fingers, or the unevenly melted marshmallows.
- Prep Time: 20 minutes
- Cook Time: 0 minutes
- Total Time: 8 hours 20 minutes (includes chilling time)
- Yield: 8 servings 1x
- Category: Dessert
- Cuisine: American
Ingredients
- 1 full box graham crackers (about 14–16 whole sheets)
- 2 cups (480 ml) heavy whipping cream
- 1/2 cup (60 g) powdered sugar
- 1 teaspoon vanilla extract
- 1 jar (7 oz or 200 g) marshmallow fluff
- 4 regular-sized milk chocolate bars (about 1.5 oz each)
- 1 cup (175 g) semi-sweet chocolate chips
- 2 tablespoons (28 g) butter
- 1 cup (about 50 g) mini marshmallows (optional, for garnish)
Instructions
- Make the marshmallow cream filling: In a large mixing bowl, pour in 2 cups of cold heavy whipping cream. Beat on medium-high speed until soft peaks form—about 3-4 minutes. Add 1/2 cup powdered sugar and 1 teaspoon vanilla extract, then continue beating until stiff peaks form. Gently fold in the entire jar of marshmallow fluff using a spatula. Don’t overmix—you want it light and airy, not deflated.
- Prepare the graham crackers: Open your box of graham crackers and gently break each sheet into pieces that will fit your loaf pan. You don’t need to be precise—just break them so they cover the bottom of the pan in a single layer. Some pieces will overlap slightly, and that’s fine. Set them aside.
- Chop the chocolate: Take your milk chocolate bars and chop them into rough chunks—some small, some bigger. You want variety in texture. Set aside about 1/4 cup for topping later.
- Layer the cake: Spread a thin layer of the marshmallow cream mixture (about 1/4 cup) on the bottom of your loaf pan. This helps the first layer of graham crackers stick. Arrange a single layer of graham crackers over the cream, breaking pieces to fill gaps. Spread about 1/2 cup of the cream mixture evenly over the crackers. Sprinkle about 1/3 of the chopped chocolate chunks over the cream. Repeat this process: graham crackers, cream, chocolate chunks—until you’ve used all the ingredients. You sh…
- Make the ganache: In a microwave-safe bowl, combine 1 cup semi-sweet chocolate chips and 2 tablespoons butter. Microwave in 30-second intervals, stirring between each, until smooth and glossy. This usually takes about 1-2 minutes total. Let it cool for 5 minutes—you don’t want it hot enough to melt the cream underneath.
- Top the cake: Pour the ganache over the top layer of cream, spreading it gently with a spatula to cover evenly. Sprinkle the reserved chocolate chunks and mini marshmallows on top. Press them in slightly so they stick.
- Chill overnight: Cover the pan tightly with plastic wrap and refrigerate for at least 8 hours, but ideally 12-24 hours. This is the most important step—the graham crackers need time to absorb the cream and soften into a cake-like texture. Don’t rush it.
- Serve: When ready to serve, run a knife around the edges of the pan. Slice directly in the pan, or carefully lift the whole cake out using the plastic wrap as handles. Cut into thick slices—about 1-2 inches wide. Serve cold straight from the fridge.
Notes
For the best texture, make sure your heavy cream is very cold straight from the fridge. If you’re dairy-free, you can use a full-fat coconut cream (chilled overnight) and dairy-free chocolate—just know the texture will be slightly different but still delicious. I’ve tested this with gluten-free graham crackers too, and it works perfectly. Use a serrated knife to slice through the graham cracker layers for clean slices.
Nutrition
- Serving Size: 1 slice (1.5 inches
- Calories: 385
- Sugar: 32
- Fat: 22
- Saturated Fat: 13
- Carbohydrates: 44
- Protein: 4
Keywords: no-bake dessert, s'mores, icebox cake, summer dessert, graham cracker, chocolate, marshmallow, easy dessert, no oven