The board sat in the middle of the table for maybe four minutes before someone reached over and grabbed a slice of pear dipped in honey. By the time I came back from the kitchen with a second round of cheese, half the prosciutto was gone and someone had already asked, “Can you make this for Thanksgiving?” That’s when I knew this simple fall harvest charcuterie board with pears and honey was going to be a repeat thing around here.
Honestly, I didn’t plan for it to become a signature dish. It started one rainy Saturday afternoon when I had friends coming over and zero energy to cook anything complicated. I had a few pears sitting on the counter, a jar of honey from the farmer’s market, and a block of brie that was begging to be used. So I just started arranging things on a wooden board—cheese here, fruit there, nuts scattered around like I meant to do it that way. And you know what? It looked beautiful. More importantly, it tasted like fall in the best possible way.
There’s something about the combination of sweet, salty, creamy, and crunchy that just works. The pears bring that subtle sweetness, the honey ties everything together, and the cheese? Well, that’s the star of the show. This board has become my go-to for everything from casual movie nights to holiday gatherings. It’s the kind of thing that makes people feel special without you having to break a sweat. And honestly, isn’t that what we all want from a recipe?
Why You’ll Love This Recipe
Let me tell you why this board is going to become your new favorite fall tradition. I’ve tested this combination at least a dozen times, tweaking the cheese ratios and fruit placement until it felt just right. And every single time, people leave the table happy.
- Quick & Easy: This board comes together in under 15 minutes. No cooking, no baking, no stress. Just arrange and serve.
- Simple Ingredients: You probably already have most of these things in your fridge and pantry. The honey, the nuts, the crackers—they’re all everyday items.
- Perfect for Fall Gatherings: Whether it’s a cozy night in, a Friendsgiving potluck, or a holiday party, this board fits right in. It’s especially great for those in-between moments when you want something special but not over-the-top.
- Crowd-Pleaser: I’ve served this to kids, adults, picky eaters, and foodies. Everyone finds something they love. The combination of flavors hits all the right notes.
- Unbelievably Delicious: The way the honey drips over the brie and mingles with the pear slices? It’s next-level comfort food. You’ll catch yourself sneaking bites while you’re arranging it.
What makes this board different from the rest is the balance. It’s not just about throwing cheese and crackers on a plate. It’s about creating moments—the crunch of a candied walnut against the creaminess of goat cheese, the sweetness of honey cutting through the saltiness of prosciutto. It’s a whole experience, not just a snack.
And here’s the thing—this board isn’t just good. It’s the kind that makes you close your eyes after the first bite. It’s comfort food reimagined for sharing, with the same soul-soothing satisfaction as a warm bowl of soup but way more fun to eat.
What Ingredients You Will Need
This recipe uses simple, wholesome ingredients that come together to create something truly special. Most of these are pantry staples or easy to find at any grocery store. Here’s what you’ll need to build your perfect fall harvest board.
For the Cheese
- Brie cheese (8 oz wheel) – Look for a ripe, creamy brie that’s soft to the touch. I prefer the double-cream variety for extra richness.
- Aged cheddar (6 oz) – Choose a sharp, crumbly cheddar for contrast. The sharpness cuts through the sweetness beautifully.
- Goat cheese log (4 oz) – The tanginess adds a bright note that balances the honey. I like the ones with herbs or cracked pepper on the outside.
- Manchego (4 oz) – This Spanish cheese brings a nutty, slightly salty flavor that pairs perfectly with pears.
For the Fruits
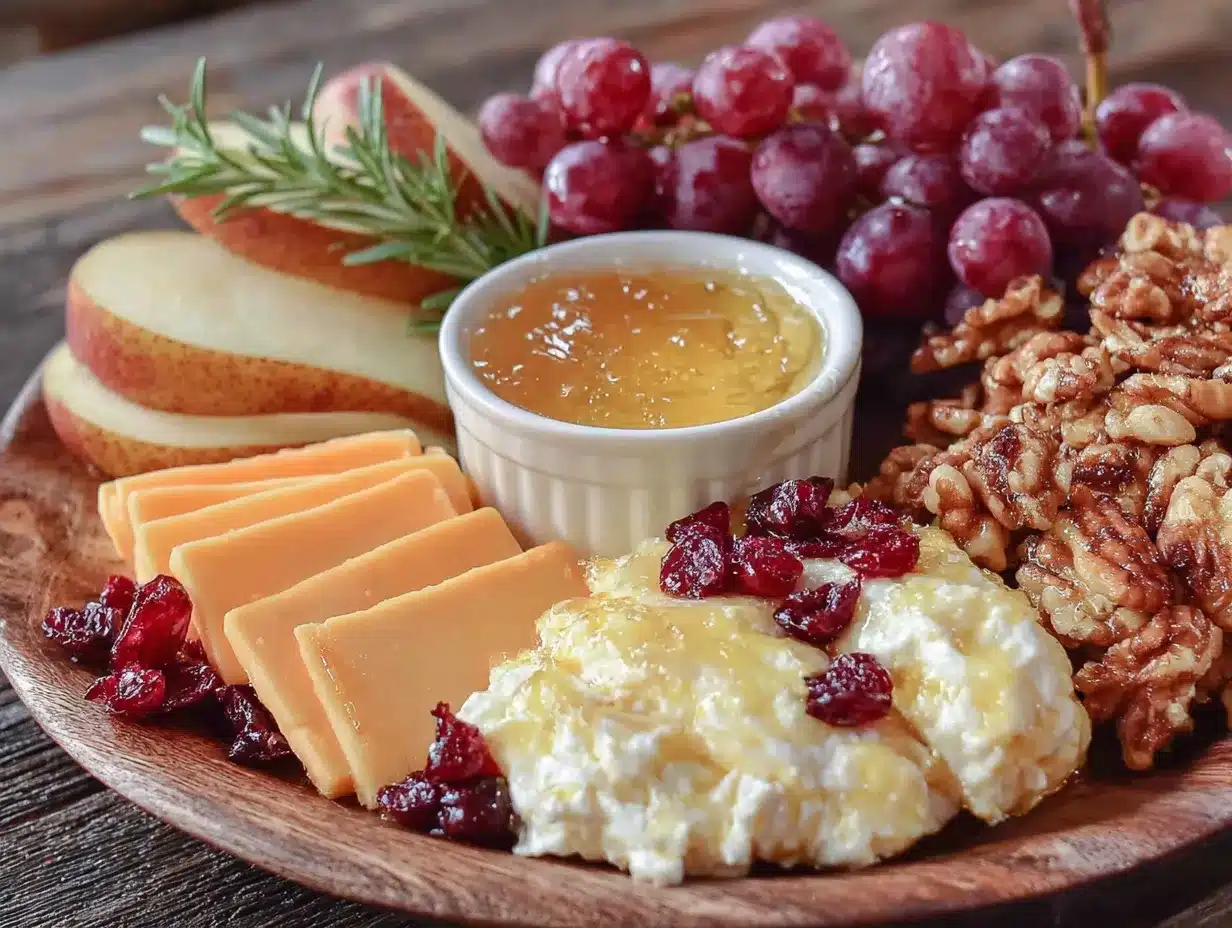
- Ripe but firm pears (2-3, depending on size) – I recommend Bosc or Anjou pears for their sweetness and texture. They hold up well and don’t get mushy too quickly.
- Fresh figs (4-6, if available) – When figs are in season, they add a gorgeous pop of color and sweetness. If you can’t find fresh, dried figs work too.
- Green grapes (1 cup) – Their crispness and mild sweetness round out the board nicely.
- Dried cranberries (1/2 cup) – For that tart, chewy bite that screams fall.
For the Meats
- Prosciutto (4 oz) – Thinly sliced, salty, and perfect for wrapping around pear slices or cheese.
- Sopressata (4 oz) – This dry salami adds a spicy, savory element that balances the sweetness.
For the Sweet & Savory Additions
- Honey (1/3 cup) – Use a good-quality local honey if you can. The floral notes really shine here. I love using a wildflower honey for its complexity.
- Candied walnuts (1/2 cup) – You can buy these or make them yourself. They add that irresistible sweet crunch.
- Roasted almonds (1/2 cup) – For a more savory nut option that balances the sweetness.
- Fig jam or apple butter (1/4 cup) – A little something extra for spreading on crackers or cheese.
For the Base
- Crackers (about 20-30) – I like a mix of water crackers, whole wheat, and something seeded. The variety keeps things interesting.
- Baguette slices (1 small baguette, sliced thin) – Toasted or fresh, they’re perfect for piling on toppings.
- Fresh rosemary sprigs (for garnish) – Not just pretty, they add a subtle aroma that ties the fall theme together.
If you’re looking to make this board even more seasonal, consider adding some of the elements from my perfect pumpkin fall baby shower cake—the fondant leaves make a gorgeous edible decoration for the board too.
Equipment Needed
You don’t need fancy equipment to make a beautiful charcuterie board. Here’s what I use and what you can substitute if needed.
- Large wooden board or slate platter (at least 12×16 inches) – A wooden cutting board works perfectly. If you don’t have one, a large baking sheet lined with parchment paper does the job. I found my favorite board at a thrift store for five dollars, so keep an eye out.
- Small bowls or ramekins (3-4) – For the honey, jam, and any loose items like cranberries. Little ceramic dishes or even small glass jars work great.
- Cheese knives (2-3) – You want separate knives for different cheeses to avoid mixing flavors. If you don’t have cheese knives, small butter knives work just fine.
- Small tongs (optional) – For picking up prosciutto or salami slices without getting your hands messy.
- Paring knife – For slicing pears and cutting cheese. A sharp knife makes all the difference.
- Cutting board (for prep) – You’ll need a separate surface for slicing fruits and cheeses before arranging.
Pro tip: If you’re serving this at a party, make sure your board is at room temperature. Cold cheese doesn’t taste as good, and the honey will be easier to drizzle when it’s not refrigerated.
Preparation Method
Building a charcuterie board is more art than science, but I’ve found that following a loose order helps everything come together beautifully. Here’s how I do it.
- Prep your ingredients (5 minutes)
Start by taking your cheeses out of the fridge about 20 minutes before you plan to serve. This lets them come to room temperature, which really brings out the flavor. While they’re warming up, wash and dry your pears, grapes, and figs. Slice the pears into thin wedges—about 8 slices per pear. Cut the figs in half lengthwise. Leave the grapes whole. - Arrange the cheeses first (3 minutes)
Place your cheese on the board first, spacing them out evenly. I like to put the brie in the center-left, the goat cheese log on the upper right, the aged cheddar in wedges on the lower left, and the manchego sliced thin on the upper left. This creates natural “zones” for people to explore. Leave a little space around each cheese so they’re easy to cut. - Add the bowls and ramekins (2 minutes)
Set your small bowls on the board. I put the honey in one, the fig jam in another, and the dried cranberries in a third. Position them near the edges so they don’t crowd the main ingredients. If you’re using a smaller board, you can place these off to the side. - Layer on the meats (3 minutes)
Fold the prosciutto slices into loose ribbons or roll them into little rosettes. Place them near the brie and goat cheese—they pair beautifully. Slice the sopressata into thin rounds and fan them out in a small cluster. I like to put the meats in two separate spots so the board feels balanced. - Scatter the fruits (4 minutes)
Now comes the fun part. Arrange the pear slices in a fan pattern near the manchego—trust me, they’re a perfect match. Place the fig halves around the board, cut side up so they catch the light. Scatter the grapes in small clusters, filling in gaps between the cheese and meats. The fruit adds color and freshness that makes the board look alive. - Fill in with nuts and crackers (3 minutes)
Sprinkle the candied walnuts and roasted almonds in the empty spaces. Don’t pile them too high—you want them to be easy to grab. Arrange your crackers and baguette slices around the edges of the board, overlapping them slightly for a rustic look. Leave some space for dipping and spreading. - Drizzle the honey and garnish (2 minutes)
Here’s the moment that makes it all come together. Drizzle honey over the brie and goat cheese, letting it pool slightly around the edges. Don’t go overboard—a little goes a long way. Place a few sprigs of fresh rosemary around the board for color and that lovely fall aroma. Add a sprinkle of flaky sea salt over the goat cheese if you’re feeling fancy. - Final touches (1 minute)
Step back and look at your board. Are there any bare spots? Fill them with extra crackers or nuts. Does anything look crowded? Move things around until it feels balanced. The goal is to make it look abundant but not messy. And remember—it doesn’t have to be perfect. The best boards look a little wild and organic.
One thing I learned the hard way—don’t slice the pears too early. They’ll start to brown after about 20 minutes. Slice them right before you arrange the board, or give them a quick squeeze of lemon juice to keep them looking fresh.
If you’re hosting a bigger gathering, this board pairs wonderfully with a warm dip like my savory pepperoni pizza dip in a bread bowl. The contrast between cold cheese and hot, melty dip is absolutely delightful.
Cooking Tips & Techniques
After making this board more times than I can count, I’ve picked up a few tricks that make the process smoother and the results better. Here’s what I’ve learned.
Don’t overthink the arrangement. The first time I made a charcuterie board, I spent 45 minutes obsessing over placement. Now I know that people are going to dig in and mess it up anyway, so just go with the flow. Start with the big items (cheese and bowls) and fill in around them. It’s like a puzzle where every piece fits somewhere.
Temperature matters more than you think. Cold cheese is sad cheese. Let your brie and goat cheese sit out for at least 20 minutes before serving. The flavors open up and the texture becomes creamy and luxurious. Same goes for the honey—if it’s been in the fridge, warm it up slightly by placing the jar in a bowl of warm water for a few minutes.
Balance textures and flavors. A good board has something creamy (brie), something sharp (cheddar), something tangy (goat cheese), something salty (prosciutto), something sweet (honey and pears), and something crunchy (nuts and crackers). When you hit all these notes, every bite is a new experience.
Prep ahead of time. You can wash and dry your fruits, slice your cheeses, and portion out your nuts the day before. Store everything in separate containers in the fridge. Then on serving day, all you have to do is arrange. It takes the stress out of last-minute hosting.
Watch out for the honey drip. Here’s a mistake I made once—I drizzled honey over the whole board and it made everything sticky. Now I only drizzle it over the brie and goat cheese, and I keep the rest in a small bowl for people to add themselves. Much cleaner and more customizable.
And if you’re making this for a party where you’ll also be serving something like my crispy buffalo chicken crescent roll ring, make sure to set up the board first so it has time to come to room temperature while you’re finishing the hot appetizers.
Variations & Adaptations
One of the best things about this board is how flexible it is. Here are some ways to make it your own.
Dietary variations:
For a dairy-free version, swap the brie and cheddar for your favorite plant-based cheeses. I’ve tried cashew-based brie alternatives that work surprisingly well. For a gluten-free board, use rice crackers or gluten-free baguette slices. And if you’re watching your sugar intake, skip the honey and dried cranberries, and use more nuts and savory crackers instead.
Seasonal swaps:
In the summer, trade the pears for sliced peaches or nectarines and add fresh berries. In the winter, use sliced apples, dried apricots, and pomegranate seeds. The beauty of this board is that it adapts to whatever looks good at the market. I’ve made a version with persimmons in late fall that was absolutely stunning.
Flavor twists:
Try swapping the honey for hot honey if you want a little heat. Or use a truffle honey for something extra luxurious. Add a small dish of olive tapenade or roasted red pepper spread for a savory option. You can also sprinkle some za’atar or everything bagel seasoning over the goat cheese for a flavor boost.
Protein boost:
If you want to make this more of a meal, add some hard-boiled eggs, smoked salmon, or even slices of grilled chicken. I’ve done a version with Spanish chorizo instead of sopressata, and it added a smoky, spicy kick that was incredible.
Personal favorite variation:
My go-to twist is what I call the “Autumn Harvest” board. I add sliced apples, a small dish of pumpkin seed butter, and some dark chocolate shavings. The chocolate with the honey and pear is a combination that sounds weird but tastes amazing. Trust me on this one.
Serving & Storage Suggestions
This board is best served at room temperature, so let it sit out for about 20 minutes before guests arrive. I like to place it in the center of the table where everyone can reach it easily. It’s perfect as an appetizer before a main meal or as the star of a casual gathering.
What to serve alongside:
This board pairs beautifully with a crisp white wine like Sauvignon Blanc or a light red like Pinot Noir. For non-alcoholic options, try sparkling apple cider or a warm cup of spiced tea. If you’re making it part of a bigger spread, it goes great with soups and salads. I’ve served it alongside my creamy roasted butternut squash soup with brown butter and sage for a full fall meal that people rave about.
Storage tips:
If you have leftovers (which honestly doesn’t happen often in my house), separate the components into airtight containers. Cheese should be wrapped in wax paper or cheese paper, not plastic wrap—it lets the cheese breathe. Fruits and vegetables go in one container, nuts in another, and crackers in a third. The honey and jam can stay in their jars.
Reheating:
This board is served cold, so no reheating needed. But if you want to warm up the brie slightly, pop it in the microwave for 15-20 seconds or in a 300°F oven for 5 minutes. Just don’t overdo it—you want it soft and gooey, not melted into a puddle.
How flavors develop:
The flavors actually get better after a few hours at room temperature. The honey seeps into the cheese slightly, the nuts absorb some of the fruit’s moisture, and everything melds together. That’s why I love making this board a little ahead of time—it just gets better.
Nutritional Information & Benefits
While this board is definitely a treat, it does offer some nutritional benefits worth noting. Here’s a rough breakdown per serving (assuming 8 servings from the full board).
| Nutrient | Amount per Serving |
|---|---|
| Calories | 380-420 |
| Protein | 15g |
| Fat | 24g |
| Carbohydrates | 30g |
| Fiber | 4g |
| Sugar | 18g |
| Sodium | 680mg |
Health highlights:
Pears are a great source of fiber and vitamin C, and they’re low in calories. The nuts provide healthy fats and protein that keep you full. Cheese offers calcium and protein, though it’s also high in saturated fat, so moderation is key. Honey contains antioxidants and has antibacterial properties, but it’s still sugar, so use it sparingly.
Dietary considerations:
This board is naturally vegetarian (if you skip the meats). For a gluten-free option, use gluten-free crackers. The board contains dairy and nuts, so it’s not suitable for those with allergies to those ingredients. You can easily adapt it as mentioned in the variations section.
Honestly, I think of this board as a balanced indulgence. It’s not something you eat every day, but when you do, you’re getting a nice mix of nutrients alongside the deliciousness. And sharing it with friends? That’s good for the soul too.
Conclusion
This simple fall harvest charcuterie board with pears and honey has become one of those recipes I turn to again and again. It’s reliable, it’s beautiful, and it makes people happy. Every time I set it on the table, I watch the same thing happen—people’s eyes light up, they start reaching for pieces, and within minutes, the board is half empty and everyone’s talking about how good it is.
What I love most about this board is that it doesn’t require any special skills or fancy equipment. You don’t need to be a chef or a food stylist. You just need good ingredients and a willingness to arrange them in a way that feels right. And honestly, that’s the kind of cooking I love most—simple, honest, and meant to be shared.
I’d love to hear how your board turns out. Did you add something unexpected? Change up the cheese? Drizzle extra honey on top? Drop a comment below and share your version. And if you make this for a gathering, tag me in your photos—I’m always looking for new ideas and inspiration.
Here’s to good food, good company, and the simple joy of a beautiful board. Happy fall, friends.
Frequently Asked Questions
How far in advance can I make this charcuterie board?
You can prep all the ingredients the day before—wash and dry fruits, slice cheeses, portion nuts—and store them separately in the fridge. Arrange the board about 30 minutes before serving so the cheese comes to room temperature. The pears should be sliced right before serving to prevent browning.
Can I use different pears for this board?
Absolutely! Bosc and Anjou pears are my favorites because they’re sweet and hold their shape well, but Bartlett or Comice pears work great too. Just make sure they’re ripe but still firm so they don’t get mushy on the board. If your pears are a little underripe, let them sit at room temperature for a day or two.
What if I can’t find fresh figs?
No worries at all. Dried figs are a wonderful substitute—they’re sweeter and chewier, which adds a different but equally delicious texture. You can also use dried apricots, dates, or even sliced apple. The board is flexible, so use whatever looks good at your market.
How do I keep the pears from turning brown?
Slice the pears just before you arrange the board, and give them a quick squeeze of lemon juice or a brush of lemon water. The acid slows down the browning process. You can also use a little orange juice for a milder flavor. If they do brown a bit, don’t worry—they’re still perfectly fine to eat.
Can I make this board for a large crowd?
Definitely. Just double or triple the quantities based on how many people you’re serving. For a crowd of 15-20, I’d use a larger board or even two separate boards. You can also set up a “charcuterie station” where people build their own plates—it’s interactive and fun. Just make sure you have enough small bowls and utensils for everyone.
Pin This Recipe!
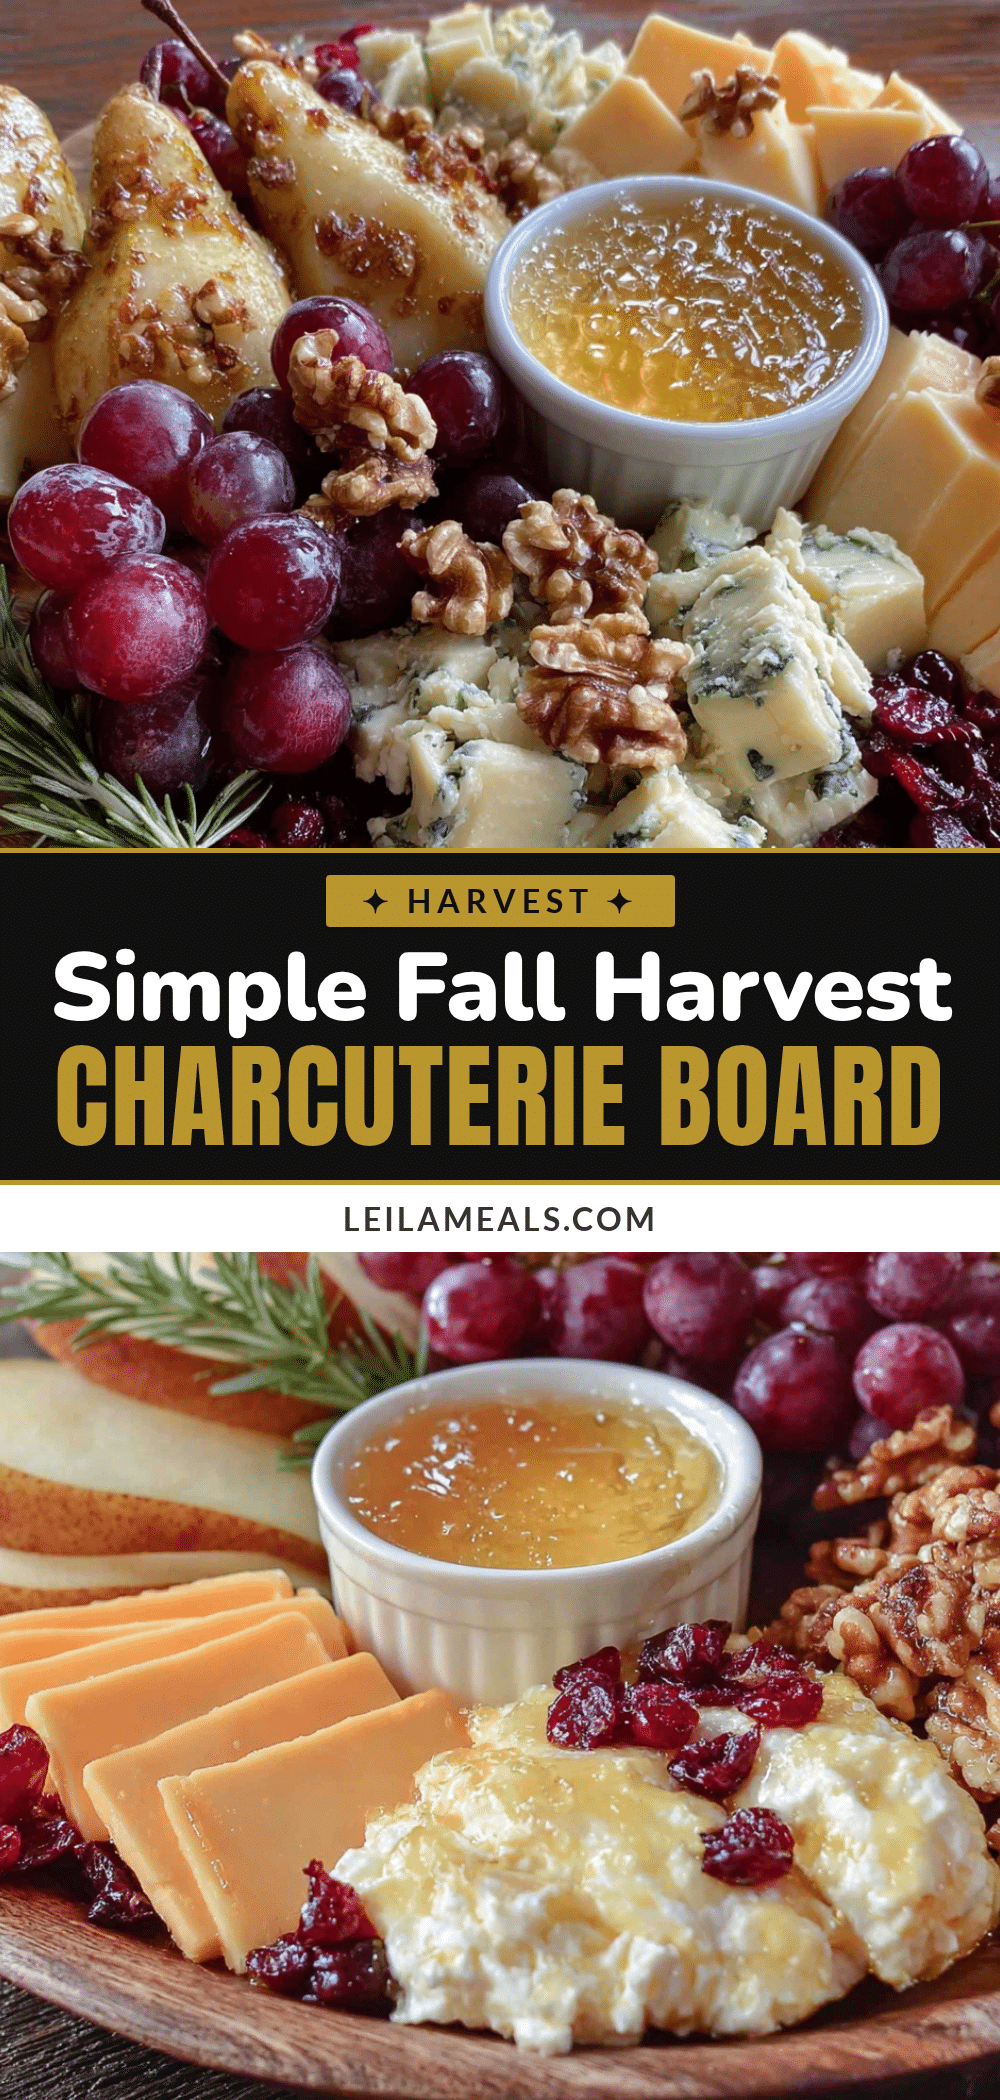
Simple Fall Harvest Charcuterie Board with Pears and Honey
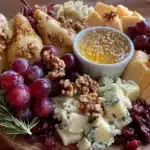
A beautiful and easy fall charcuterie board featuring ripe pears, honey, creamy brie, and a variety of cheeses and meats. Perfect for gatherings, this no-cook recipe comes together in under 15 minutes and is always a crowd-pleaser.
- Prep Time: 15 minutes
- Cook Time: 0 minutes
- Total Time: 15 minutes
- Yield: 8 servings 1x
- Category: Appetizer
- Cuisine: American
Ingredients
- 8 oz brie cheese (wheel)
- 6 oz aged cheddar
- 4 oz goat cheese log
- 4 oz manchego
- 2–3 ripe but firm pears (Bosc or Anjou)
- 4–6 fresh figs (or dried figs)
- 1 cup green grapes
- 1/2 cup dried cranberries
- 4 oz prosciutto, thinly sliced
- 4 oz sopressata
- 1/3 cup honey
- 1/2 cup candied walnuts
- 1/2 cup roasted almonds
- 1/4 cup fig jam or apple butter
- 20–30 crackers (water crackers, whole wheat, seeded)
- 1 small baguette, sliced thin
- Fresh rosemary sprigs for garnish
- Flaky sea salt (optional)
Instructions
- Take cheeses out of fridge 20 minutes before serving to come to room temperature. Wash and dry pears, grapes, and figs. Slice pears into thin wedges (about 8 per pear), cut figs in half lengthwise, leave grapes whole.
- Place cheeses on the board first, spacing evenly: brie in center-left, goat cheese on upper right, aged cheddar wedges on lower left, manchego sliced thin on upper left.
- Set small bowls on the board for honey, fig jam, and dried cranberries, positioning them near the edges.
- Fold prosciutto into loose ribbons or rosettes and place near brie and goat cheese. Slice sopressata into thin rounds and fan out in a small cluster. Place meats in two separate spots for balance.
- Arrange pear slices in a fan pattern near manchego. Place fig halves around the board, cut side up. Scatter grapes in small clusters to fill gaps.
- Sprinkle candied walnuts and roasted almonds in empty spaces. Arrange crackers and baguette slices around the edges, overlapping slightly.
- Drizzle honey over brie and goat cheese, letting it pool slightly. Place fresh rosemary sprigs around the board. Sprinkle flaky sea salt over goat cheese if desired.
- Step back and check for bare spots, filling with extra crackers or nuts. Adjust until balanced and abundant but not messy.
Notes
Slice pears just before serving to prevent browning, or brush with lemon juice. Let cheeses come to room temperature for best flavor. Drizzle honey only over brie and goat cheese to avoid stickiness; keep extra honey in a bowl for guests. The board can be prepped a day ahead by washing fruits, slicing cheeses, and portioning nuts; arrange 30 minutes before serving.
Nutrition
- Serving Size: 1 serving (approxima
- Calories: 400
- Sugar: 18
- Sodium: 680
- Fat: 24
- Saturated Fat: 12
- Carbohydrates: 30
- Fiber: 4
- Protein: 15
Keywords: fall charcuterie board, pear and honey board, easy appetizer, no-cook recipe, holiday appetizer, cheese board, fall entertaining