For a while, I just accepted that pumpkin banana bread meant washing a mixer bowl, a separate bowl for dry ingredients, and then another bowl for the wet stuff. Honestly, the flavor combo was always worth it—the sweet, almost floral banana against that earthy pumpkin spice—but the cleanup felt like a punishment for wanting a cozy snack. I’d stare at the sink full of dishes and think, there has to be a simpler way to get that same tender, spiced loaf without the kitchen looking like a flour bomb went off.
It wasn’t a dramatic revelation, more of a stubborn experiment one rainy Tuesday. I had a very ripe banana on the counter and half a can of pumpkin in the fridge from making pumpkin cream cheese swirl muffins the day before. Instead of reaching for multiple bowls, I just grabbed the biggest one I own and started tossing everything in. I was sure I’d end up with a dense, uneven mess.
But the batter came together smoother than I expected, and the loaf that came out of the oven was just as good—maybe better—than the multi-bowl version. The crumb was moist, the top had that perfect crack, and the flavor was exactly what I was craving. It turns out, you really don’t need all that extra fuss. This easy one-bowl pumpkin banana bread is proof that a great recipe can also be a simple one, and that’s a discovery I’m honestly pretty happy about.
Why You’ll Love This Recipe
This isn’t just another quick bread recipe. It’s the result of testing, tweaking, and a few happy accidents that proved less can really be more. Here’s why this one-bowl pumpkin banana bread will become your new go-to:
- One Bowl, No Mixer: Seriously, you only need one large bowl and a whisk or spatula. No hauling out the stand mixer or dirtying extra dishes. It’s the kind of low-effort baking that makes you feel like a genius.
- Perfectly Moist Every Time: The combination of pumpkin puree and ripe banana creates a loaf that’s incredibly tender and stays moist for days. You won’t get that dry, crumbly texture that haunts other quick breads.
- Pantry-Friendly Ingredients: Chances are you already have everything you need. Canned pumpkin, a spotty banana, basic flour, sugar, and your go-to pumpkin pie spice. No special trips to the store required.
- Fall Flavor, Year-Round: While it screams autumn, this bread is delicious any time you’re craving those warm, spiced flavors. It’s a great way to use up a ripe banana even in the middle of July.
- Foolproof for Beginners: If you’re new to baking, this is a fantastic recipe to start with. The steps are straightforward, the batter is forgiving, and the result is almost guaranteed to impress.
This recipe is different because it focuses on efficiency without sacrificing an ounce of flavor or texture. It’s not just about saving dishes—it’s about making baking feel easy and accessible again. The kind of bread you can whip up on a whim, slice up with a cup of coffee, and feel like you’ve got your life together, even if the rest of the kitchen is a mess.
What Ingredients You Will Need
This recipe uses simple, wholesome ingredients that work together to create a tender, flavorful loaf without any fuss. Most of these are likely already in your pantry or fridge.
- All-Purpose Flour (1 ½ cups / 180g): The base of our bread. Spoon and level it into your measuring cup for the most accurate result. Scooping directly can pack the flour and make the bread dry.
- Baking Soda (1 teaspoon): Our main leavening agent. It reacts with the acidity in the pumpkin and banana to help the bread rise. Make sure it’s fresh for the best lift.
- Pumpkin Pie Spice (1 ½ teaspoons): The heart of the fall flavor. You can use store-bought or make your own with a mix of cinnamon, nutmeg, ginger, and cloves. I prefer using a quality brand like Simply Organic for a more vibrant taste.
- Cinnamon (1 teaspoon): Adds that extra layer of warmth. I always add a little more cinnamon than the spice mix calls for—it just rounds out the flavor beautifully.
- Salt (½ teaspoon): Don’t skip it! Salt balances the sweetness and enhances all the other flavors. A little fine sea salt is perfect here.
- Granulated Sugar (½ cup / 100g): Adds sweetness and helps create a tender crumb.
- Light Brown Sugar (½ cup / 100g, packed): This is where the magic happens. Brown sugar adds moisture and a deep, almost caramel-like flavor that pairs perfectly with the pumpkin and banana.
- Pumpkin Puree (1 cup / 240g): Not pumpkin pie filling! Make sure you grab 100% pure pumpkin puree. It adds moisture, color, and a subtle earthy sweetness. Libby’s is my go-to brand for consistent results.
- Ripe Banana (1 large, about ½ cup / 120g mashed): The browner, the better. A very ripe banana is softer, sweeter, and easier to mash, adding incredible moisture and flavor to the loaf.
- Vegetable Oil (⅓ cup / 80ml): Keeps the bread incredibly moist without the fuss of creaming butter. You can also use melted coconut oil or canola oil.
- Large Eggs (2): They bind everything together and help with structure. Make sure they are at room temperature for the smoothest batter.
- Vanilla Extract (1 teaspoon): A little splash rounds out the flavors and adds a lovely aromatic note. Use pure vanilla extract if you have it.
Ingredient Substitutions: For a dairy-free version, this recipe is already naturally dairy-free! For a gluten-free option, you can substitute the all-purpose flour with a 1:1 gluten-free baking blend that contains xanthan gum. I’ve had good results with Bob’s Red Mill brand. If you don’t have pumpkin pie spice, just use 1 teaspoon of cinnamon, ½ teaspoon of nutmeg, and ¼ teaspoon each of ginger and cloves.
Equipment Needed
One of the best parts of this recipe is how little gear you need. Here’s what you’ll need to have on hand:
- One Large Mixing Bowl: Any large bowl will do. I use my favorite ceramic mixing bowl, but a glass or metal one works just as well.
- Whisk or Wooden Spoon: A whisk is great for getting the batter smooth, but a sturdy wooden spoon or silicone spatula works perfectly too.
- 9×5-Inch Loaf Pan: This is the standard size for a loaf of bread. If you have an 8.5×4.5-inch pan, your loaf will be a little taller and may need an extra 5-10 minutes of baking time.
- Parchment Paper: Not strictly necessary, but it makes removing the bread from the pan a breeze. I like to leave a little overhang on the sides to use as handles.
- Measuring Cups and Spoons: For accurate measurements.
- Cooling Rack: Essential for letting the bread cool evenly so the bottom doesn’t get soggy.
If you don’t have parchment paper, you can generously grease the loaf pan with butter or non-stick spray. A little trick I learned: dust the greased pan with a tablespoon of flour and tap out the excess. It creates a non-stick barrier that works like a charm.
Preparation Method
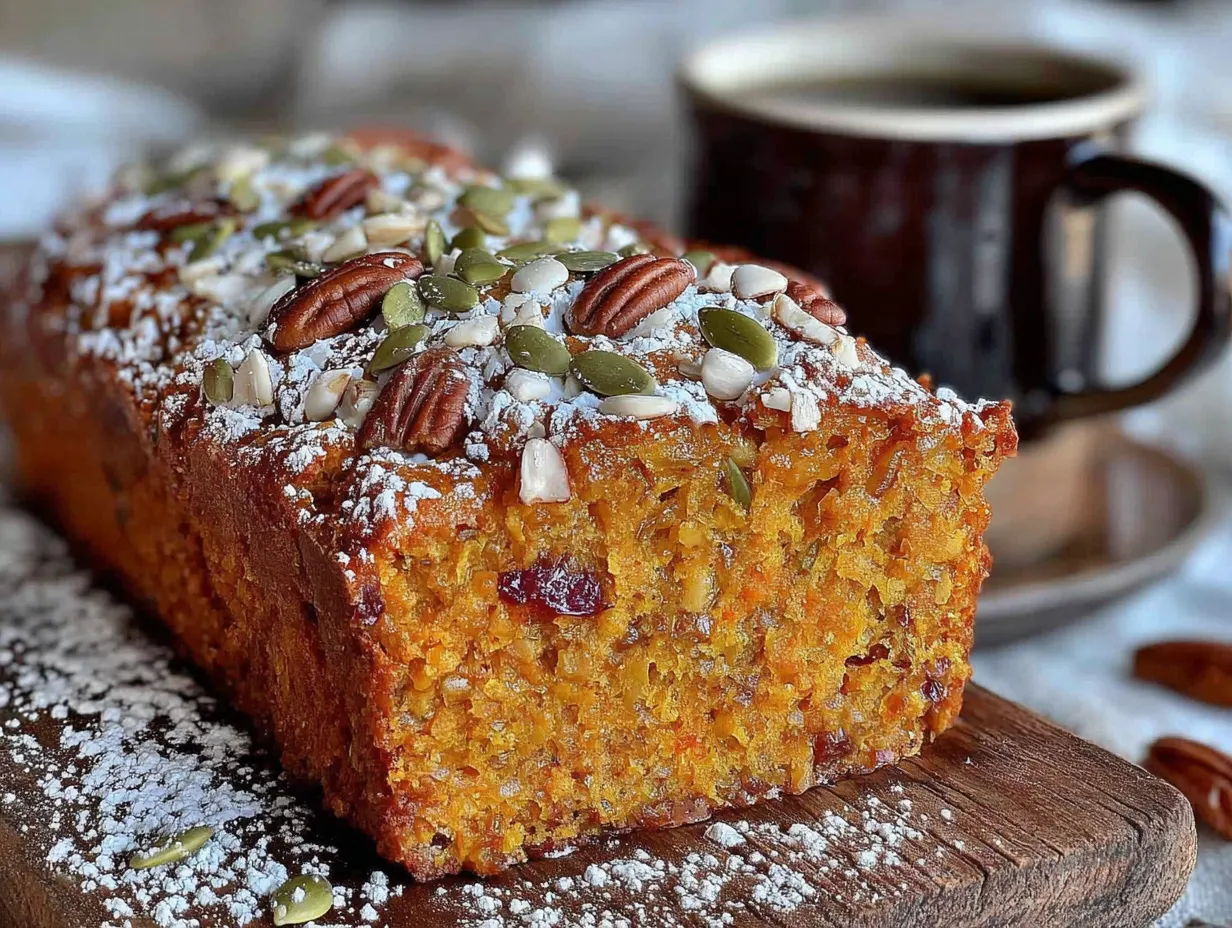
Making this easy one-bowl pumpkin banana bread is as simple as it sounds. Just follow these steps, and you’ll have a beautiful, fragrant loaf in no time.
- Preheat and Prep: First, preheat your oven to 350°F (175°C). Move the rack to the center position. Line your 9×5-inch loaf pan with a strip of parchment paper, leaving some overhang on the long sides, or grease it thoroughly.
- Mash the Banana: In your large mixing bowl, add the very ripe banana. Mash it well with a fork until it’s mostly smooth with just a few small lumps. This should take about 30 seconds.
- Combine the Wet Ingredients: To the mashed banana, add the pumpkin puree, both sugars, vegetable oil, eggs, and vanilla extract. Whisk everything together until it’s completely smooth and well combined. The mixture will look thick and glossy.
- Add the Dry Ingredients: Directly on top of the wet mixture, add the all-purpose flour, baking soda, pumpkin pie spice, cinnamon, and salt. Don’t stir yet!
- Mix Gently: Using a spatula or wooden spoon, gently fold the dry ingredients into the wet. Stir just until you no longer see any streaks of flour. A few lumps are perfectly fine. Overmixing at this stage can make the bread tough, so stop as soon as it comes together. The batter will be thick and slightly fluffy.
- Pour and Bake: Scrape the batter into your prepared loaf pan and spread it into an even layer. Bake for 50-60 minutes, or until a toothpick inserted into the center comes out clean or with just a few moist crumbs attached. The top should be a deep golden brown and spring back lightly when touched.
- Cool Completely: Place the pan on a cooling rack and let it cool for about 15 minutes. Then, using the parchment paper overhang, lift the bread out of the pan and transfer it directly to the cooling rack to cool completely. This is an important step—slicing it while it’s still warm can result in a gummy texture.
Pro-Tip: If the top of your bread is browning too quickly but the center isn’t done yet, loosely tent the loaf pan with a piece of aluminum foil for the last 15-20 minutes of baking. This will prevent the crust from burning while the inside finishes cooking.
Cooking Tips & Techniques
Over the years, I’ve learned a few tricks that make this simple bread even better. Here are some tips to ensure your loaf turns out perfect every time.
The Ripeness of Your Banana Matters. I cannot stress this enough. A green or barely yellow banana will not mash well and won’t provide enough sweetness or moisture. You want a banana that is heavily speckled with brown spots, or even completely black. It might look unappetizing, but that’s when it’s at its peak for baking. If your banana isn’t ripe enough, you can speed up the process by placing it (unpeeled) on a baking sheet in a 300°F oven for 15-20 minutes until the skin turns black.
Don’t Overmix the Batter. This is the most common mistake in quick bread baking. Once you add the flour, gluten starts to develop. If you stir too vigorously or for too long, you’ll end up with a tough, dense, or even tunnels in your bread. Mix just until the flour disappears. A few lumps are your friend here.
Check for Doneness Properly. Ovens can be finicky, and baking times are just guidelines. Start checking your bread at the 50-minute mark. Insert a toothpick or a thin knife into the very center of the loaf. If it comes out clean, it’s done. If it has wet batter on it, give it another 5 minutes and check again. I once pulled a loaf out too early because the top looked perfect, and the center was a gooey mess. Learn from my mistake!
Variations & Adaptations
This one-bowl pumpkin banana bread is a fantastic base recipe that’s easy to customize. Here are a few of my favorite variations to keep things interesting.
- Chocolate Chip Pumpkin Banana Bread: Fold in ¾ cup of semi-sweet or dark chocolate chips after mixing the batter. The warm, melted chocolate against the spiced pumpkin is a match made in heaven. I personally love using mini chocolate chips so they distribute more evenly.
- Nutty Crunch: Add ½ cup of toasted, chopped walnuts or pecans to the batter. For an extra touch, sprinkle another ¼ cup on top of the batter before baking for a beautiful, crunchy crust. Toasting the nuts first really brings out their flavor.
- Streusel Topping: For a more decadent loaf, make a quick streusel. Combine ¼ cup of flour, ¼ cup of brown sugar, ½ teaspoon of cinnamon, and 2 tablespoons of cold butter. Use your fingers to rub the butter into the dry ingredients until it forms coarse crumbs. Sprinkle this over the batter before baking.
- Dairy-Free & Vegan: To make this vegan, replace the two eggs with two “flax eggs” (2 tablespoons of ground flaxseed mixed with 5 tablespoons of water, left to sit for 5 minutes to thicken). The texture will be slightly denser but still delicious.
- Gluten-Free: As mentioned, a good 1:1 gluten-free flour blend works perfectly here. I’ve tested this with Cup4Cup and King Arthur Measure for Measure blends with great success. Just be sure not to overmix.
Serving & Storage Suggestions
This bread is wonderful in so many ways. Here’s how to enjoy it and keep it fresh.
Serving: This pumpkin banana bread is fantastic served slightly warm or at room temperature. A simple pat of butter melting into a warm slice is pure comfort. For a real treat, spread a slice with cream cheese or a dollop of maple-flavored Greek yogurt. It’s also delicious toasted the next day—the edges get slightly crispy while the inside stays soft. It pairs beautifully with a hot cup of coffee or a cozy pumpkin spice cold brew for the ultimate fall treat.
Storage: Store the completely cooled bread wrapped tightly in plastic wrap or in an airtight container at room temperature. It will stay moist and delicious for up to 4 days. I find the flavors actually meld together and taste even better on the second day.
Freezing: This bread freezes like a dream. To freeze the whole loaf, let it cool completely, then wrap it tightly in a layer of plastic wrap, followed by a layer of aluminum foil. It will keep in the freezer for up to 3 months. You can also freeze individual slices by wrapping them separately. This is perfect for grabbing a quick breakfast or snack. To thaw, simply leave a slice on the counter for about 30 minutes, or pop it in the microwave for 15-20 seconds.
Nutritional Information & Benefits
While this is a treat, it does offer some surprising nutritional perks thanks to its star ingredients. Here are the approximate nutritional values for one slice (based on 10 slices):
| Nutrient | Per Slice |
|---|---|
| Calories | ~245 |
| Fat | 9g |
| Carbohydrates | 38g |
| Fiber | 2g |
| Sugar | 21g |
| Protein | 4g |
Health Benefits: Pumpkin is packed with Vitamin A and fiber, which is great for eye health and digestion. Bananas are a fantastic source of potassium, which helps regulate blood pressure. By using oil instead of butter, this recipe is also naturally dairy-free. It’s a more wholesome way to satisfy that sweet bread craving, especially when compared to bakery-style loaves that are loaded with extra fats and preservatives. It’s the kind of treat you can feel good about sharing with your family.
Conclusion
This easy one-bowl pumpkin banana bread is more than just a recipe—it’s a solution to the age-old problem of wanting a delicious, homemade treat without spending an hour cleaning up. It proves that you don’t need fancy equipment or a sink full of bowls to create something truly wonderful. The combination of sweet banana and warm pumpkin spice is a classic for a reason, and this method makes it accessible for even the busiest of schedules.
I hope you give this recipe a try and see just how simple and rewarding it can be. Feel free to make it your own—toss in some chocolate chips, add a streusel topping, or just enjoy it as is. I guarantee you’ll be reaching for this recipe again and again. If you make it, I’d love to hear how it turned out! Leave a comment below or tag me in your photos. Happy baking!
Frequently Asked Questions
Can I use frozen banana instead of fresh?
Absolutely! Thaw the banana completely and drain off any excess liquid before mashing. The texture will be even softer and sweeter.
Why did my bread sink in the middle?
This usually happens if the bread is underbaked or if the oven door was opened too early. Make sure your oven is fully preheated and resist the urge to peek for the first 40 minutes.
Can I make this into muffins instead of a loaf?
Yes! Grease a 12-cup muffin tin and divide the batter evenly. Bake at 350°F (175°C) for 18-22 minutes, or until a toothpick inserted into a center muffin comes out clean.
Can I use whole wheat flour?
You can substitute up to half of the all-purpose flour with whole wheat flour. Using 100% whole wheat will result in a much denser, drier loaf.
How do I know if my baking soda is still good?
To test, place a teaspoon of baking soda in a small bowl and add a splash of vinegar. If it bubbles vigorously, it’s still active. If it barely fizzes, it’s time to buy a new box.
Pin This Recipe!
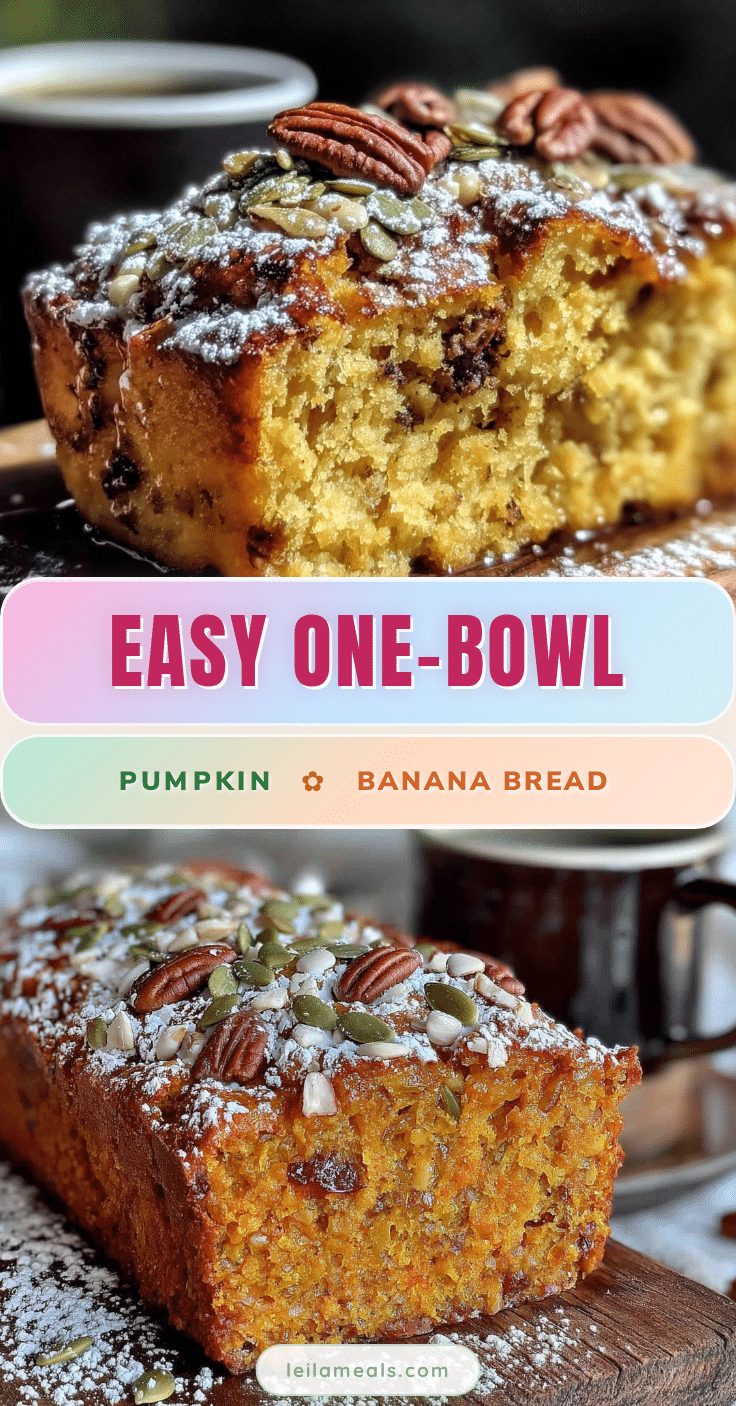
Easy One-Bowl Pumpkin Banana Bread (Best Recipe!)
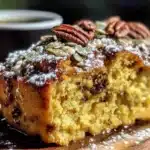
This easy one-bowl pumpkin banana bread is incredibly moist and flavorful, combining sweet banana with warm pumpkin spice. Made in a single bowl with no mixer, it’s a simple and foolproof recipe that delivers a perfect loaf every time.
- Prep Time: 15 minutes
- Cook Time: 55 minutes
- Total Time: 1 hour 10 minutes
- Yield: 10 servings 1x
- Category: Bread
- Cuisine: American
Ingredients
- 1 ½ cups (180g) all-purpose flour
- 1 teaspoon baking soda
- 1 ½ teaspoons pumpkin pie spice
- 1 teaspoon cinnamon
- ½ teaspoon salt
- ½ cup (100g) granulated sugar
- ½ cup (100g) packed light brown sugar
- 1 cup (240g) pumpkin puree (not pumpkin pie filling)
- 1 large ripe banana (about ½ cup / 120g mashed)
- ⅓ cup (80ml) vegetable oil (or melted coconut oil or canola oil)
- 2 large eggs, at room temperature
- 1 teaspoon vanilla extract
Instructions
- Preheat oven to 350°F (175°C). Move rack to center position. Line a 9×5-inch loaf pan with parchment paper, leaving overhang on long sides, or grease thoroughly.
- In a large mixing bowl, mash the ripe banana with a fork until mostly smooth with a few small lumps.
- Add pumpkin puree, both sugars, vegetable oil, eggs, and vanilla extract to the mashed banana. Whisk until completely smooth and well combined.
- Add all-purpose flour, baking soda, pumpkin pie spice, cinnamon, and salt directly on top of the wet mixture. Do not stir yet.
- Using a spatula or wooden spoon, gently fold the dry ingredients into the wet until just combined and no streaks of flour remain. A few lumps are fine. Do not overmix.
- Pour batter into prepared loaf pan and spread evenly. Bake for 50-60 minutes, or until a toothpick inserted into the center comes out clean or with a few moist crumbs. The top should be deep golden brown and spring back lightly.
- Place pan on a cooling rack and cool for 15 minutes. Then lift bread out using parchment overhang and transfer to cooling rack to cool completely before slicing.
Notes
If the top browns too quickly, tent loosely with aluminum foil for the last 15-20 minutes. For best results, use a very ripe banana (heavily speckled or black). Do not overmix the batter. Let cool completely before slicing to avoid gummy texture.
Nutrition
- Serving Size: 1 slice
- Calories: 245
- Sugar: 21
- Sodium: 280
- Fat: 9
- Saturated Fat: 1
- Carbohydrates: 38
- Fiber: 2
- Protein: 4
Keywords: pumpkin banana bread, one bowl, easy, moist, fall recipe, quick bread