I want a pumpkin muffin right now, but I don’t want 24 of them hanging around my kitchen for the next week. That’s the honest thought that hit me on a drizzly Tuesday afternoon when the air finally smelled like fall. I had one can of pumpkin puree left in the pantry, a carton of buttermilk about to expire, and zero desire to commit to a full batch of anything. So I did what any reasonable person would do—I scaled everything down until it felt right for just me and maybe one other person if they were lucky.
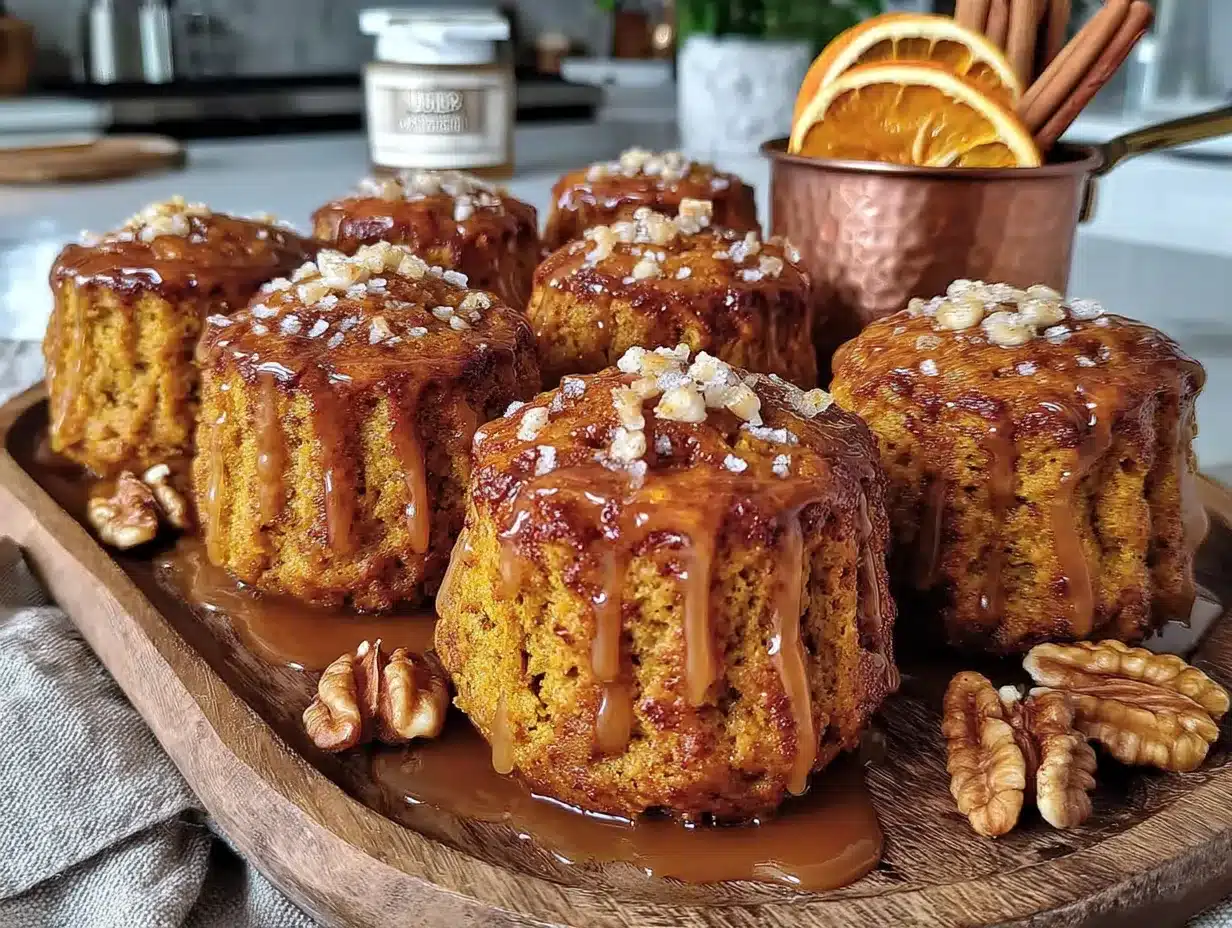
These cozy small-batch pumpkin muffins with maple glaze came out of that very specific craving. They’re not a compromise. They’re not a scaled-down afterthought. They’re intentionally made for those moments when you want something warm and spiced without the kitchen counter looking like a bakery exploded. The texture is exactly what you want from a pumpkin muffin—tender, domed tops, that perfect crumb that’s not too dense and not too airy. And the maple glaze? Honestly, that’s the part I kept tweaking until it felt like liquid gold. Not too sweet, with that unmistakable maple flavor that cuts through the warm spices.
I’ve tested this recipe about seven times now, and each batch confirmed what I suspected from the start. Sometimes you don’t need a dozen muffins. Sometimes you need just enough to satisfy the craving, share one with a friend, and still have room in your life for other things. This is that recipe. It’s the one I reach for when I want fall in a muffin tin without the commitment of a full batch. And if you’ve ever stood in your kitchen wondering if you really need twelve of anything—this one’s for you.
Why You’ll Love This Recipe
Let me tell you why these small-batch pumpkin muffins have earned a permanent spot in my fall rotation. First off, they come together in about 30 minutes from start to finish. That’s not a typo. By the time your coffee is ready, you could have warm muffins with that dreamy maple glaze dripping down the sides. No standing mixer required, no complicated techniques, just a bowl and a whisk and a whole lot of cozy vibes.
- Perfectly Portioned : This recipe makes exactly 6 muffins. Not 8, not 10, not 12. Six perfectly domed, golden beauties that are just enough for a few days of breakfast treats or an afternoon pick-me-up. No waste, no guilt, no wondering what to do with stale muffins on day four.
- Simple Pantry Ingredients : You probably have most of these in your kitchen right now. Pumpkin puree, flour, sugar, eggs, butter, and a few warm spices. The maple glaze uses just three ingredients. No weird specialty items that you’ll use once and forget about.
- Bakery-Style Tops : I figured out the trick to getting those gorgeous domed tops without any special equipment. It’s all about the resting time and oven temperature, and I’ll walk you through every step so your muffins come out looking like they belong in a fancy coffee shop case.
- That Maple Glaze : Let’s be real—the glaze is what takes these from good to unforgettable. It’s got that deep, almost woodsy maple flavor that pairs perfectly with the pumpkin and warm spices. I use real maple syrup here, not pancake syrup, and the difference is night and day.
- Fall Comfort in Every Bite : These muffins have that thing. You know the thing—where you take a bite and suddenly everything feels a little cozier, a little warmer, a little more like the season you’ve been waiting for. The cinnamon, ginger, and nutmeg hit just right, and the pumpkin keeps everything incredibly moist.
What makes this recipe different from the dozens of other pumpkin muffin recipes out there? It’s the combination of buttermilk and a tiny bit of melted butter that gives these muffins their tender crumb and golden crust. Plus, I use a technique where you let the batter rest for 10 minutes before baking. That little pause allows the flour to fully hydrate and the leavening to activate, which means taller, more evenly baked muffins every single time. I learned this trick after one too many flat-topped muffins, and honestly, it changed everything.
This is the kind of recipe that makes you close your eyes after the first bite. It’s comfort food in its purest form—simple, honest, and exactly what you need on a cool fall morning. And because it’s a small batch, you can make it just for yourself without feeling like you’re committing to a week’s worth of muffins. That’s the kind of freedom I can get behind.
What Ingredients You Will Need
This recipe uses simple, wholesome ingredients that work together to create muffins with incredible texture and deep fall flavor. Most of these are pantry staples, which means you’re probably already halfway to having everything you need.
For the Muffins
- All-purpose flour – 1 cup (120g). Spoon and level it for the most accurate measurement. Too much flour will make your muffins dense, and nobody wants that.
- Granulated sugar – ⅓ cup (65g). Just enough sweetness without overpowering the pumpkin and spices.
- Light brown sugar – 2 tablespoons (25g), packed. This adds moisture and a subtle molasses flavor that deepens the overall taste.
- Baking powder – 1 teaspoon. Make sure it’s fresh—old baking powder is the number one reason muffins don’t rise properly.
- Baking soda – ¼ teaspoon. Helps with browning and tenderness.
- Salt – ¼ teaspoon. Don’t skip this—it balances the sweetness and enhances the spices.
- Ground cinnamon – 1 teaspoon. The backbone of the spice blend. I use Ceylon cinnamon for its milder, sweeter flavor.
- Ground ginger – ½ teaspoon. Adds warmth without being overpowering.
- Ground nutmeg – ¼ teaspoon. Freshly grated if you have it—the difference is noticeable.
- Ground cloves – ⅛ teaspoon. A little goes a long way, but it adds that classic pumpkin pie depth.
- Pumpkin puree – ½ cup (120g). Make sure you’re using 100% pumpkin puree, not pumpkin pie filling. Libby’s is my go-to for consistent results.
- Buttermilk – ¼ cup (60ml). Room temperature. If you don’t have buttermilk, you can make a quick substitute by adding 1 teaspoon of lemon juice or white vinegar to regular milk and letting it sit for 5 minutes.
- Large egg – 1, room temperature. This helps with structure and moisture.
- Vanilla extract – 1 teaspoon. Pure vanilla extract makes a difference here.
- Unsalted butter – 3 tablespoons (42g), melted and slightly cooled.
For the Maple Glaze
- Powdered sugar – ½ cup (60g), sifted if it’s lumpy.
- Pure maple syrup – 2 tablespoons. Grade A dark amber is my preference for its robust flavor.
- Milk or heavy cream – 1 to 2 teaspoons, as needed. Heavy cream makes a richer, more luxurious glaze.
For the pumpkin puree, I recommend sticking with a trusted brand like Libby’s. I’ve tested this with store-brand pumpkin puree, and while it works fine, Libby’s consistently gives a slightly smoother texture and more vibrant color. If you’re using homemade pumpkin puree, just make sure it’s well-drained—excess moisture can throw off the muffin texture.
When it comes to the maple syrup, please use the real stuff. The imitation pancake syrups have a different consistency and an artificial flavor that just doesn’t work here. I like to use a dark amber maple syrup for the glaze because it has a more pronounced maple taste that stands up beautifully against the warm spices in the muffins. If all you have is grade A light amber, that works too—just know the maple flavor will be a bit more subtle.
If you’re looking for a dairy-free option, you can substitute the buttermilk with a dairy-free milk mixed with a teaspoon of lemon juice, and use a plant-based butter alternative. The texture will be slightly different, but still delicious. For a gluten-free version, use a 1:1 gluten-free flour blend that contains xanthan gum—I’ve had good results with Bob’s Red Mill 1:1 Baking Flour.
Equipment Needed
You don’t need much to make these muffins, which is exactly how I like my baking projects. Here’s what you’ll need:
- Standard 6-cup muffin tin – This is the star of the show. A standard muffin tin with ½-cup capacity cups works perfectly. If you only have a 12-cup tin, just fill the empty cups halfway with water to ensure even baking.
- Muffin liners – I prefer paper liners for easy cleanup, but you can also grease the tin thoroughly with butter or non-stick spray. If you want those bakery-style edges, skip the liners and grease the pan directly.
- Mixing bowls – One medium bowl for dry ingredients and one larger bowl for wet ingredients. Glass or stainless steel works great.
- Whisk – For combining everything smoothly. A fork works in a pinch, but a whisk gives you better control.
- Rubber spatula – For folding the batter and scraping every last bit into the muffin cups.
- Measuring cups and spoons – Accurate measurements matter in baking. I use dry measuring cups for flour and sugar, and a liquid measuring cup for the buttermilk and pumpkin.
- Kitchen scale – Optional but highly recommended. Weighing your ingredients gives you the most consistent results, especially with flour.
- Cooling rack – Essential for letting the muffins cool evenly so the glaze doesn’t slide right off.
- Small whisk or fork – For making the maple glaze. A fork works surprisingly well here.
If you don’t have a cooling rack, you can let the muffins cool in the pan for a few minutes, then transfer them to a plate. Just be careful—the bottoms can get a bit soggy if they sit in the hot pan too long. I learned that the hard way during my first test batch. Also, if you’re using a dark-colored muffin tin, reduce your oven temperature by 25°F to prevent the bottoms from browning too quickly. Dark pans absorb more heat, and nobody wants burnt muffin bottoms.
Preparation Method
Let’s walk through this step by step. I promise it’s easier than it looks, and I’ll share all the little tricks I’ve picked up along the way.
- Preheat your oven to 375°F (190°C) and position the rack in the center. Line 6 cups of your muffin tin with paper liners or grease them thoroughly. I like to use a light-colored metal pan for the most even browning.
- In a medium bowl, whisk together the dry ingredients – 1 cup all-purpose flour, ⅓ cup granulated sugar, 2 tablespoons packed light brown sugar, 1 teaspoon baking powder, ¼ teaspoon baking soda, ¼ teaspoon salt, 1 teaspoon cinnamon, ½ teaspoon ginger, ¼ teaspoon nutmeg, and ⅛ teaspoon cloves. Whisk until everything is evenly distributed. This ensures you don’t get pockets of baking powder or spice in your muffins.
- In a larger bowl, combine the wet ingredients – ½ cup pumpkin puree, ¼ cup buttermilk (room temperature), 1 large egg (room temperature), 1 teaspoon vanilla extract, and 3 tablespoons melted unsalted butter (cooled slightly). Whisk until smooth and fully combined. The mixture should look uniform and slightly glossy.
- Pour the dry ingredients into the wet ingredients and fold together with a rubber spatula. Use a gentle hand here—mix just until you no longer see streaks of flour. A few small lumps are perfectly fine. Overmixing will develop the gluten and make your muffins tough and dense. I count about 12 to 15 folds, and then I stop.
- Let the batter rest for 10 minutes at room temperature. This is my secret step. During this time, the flour fully hydrates, the leavening agents activate, and the starches begin to gelatinize. The result is taller, more evenly domed muffins with a better texture. Don’t skip this—it makes a real difference.
- Divide the batter evenly among the 6 muffin cups. I use a cookie scoop or a ¼-cup measure to ensure even portions. Each cup should be about ¾ full. The batter will be thick and slightly sticky—that’s exactly what you want.
- Bake for 15 to 18 minutes, or until the tops are golden brown and a toothpick inserted into the center of a muffin comes out clean or with a few moist crumbs. My oven usually takes about 16 minutes. The muffins should spring back lightly when you touch the tops.
- Cool in the pan for 5 minutes, then transfer the muffins to a wire rack. This short rest in the pan allows the muffins to set without sticking. After 5 minutes, gently lift them out and let them cool completely on the rack. If you try to glaze them while they’re still warm, the glaze will melt and soak into the muffins instead of sitting beautifully on top.
- While the muffins cool, make the maple glaze. In a small bowl, whisk together ½ cup powdered sugar and 2 tablespoons pure maple syrup until smooth. If the glaze is too thick, add milk or heavy cream 1 teaspoon at a time until it reaches a drizzling consistency. If it’s too thin, add a bit more powdered sugar. You want it thick enough to coat the back of a spoon but still pourable.
- Drizzle the glaze over the cooled muffins. I like to use a spoon to drizzle it back and forth in a zigzag pattern. Let the glaze set for about 10 minutes before serving. If you’re in a hurry, you can pop them in the fridge for 5 minutes to speed things up.
One thing I want to mention—if your muffins come out with flat tops, it’s usually because the oven wasn’t hot enough or the batter sat too long after mixing. That 10-minute rest is perfect, but don’t let the batter sit for 20 or 30 minutes. The leavening will start to lose its oomph, and you’ll end up with denser muffins. Trust me, I’ve tested that too.
Cooking Tips & Techniques
After making these muffins more times than I care to count, I’ve picked up a few things that make the process smoother and the results more consistent. Let me share what I’ve learned.
Room temperature ingredients matter. I know it’s tempting to use cold buttermilk straight from the fridge, but cold ingredients don’t emulsify as well with melted butter. The result can be a slightly greasy or uneven texture. Take the egg and buttermilk out of the fridge about 30 minutes before you start baking. If you forgot, place the egg in a bowl of warm water for 5 minutes, and microwave the buttermilk for about 10 seconds—just until it’s no longer cold to the touch.
Don’t overmix the batter. This is probably the most common mistake I see with muffin recipes. When you overmix, you develop the gluten in the flour, which leads to tough, rubbery muffins instead of tender, fluffy ones. Mix until the flour just disappears, and then stop. A few lumps are your friends here. I actually prefer using a spatula over an electric mixer for this reason—it gives you more control.
The resting period is non-negotiable. I mentioned this in the method, but it’s worth repeating. That 10-minute rest allows the starches in the flour to absorb the liquid, which creates a thicker batter that rises higher in the oven. It also gives the baking powder and baking soda time to start working, which means more even rising. I’ve tested batches with and without the rest, and the difference is noticeable every single time.
Use an ice cream scoop for even portions. A 2-tablespoon cookie scoop or a ¼-cup measure makes dividing the batter so much easier. You get evenly sized muffins that bake at the same rate, and you don’t have to guess whether each cup has enough batter. Plus, it’s less messy than using a spoon.
Rotate the pan halfway through baking. Ovens have hot spots, and rotating the pan ensures even browning. I do this at the 8-minute mark, quickly turning the pan 180 degrees. Don’t leave the oven door open too long—you’ll lose heat and the muffins might not rise as well.
Let the glaze set before stacking or storing. If you stack warm glazed muffins, you’ll end up with a sticky mess. Give the glaze at least 10 minutes to set at room temperature, or pop them in the fridge for a few minutes if you’re impatient like me. The glaze should be firm to the touch but still soft enough to be recognizable as glaze.
One failure I’ll admit to—my first test batch, I forgot the salt. The muffins tasted flat and one-dimensional, even with all those warm spices. Salt doesn’t just make things salty; it enhances and balances all the other flavors. Don’t skip it, and don’t reduce it. That ¼ teaspoon is doing important work.
Variations & Adaptations
One of the best things about this recipe is how easily it adapts to different tastes and dietary needs. Here are some variations I’ve tried and loved.
Add chocolate chips. Because chocolate makes everything better. Fold in ⅓ cup of semi-sweet or dark chocolate chips after mixing the batter. The warm spices and chocolate combo is absolutely divine. I’ve also tried white chocolate chips, and they’re amazing with the maple glaze.
Make them dairy-free. Substitute the buttermilk with a dairy-free milk (like almond or oat milk) mixed with 1 teaspoon of lemon juice, and use melted coconut oil or a plant-based butter alternative instead of regular butter. The texture will be slightly different—slightly less tender—but still delicious. I’ve tested this with oat milk and coconut oil, and the results were surprisingly good.
Add a streusel topping. For extra texture and sweetness, make a simple streusel by mixing 2 tablespoons flour, 2 tablespoons brown sugar, 2 tablespoons cold butter, and ¼ teaspoon cinnamon. Cut the butter into the dry ingredients until it resembles coarse crumbs, then sprinkle over the muffin batter before baking. The streusel adds a lovely crunch that contrasts with the soft muffin.
Swap the spices. If you don’t have all the individual spices, you can use 2 teaspoons of pumpkin pie spice instead of the cinnamon, ginger, nutmeg, and cloves. It’s not quite as complex, but it works in a pinch. I’ve done this when I ran out of ginger, and the muffins were still fantastic.
Make them mini. Use a mini muffin tin and reduce the baking time to 10 to 12 minutes. You’ll get about 18 mini muffins, which are perfect for snacking or packing in lunchboxes. The glaze recipe stays the same—just drizzle it over the cooled mini muffins.
Try a different glaze. If maple isn’t your thing, you can make a simple vanilla glaze by substituting the maple syrup with 2 tablespoons of milk and ½ teaspoon of vanilla extract. Or try a cream cheese glaze by mixing 2 ounces of softened cream cheese with ½ cup powdered sugar and a splash of milk. Both are delicious in their own way.
One variation I particularly love is adding chopped pecans or walnuts to the batter. About ¼ cup of toasted nuts adds a lovely crunch and pairs beautifully with the pumpkin and maple flavors. Toast them in a dry pan over medium heat for about 3 minutes until fragrant, then let them cool before folding them into the batter. The toasting step is important—raw nuts can taste a bit flat.
Serving & Storage Suggestions
These muffins are best served slightly warm, with the maple glaze still soft and glossy. If you’ve let them cool completely, you can warm them in the microwave for about 10 to 15 seconds—just enough to take the chill off without melting the glaze entirely.
For serving, I love to pair these muffins with a hot cup of coffee or a cozy pumpkin spice cold brew. The combination of warm spiced muffin and cold, creamy coffee is absolutely perfect for a fall morning. If you’re serving them for brunch, they also go beautifully with a creamy chicken and wild rice soup for a comforting lunch that feels like a warm hug.
For a more indulgent presentation, serve the muffins with a pat of butter on top and an extra drizzle of maple syrup. The butter melts into the warm muffin, and the maple syrup adds another layer of sweetness. It’s a little over the top, but sometimes that’s exactly what you need.
These muffins also make a great addition to a fall brunch spread alongside cozy pumpkin cinnamon rolls. The two recipes share similar flavors but offer different textures, and your guests will love having options.
Storage: Store the muffins in an airtight container at room temperature for up to 3 days. If you’ve already glazed them, place a sheet of paper towel at the bottom of the container to absorb any excess moisture. Don’t stack the muffins on top of each other, or the glaze will stick and smudge.
Freezing: These muffins freeze beautifully. Freeze them without the glaze for best results. Once cooled, wrap each muffin individually in plastic wrap, then place them in a freezer-safe bag or container. They’ll keep for up to 3 months. When you’re ready to enjoy them, thaw at room temperature for about an hour, then warm in the microwave or oven. Make the glaze fresh and drizzle it over the warmed muffins.
Reheating: For the best texture, reheat muffins in a 350°F oven for about 5 to 7 minutes. This restores the crispy edges and soft interior. The microwave works in a pinch, but it can make the muffins a bit rubbery. If you’re reheating glazed muffins, do it gently—the glaze can melt and become messy.
One thing I’ve noticed is that the flavors actually deepen after the first day. The spices meld together, and the pumpkin flavor becomes more pronounced. So if you can resist eating them all on day one, day two is even better. The texture stays moist and tender, especially if you’ve stored them properly.
Nutritional Information & Benefits
Here’s the nutritional breakdown for one muffin (based on 6 servings, with glaze):
| Nutrient | Amount per Muffin |
|---|---|
| Calories | 245 |
| Total Fat | 8g |
| Saturated Fat | 5g |
| Cholesterol | 45mg |
| Sodium | 220mg |
| Total Carbohydrates | 40g |
| Dietary Fiber | 2g |
| Sugars | 24g |
| Protein | 4g |
| Vitamin A | 80% DV |
| Vitamin C | 2% DV |
| Calcium | 6% DV |
| Iron | 8% DV |
Pumpkin is packed with vitamin A, which supports eye health and immune function. It’s also a good source of fiber, which helps with digestion and keeps you feeling full. The buttermilk adds calcium and probiotics, while the warm spices like cinnamon and ginger have anti-inflammatory properties.
These muffins are vegetarian-friendly and can easily be made dairy-free with the substitutions mentioned earlier. They’re also nut-free (unless you add nuts), which makes them a safe option for school lunches or gatherings. If you’re watching your sugar intake, you can reduce the sugar in the muffins to ¼ cup and skip the glaze—the muffins will still be flavorful and moist.
One thing I appreciate about this recipe is that it uses real, whole ingredients. No artificial flavors, no preservatives, just honest food that happens to taste incredible. And because it’s a small batch, you’re not tempted to overindulge. Everything in moderation, right?
Conclusion
These cozy small-batch pumpkin muffins with maple glaze are exactly what fall baking should be—simple, satisfying, and full of flavor. They come together quickly with ingredients you probably already have, and they deliver that warm, spiced comfort that makes this season so special. Whether you’re making them for a quiet morning with a cup of coffee, a weekend brunch with friends, or just because you need a little something sweet, they never disappoint.
What I love most about this recipe is how forgiving it is. You can customize the spices, add mix-ins, change up the glaze, and it always works. It’s the kind of recipe you can make your own. And because it only makes six, you can experiment without feeling like you’ve committed to a dozen muffins that might not turn out perfectly.
I’d love to hear how these turn out for you. Did you add chocolate chips? Try a different glaze? Make them for someone special? Drop a comment below and let me know. And if you share a photo on social media, tag me—I love seeing your baking adventures. Until next time, happy baking, and may your kitchen always smell like cinnamon and maple.
Frequently Asked Questions
Can I use canned pumpkin pie filling instead of pumpkin puree?
No, please don’t. Pumpkin pie filling already has sugar and spices added, which will throw off the balance of this recipe. Stick with 100% pumpkin puree for the best results. If you only have pumpkin pie filling, you’ll need to adjust the sugar and spices, but I can’t guarantee the texture will be the same.
Why did my muffins turn out dense and flat?
This usually happens for one of three reasons: overmixing the batter, using expired leavening agents, or not letting the batter rest. Make sure your baking powder and baking soda are fresh (less than 6 months old), mix just until combined, and don’t skip that 10-minute rest. Also, check that your oven is actually at 375°F—an oven thermometer is a worthwhile investment.
Can I make these muffins gluten-free?
Yes! Use a 1:1 gluten-free flour blend that contains xanthan gum, like Bob’s Red Mill 1:1 Baking Flour. The texture will be slightly different—a bit more crumbly—but still delicious. I’ve tested this substitution and it works well. Just be careful not to overmix, as gluten-free batters can get gummy if overworked.
How do I get that bakery-style domed top?
The key is the resting period and the high initial oven temperature. Letting the batter rest for 10 minutes allows the leavening to activate, which creates a stronger rise. Also, make sure your oven is fully preheated before you put the muffins in. You can also try baking at 400°F for the first 5 minutes, then reducing to 375°F for the remaining time—this creates a burst of steam that pushes the tops up.
Can I double this recipe to make 12 muffins?
Absolutely. Just double all the ingredients and follow the same instructions. You may need to add a minute or two to the baking time. If you’re using a 12-cup muffin tin, fill the empty cups with water to ensure even baking. The recipe scales beautifully, so don’t hesitate to make a full batch when you need more muffins.
Pin This Recipe!
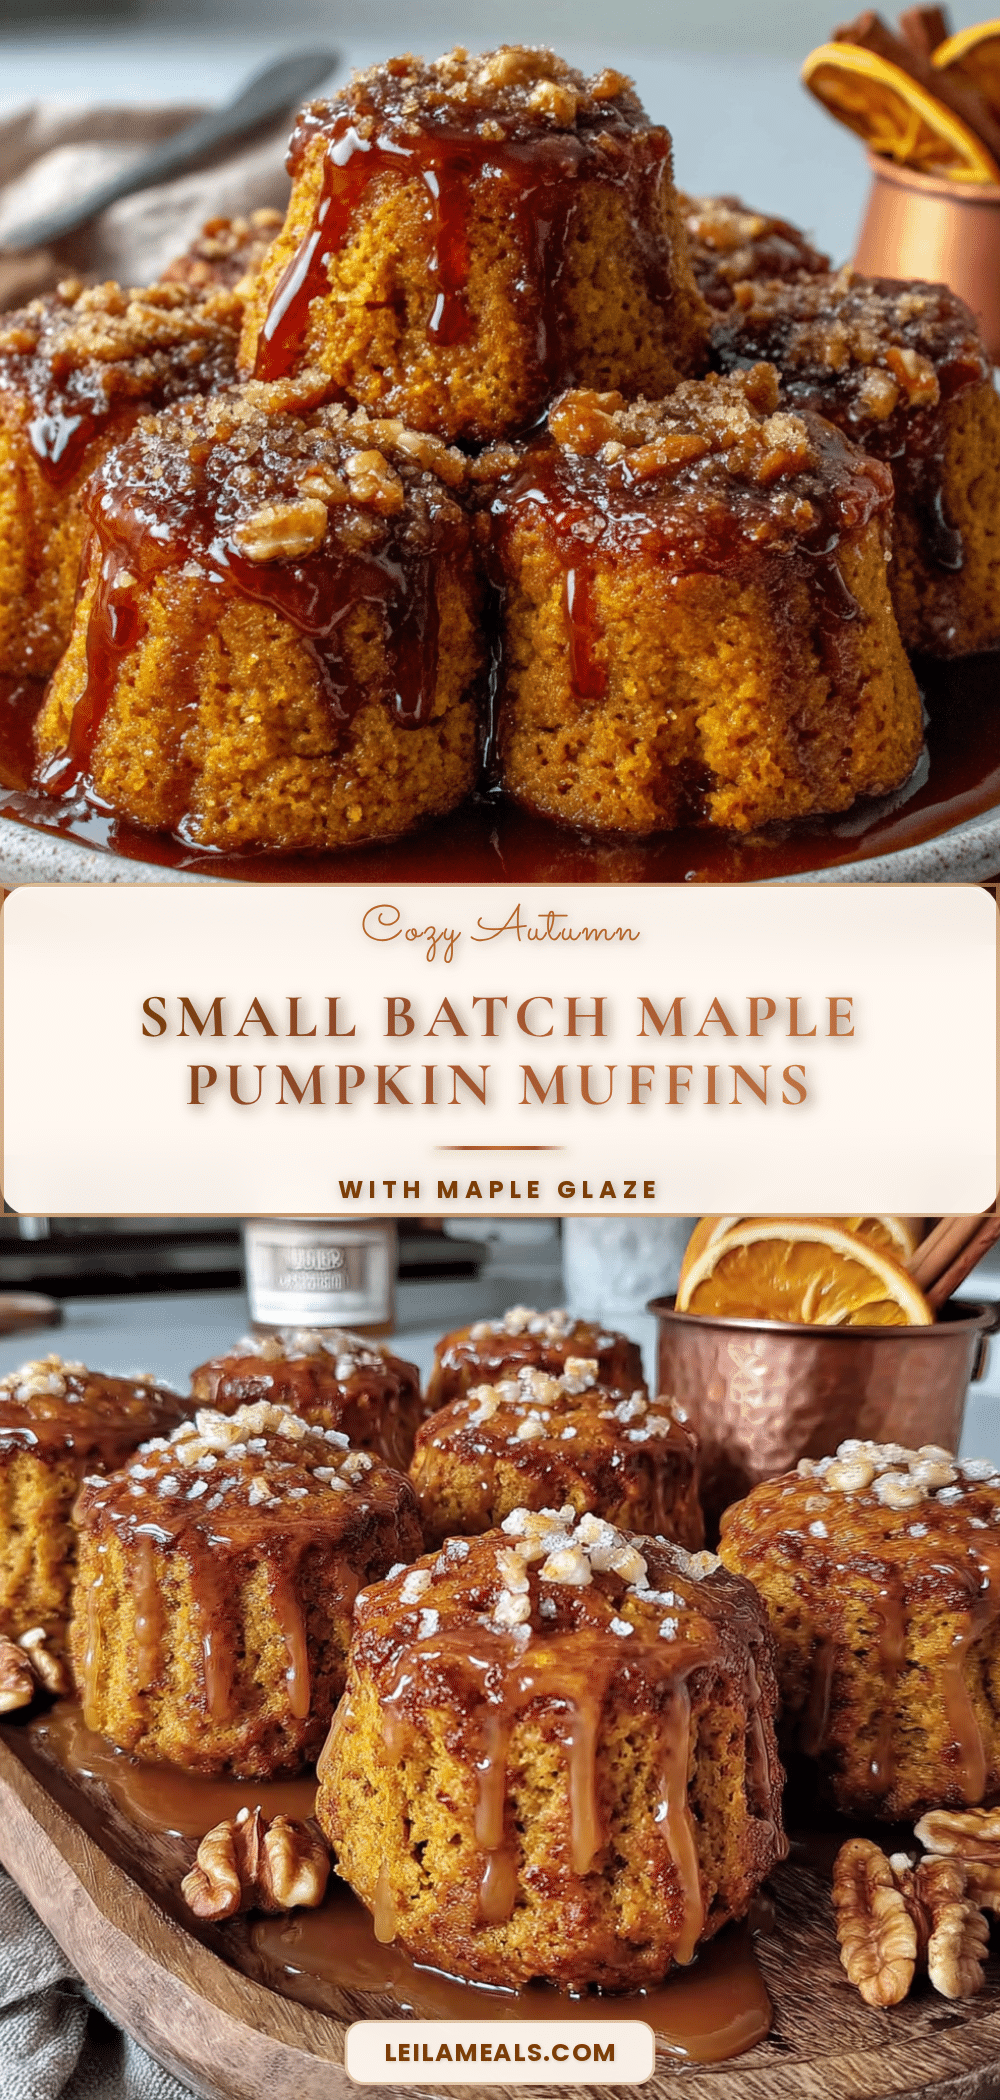
Cozy Small-Batch Pumpkin Muffins with Maple Glaze
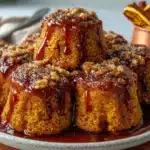
These tender, spiced pumpkin muffins are made in a small batch of six, topped with a rich maple glaze. Perfect for a cozy fall treat without the commitment of a full dozen.
- Prep Time: 15 minutes
- Cook Time: 16 minutes
- Total Time: 31 minutes
- Yield: 6 servings 1x
- Category: Dessert
- Cuisine: American
Ingredients
- 1 cup (120g) all-purpose flour
- ⅓ cup (65g) granulated sugar
- 2 tablespoons (25g) packed light brown sugar
- 1 teaspoon baking powder
- ¼ teaspoon baking soda
- ¼ teaspoon salt
- 1 teaspoon ground cinnamon
- ½ teaspoon ground ginger
- ¼ teaspoon ground nutmeg
- ⅛ teaspoon ground cloves
- ½ cup (120g) pumpkin puree
- ¼ cup (60ml) buttermilk, room temperature
- 1 large egg, room temperature
- 1 teaspoon vanilla extract
- 3 tablespoons (42g) unsalted butter, melted and slightly cooled
- ½ cup (60g) powdered sugar, sifted
- 2 tablespoons pure maple syrup
- 1 to 2 teaspoons milk or heavy cream
Instructions
- Preheat oven to 375°F (190°C). Line 6 cups of a standard muffin tin with paper liners or grease thoroughly.
- In a medium bowl, whisk together flour, granulated sugar, brown sugar, baking powder, baking soda, salt, cinnamon, ginger, nutmeg, and cloves.
- In a larger bowl, whisk together pumpkin puree, buttermilk, egg, vanilla extract, and melted butter until smooth.
- Pour dry ingredients into wet ingredients and fold with a rubber spatula until just combined (a few lumps are fine). Do not overmix.
- Let batter rest at room temperature for 10 minutes.
- Divide batter evenly among the 6 muffin cups, filling each about ¾ full.
- Bake for 15 to 18 minutes, until tops are golden and a toothpick inserted in center comes out clean or with a few moist crumbs.
- Cool in pan for 5 minutes, then transfer muffins to a wire rack to cool completely.
- While muffins cool, make the glaze: In a small bowl, whisk together powdered sugar and maple syrup until smooth. Add milk or cream 1 teaspoon at a time until drizzling consistency.
- Drizzle glaze over cooled muffins. Let set for about 10 minutes before serving.
Notes
For best results, use room temperature ingredients. Let batter rest for 10 minutes for taller, domed tops. Do not overmix. Use pure maple syrup for the glaze, not pancake syrup. Muffins can be stored in an airtight container at room temperature for up to 3 days. Freeze unglazed muffins for up to 3 months.
Nutrition
- Serving Size: 1 muffin
- Calories: 245
- Sugar: 24
- Sodium: 220
- Fat: 8
- Saturated Fat: 5
- Carbohydrates: 40
- Fiber: 2
- Protein: 4
Keywords: pumpkin muffins, small batch, maple glaze, fall recipe, easy muffins