My neighbor Ruth didn’t trust canned tomatoes from a jar. “They taste like the tin they live in,” she’d say every August when her garden exploded with Roma tomatoes. I’d nod, not really agreeing—store-bought was fine by me. Then she showed up at my door with three jars of her small-batch homemade tomato canning sauce, still warm from the water bath, and told me to try it on pasta that night. I put it in the pantry out of politeness. Two weeks later, I ran out of my usual jarred stuff and grabbed hers. That first bite of spaghetti—honestly, I felt a little embarrassed. Not because it was good, but because I’d been settling for something so much less for years. The sauce had this brightness, this clean tomato flavor that didn’t hide behind sugar or too much oregano. It tasted like August in a bowl. I asked for the recipe, expecting some complicated heirloom process. She shrugged and said, “It’s just tomatoes, garlic, basil, and patience.” That was it. No fancy equipment, no hours of stirring. Just a small batch of something real. I’ve been making it every summer since, tweaking it just a little, and now I’m finally sharing it with you.
This small-batch homemade tomato canning sauce is the kind of recipe that changes how you think about pantry staples. It is not about preserving bushels of tomatoes for the apocalypse. It is about putting up six or eight jars of the best pasta sauce you will ever taste, so you have it tucked away for busy weeknights or last-minute dinners that deserve something special. You do not need a pressure canner or a lifetime of experience. If you can boil water and chop garlic, you can make this.
Let me walk you through it.
Why You’ll Love This Recipe
I have tested this small-batch homemade tomato canning sauce more times than I care to count. The first batch was too watery. The second needed more salt. The third? That was the one where I finally understood what Ruth meant about patience. Here is why this recipe works, and why I think you will come back to it year after year.
- Small Batch, Big Flavor : This recipe makes about 6-8 pints, not 20 quarts. You can handle it in an afternoon without feeling like you are running a commercial kitchen.
- Simple Ingredients : Tomatoes, garlic, onion, basil, olive oil, salt. That is it. No citric acid powders or weird preservatives.
- Perfect for Garden Bounty : Got more tomatoes than you know what to do with? This is the answer. It uses about 10 pounds, which is exactly what a few plants will produce in a good week.
- No Special Skills Required : If you have ever boiled pasta, you can water bath can this sauce. It is beginner-friendly, I promise.
- Tastes Like Summer All Year : Opening a jar in January feels like a small miracle. The flavor is bright, fresh, and nothing like store-bought.
What makes this recipe different from the dozens of others out there? It is the roasting step. Instead of just simmering raw tomatoes, you roast them first with garlic and onion. This concentrates the flavor, deepens the sweetness, and gives you a sauce that tastes like it has been cooking all day—even though the active work is maybe 45 minutes. I have tried skipping this step to save time, and the sauce was flat. Do not skip it.
This sauce is the kind of thing that makes you feel proud. Proud of the work, proud of the jars lined up on your shelf, proud of the dinner you pull together in 20 minutes on a Tuesday night. It is comfort food you made yourself, and that matters.
What Ingredients You Will Need
This small-batch homemade tomato canning sauce uses simple, whole ingredients. The quality of each one matters because there are so few of them. Here is what you need, plus a few notes from my kitchen.
- Roma tomatoes (10 pounds) : These are the gold standard for canning sauce. They have fewer seeds and less water than other varieties, which means a thicker sauce with less simmering time. Look for tomatoes that are deep red, firm, and heavy for their size. If you cannot find Romas, San Marzano or Amish Paste work beautifully. Stay away from big beefsteak tomatoes—they are too watery.
- Garlic (1 whole head) : Use fresh garlic, not the pre-minced stuff in a jar. The roasting mellows it out, making it sweet and nutty instead of sharp. I like to use a full head because I love garlic. If you are more moderate, use half.
- Yellow onion (1 large) : A sweet onion like Vidalia works great, but any yellow onion will do. The roasting caramelizes it and adds depth to the sauce.
- Fresh basil (1 cup, packed) : Do not use dried basil here. Fresh basil adds a brightness that cannot be replicated. I grow my own in a pot on the porch, and I toss in whole leaves—stems and all—because the stems have flavor too. You will fish them out later.
- Extra virgin olive oil (1/4 cup) : Use a good quality oil because it is a primary flavor. I use California Olive Ranch for everyday cooking. Avoid anything labeled “light” or “pure”—those are too refined and lack flavor.
- Kosher salt (2 teaspoons, plus more to taste) : I use Diamond Crystal. If you use Morton, reduce to 1 1/2 teaspoons because it is denser and saltier. You can always add more, but you cannot take it out.
- Bottled lemon juice (2 tablespoons per pint jar) : This is non-negotiable for safe water bath canning. Tomatoes are borderline in acidity, and lemon juice ensures the pH is safe. Use bottled lemon juice, not fresh—it has a consistent acidity level that is tested and reliable.
Optional additions : Some people add a teaspoon of sugar per jar to balance acidity. I do not find it necessary with roasted tomatoes, but if your tomatoes are very tart, go ahead. You can also add a dried bay leaf to each jar for extra depth.
Equipment Needed
You do not need a lot of fancy gear for this small-batch homemade tomato canning sauce. Here is what I use, plus some alternatives if you are just starting out.
- Water bath canner or large stockpot : A water bath canner is ideal because it has a rack to keep jars off the bottom. But you can use any pot deep enough to cover the jars by at least an inch of water. I used a lobster pot for years before I bought a proper canner.
- Canning jars (6-8 pint-sized) : Use Mason jars with new lids and clean bands. I prefer wide-mouth pints because they are easier to fill and clean. Do not reuse lids—they will not seal properly.
- Jar lifter : This is a tool you should buy. Trying to grab hot jars with tongs is a recipe for burns and broken glass. They cost about $10 and are worth every penny.
- Canning funnel : A wide-mouth funnel makes filling jars clean and easy. Without one, you will spill sauce everywhere.
- Baking sheet with rim : For roasting the tomatoes. A half-sheet pan is perfect. Line it with parchment for easier cleanup.
- Immersion blender or food mill : I use an immersion blender right in the pot. A food mill produces a smoother sauce and removes seeds and skins completely. Both work fine.
- Large pot (8-quart or bigger) : For simmering the sauce after roasting.
- Kitchen towels : For drying jars and catching spills. I keep a stack of clean dish towels specifically for canning day.
Preparation Method
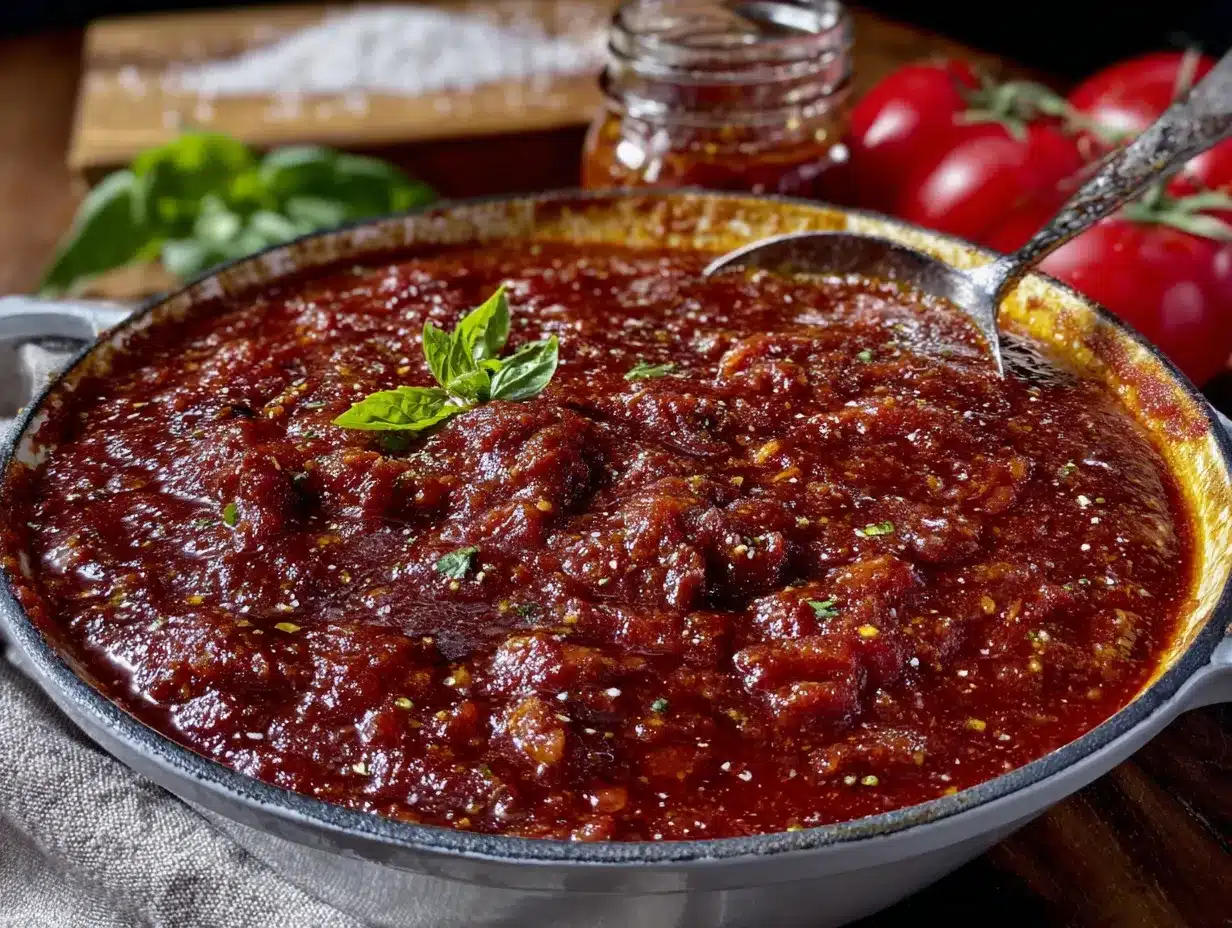
This process has three main stages: roasting, blending, and canning. Take your time with each one. Here is exactly how I do it.
- Preheat your oven to 400°F. Wash the tomatoes and cut them in half lengthwise. Remove the tough stem core but leave the seeds and skins—they add flavor and body. Arrange the tomato halves cut-side up on two rimmed baking sheets. Do not overcrowd; they need space to roast, not steam.
- Peel the garlic cloves from the head. Leave them whole. Cut the onion into 1-inch wedges. Scatter the garlic and onion over the tomatoes. Drizzle everything with the olive oil and sprinkle with 1 teaspoon of salt. Toss gently with your hands to coat.
- Roast for 45-60 minutes, rotating the pans halfway through. The tomatoes should be softened, slightly wrinkled, and beginning to brown around the edges. The garlic should be golden and soft enough to squish. The onions will be caramelized and sweet. Let everything cool on the pans for 10 minutes.
- Transfer the roasted vegetables to a large pot. Add the fresh basil (stems and all). Use an immersion blender to puree until smooth. If you want a completely seedless sauce, pass the mixture through a food mill instead. I like a little texture, so I leave some tiny seed pieces.
- Bring the sauce to a gentle simmer over medium heat. Reduce the heat to low and cook, stirring occasionally, for 30-45 minutes. The sauce should thicken slightly and reduce by about a quarter. Taste and add more salt if needed. Remember, you will add lemon juice later, which also adds saltiness.
- While the sauce simmers, prepare your canning equipment. Wash the jars, lids, and bands in hot soapy water. Rinse well. Place the jars in your canner or stockpot, cover with water, and bring to a simmer (180°F). Keep them hot until you are ready to fill. Place the lids in a small saucepan of hot water (not boiling) to soften the rubber seals.
- Add the lemon juice to each hot jar: 2 tablespoons per pint. Use a funnel to ladle the hot sauce into the jars, leaving 1/2 inch of headspace at the top. Run a non-metallic spatula or chopstick around the inside of each jar to release air bubbles. Wipe the jar rims clean with a damp paper towel. Center a lid on each jar and screw on the band until fingertip-tight—do not overtighten.
- Place the filled jars back into the canner using your jar lifter. Make sure they are covered by at least 1 inch of water. Bring the water to a full rolling boil, then start your timer: 35 minutes for pints at sea level. Adjust for altitude if needed (add 5 minutes for every 1,000 feet above sea level).
- When the time is up, turn off the heat and let the jars sit in the water for 5 minutes. Then remove them with the jar lifter and place them on a clean kitchen towel, leaving at least 1 inch of space between jars. Do not tighten the bands or touch the lids. Let them cool completely, undisturbed, for 12-24 hours.
- Check the seals by pressing the center of each lid. If it does not pop back, it is sealed. Remove the bands, wipe the jars clean, label with the date, and store in a cool, dark place. Any unsealed jars should be refrigerated and used within a week.
Cooking Tips & Techniques
I have made this small-batch homemade tomato canning sauce more times than I can count, and I have made every mistake in the book. Here is what I learned so you do not have to.
Do not skip the roasting step. I know it adds time, but it is the single most important thing you can do for flavor. The first time I made this, I was in a hurry and just simmered the raw tomatoes. The sauce was thin and tasted like watered-down tomato juice. Roasting concentrates the sugars and adds a subtle smokiness that makes the sauce taste like it cooked all day.
Watch your headspace. Too much air in the jar and the seal might fail. Too little and the sauce can bubble out during processing. The 1/2 inch rule is not arbitrary—it is tested and safe. I use a chopstick to measure if I am unsure.
Do not rush the cooling process. I once moved a jar while it was still warm, and the seal broke. You will hear a loud pop as the lid releases, and it is heartbreaking. Let the jars sit completely undisturbed for the full 12 hours. I usually make the sauce in the afternoon and leave the jars on the counter overnight.
Use bottled lemon juice, not fresh. I know it feels wrong—fresh is always better, right? Not here. Bottled lemon juice has a standardized acidity level that ensures your sauce is safe for water bath canning. Fresh lemons vary too much. I keep a bottle of ReaLemon in my pantry just for canning.
If you are short on time, you can skip the canning step entirely and just refrigerate or freeze the sauce. It will keep in the fridge for about a week or in the freezer for up to 6 months. Just skip the lemon juice if you are not canning—it is not needed for flavor, only for safety.
Variations & Adaptations
This small-batch homemade tomato canning sauce is a great base for customization. Here are a few ways I have adapted it over the years.
Spicy Arrabiata Version : Add 2-3 dried red chili peppers to the roasting pan with the tomatoes. Remove them before blending, or leave one in for extra heat. I made this version last summer and gave jars to friends who love spicy food—it was gone in weeks.
Herb Garden Medley : Swap half the basil for a mix of fresh oregano, thyme, and rosemary. Use about 1/2 cup total of mixed herbs. This version works beautifully in Italian dishes like lasagna or baked ziti. I like it on a peach burrata flatbread for a sweet-savory twist.
Roasted Red Pepper Addition : Add 2 large red bell peppers to the roasting pan. Core and seed them, cut into strips, and roast alongside the tomatoes. This adds sweetness and a gorgeous color. The sauce becomes almost creamy without any dairy.
Low-Sodium Option : Reduce the salt to 1 teaspoon total and skip the salt in the roasting step. Rely on the lemon juice and herbs for flavor. The sauce will still be delicious, just less salty. You can always add salt when you cook with it later.
Smoky Chipotle Version : Add 1-2 chipotle peppers in adobo sauce to the pot before blending. This gives the sauce a smoky, spicy kick that is amazing on tacos or in green chile chicken enchiladas. Start with one pepper and taste before adding more—chipotle heat builds fast.
Serving & Storage Suggestions
This small-batch homemade tomato canning sauce is incredibly versatile. Here is how I use it throughout the year.
Serving suggestions : The obvious use is over pasta—spaghetti, penne, or rigatoni all work. But I also use it as a pizza sauce, a base for shakshuka, or a dipping sauce for crusty bread. It is amazing on zucchini parmesan fritters for a quick appetizer. Serve it warm, straight from the jar, or reheated gently on the stove.
Temperature and presentation : The sauce is best served warm, not boiling hot. Reheat it slowly over low heat, stirring occasionally. If it thickens too much, add a splash of pasta water or a drizzle of olive oil. Garnish with fresh basil and grated Parmesan if you want to be fancy.
Storage instructions : Sealed jars will keep in a cool, dark pantry for up to 18 months. Once opened, refrigerate and use within 5-7 days. I keep an opened jar in the fridge door for quick dinners. The flavor actually improves after a few days in the fridge—the herbs meld together beautifully.
Freezing option : If you do not want to can, pour the cooled sauce into freezer-safe containers or zip-top bags. Leave 1 inch of headspace for expansion. Freeze flat for easy stacking. Thaw in the refrigerator overnight or run the container under warm water.
Flavor development : The sauce tastes best after about a month of sitting. The flavors mellow and blend together. I always save the first jar I open for at least 4 weeks after canning. It is worth the wait.
Nutritional Information & Benefits
This small-batch homemade tomato canning sauce is not just delicious—it is good for you. Here is what is in a typical 1/2 cup serving.
- Calories : Approximately 80-100, depending on olive oil content
- Fat : 5-7 grams (mostly from heart-healthy olive oil)
- Carbohydrates : 8-10 grams
- Fiber : 2-3 grams
- Sugar : 5-7 grams (natural, from tomatoes)
- Protein : 2 grams
- Sodium : 200-300 mg (adjustable with salt)
- Vitamin C : 20% of daily value
- Vitamin A : 15% of daily value
- Lycopene : High levels, especially from cooked tomatoes
Health benefits : Tomatoes are rich in lycopene, a powerful antioxidant linked to heart health and reduced cancer risk. Cooking tomatoes actually increases the bioavailability of lycopene, so this sauce is even more beneficial than raw tomatoes. The olive oil adds healthy monounsaturated fats, which help your body absorb the fat-soluble vitamins in the tomatoes. Garlic and onions provide anti-inflammatory compounds and support immune health.
Dietary considerations : This sauce is naturally vegan, gluten-free, dairy-free, and nut-free. It is also Whole30-friendly if you omit any added sugar. The only potential allergen is garlic, which some people with FODMAP sensitivities may need to avoid. For a low-FODMAP version, use garlic-infused olive oil instead of whole garlic.
Conclusion
This small-batch homemade tomato canning sauce is the recipe I look forward to every summer. It is not complicated, and it does not require a kitchen full of gadgets. It just asks for good tomatoes, a little patience, and the willingness to try something that takes a few hours but rewards you for months.
I love that I can open a jar in February and taste August. I love that I know exactly what is in it—no preservatives, no added sugar, no mystery ingredients. And I love that it makes me feel connected to something real, something handmade, something that matters.
If you have never canned before, start here. This small batch is forgiving and manageable. If you are a seasoned canner, you will appreciate the simplicity and the clean, pure flavor. Either way, I hope you make this sauce your own. Add your favorite herbs, adjust the garlic, make it spicy or mild. That is the beauty of a small batch—it is yours.
I would love to hear how it turns out. Drop a comment below or tag me in your photos. And if you have a favorite way to use this sauce, share it—I am always looking for new ideas. Happy canning, friends.
Frequently Asked Questions
Can I use this recipe for water bath canning without lemon juice?
No. Tomatoes are borderline in acidity, and lemon juice ensures the pH is safe for water bath canning. Bottled lemon juice has a standardized acidity level that is tested and reliable. Do not skip it or substitute with fresh lemon juice, which can vary in acidity.
How long does homemade tomato canning sauce last?
Sealed jars stored in a cool, dark pantry will last 12-18 months. The quality is best within the first year. Once opened, refrigerate and use within 5-7 days. Always check the seal before using—if the lid pops when pressed, the seal has failed and the sauce should be discarded.
Can I double this recipe?
Absolutely. This recipe scales up easily. Just make sure you have enough roasting pans and a large enough pot for simmering. The processing time in the water bath remains the same for pints. If you are using quart jars, increase the processing time to 45 minutes and add 4 tablespoons of lemon juice per quart.
Why did my sauce separate in the jar?
Separation is normal and not a sign of spoilage. The watery liquid is just tomato juice that settled. Give the jar a good shake before opening, or stir the sauce after opening. To minimize separation, make sure you simmer the sauce long enough to thicken it before canning.
Can I use this sauce for canning if I add meat or vegetables?
No. This recipe is tested for safety as a tomato-only sauce. Adding meat, vegetables, or other low-acid ingredients changes the pH and requires pressure canning for safety. If you want to add extras, do it when you open the jar and cook the sauce for immediate use.
Pin This Recipe!
Small-Batch Homemade Tomato Canning Sauce: Easy Canning Recipe
This small-batch homemade tomato canning sauce is the kind of recipe that changes how you think about pantry staples. It is about putting up six or eight jars of the best pasta sauce you will ever taste, so you have it tucked away for busy weeknights or last-minute dinners that deserve something special.
- Prep Time: 45 minutes
- Cook Time: 1 hour 30 minutes
- Total Time: 2 hours 15 minutes
- Yield: 6-8 pint jars
- Category: Sauce
- Cuisine: American
Ingredients
- Roma tomatoes (10 pounds)
- Garlic (1 whole head)
- Yellow onion (1 large)
- Fresh basil (1 cup, packed)
- Extra virgin olive oil (1/4 cup)
- Kosher salt (2 teaspoons, plus more to taste)
- Bottled lemon juice (2 tablespoons per pint jar)
Instructions
- Preheat your oven to 400°F. Wash the tomatoes and cut them in half lengthwise. Remove the tough stem core but leave the seeds and skins. Arrange the tomato halves cut-side up on two rimmed baking sheets. Do not overcrowd.
- Peel the garlic cloves from the head. Leave them whole. Cut the onion into 1-inch wedges. Scatter the garlic and onion over the tomatoes. Drizzle everything with the olive oil and sprinkle with 1 teaspoon of salt. Toss gently with your hands to coat.
- Roast for 45-60 minutes, rotating the pans halfway through. The tomatoes should be softened, slightly wrinkled, and beginning to brown around the edges. The garlic should be golden and soft enough to squish. Let everything cool on the pans for 10 minutes.
- Transfer the roasted vegetables to a large pot. Add the fresh basil (stems and all). Use an immersion blender to puree until smooth. If you want a completely seedless sauce, pass the mixture through a food mill instead.
- Bring the sauce to a gentle simmer over medium heat. Reduce the heat to low and cook, stirring occasionally, for 30-45 minutes. The sauce should thicken slightly and reduce by about a quarter. Taste and add more salt if needed.
- While the sauce simmers, prepare your canning equipment. Wash the jars, lids, and bands in hot soapy water. Rinse well. Place the jars in your canner or stockpot, cover with water, and bring to a simmer (180°F). Keep them hot until you are ready to fill. Place the lids in a small saucepan of hot water (not boiling) to soften the rubber seals.
- Add the lemon juice to each hot jar: 2 tablespoons per pint. Use a funnel to ladle the hot sauce into the jars, leaving 1/2 inch of headspace at the top. Run a non-metallic spatula or chopstick around the inside of each jar to release air bubbles. Wipe the jar rims clean with a damp paper towel. Center a lid on each jar and screw on the band until fingertip-tight—do not overtighten.
- Place the filled jars back into the canner using your jar lifter. Make sure they are covered by at least 1 inch of water. Bring the water to a full rolling boil, then start your timer: 35 minutes for pints at sea level. Adjust for altitude if needed (add 5 minutes for every 1,000 feet above sea level).
- When the time is up, turn off the heat and let the jars sit in the water for 5 minutes. Then remove them with the jar lifter and place them on a clean kitchen towel, leaving at least 1 inch of space between jars. Do not tighten the bands or touch the lids. Let them cool completely, undisturbed, for 12-24 hours.
- Check the seals by pressing the center of each lid. If it does not pop back, it is sealed. Remove the bands, wipe the jars clean, label with the date, and store in a cool, dark place. Any unsealed jars should be refrigerated and used within a week.
Notes
Do not skip the roasting step—it concentrates the sugars and adds a subtle smokiness. Use bottled lemon juice, not fresh, for safe canning. Let jars cool completely undisturbed for 12-24 hours to ensure proper seals. The sauce tastes best after about a month of sitting.
Nutrition
- Serving Size: 1/2 cup
- Calories: 80100
- Sugar: 57
- Sodium: 200300
- Fat: 57
- Saturated Fat: 1
- Carbohydrates: 810
- Fiber: 23
- Protein: 2
Keywords: tomato canning sauce, small batch canning, homemade pasta sauce, water bath canning, garden tomato sauce, easy canning recipe