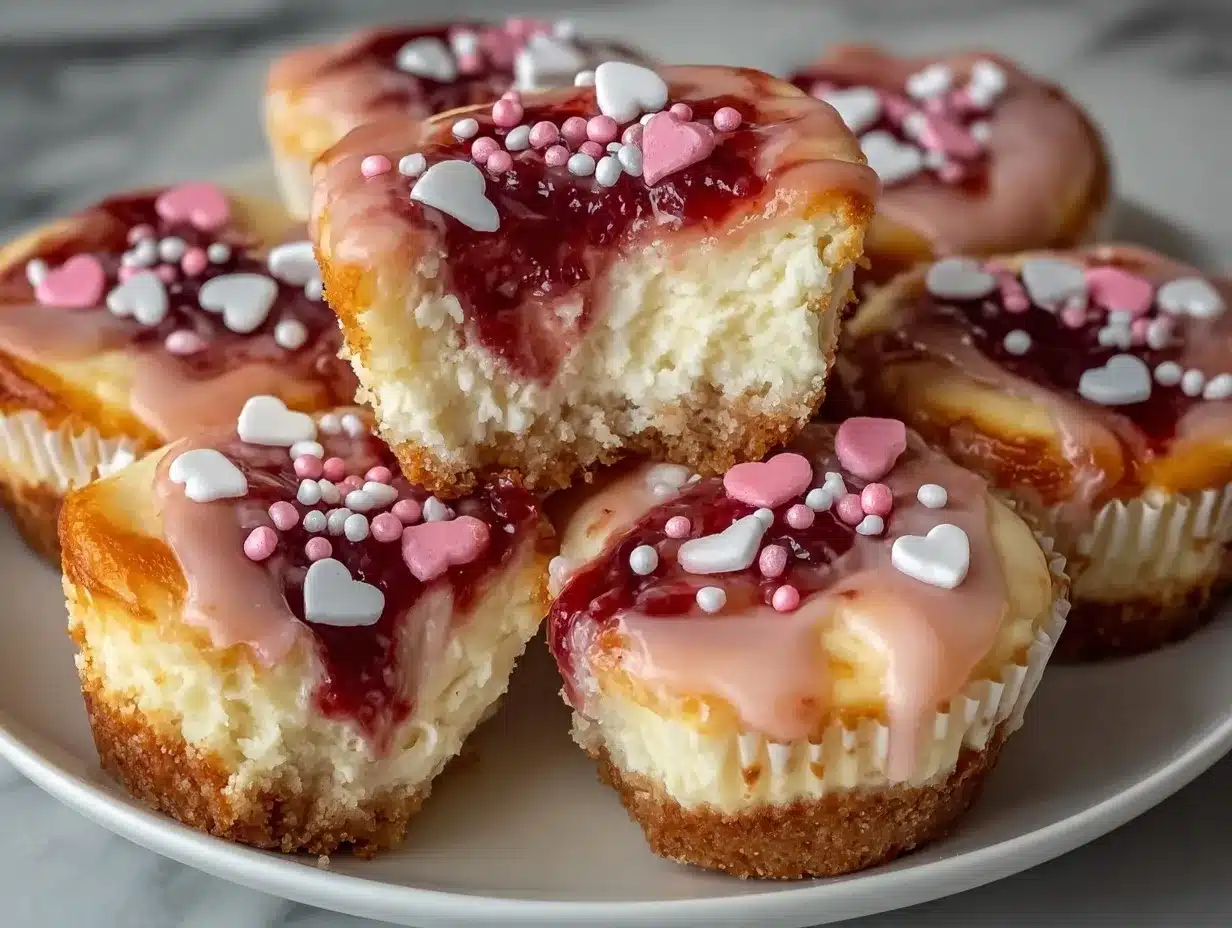
Picture this: the kitchen is filled with the sweet aroma of buttery graham cracker crumbs and creamy cheesecake filling, while a splash of cherry pink catches your eye—yep, that’s the magic of these Valentine’s Pink Cherry Cheesecake Cups! The first time I pulled a tray of these out of the fridge, the colors alone made everyone in my house stop in their tracks. Not gonna lie, the moment felt like when you pause, take a deep breath, and just grin because you know you’ve created something totally special. The velvety cheesecake, the gorgeous pink hue, and that punch of cherry—honestly, they’re the kind of treat you wish you’d stumbled upon years ago.
Growing up, my grandma would whip up cheesecakes for every holiday, but she never tried anything quite like this. I started tinkering with cheesecake cups years ago (back when I was knee-high to a grasshopper), trying to recreate those nostalgic flavors in a modern, bite-sized way. These little guys are dangerously easy to make, and they deliver pure comfort—plus, they look adorable on any dessert table. At our last family Valentine’s party, my kids couldn’t stop sneaking them, and even my husband (who claims he’s “not a dessert guy”) went back for seconds. Let’s face it, there’s something about the combo of tangy cream cheese, sweet cherries, and a hint of vanilla that makes these cups irresistible.
I tested this recipe more times than I care to admit (all in the name of research, of course), and now it’s a staple for family celebrations, gifting to friends, and even brightening up my Pinterest boards. If you’re looking for an easy party dessert that feels like a warm hug and looks like a Valentine’s Day dream, you’re going to want to bookmark these Valentine’s Pink Cherry Cheesecake Cups. Trust me, these will steal the show at any celebration!
Why You’ll Love These Valentine’s Pink Cherry Cheesecake Cups
- Quick & Easy: You can whip them up in under 30 minutes of hands-on time—perfect for busy schedules or last-minute party prep.
- Simple Ingredients: No hunting for fancy stuff; everything needed is pretty much a pantry staple or a quick grocery grab.
- Perfect for Celebrations: These cheesecake cups are ideal for Valentine’s Day, birthday parties, bridal showers, or just a sweet treat for your kids.
- Crowd-Pleaser: From toddlers to grandparents, everyone goes wild for the creamy texture and pops of cherry flavor.
- Unbelievably Delicious: The combination of velvety cream cheese, vibrant cherries, and a buttery graham base is pure comfort food—honestly, you’ll want to close your eyes and savor every bite.
Here’s what sets this recipe apart: I use a little cherry juice and a drop of pink food coloring to get that gorgeous Valentine’s color (no more dull, beige cheesecake!). The filling is ultra-creamy, thanks to the perfect blend of cream cheese and Greek yogurt, and the cherry swirl adds a punch of fruity flavor. I spent way too many hours tweaking the crust-to-filling ratio, and now it’s spot on—no more soggy bottoms or bland bites.
These cups aren’t just pretty to look at. They’re the kind of dessert that brings people together—whether you’re trying to impress guests, treat your sweetie, or just spoil yourself on a cozy night in. It’s the exact recipe I reach for when I want something simple, fun, and guaranteed to make people smile. Plus, you can make them ahead and they travel beautifully. That’s a win-win!
What Ingredients You Will Need
This recipe uses simple, wholesome ingredients to deliver bold flavor and a satisfying texture—without any fuss. Most of these are things you probably already have lurking in your fridge or pantry, and if not, they’re easy to find at any grocery store. Let’s break it down:
- For the Graham Cracker Crust:
- 1 cup (100g) graham cracker crumbs (classic, but digestive biscuits work too)
- 3 tbsp (40g) unsalted butter, melted (adds richness and helps the crust hold)
- 1 tbsp (12g) granulated sugar (just a touch to balance the tang)
- Pinch of salt (brings out the flavors)
- For the Cheesecake Filling:
- 8 oz (225g) cream cheese, softened (I like Philadelphia for best texture)
- 1/3 cup (80g) Greek yogurt or sour cream (for tang and creaminess)
- 1/3 cup (65g) granulated sugar (you could use coconut sugar for a hint of caramel)
- 1 large egg, room temperature (for structure—leave it out for a no-bake version)
- 1 tsp vanilla extract (trust me, don’t skip this!)
- 2 tbsp (30ml) cherry juice (from canned cherries or jarred cherry pie filling)
- Pink food coloring (just a drop or two—optional, but makes the cups super festive)
- For the Cherry Swirl & Topping:
- 1/2 cup (120g) cherry pie filling or canned cherries, chopped (I use Oregon brand for real fruit chunks)
- Extra cherry halves for garnish (totally optional, but they look adorable!)
- Whipped cream (homemade or store-bought—go wild!)
- Festive sprinkles or edible glitter (for extra Pinterest pizzazz)
If you’re gluten-free, use almond flour or gluten-free cookie crumbs for the crust. For dairy-free cheesecake cups, swap in dairy-free cream cheese and coconut yogurt (So Delicious works well). In summer, try swapping the cherries for fresh strawberries or raspberries. Ingredient substitutions are easy, and honestly, don’t stress if you have to tweak—these cups are forgiving!
Equipment Needed
- 12-cup muffin tin (standard size works best for portion control)
- Paper or silicone cupcake liners (makes for easy cleanup and serving)
- Mixing bowls (one for crust, one for filling)
- Hand mixer or stand mixer (a whisk works in a pinch, but a mixer means less elbow grease)
- Measuring cups and spoons (accuracy matters for cheesecake texture!)
- Rubber spatula (for scraping every last bit of filling)
- Small spoon or scoop (for pressing crust into liners)
If you don’t have a muffin tin, mini mason jars or ramekins work just fine—just adjust the crust and filling amounts for different sizes. Silicone liners are my go-to for easy release (plus, they last forever), but paper works too. Keeping your mixer clean is key—wipe it down after every use; sticky cheesecake batter can gum up the works! Budget hack: Dollar store measuring cups are perfectly fine, just check for accurate markings.
Preparation Method
- Prep the muffin tin: Line a 12-cup muffin tin with paper or silicone liners. This keeps everything neat and makes unmolding a breeze.
- Make the crust: In a medium bowl, stir together 1 cup (100g) graham cracker crumbs, 3 tbsp (40g) melted butter, 1 tbsp (12g) sugar, and a pinch of salt until the mixture looks like wet sand. If it feels too dry, add a little more melted butter, a teaspoon at a time.
- Press the crust: Spoon about 1 tablespoon (10g) of the crust mixture into each liner. Use the back of a spoon or your fingers to press firmly. The crust should feel compact, not loose. Set aside.
- Make the cheesecake filling: In a large bowl, beat 8 oz (225g) cream cheese until smooth—no lumps! Add 1/3 cup (80g) Greek yogurt, 1/3 cup (65g) sugar, 1 large egg, and 1 tsp vanilla extract. Mix until creamy and well-blended. Scrape the bowl a few times so nothing sticks.
- Add color and cherry flavor: Pour in 2 tbsp (30ml) cherry juice and a drop or two of pink food coloring. Mix just until the color is even. (Don’t over-mix or the filling can get too runny.)
- Fill the cups: Spoon about 2 tablespoons (25g) of cheesecake filling into each crust-lined cup. The filling should cover the crust and leave just a bit of space at the top.
- Add the cherry swirl: Drop a small spoonful (about 1 teaspoon) of cherry pie filling or chopped cherries on top of each cup. Use a toothpick or skewer to gently swirl the cherry into the cheesecake mixture for a marbled effect. It doesn’t have to be perfect—imperfections are pretty!
- Bake: Bake at 325°F (163°C) for 16-18 minutes, until the centers are set but still have a slight jiggle. If you’re going for a no-bake version, skip the egg and refrigerate for 3-4 hours instead.
- Cool and chill: Let the cups cool in the tin for 10 minutes, then move to a wire rack. Once room temperature, chill in the fridge for at least 2 hours (overnight is even better for flavor!).
- Top and serve: Before serving, add whipped cream, extra cherry halves, and festive sprinkles. The cups should be cold to the touch and firm.
Troubleshooting: If the cheesecake filling cracks, it’s usually from over-baking. If the crust feels crumbly, add a touch more butter next time. If the cherry swirl sinks, just swirl less aggressively. My personal hack: Make these a day ahead—the flavors meld and the texture improves overnight!
Cooking Tips & Techniques
Honestly, the secret to great Valentine’s Pink Cherry Cheesecake Cups is all about the details. Here are my best tried-and-true tips:
- Room temperature ingredients matter: Cold cream cheese leads to lumps, so let it sit out for 30 minutes before mixing.
- Don’t over-mix: Too much mixing adds air, which can cause cracks. Mix just until smooth.
- Watch your bake time: Cheesecake is done when the center jiggles slightly. Over-baking makes it dry.
- Chill for flavor: Refrigerating the cups overnight helps the flavors meld and gives a firmer texture.
- Keep it consistent: Use a cookie scoop for even portions—this means every cup bakes the same.
- Make ahead: These cheesecake cups are fantastic for prepping ahead. They hold up well for up to three days in the fridge.
Once, I tried to rush the cooling process (because, you know, impatience), and the cups sank in the middle—lesson learned! If you skip the chill, things can get messy. Multitasking tip: While the cups chill, whip up your toppings and prep your serving tray. And hey, if the cherry swirl goes wonky, just sprinkle a little extra glitter—no one will notice.
Variations & Adaptations
These Valentine’s Pink Cherry Cheesecake Cups are super versatile—here are a few ways I like to switch things up:
- Gluten-Free: Use gluten-free graham crackers or almond flour for a crust that’s just as tasty. A friend of mine swears by pecan meal for extra crunch.
- Dairy-Free: Swap regular cream cheese for a plant-based version and use coconut yogurt instead of Greek yogurt. The texture is a little lighter but still creamy.
- Berry Twist: Try raspberries or strawberries in place of cherries for a fresh, summery vibe.
- No-Bake Version: Leave out the egg and skip baking—just chill the cups for 3-4 hours. They’re softer, but perfect for hot days.
- Chocolate Swirl: Add a drizzle of melted chocolate with the cherry swirl for an extra decadent treat (my kids go nuts for this).
Allergen swaps are easy—use nut-free cookies for the crust, or lactose-free dairy as needed. Once, I tried adding a hint of almond extract to the filling, and wow, it really paired well with the cherries. Don’t be afraid to customize for your family’s tastes!
Serving & Storage Suggestions
Serve these Valentine’s Pink Cherry Cheesecake Cups cold for best texture. I like to add a swirl of whipped cream and a cherry half on top—makes them pop on any dessert tray. For parties, arrange on a pretty platter with sprinkles or edible glitter for that Pinterest-worthy look!
Pair with a cup of coffee, sparkling rosé, or even a glass of milk for the kiddos. These cups also play well alongside fresh fruit or chocolate-dipped strawberries.
To store: pop them in an airtight container in the fridge for up to 3 days. They freeze well too—just wrap tightly and thaw overnight in the fridge. Reheat (if needed) by letting them sit at room temperature for 15 minutes (don’t microwave, or they’ll get soggy). Honestly, the flavors get even richer after a day; the cherry and vanilla really shine.
Nutritional Information & Benefits
Each Valentine’s Pink Cherry Cheesecake Cup has, on average: 180 calories, 13g fat, 15g carbs, and 4g protein. They’re portion-controlled, so you get all the flavor without going overboard.
Cherries are packed with antioxidants and vitamin C, while Greek yogurt adds a nice protein boost. You can make these gluten-free or low-carb by swapping ingredients (see above). The main allergens are dairy, eggs, and gluten (if not adapted).
From a wellness perspective, these cheesecake cups are a treat—but having a small, satisfying dessert means you can indulge without guilt. My personal rule: a little bit of sweetness makes celebrations brighter!
Conclusion
If you’re looking for an easy, adorable, and truly delicious party dessert, these Valentine’s Pink Cherry Cheesecake Cups are the answer. They’re simple, flexible, and guaranteed to bring smiles—whether you’re celebrating Valentine’s, a birthday, or just want something sweet.
Feel free to tweak the flavors, swap ingredients, and make these cups your own. That’s the beauty of a good recipe—it’s always a little different in every kitchen.
I love these because they remind me of family, fun, and the little joys that make holidays memorable (plus, they’re just darn cute). Give them a try, share your tweaks in the comments, and don’t forget to pin for later. Happy baking, friends!
Frequently Asked Questions
Can I make these Valentine’s Pink Cherry Cheesecake Cups ahead of time?
Absolutely! They actually taste better after a night in the fridge, and you can make them up to three days ahead.
Do I have to use cherry pie filling, or can I use fresh cherries?
You can use fresh, pitted cherries or any berry you love—just chop them and stir with a little sugar for the swirl.
Are these cheesecake cups gluten-free?
They can be! Just use gluten-free graham crackers or almond flour for the crust.
Can I freeze the cheesecake cups?
Yes, wrap them tightly and pop in the freezer for up to two months. Thaw in the fridge before serving.
How do I keep the cheesecake filling from cracking?
Don’t over-mix, bake just until set, and let them cool gradually before chilling—these three tricks will keep the tops smooth and creamy.
Pin This Recipe!
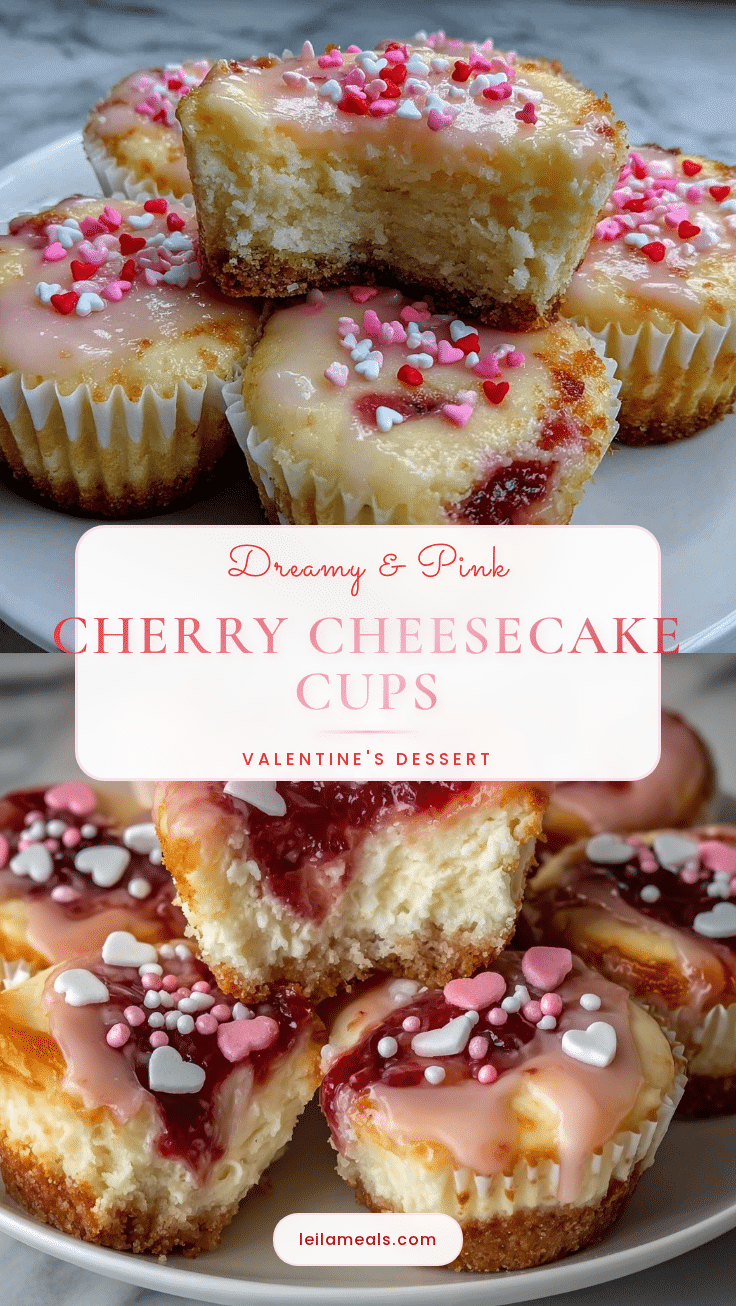
Valentine’s Pink Cherry Cheesecake Cups
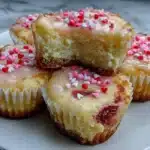
These Valentine’s Pink Cherry Cheesecake Cups are a quick, easy, and adorable party dessert featuring a buttery graham cracker crust, creamy pink cheesecake filling, and a cherry swirl. Perfect for celebrations, they’re portion-controlled, crowd-pleasing, and can be made ahead for stress-free entertaining.
- Prep Time: 15 minutes
- Cook Time: 18 minutes
- Total Time: 2 hours 45 minutes
- Yield: 12 cheesecake cups 1x
- Category: Dessert
- Cuisine: American
Ingredients
- 1 cup (100g) graham cracker crumbs
- 3 tbsp (40g) unsalted butter, melted
- 1 tbsp (12g) granulated sugar
- Pinch of salt
- 8 oz (225g) cream cheese, softened
- 1/3 cup (80g) Greek yogurt or sour cream
- 1/3 cup (65g) granulated sugar
- 1 large egg, room temperature
- 1 tsp vanilla extract
- 2 tbsp (30ml) cherry juice
- Pink food coloring (optional, a drop or two)
- 1/2 cup (120g) cherry pie filling or canned cherries, chopped
- Extra cherry halves for garnish (optional)
- Whipped cream (homemade or store-bought)
- Festive sprinkles or edible glitter (optional)
Instructions
- Line a 12-cup muffin tin with paper or silicone liners.
- In a medium bowl, stir together graham cracker crumbs, melted butter, sugar, and a pinch of salt until the mixture resembles wet sand.
- Spoon about 1 tablespoon of the crust mixture into each liner and press firmly to compact. Set aside.
- In a large bowl, beat cream cheese until smooth. Add Greek yogurt, sugar, egg, and vanilla extract. Mix until creamy and well-blended, scraping the bowl as needed.
- Add cherry juice and pink food coloring (if using). Mix just until the color is even.
- Spoon about 2 tablespoons of cheesecake filling into each crust-lined cup, leaving a bit of space at the top.
- Drop a small spoonful (about 1 teaspoon) of cherry pie filling or chopped cherries on top of each cup. Swirl gently with a toothpick or skewer.
- Bake at 325°F (163°C) for 16-18 minutes, until centers are set but still slightly jiggly. (For no-bake: skip the egg and refrigerate for 3-4 hours instead.)
- Let cups cool in the tin for 10 minutes, then transfer to a wire rack. Once at room temperature, chill in the fridge for at least 2 hours (overnight is best).
- Before serving, top with whipped cream, extra cherry halves, and sprinkles or glitter if desired. Serve cold.
Notes
For gluten-free, use almond flour or gluten-free cookie crumbs for the crust. For dairy-free, substitute plant-based cream cheese and coconut yogurt. Don’t over-mix the filling to avoid cracks. Chill overnight for best flavor and texture. These cups can be made ahead and freeze well. If making no-bake, omit the egg and chill for 3-4 hours.
Nutrition
- Serving Size: 1 cheesecake cup
- Calories: 180
- Sugar: 10
- Sodium: 120
- Fat: 13
- Saturated Fat: 7
- Carbohydrates: 15
- Protein: 4
Keywords: cheesecake cups, cherry cheesecake, Valentine’s dessert, party dessert, mini cheesecake, pink dessert, easy cheesecake, make ahead dessert