Imagine this—steam rising from pots of bubbling water, the aroma of garlic and fresh basil filling the air, and platters overflowing with vibrant veggies, cheeses, and sauces. That’s what greeted me the first time I hosted a Galentine’s DIY Pasta Bar for my closest friends. I’ll never forget the way everyone’s faces lit up when they saw the colorful spread—like kids in a candy store, but with way more carbs (and laughter!).
The first time I put together this pasta bar, I was knee-high to a grasshopper, helping my mom prep for girls’ night in. Years later, it’s become my go-to for celebrating Galentine’s Day—because honestly, who doesn’t love a night filled with comfort food, friendship, and a touch of sparkle? It’s the kind of moment where you pause, take a deep breath, and just smile because you know you’re onto something truly special. There’s something about gathering your favorite girls, rolling up your sleeves, and letting everyone build their dream pasta bowl that feels downright magical.
My family couldn’t stop sneaking bites off the prep trays (and I can’t really blame them). When my best friend declared, “This is dangerously easy and so much fun!”—I knew this pasta bar would be a staple for every Galentine’s celebration, Sunday potluck, or cozy girls’ night from then on. Whether you’re looking to brighten up your Pinterest party board or just want an excuse to eat pasta in your pajamas, this recipe is pure, nostalgic comfort—each bowl feels like a warm hug, and you’re going to want to bookmark this one.
After testing dozens of sauce combos (in the name of research, of course), I finally landed on the perfect mix of flavors and textures. Now, every year, my Galentine’s DIY Pasta Bar brings the kind of joy that makes you laugh until you snort and eat until you’re happily stuffed. Let’s face it, nothing says “I love you, friend” like letting her pile extra cheese on her pasta. Welcome to your new favorite party tradition!
Why You’ll Love This Perfect Galentine’s DIY Pasta Bar
Let me spill the beans (or noodles)—this isn’t just a meal, it’s an experience. After years of hosting girls’ nights and experimenting with countless pasta bar setups, I’ve gathered a treasure trove of tips to make this celebration stand out. It’s chef-tested, friend-approved, and a true party starter for the ages.
- Quick & Easy: Comes together in under an hour, so you’ll spend less time fussing and more time laughing with your girls.
- Simple Ingredients: No fancy grocery trips—just pantry staples, fresh produce, and a handful of delicious cheeses and sauces.
- Perfect for Galentine’s: Ideal for a festive girls’ night, Valentine’s brunch, or anytime you want to celebrate friendship with flair.
- Crowd-Pleaser: Kids, adults, picky eaters—everyone gets to create their own bowl (and they always come back for seconds).
- Unbelievably Delicious: The mix-and-match options means every plate is bursting with flavor, texture, and color—seriously, it’s comfort food turned up to eleven.
What sets this pasta bar apart? For starters, the sauces are all about balance—think rich tomato basil, creamy Alfredo, and a zippy pesto that brightens up every bite. The toppings? Next-level, with roasted veggies, crunchy nuts, and fresh herbs that make everyone feel like a kitchen rockstar. You know what’s even better? You can prep everything ahead, so you’re not stuck sweating over the stove when you’d rather be sipping rosé and gossiping.
This pasta bar isn’t just “good”—it’s the kind of meal that makes you close your eyes after the first bite and sigh with happiness. It’s all about giving your favorite ladies a night to remember, without the stress or complicated prep. Whether you’re hosting two or twelve, this DIY pasta bar transforms a simple dinner into a full-on celebration, bursting with laughter, love, and carbs.
Trust me, once you try this setup, you’ll wonder why you didn’t start making pasta bars for every occasion years ago. It’s comfort food that’s festive, customizable, and so easy you’ll be planning another girls’ night before you’ve even finished cleaning up.
What Ingredients You Will Need for the Perfect Galentine’s DIY Pasta Bar
This pasta bar is all about keeping things simple, fresh, and full of flavor. Most ingredients are pantry staples, and you can mix and match depending on what’s in season or what your friends love. Here’s what you’ll need to create a festive spread that’ll wow your Galentine’s crew.
- For the Pasta:
- Rigatoni (1 lb / 450 g)
- Penne (1 lb / 450 g)
- Farfalle (1 lb / 450 g)
- Gluten-free pasta (optional, 12 oz / 340 g)
- Fresh ravioli or tortellini (optional for a fun twist, 1 lb / 450 g)
- For the Sauces:
- Marinara sauce (2 cups / 480 ml, homemade or store-bought)
- Creamy Alfredo sauce (2 cups / 480 ml)
- Pesto sauce (1 cup / 240 ml)
- Vodka sauce (1 cup / 240 ml, optional for extra flair)
- Olive oil & garlic (classic, ½ cup / 120 ml, warmed)
- For the Toppings:
- Grated Parmesan cheese (1 cup / 100 g)
- Fresh mozzarella pearls (1 cup / 150 g)
- Crumbled feta cheese (½ cup / 75 g)
- Chopped fresh basil (½ cup / 15 g)
- Chopped fresh parsley (¼ cup / 7 g)
- Toasted pine nuts (¼ cup / 30 g)
- Chopped sun-dried tomatoes (½ cup / 60 g)
- Roasted cherry tomatoes (1 cup / 150 g)
- Sauteed mushrooms (1 cup / 120 g)
- Grilled or roasted bell peppers (1 cup / 120 g)
- Olives, sliced (½ cup / 60 g, any variety)
- Red pepper flakes (to taste)
- Freshly cracked black pepper (to taste)
- Extra virgin olive oil (for drizzling)
- For Protein Options (Optional):
- Grilled chicken breast, sliced (2 cups / 250 g)
- Italian sausage, cooked and crumbled (1 cup / 140 g)
- Chickpeas, roasted (1 cup / 170 g, for a plant-based protein boost)
- Shrimp, sautéed (1 cup / 140 g, if you’re feeling fancy)
- Extras & Garnishes:
- Lemon wedges (for brightening flavors)
- Microgreens (just a handful for a pretty touch)
- Balsamic glaze (drizzle for extra zing)
I always keep a mix of cheeses on hand—Parmesan for salty goodness, mozzarella for creaminess, and feta for a tangy punch. For sauces, I stick with what my friends love but toss in a wildcard (like vodka sauce) for the adventurous types. If you’ve got dietary needs, swap regular pasta for gluten-free or chickpea varieties, and use dairy-free cheese and sauces for vegan pals. In summer, I love swapping in grilled zucchini or eggplant for the toppings—so fresh!
If you’re short on time, store-bought sauces can be a lifesaver. I recommend Rao’s for marinara and Trader Joe’s for pesto. For those with allergies, double-check labels and offer nut-free pesto or cheese alternatives.
With so many options, everyone gets to craft their perfect bowl—no one leaves hungry, and everyone leaves happy.
Equipment Needed
- Large pots: At least two for boiling different types of pasta (trust me, it’s worth it for variety).
- Colanders: One for each pasta type, or rinse between uses.
- Serving bowls: Big bowls for pasta and sauces—bonus points for pretty, colorful ones that pop on the table.
- Small bowls & ramekins: Perfect for toppings, cheeses, and garnishes.
- Tongs and serving spoons: For easy self-serve action (I love using tongs for pasta, spoons for sauces).
- Cutting board & knife: For prepping veggies, proteins, and herbs.
- Grater or microplane: For fresh Parmesan or zesting lemons.
- Sheet pans: For roasting veggies and proteins (easy cleanup).
- Slow cooker or warming tray (optional): Keeps sauces hot for longer parties.
If you’re working with a small kitchen, swap big pots for a single pot and batch-cook your pasta. I’ve used thrift store bowls (they’re quirky and perfect!) and even old tea cups for toppings. For warming trays, I use my trusty slow cooker on “keep warm”—it works like a charm. Maintenance tip: Soak pots and pans right after serving to avoid stuck-on pasta bits (learned that one the hard way).
Honestly, you don’t need anything fancy. Just a few bowls and a good grater, and you’re golden!
Preparation Method
-
Prep the Pasta:
Fill two large pots with salted water (about 1 tbsp / 15 g salt per gallon / 3.8 L water) and bring to a rolling boil. Add rigatoni to one pot and penne to the other. Cook each according to package instructions (usually 10-12 minutes for rigatoni, 8-10 minutes for penne) until al dente.
Tip: Stir occasionally to prevent sticking. Taste a noodle before draining—should be firm but tender. -
Prepare the Sauces:
While pasta cooks, warm your marinara, Alfredo, and pesto sauces in separate saucepans over low heat (about 5-10 minutes). If using store-bought, add a splash of olive oil and fresh herbs to boost flavor. For homemade, simmer gently, stirring occasionally.
Prep note: Keep sauces covered to avoid skin forming. -
Roast or Sauté Toppings:
Preheat oven to 400°F (200°C). Spread cherry tomatoes, mushrooms, and bell peppers on sheet pans; drizzle with olive oil, salt, and pepper. Roast for 20 minutes, tossing halfway through.
Warning: Watch closely—veggies can burn quickly. -
Cook Proteins (Optional):
Grill or sauté chicken breasts (season with salt, pepper, and a touch of garlic powder) for 6-8 minutes per side, until cooked through. Cook Italian sausage in a skillet, breaking apart, until browned (about 10 minutes). Sauté shrimp with olive oil and garlic until pink (about 3 minutes per side).
Personal tip: Let cooked proteins rest before slicing—keeps them juicy! -
Prep Cheeses and Herbs:
Grate Parmesan, slice mozzarella, and crumble feta into small bowls. Chop basil and parsley; keep cold until serving.
Efficiency tip: Prep cheeses and herbs while veggies roast to save time. -
Arrange the Pasta Bar:
Drain pasta and toss lightly with olive oil to prevent sticking. Transfer each pasta type to large serving bowls. Place sauces in smaller bowls (or slow cooker if using), and arrange toppings in ramekins around the table.
Sensory cue: Everything should be colorful and inviting—a feast for the eyes! -
Set Up Self-Serve Stations:
Lay out tongs for pasta, spoons for sauces, and forks for toppings. Add small plates and napkins for easy serving. If space is tight, stagger stations around the kitchen or dining room.
Prep note: Label sauces and proteins to avoid confusion (and help allergy-conscious friends). -
Final Touches:
Garnish with extra basil, lemon wedges, and a drizzle of olive oil. Snap a photo for your Pinterest board—trust me, it’ll be a hit!
Personal tip: Keep a pitcher of water and some sparkling drinks on hand—it’s the little things that make everyone feel pampered.
If anything starts to cool off, a quick zap in the microwave or a minute under foil in the oven does the trick. If you’ve got leftovers, keep them in airtight containers for tomorrow’s lunch.
Cooking Tips & Techniques
Years of hosting pasta nights have taught me a thing or two (mainly, always cook extra pasta!). Here are some tips that’ll help your Galentine’s DIY Pasta Bar run smoothly every time:
- Don’t Overcook Pasta: Go for al dente—soft but with a little bite. Overcooked pasta gets mushy and soaks up sauces too quickly.
- Multitask Like a Pro: Start sauces while pasta boils, and prep veggies as soon as the oven is hot. I always set a timer for each step—one time I totally forgot the mushrooms, and they ended up charred (whoops!).
- Consistency is Key: Toss cooked pasta with a splash of olive oil to keep it from sticking. If pasta sits out too long and dries, toss it with a bit of warm water or sauce before serving.
- Flavor Boosters: Add fresh herbs and a squeeze of lemon to brighten up rich sauces. Toasted nuts add crunch and a subtle nutty flavor—don’t skip them!
- Common Mistakes: Forgetting to label toppings (especially important if you’ve got vegans or nut allergies in the group). I once swapped pesto bowls and my friend nearly got a mouthful of cashews—now I use sticky notes to mark everything.
- Keep Sauces Warm: Use a slow cooker or warming tray for sauces, especially if your party runs long. Cold sauce just isn’t the same!
Honestly, the most important thing is to relax and have fun. Even if the pasta gets a little sticky or the veggies roast a bit too long, your friends will remember the laughter more than any little imperfection. That’s the real secret to a perfect Galentine’s DIY Pasta Bar.
Variations & Adaptations
One of the best parts about a DIY pasta bar is how easy it is to tweak for any taste, season, or dietary need. Here are my favorite ways to mix things up:
- Gluten-Free & Vegan: Use chickpea or lentil-based pasta and swap out cheese for dairy-free alternatives. For sauce, try cashew Alfredo or tomato basil without cream.
- Seasonal Twist: In spring, add asparagus or peas to your toppings. In fall, roasted butternut squash or sage butter make amazing additions.
- Spicy & Bold: Offer arrabbiata sauce and add chili flakes or spicy sausage for those who like a kick.
- Low-Carb Option: Zucchini noodles or spaghetti squash work beautifully—just roast or spiralize before serving.
- Flavor Customization: Let guests mix two sauces (pesto + Alfredo is my personal favorite). Offer truffle oil or lemon zest for a fancy touch.
- Allergen Swaps: Nut-free pesto (use sunflower seeds), dairy-free cheeses, and gluten-free pasta for sensitive guests.
Last year, I tried a Mediterranean theme with feta, olives, sundried tomatoes, and lemony chicken—it was a huge hit! The key is to let your creativity (and your friends’ cravings) guide the menu. No two pasta bars are ever quite the same, and that’s the fun of it!
Serving & Storage Suggestions
Serve your Galentine’s DIY Pasta Bar warm and fresh—right off the stove or oven. I like to set everything up buffet-style on a big table, with pretty bowls and platters for that Pinterest-worthy look. Add candles or fairy lights for a little extra sparkle!
Pasta is best enjoyed hot, but if you’re prepping ahead, keep sauces and proteins warm in slow cookers or warming trays. For drinks, offer sparkling water, rosé, or lemonade—something light and festive pairs perfectly.
Leftovers? Store pasta and toppings in separate airtight containers in the fridge (up to 3 days). Sauces can be frozen for up to a month—just thaw and reheat gently on the stove. To reheat pasta, add a splash of water and microwave in short bursts, or toss in a skillet with sauce until warmed through.
Honestly, the flavors just get better overnight—so don’t be shy about making extra for quick lunches or a second round of pasta fun the next day!
Nutritional Information & Benefits
Each serving of DIY pasta (about 2 cups with sauce and toppings) contains roughly 400-600 calories, depending on choices. Pasta provides energizing carbs, while veggies and proteins add fiber and nutrients. Parmesan and mozzarella offer calcium and protein, while olive oil and nuts give healthy fats.
For gluten-free or low-carb diets, swap regular pasta for chickpea, lentil, or spiralized veggies. Vegan options abound—just use dairy-free cheese and plant-based proteins. Watch out for allergens like nuts (in pesto) and dairy (in cheese/sauces).
From my wellness journey, I love that this pasta bar lets everyone build their own balanced bowl—lots of veggies, lean proteins, and heart-healthy fats. It’s indulgent but nourishing, and honestly, everyone leaves happy and satisfied.
Conclusion: Why This Galentine’s DIY Pasta Bar is a Must-Try
If you want a recipe that’s festive, fun, and full of flavor, this Perfect Galentine’s DIY Pasta Bar is the answer. It’s easy to customize, brings everyone together, and makes hosting a breeze—trust me, your friends will rave about it for weeks.
Mix up the ingredients, try new sauces, or add extra toppings—make it your own! I love this recipe because it’s as much about connection as it is about good food. Every bowl tells a story, and every party feels like a celebration of friendship.
I’d love to hear how your pasta bar turns out—drop a comment below, share your favorite toppings, or tag me in your party pics! Let’s keep the Galentine’s love going strong, one bowl of pasta at a time. Here’s to laughter, carbs, and unforgettable girls’ nights!
FAQs About the Perfect Galentine’s DIY Pasta Bar
Can I prepare the pasta bar ingredients ahead of time?
Absolutely! Cook pasta and prep toppings the day before, then warm everything before serving. Sauces can be refrigerated or frozen and reheated gently.
What are the best pasta types for a DIY pasta bar?
Rigatoni, penne, and farfalle are great for holding sauce and toppings. For variety, add ravioli or tortellini. Gluten-free and veggie-based pastas work well too!
How do I keep pasta from sticking when serving buffet-style?
Toss drained pasta with a splash of olive oil. If it gets sticky, add a little warm water or sauce and toss again before serving.
What sauces work best for different dietary needs?
Marinara and olive oil sauces are naturally vegan and gluten-free. For dairy-free, try cashew Alfredo or nut-free pesto. Label everything to help guests choose safely!
Can I freeze leftovers from the pasta bar?
Yes! Sauces freeze well for up to a month. Cooked pasta and veggies can be frozen in airtight containers—just thaw and reheat with a bit of water or sauce.
Pin This Recipe!
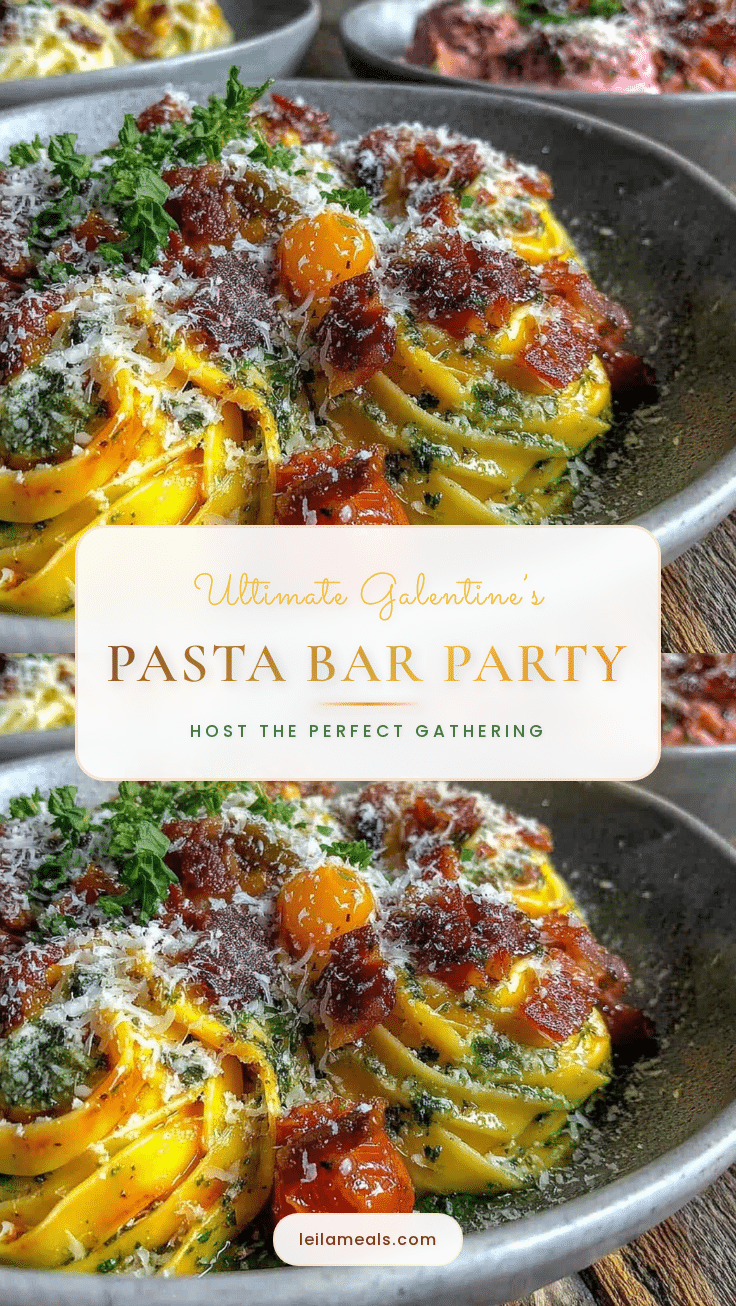
Perfect DIY Pasta Bar for Galentine’s Festive Girls’ Night Party
This DIY Pasta Bar is the ultimate festive, customizable meal for Galentine’s or any girls’ night in. With a variety of pastas, sauces, and toppings, everyone can build their dream bowl for a night filled with comfort food, laughter, and friendship.
- Prep Time: 30 minutes
- Cook Time: 20 minutes
- Total Time: 50 minutes
- Yield: 8 servings 1x
- Category: Main Course
- Cuisine: Italian-American
Ingredients
- 1 lb rigatoni
- 1 lb penne
- 1 lb farfalle
- 12 oz gluten-free pasta (optional)
- 1 lb fresh ravioli or tortellini (optional)
- 2 cups marinara sauce (homemade or store-bought)
- 2 cups creamy Alfredo sauce
- 1 cup pesto sauce
- 1 cup vodka sauce (optional)
- 1/2 cup olive oil & garlic, warmed
- 1 cup grated Parmesan cheese
- 1 cup fresh mozzarella pearls
- 1/2 cup crumbled feta cheese
- 1/2 cup chopped fresh basil
- 1/4 cup chopped fresh parsley
- 1/4 cup toasted pine nuts
- 1/2 cup chopped sun-dried tomatoes
- 1 cup roasted cherry tomatoes
- 1 cup sautéed mushrooms
- 1 cup grilled or roasted bell peppers
- 1/2 cup sliced olives (any variety)
- Red pepper flakes, to taste
- Freshly cracked black pepper, to taste
- Extra virgin olive oil, for drizzling
- 2 cups grilled chicken breast, sliced (optional)
- 1 cup Italian sausage, cooked and crumbled (optional)
- 1 cup roasted chickpeas (optional, for plant-based protein)
- 1 cup sautéed shrimp (optional)
- Lemon wedges
- Microgreens (handful, optional)
- Balsamic glaze (for drizzling)
Instructions
- Prep the Pasta: Fill two large pots with salted water (about 1 tbsp salt per gallon water) and bring to a rolling boil. Add rigatoni to one pot and penne to the other. Cook each according to package instructions (10-12 minutes for rigatoni, 8-10 minutes for penne) until al dente. Stir occasionally to prevent sticking. Taste a noodle before draining.
- Prepare the Sauces: While pasta cooks, warm marinara, Alfredo, and pesto sauces in separate saucepans over low heat (5-10 minutes). If using store-bought, add a splash of olive oil and fresh herbs to boost flavor. For homemade, simmer gently, stirring occasionally. Keep sauces covered.
- Roast or Sauté Toppings: Preheat oven to 400°F. Spread cherry tomatoes, mushrooms, and bell peppers on sheet pans; drizzle with olive oil, salt, and pepper. Roast for 20 minutes, tossing halfway through.
- Cook Proteins (Optional): Grill or sauté chicken breasts (season with salt, pepper, garlic powder) for 6-8 minutes per side, until cooked through. Cook Italian sausage in a skillet, breaking apart, until browned (about 10 minutes). Sauté shrimp with olive oil and garlic until pink (about 3 minutes per side). Let cooked proteins rest before slicing.
- Prep Cheeses and Herbs: Grate Parmesan, slice mozzarella, and crumble feta into small bowls. Chop basil and parsley; keep cold until serving.
- Arrange the Pasta Bar: Drain pasta and toss lightly with olive oil to prevent sticking. Transfer each pasta type to large serving bowls. Place sauces in smaller bowls (or slow cooker if using), and arrange toppings in ramekins around the table.
- Set Up Self-Serve Stations: Lay out tongs for pasta, spoons for sauces, and forks for toppings. Add small plates and napkins for easy serving. Label sauces and proteins to help guests with allergies.
- Final Touches: Garnish with extra basil, lemon wedges, and a drizzle of olive oil. Serve with drinks and enjoy!
Notes
Prep sauces and toppings ahead for easy serving. Label all toppings and sauces for guests with allergies. For vegan or gluten-free needs, use dairy-free cheeses and gluten-free pasta. Store leftovers in airtight containers; sauces freeze well. Offer a variety of toppings for maximum customization.
Nutrition
- Serving Size: About 2 cups pasta w
- Calories: 500
- Sugar: 7
- Sodium: 700
- Fat: 18
- Saturated Fat: 6
- Carbohydrates: 65
- Fiber: 5
- Protein: 18
Keywords: pasta bar, Galentine’s, girls’ night, party food, Italian, DIY, buffet, comfort food, customizable, vegetarian, gluten-free, easy entertaining