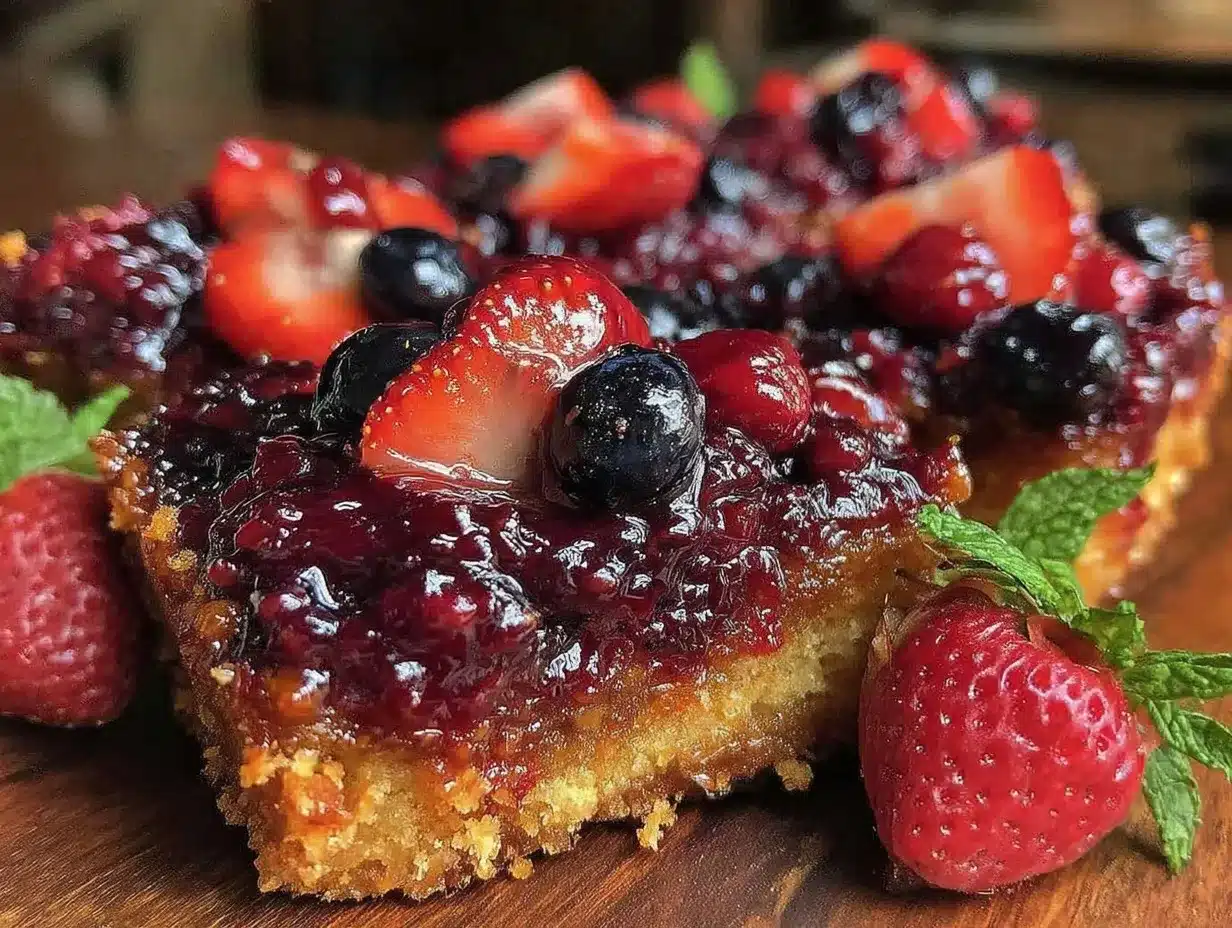
Let me tell you, the moment the scent of warm, buttery crust mingled with juicy, tangy mixed berries filling my kitchen, I knew these Irresistible Chewy Mixed Berry Magic Bars were something special. The sweet aroma alone could make anyone’s mouth water, promising a dessert that’s both comforting and exciting. The first time I baked these bars, I was instantly hooked—honestly, it was one of those rare moments where you pause, take a deep breath, and just smile because you know you’re onto something truly special.
Years ago, when I was knee-high to a grasshopper, my grandma used to make simple fruit bars that brought the whole family together, especially on rainy weekends. This recipe is like a grown-up, jazzed-up version of that nostalgic treat, packed with the vibrant flavors of mixed berries and a chewy texture that’s downright addictive. I stumbled upon this gem while trying to recreate a dessert from a little bakery in town, and I wish I’d found it years ago—it’s the kind of recipe you want to keep close for potlucks, family gatherings, or just a sweet treat for your kids after school.
My family couldn’t stop sneaking these bars off the cooling rack (and I can’t really blame them). They’re dangerously easy to make and deliver pure, nostalgic comfort with every bite. You know what? These Irresistible Chewy Mixed Berry Magic Bars have become a staple for holiday mornings, afternoon tea, and even last-minute dessert emergencies. Tested multiple times in the name of research, of course, this recipe feels like a warm hug. You’re going to want to bookmark this one—trust me.
Why You’ll Love This Recipe
Honestly, what makes these Irresistible Chewy Mixed Berry Magic Bars stand out isn’t just the delicious combo of chewy crust and luscious berries—it’s the way this recipe just works every single time. Having tested it more times than I can count, I can say with confidence this is a dessert that’s as reliable as it is scrumptious. Here’s why you’ll fall for it:
- Quick & Easy: Comes together in under 45 minutes, perfect for busy weeknights or last-minute cravings.
- Simple Ingredients: No need for fancy specialty stores—most are pantry staples or easy to find in any grocery.
- Perfect for Any Occasion: Whether you’re hosting a brunch, bringing something to a potluck, or just craving a cozy dessert, these bars fit the bill.
- Crowd-Pleaser: Kids and adults alike can’t get enough of the chewy texture paired with that natural berry sweetness.
- Unbelievably Delicious: The perfect balance of tart and sweet, with a chewiness that keeps you coming back for more.
This recipe isn’t just another berry bar—it’s the best version you’ll find out there. The secret? Blending a buttery crust with just the right amount of chewy, chewy magic and folding in mixed berries that burst with flavor. Plus, I’ve fine-tuned the sweetness to keep it balanced and never overpowering. It’s comfort food reimagined: quick, fuss-free, yet still soul-soothing. Whether you want to impress guests or just treat yourself, these bars deliver every time.
What Ingredients You Will Need
This recipe uses simple, wholesome ingredients to deliver bold flavor and a satisfying chewy texture without the fuss. Most of these are pantry staples or can be swapped easily if needed. Here’s what you’ll want to gather:
- For the Crust & Base:
- 1 ½ cups graham cracker crumbs (about 10 full sheets, finely crushed) – I like to use Honey Maid for consistent texture
- ½ cup unsalted butter, melted (adds richness and chewiness)
- ¼ cup granulated sugar (balances the tartness of the berries)
- For the Berry Filling:
- 2 cups mixed berries (fresh or frozen; blueberries, raspberries, blackberries, strawberries work well) – fresh in summer, frozen is perfect off-season
- ¼ cup brown sugar (helps create that irresistible chew)
- 2 tablespoons all-purpose flour (helps thicken the berry juices)
- 1 teaspoon lemon zest (brightens the berry flavor)
- For the Topping:
- ½ cup old-fashioned rolled oats (adds a subtle crunch and texture contrast)
- ¼ cup chopped walnuts or pecans (optional, for nutty depth)
- 2 tablespoons honey or maple syrup (a natural touch of sweetness)
- Optional Extras:
- ½ teaspoon vanilla extract (for a warm, comforting aroma)
- A pinch of sea salt (to balance flavors)
If you’re looking for gluten-free, swap the graham cracker crumbs for almond flour or gluten-free cookies crushed finely. For a dairy-free version, use coconut oil instead of butter and opt for a plant-based sweetener. The mixed berries can be tailored to whatever you have on hand—strawberries in spring, blackberries in late summer—it all works beautifully.
Equipment Needed
To make these Irresistible Chewy Mixed Berry Magic Bars, you’ll need some basic kitchen tools that most home cooks already have. Here’s what worked best for me:
- 9×9-inch (23×23 cm) baking pan – metal or glass both work fine; I prefer glass for even baking
- Mixing bowls – one large for the crust and another for the filling
- Measuring cups and spoons – precision matters here for the perfect chewiness
- Rubber spatula or wooden spoon – great for folding berries gently
- Food processor or rolling pin – for crushing graham crackers finely (a zip-top bag and rolling pin work wonders if you don’t have a processor)
- Oven mitts and cooling rack – safety first, and bars cool best on a rack
If you’re on a budget, no worries—substitute a glass dish for the metal pan or crush the crackers by hand. I’ve found that using a food processor speeds things up but crushing with a rolling pin and zip-top bag is just as effective. Keeping your butter melted but not hot is key, so a microwave-safe bowl is handy too.
Preparation Method
- Preheat your oven: Set to 350°F (175°C) and grease your 9×9-inch (23×23 cm) baking pan lightly with butter or non-stick spray. This usually takes about 10 minutes, so it’s perfect to get your ingredients ready while it warms.
- Make the crust: In a large bowl, combine 1 ½ cups graham cracker crumbs, ½ cup melted unsalted butter, and ¼ cup granulated sugar. Stir until the mixture looks evenly moistened with no dry spots. It should feel like wet sand—press a bit between your fingers to check. If it’s too crumbly, add a teaspoon more melted butter.
- Press the crust: Transfer the crust mixture into your prepared pan. Using the back of a spoon or your fingers, press it firmly and evenly into the bottom. This base needs to be compact to hold those luscious berries later. Pop it into the oven for 10 minutes until it’s set and lightly golden around the edges.
- Prepare the berry filling: While the crust bakes, toss 2 cups of mixed berries with ¼ cup brown sugar, 2 tablespoons all-purpose flour, and 1 teaspoon lemon zest in a bowl. The flour helps thicken the juices, so your bars don’t get soggy. If using frozen berries, no need to thaw first—just mix gently to avoid breaking them up too much.
- Layer the berries: Once the crust is out and slightly cooled (about 5 minutes), evenly spread the berry mixture over it. Be gentle to keep those berries intact but ensure they cover the surface completely.
- Add the topping: In a small bowl, mix ½ cup rolled oats, ¼ cup chopped nuts (optional), and 2 tablespoons honey or maple syrup. Sprinkle this evenly over the berries. This topping adds a lovely chewy crunch and nutty flavor that’s hard to resist.
- Bake again: Return the pan to the oven and bake for 25–30 minutes more. You’ll know it’s done when the topping is golden and the berries are bubbly around the edges. If you see bubbling fruit juice, you’re on the right track.
- Cool completely: Remove from oven and let the bars cool on a rack for at least 1 hour before slicing. This step is crucial—cutting too soon will cause the bars to fall apart. The cooling lets the filling set into that perfect chewy magic.
- Slice and serve: Cut into 16 squares or bars and enjoy! These keep well at room temperature for a day, or you can refrigerate them for up to 5 days.
Pro tip: If your berries release a lot of juice, adding an extra tablespoon of flour to the filling helps keep the bars from being too wet. Also, pressing the crust firmly ensures it holds up to the juicy berries without crumbling.
Cooking Tips & Techniques
Making these bars chewy and delicious can be a bit of a balancing act, but here’s what I’ve learned from countless batches (and a few kitchen mishaps):
- Don’t skip pressing the crust firmly: It’s tempting to just spread it loosely, but pressing it well prevents crumbling and gives that satisfying chewy base.
- Keep the butter melted but not hot: Too hot, and it can start cooking the sugar or flour prematurely, changing texture. Warm and fluid is perfect.
- Handle berries gently: If you mix too vigorously, the berries break down and turn your bars into a soggy mess. A light toss is all you need.
- Watch your oven temperature: Ovens vary, so use an oven thermometer if you have one. Too hot and the topping burns before the berries cook; too low and the crust won’t crisp.
- Let bars cool completely: I can’t stress this enough—cutting while warm means gooey, falling-apart bars. Patience here pays off big.
- Multitask by prepping toppings while crust bakes: Saves time and keeps your workflow smooth.
I once rushed the cooling step and ended up with a berry-stained cutting board mess—lesson learned the hard way! Also, when I first tried swapping frozen for fresh berries, I forgot to add extra flour, and the bars were a bit too juicy. Now I always adjust accordingly.
Variations & Adaptations
These Irresistible Chewy Mixed Berry Magic Bars are wonderfully adaptable—here are some of my favorite twists and swaps to fit any mood or diet:
- Gluten-Free: Use almond flour or gluten-free graham cracker crumbs for the crust. I’ve done this often for friends, and it still turns out chewy and delicious.
- Seasonal Fruit Swap: Swap mixed berries for diced apples and cinnamon in fall or peaches and a touch of ginger in summer. Just adjust the sugar to taste.
- Dairy-Free/Vegan: Replace butter with coconut oil and honey with maple syrup. The texture changes slightly but stays delightfully chewy.
- Nut-Free: Skip the nuts in the topping and add extra oats or sunflower seeds for crunch instead.
- Extra Chocolatey: Sprinkle mini chocolate chips over the berries before adding the topping for a sweet surprise.
One variation I adore is adding a splash of almond extract to the berry filling—it gives the bars a subtle, nutty aroma that’s simply irresistible. Feel free to experiment and find your own magic!
Serving & Storage Suggestions
These bars are best served at room temperature or slightly warmed—pop them in the oven for 5 minutes at 300°F (150°C) if you want that fresh-from-the-bakery feel. They pair beautifully with a dollop of whipped cream or a scoop of vanilla ice cream for an indulgent treat.
For a lighter approach, plain Greek yogurt or a drizzle of honey works wonders. I often serve these bars alongside afternoon tea or coffee, and they never last long.
Store any leftovers covered tightly in the fridge for up to 5 days. If you want to keep them longer, freeze them wrapped individually in plastic wrap and foil for up to 3 months. To reheat frozen bars, thaw overnight in the fridge and warm briefly in the oven.
Flavors actually deepen after a day or two, so if you can wait, you might find them even tastier the next day. Just don’t wait too long—they tend to disappear fast around here!
Nutritional Information & Benefits
Each bar provides a balanced mix of carbohydrates, healthy fats, and a good dose of antioxidants from the mixed berries. Here’s an approximate breakdown per serving (1 bar):
| Nutrient | Amount |
|---|---|
| Calories | 210 kcal |
| Fat | 10 g |
| Carbohydrates | 28 g |
| Fiber | 3 g |
| Sugars | 15 g |
| Protein | 2 g |
Mixed berries are rich in vitamins C and K, along with antioxidants that support overall health. Using oats and nuts in the topping adds fiber and heart-healthy fats. This recipe can easily be tailored for gluten-free or dairy-free diets, making it a versatile option for many.
From a wellness perspective, these bars satisfy sweet cravings while sneaking in some nutritious ingredients, making them a smarter homemade dessert choice compared to store-bought sweets.
Conclusion
Irresistible Chewy Mixed Berry Magic Bars are a must-try for anyone who loves a dessert that’s quick, easy, and bursting with fresh fruit flavor. Their chewy crust, juicy berries, and crunchy topping combine in a way that’s pure magic. Honestly, this recipe has won over my family and friends time and again, and I hope it does the same for you.
Feel free to customize these bars with your favorite fruits, nuts, or sweeteners—you really can’t go wrong. I love how this recipe brings a little joy and nostalgia to the table, any time of year.
Give it a go, then come back and let me know how your batch turned out. Share your variations or tips—I’m always excited to hear how you make these bars your own. Happy baking and enjoy every chewy, berry-filled bite!
FAQs
Can I use frozen berries for this recipe?
Absolutely! No need to thaw them first; just toss gently to avoid breaking up the berries too much. You might want to add a little extra flour to help thicken the filling.
How do I keep the bars from getting soggy?
Press the crust firmly before baking and let the bars cool completely before slicing. Also, adding flour to the berry mixture helps absorb excess juice.
Can I make these bars ahead of time?
Yes! They store well in the fridge for up to 5 days and freeze beautifully for up to 3 months, making them great for prepping in advance.
What’s the best way to cut these bars?
Use a sharp knife and wait until the bars are fully cool. For cleaner cuts, run the knife under hot water and dry it before slicing.
Can I substitute the graham cracker crust for something else?
Yes, gluten-free cookie crumbs or almond flour work well for a gluten-free option, and crushed digestive biscuits are a great alternative too.
Pin This Recipe!
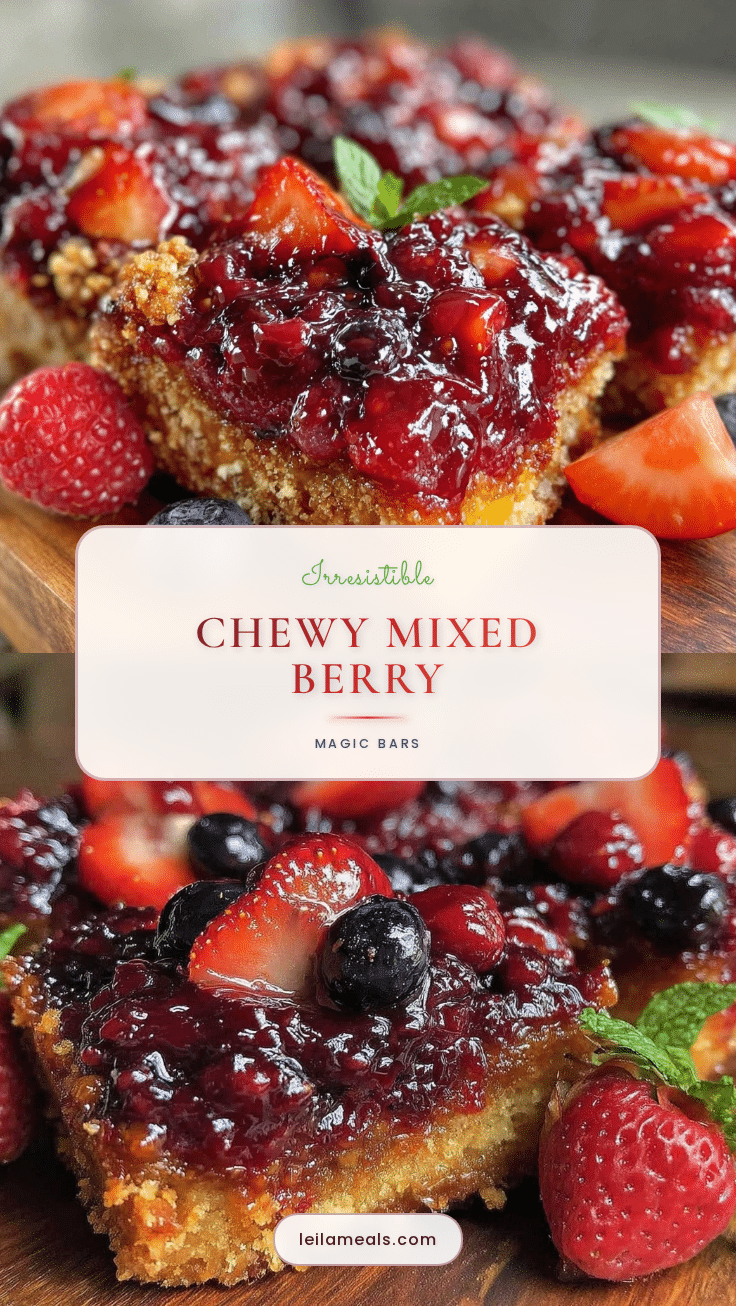
Irresistible Chewy Mixed Berry Magic Bars
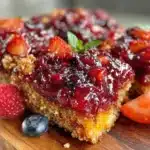
These chewy mixed berry magic bars combine a buttery crust with luscious berries and a crunchy topping, making a quick and easy homemade dessert perfect for any occasion.
- Prep Time: 15 minutes
- Cook Time: 40 minutes
- Total Time: 55 minutes
- Yield: 16 bars 1x
- Category: Dessert
- Cuisine: American
Ingredients
- 1 ½ cups graham cracker crumbs (about 10 full sheets, finely crushed)
- ½ cup unsalted butter, melted
- ¼ cup granulated sugar
- 2 cups mixed berries (fresh or frozen; blueberries, raspberries, blackberries, strawberries)
- ¼ cup brown sugar
- 2 tablespoons all-purpose flour
- 1 teaspoon lemon zest
- ½ cup old-fashioned rolled oats
- ¼ cup chopped walnuts or pecans (optional)
- 2 tablespoons honey or maple syrup
- ½ teaspoon vanilla extract (optional)
- A pinch of sea salt (optional)
Instructions
- Preheat your oven to 350°F (175°C) and grease a 9×9-inch baking pan lightly with butter or non-stick spray.
- In a large bowl, combine graham cracker crumbs, melted unsalted butter, and granulated sugar. Stir until evenly moistened with no dry spots.
- Press the crust mixture firmly and evenly into the bottom of the prepared pan. Bake for 10 minutes until set and lightly golden.
- While the crust bakes, toss mixed berries with brown sugar, all-purpose flour, and lemon zest in a bowl.
- Once the crust is slightly cooled (about 5 minutes), evenly spread the berry mixture over it gently.
- In a small bowl, mix rolled oats, chopped nuts (if using), and honey or maple syrup. Sprinkle this topping evenly over the berries.
- Return the pan to the oven and bake for 25–30 minutes until the topping is golden and berries are bubbly.
- Remove from oven and let the bars cool completely on a rack for at least 1 hour before slicing.
- Cut into 16 squares and serve.
Notes
Press the crust firmly to prevent crumbling. Keep butter melted but not hot to avoid texture issues. Handle berries gently to prevent sogginess. Let bars cool completely before slicing to maintain shape. Add extra flour if berries release too much juice.
Nutrition
- Serving Size: 1 bar (1 of 16 squar
- Calories: 210
- Sugar: 15
- Fat: 10
- Carbohydrates: 28
- Fiber: 3
- Protein: 2
Keywords: mixed berry bars, chewy dessert bars, magic bars, easy berry dessert, homemade dessert, berry magic bars, quick dessert