Introduction
Picture this: the sweet aroma of strawberries and chocolate swirling through your kitchen, the gentle sizzle from the waffle iron, and that first bite—fluffy, warm, and just a bit decadent. That’s exactly what you get with these Fluffy Chocolate-Dipped Strawberry Cupcake Waffles. The first time I made them, it was a rainy Saturday morning. I wanted something special—something that would make my kids rush to the table with big, eager grins. Honestly, the scent alone had everyone peeking into the kitchen, asking when brunch would be ready.
This recipe was inspired by a mashup of two childhood favorites: my grandma’s strawberry cupcakes (she always said cupcakes were just cake you didn’t have to share) and the classic waffles we’d eat on sleepy weekend mornings. I remember standing on a chair, barely tall enough to see the counter, helping her dip strawberries in chocolate—messy, sure, but pure fun. The kind of moment where you pause, take a deep breath, and just smile because you know you’re onto something truly special.
Let’s face it, these waffle cupcakes are dangerously easy to make. There’s something about the combination of a fluffy cupcake batter transformed into golden waffles, topped with chocolate and fresh strawberries, that brings pure, nostalgic comfort. My family couldn’t stop sneaking them off the cooling rack (and honestly, I didn’t try very hard to stop them). Perfect for potlucks, birthday brunches, or any time you want to brighten up your Pinterest board with something whimsical. I’ve tested this recipe more times than I care to admit—in the name of research, of course—and it’s become a staple for family gatherings and gifting. So if you’re looking for a treat that feels like a warm hug, you’re going to want to bookmark this one!
Why You’ll Love This Recipe
If there’s one thing I’ve learned from years of recipe testing, it’s that Fluffy Chocolate-Dipped Strawberry Cupcake Waffles hit every mark for a memorable brunch. Here’s why you’re going to love making—and eating—them:
- Quick & Easy: Whips up in under 30 minutes, so you can satisfy cravings in a snap (seriously, you’ll be plating these before your coffee finishes brewing).
- Simple Ingredients: No wild goose chase at the store; most of these are pantry staples. I’m talking flour, eggs, cocoa powder, and strawberries—nothing fancy here.
- Perfect for Brunch: These cupcake waffles are ideal for birthdays, weekend sleepovers, or any gathering where you want folks asking for seconds.
- Crowd-Pleaser: Kids love the chocolate dip, adults love the fluffy texture. I’ve yet to meet anyone who turns down seconds.
- Unbelievably Delicious: The cupcake base is fluffy like a cloud, with bursts of strawberry and a crisp exterior. The chocolate shell gives just the right snap.
What sets this recipe apart? The batter is inspired by classic cupcakes, but adapted for waffle irons—so you get that ultra-soft, cakey texture without losing the signature waffle pockets. I blend in sour cream for richness, and dip the finished waffles in melted chocolate, letting them set for a treat that’s half breakfast, half dessert. You know what? This isn’t your run-of-the-mill waffle—it’s a brunch showstopper, with layers of flavor you won’t forget.
Let’s be honest, there are plenty of chocolate-strawberry recipes out there, but this one makes you close your eyes after the first bite. It’s comfort food, reimagined for busy mornings, but with the same soul-soothing satisfaction as your favorite cupcake. Great for impressing guests or just treating yourself when you need a pick-me-up. If you want a recipe that works hard for you—delicious, beautiful, and easy—these Fluffy Chocolate-Dipped Strawberry Cupcake Waffles are the answer.
What Ingredients You Will Need
This recipe uses simple, wholesome ingredients to deliver bold flavor and satisfying texture without the fuss. Most of these are probably already in your pantry—if not, they’re easy to find at any grocery store. And if you need to swap something, I’ve got you covered.
- For the cupcake waffle batter:
- All-purpose flour – 2 cups (250g) (gives structure and fluff)
- Granulated sugar – 1/2 cup (100g) (for sweetness and crisp edges)
- Baking powder – 2 teaspoons (helps with rise)
- Baking soda – 1/2 teaspoon (balances acidity)
- Salt – 1/4 teaspoon (enhances flavor)
- Sour cream – 1/2 cup (120g) (adds moistness and tang; use Greek yogurt for a lighter option)
- Whole milk – 3/4 cup (180ml) (can use almond or oat milk for dairy-free)
- Large eggs – 2, room temperature
- Unsalted butter – 1/2 cup (113g), melted and slightly cooled (for richness; swap with coconut oil for dairy-free)
- Vanilla extract – 2 teaspoons (brings out cupcake flavor)
- Fresh strawberries – 1 cup (150g), diced small (try frozen if out of season, just thaw and drain well)
- For the chocolate dip:
- Semi-sweet chocolate chips – 1 cup (175g) (I like Ghirardelli for a smooth finish; use dairy-free chocolate if needed)
- Coconut oil – 1 tablespoon (makes dipping easier and sets the chocolate nicely)
- Optional toppings and decorations:
- Sprinkles (for that cupcake look)
- Extra diced strawberries
- Whipped cream (store-bought or homemade)
If you want a gluten-free option, swap the flour for a 1:1 gluten-free blend. For vegan waffle cupcakes, use flax eggs and dairy-free butter. And if strawberries aren’t your thing, blueberries work beautifully in summer. Choose ripe, fragrant strawberries for the best flavor—little things make a big difference.
Equipment Needed
- Waffle iron – Any standard model will work. I use a non-stick Belgian-style for those deep pockets, but regular ones are fine too. If you only have a panini press, it’ll do in a pinch (waffle shape might be different, but it’s still delicious).
- Mixing bowls – At least two. I like glass so I can see what’s going on, but plastic works.
- Whisk – For combining dry and wet ingredients; a fork is a decent substitute.
- Spatula – To fold in strawberries and scrape batter.
- Measuring cups and spoons – Accuracy matters for fluffy waffles.
- Small saucepan or microwave-safe bowl – For melting chocolate.
- Cooling rack – Keeps the dipped waffles crisp (if you don’t have one, use a baking sheet lined with parchment).
- Baking sheet – For setting chocolate-dipped waffles.
I’ve tried budget waffle irons and fancy ones—both get the job done. Just keep it clean between batches (wipe down after each use to avoid sticking). If you’re dipping in chocolate, line your baking sheet for easy cleanup. Trust me, you’ll thank yourself later.
Preparation Method
- Preheat the waffle iron: Set your waffle iron to medium-high and let it heat for at least 5 minutes. You want it hot enough that the batter sizzles when it hits the plates. (If yours has a ready light, wait for it!)
- Mix dry ingredients: In a large bowl, whisk together 2 cups (250g) all-purpose flour, 1/2 cup (100g) sugar, 2 teaspoons baking powder, 1/2 teaspoon baking soda, and 1/4 teaspoon salt. Make sure no lumps remain.
- Combine wet ingredients: In a separate bowl, whisk 2 large eggs, 1/2 cup (120g) sour cream, 3/4 cup (180ml) milk, 1/2 cup (113g) melted butter, and 2 teaspoons vanilla extract until smooth. The mixture should look creamy and slightly thick.
- Make the batter: Pour the wet ingredients into the dry. Stir gently until just combined—don’t overmix, or you’ll lose that fluffy texture. The batter might be a little lumpy, and that’s totally fine.
- Fold in strawberries: Carefully fold in 1 cup (150g) diced strawberries with a spatula. If using frozen, pat dry first to avoid extra moisture.
- Prep for waffle iron: Lightly coat the waffle iron with non-stick spray or brush with melted butter. (Skip if yours is truly non-stick, but a little insurance never hurts.)
- Cook the waffles: Scoop about 1/2 cup (120ml) batter onto the waffle iron for each waffle (adjust if your iron is larger or smaller). Close the lid and cook for 4-5 minutes, until golden brown and cooked through. The edges should be crisp, and the center fluffy. (Peek at 4 minutes—if the waffle sticks, give it another minute.)
- Cool the waffles: Remove waffles and place on a cooling rack. This helps keep them crisp as they cool. Repeat with remaining batter.
- Melt the chocolate: In a small saucepan or microwave-safe bowl, combine 1 cup (175g) chocolate chips and 1 tablespoon coconut oil. Melt in 20-second bursts, stirring until smooth. (Don’t overheat, or the chocolate might seize; slow and steady is best.)
- Dip the waffles: Once waffles are cool enough to handle, dip one side into the melted chocolate. Let excess drip off, and set each waffle on a parchment-lined baking sheet. Add sprinkles, extra strawberries, or whipped cream if you like.
- Let the chocolate set: Allow dipped waffles to rest at room temperature for about 10 minutes, or refrigerate for 5 minutes if you’re impatient (like me). The chocolate should harden into a shell.
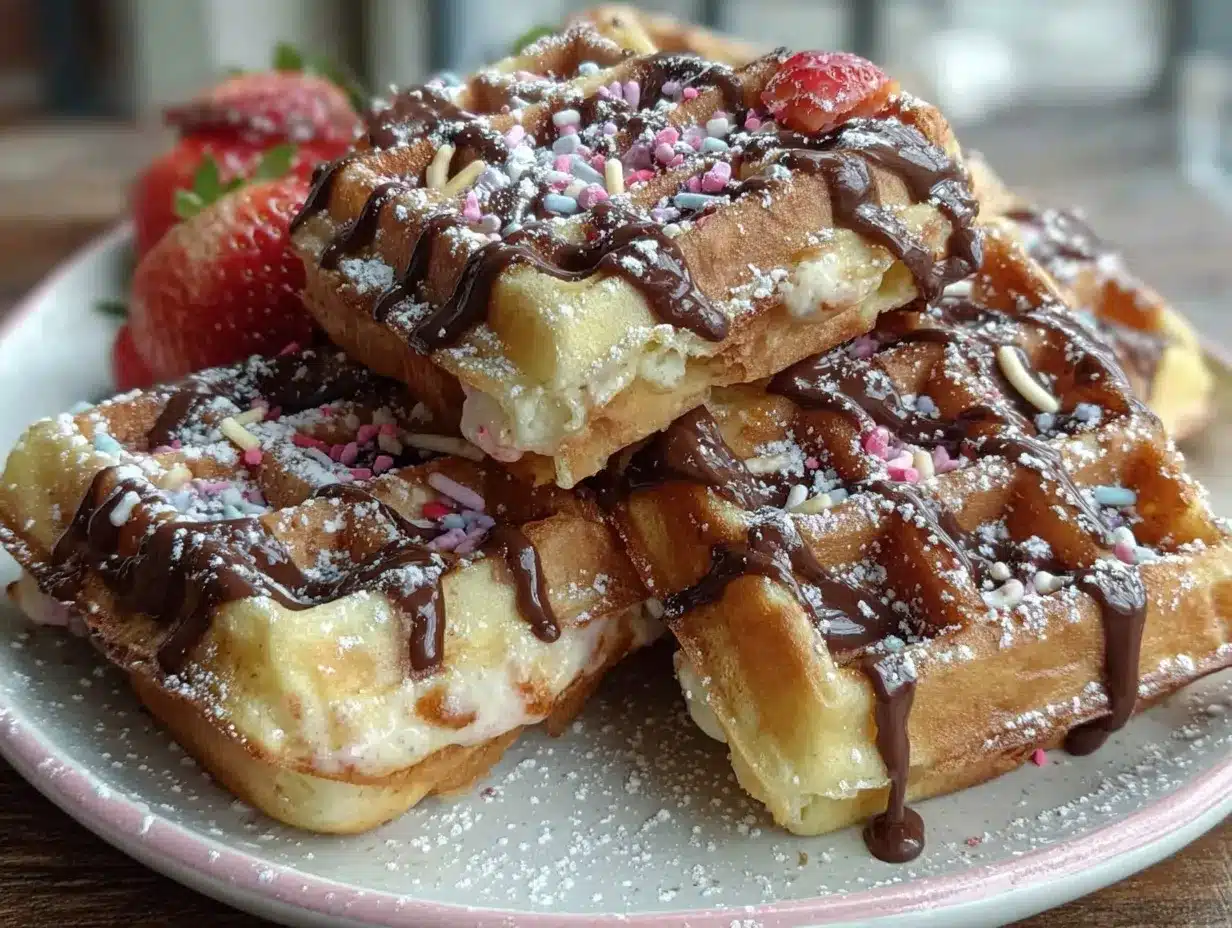
- Serve and enjoy: Plate your Fluffy Chocolate-Dipped Strawberry Cupcake Waffles while still slightly warm, or let them cool for a firmer bite. The texture should be light and cakey, with a crisp shell and juicy strawberry bits throughout.
If your waffles feel dense, try sifting the flour next time, or make sure you’re not overmixing. If the chocolate isn’t sticking, the waffles may be too warm—let them cool a bit longer. And if you get impatient, just drizzle the chocolate instead of dipping. Works every time!
Cooking Tips & Techniques
I’ve had my fair share of waffle fails, so here’s what I’ve learned to make these Fluffy Chocolate-Dipped Strawberry Cupcake Waffles foolproof:
- Don’t overmix: The batter should be just combined. Overmixing makes waffles tough, not fluffy. A few lumps are totally fine, I promise.
- Preheat thoroughly: A hot waffle iron is key for that perfect rise and crisp. If your iron isn’t hot enough, the batter spreads and sticks.
- Strawberry moisture control: Dry strawberries well before folding in. Too much juice makes the batter runny and can cause sticking.
- Chocolate dipping: Let waffles cool slightly before dipping. If they’re too warm, the chocolate runs right off. I found out the hard way—patience is your friend.
- Batch cooking: Keep finished waffles warm in a low oven (200°F/90°C) while you finish the rest. This helps them stay crisp.
- Multitasking: Melt the chocolate while the last batch of waffles cooks. Saves time and keeps everything moving smoothly.
- Consistency: Use a measuring cup for the batter so every waffle is the same size. It looks nicer and cooks evenly.
- Cleanup: Line your cooling rack and baking sheet with parchment for easy cleanup. Chocolate can get messy! Trust me, you’ll appreciate the little shortcut later.
If you ever get stuck with waffles that won’t release, let them cook another minute or two. Most irons have a sweet spot—you’ll learn yours after a couple tries. And if all else fails, those crispy bits taste great as “waffle chips”!
Variations & Adaptations
One of the best parts about these Fluffy Chocolate-Dipped Strawberry Cupcake Waffles is how flexible they are. I’ve tried a bunch of tweaks (some on purpose, some by accident) and they mostly turned out delicious:
- Gluten-Free: Swap all-purpose flour for a 1:1 gluten-free baking blend. The texture stays fluffy, just add an extra splash of milk if the batter gets thick.
- Vegan: Use flax eggs (2 tablespoons flaxseed meal + 5 tablespoons water), dairy-free butter, and coconut yogurt. Works like a charm for plant-based brunches.
- Seasonal Fruit: Blueberries or raspberries instead of strawberries, especially in summer. Peaches are amazing in late July (just dice small and pat dry).
- Chocolate Variations: White chocolate or dark chocolate for dipping. You can even drizzle instead of dipping if you’re short on time.
- Nutty Twist: Add 1/3 cup (30g) chopped pecans or walnuts to the batter for crunch. My uncle swears by the pecan version.
- Cooking Method: No waffle iron? Spoon batter into a greased muffin tin and bake at 350°F (175°C) for 18-20 minutes for cupcake muffins.
Personally, I love the blueberry-dark chocolate combo for summer gatherings. If you have allergies in the family, sunflower butter works as a topping instead of chocolate. And if you want to go extra fancy, try a swirl of strawberry jam in the batter—you won’t regret it!
Serving & Storage Suggestions
Serve your Fluffy Chocolate-Dipped Strawberry Cupcake Waffles warm, with the chocolate shell just set and the strawberries still juicy. Stack them on a pretty platter for brunch, or layer with whipped cream and extra berries for dessert vibes. Honestly, they’re show-stoppers—great for birthday breakfasts or as a sweet treat for kids.
Pair with a steaming mug of coffee, hot chocolate, or even a fruity mimosa if you’re feeling festive. These waffles play nice with savory sides too—try crispy bacon or scrambled eggs for a well-rounded meal.
Storage is easy: Let leftovers cool completely, then keep in an airtight container in the fridge for up to 3 days. For longer storage, freeze in a single layer (with parchment between) for up to 2 months. Reheat in a toaster or low oven (300°F/150°C) until warmed through and slightly crisp. The chocolate may soften a bit, but the flavor gets even richer over time. If you like, drizzle extra chocolate after reheating for a fresh shell.
Honestly, the flavors develop overnight—the strawberry notes get sweeter and the chocolate melds into the waffle. Perfect for make-ahead brunches!
Nutritional Information & Benefits
Each Fluffy Chocolate-Dipped Strawberry Cupcake Waffle clocks in around 220 calories, with about 6g protein, 9g fat, and 30g carbs. Strawberries pack vitamin C and antioxidants, while the chocolate adds a dose of mood-boosting flavonoids.
If you use gluten-free flour, they’re safe for those with sensitivities. Dairy-free swaps work for lactose intolerance, and the vegan version is egg-free. Be mindful of allergens—chocolate and butter can contain traces of nuts, so check your brands if needed.
I love that these waffles are portion-controlled and easy to customize. They’re sweet, satisfying, and give you a little fruit boost in every bite. Sometimes, food that makes you happy is wellness too!
Conclusion
So there you have it—Fluffy Chocolate-Dipped Strawberry Cupcake Waffles, the kind of brunch treat that’s equal parts fun and delicious. They’re easy to adapt, sure to impress, and honestly, just make mornings a little brighter. If you’re looking for something special to add to your next celebration, or just want a new favorite for lazy weekends, give these a try.
Don’t be afraid to mix up the flavors—swap in your favorite fruit, try a new chocolate, or add nuts for crunch. That’s the beauty of homemade brunch recipes; you get to make them your own. I love these because they remind me of family breakfasts, laughter, and those simple moments that stick with you.
If you try this recipe, let me know in the comments how it turned out! Share your twists, tag your photos, and spread the waffle joy. Wishing you happy, chocolate-dipped mornings—bookmark this one and come back whenever you need a little comfort on your plate!
Frequently Asked Questions
Can I make Fluffy Chocolate-Dipped Strawberry Cupcake Waffles ahead of time?
Yes! You can make the waffles a day ahead, store them in the fridge, and dip in chocolate right before serving. They reheat beautifully in the oven or toaster.
What if I don’t have a waffle iron?
No worries—pour the batter into a greased muffin tin and bake at 350°F (175°C) for 18-20 minutes. You’ll get cupcake muffins with the same great flavor.
Can I freeze these waffle cupcakes?
Absolutely. Freeze them in a single layer, then reheat in the oven or toaster. The chocolate may soften, but you can always drizzle more after warming.
What’s the best way to clean the waffle iron after making these?
Let the iron cool, then wipe with a damp cloth. If any chocolate or batter sticks, use a soft brush. Avoid harsh scrubbing to protect the non-stick surface.
Are there nut-free options for this recipe?
Yes, just use nut-free chocolate and skip any nut toppings. Always check your ingredient labels if allergies are a concern.
Pin This Recipe!

Fluffy Chocolate-Dipped Strawberry Cupcake Waffles

These Fluffy Chocolate-Dipped Strawberry Cupcake Waffles combine the best of cupcakes and waffles for a whimsical brunch treat. Fluffy, cakey waffles are studded with strawberries, dipped in chocolate, and perfect for celebrations or cozy mornings.
- Prep Time: 15 minutes
- Cook Time: 15 minutes
- Total Time: 30 minutes
- Yield: 8 waffles 1x
- Category: Breakfast, Brunch, Dessert
- Cuisine: American
Ingredients
- 2 cups all-purpose flour (250g)
- 1/2 cup granulated sugar (100g)
- 2 teaspoons baking powder
- 1/2 teaspoon baking soda
- 1/4 teaspoon salt
- 1/2 cup sour cream (120g) (or Greek yogurt)
- 3/4 cup whole milk (180ml) (or almond/oat milk for dairy-free)
- 2 large eggs, room temperature
- 1/2 cup unsalted butter (113g), melted and slightly cooled (or coconut oil for dairy-free)
- 2 teaspoons vanilla extract
- 1 cup fresh strawberries (150g), diced small (or thawed/drained frozen strawberries)
- 1 cup semi-sweet chocolate chips (175g) (or dairy-free chocolate)
- 1 tablespoon coconut oil
- Sprinkles (optional)
- Extra diced strawberries (optional)
- Whipped cream (optional)
Instructions
- Preheat the waffle iron to medium-high and let it heat for at least 5 minutes.
- In a large bowl, whisk together flour, sugar, baking powder, baking soda, and salt until no lumps remain.
- In a separate bowl, whisk eggs, sour cream, milk, melted butter, and vanilla extract until smooth.
- Pour the wet ingredients into the dry ingredients and stir gently until just combined. Do not overmix.
- Fold in diced strawberries with a spatula.
- Lightly coat the waffle iron with non-stick spray or melted butter.
- Scoop about 1/2 cup batter onto the waffle iron for each waffle. Close the lid and cook for 4-5 minutes, until golden brown and cooked through.
- Remove waffles and place on a cooling rack. Repeat with remaining batter.
- In a small saucepan or microwave-safe bowl, combine chocolate chips and coconut oil. Melt in 20-second bursts, stirring until smooth.
- Once waffles are cool enough to handle, dip one side into the melted chocolate. Let excess drip off and set on a parchment-lined baking sheet.
- Add sprinkles, extra strawberries, or whipped cream if desired.
- Let dipped waffles rest at room temperature for about 10 minutes, or refrigerate for 5 minutes until the chocolate sets.
- Serve warm or at room temperature.
Notes
For best results, do not overmix the batter. Dry strawberries well before folding in to avoid excess moisture. Let waffles cool slightly before dipping in chocolate for best coating. Waffles can be made ahead and dipped in chocolate before serving. For gluten-free, use a 1:1 gluten-free flour blend. For vegan, use flax eggs, dairy-free butter, and coconut yogurt.
Nutrition
- Serving Size: 1 waffle
- Calories: 220
- Sugar: 12
- Sodium: 180
- Fat: 9
- Saturated Fat: 5
- Carbohydrates: 30
- Fiber: 2
- Protein: 6
Keywords: strawberry waffles, chocolate dipped waffles, cupcake waffles, brunch recipe, easy waffles, kid-friendly, spring brunch, summer brunch, chocolate strawberry, waffle cupcakes