There was this one evening when I found myself staring at a half-empty tub of cream cheese in the fridge, wondering what on earth to do with it. Honestly, I wasn’t planning a dessert marathon or some complicated bake-off. I just wanted something sweet, something comforting, and maybe a bit festive—because it was February, and the hint of Valentine’s Day felt like a whisper in the air.
I started rummaging through my pantry and spotted the cocoa powder and a box of red velvet cake mix left from a previous baking spree. To be frank, I was skeptical about mixing cheesecake and brownies—two favorites, sure, but together? It sounded like a gamble. But hey, sometimes a little kitchen chaos leads to the best surprises.
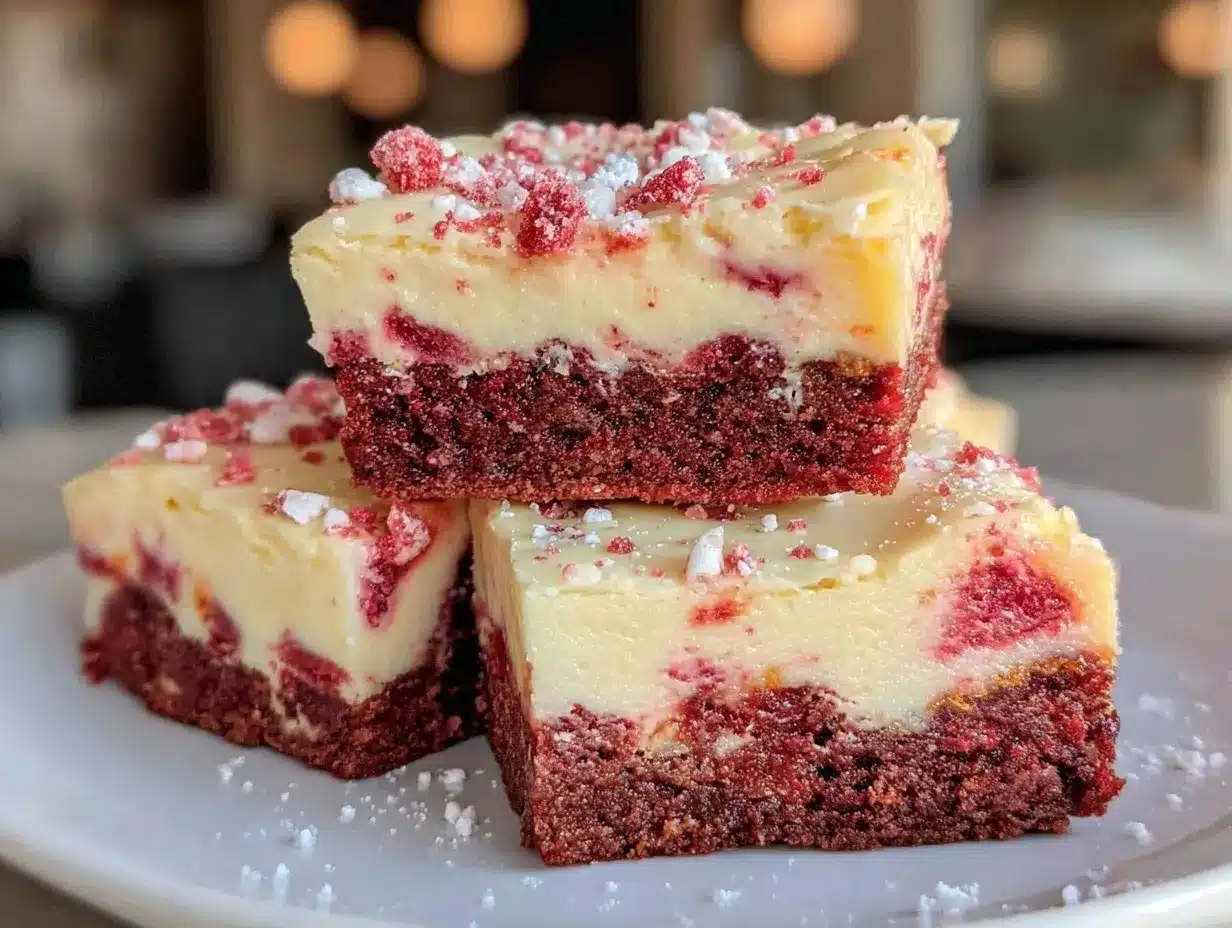
So, I layered the fudgy brownie base with a creamy, tangy red velvet cheesecake layer, and baked it with zero expectations. The result? Creamy red velvet cheesecake brownies with fudgy layers that not only looked stunning but tasted like a dream. The rich, velvety red color contrasted beautifully with the smooth cheesecake swirl, and every bite was a perfect balance of dense chocolate, tangy cream cheese, and just a hint of sweetness.
That night, as I shared these brownies with my friends, I realized that this recipe wasn’t just about dessert—it was about those little moments of joy when something simple turns out unexpectedly wonderful. And honestly, that’s why it’s stuck around in my kitchen rotation ever since.
Why You’ll Love This Recipe
- Quick & Easy: Comes together in under 45 minutes—perfect for busy weeknights or last-minute dessert cravings.
- Simple Ingredients: Uses pantry staples and a trusty box mix, so no need for fancy grocery runs.
- Perfect for Celebrations: Ideal for Valentine’s Day, birthdays, or just when you want to impress without stress.
- Crowd-Pleaser: Always gets rave reviews from kids and adults alike—seriously, people ask for the recipe every time.
- Unbelievably Delicious: The creamy cheesecake layer complements the fudgy brownie base, creating a texture and flavor combo that feels indulgent but not overwhelming.
This recipe isn’t just another brownie with cream cheese swirls. I tweak the red velvet batter with just a touch of vanilla and sour cream to keep it moist and flavorful. Plus, the cheesecake layer is whipped until silky smooth, giving these brownies that luxurious, melt-in-your-mouth feel. It’s a dessert that looks fancy but is honestly pretty straightforward—making it a perfect recipe to keep in your back pocket for when you want to impress without the fuss.
What Ingredients You Will Need
This recipe uses simple, wholesome ingredients to deliver bold flavor and satisfying texture without the fuss. Most of these are pantry staples, and if you don’t have something, I’ll share easy swaps along the way.
- For the Fudgy Brownie Base:
- Unsweetened cocoa powder (1/3 cup, about 35g) – I recommend Ghirardelli for rich flavor
- All-purpose flour (3/4 cup, 95g)
- Granulated sugar (3/4 cup, 150g)
- Unsalted butter (1/2 cup, 113g), melted and slightly cooled
- Large egg (1), room temperature
- Vanilla extract (1 tsp)
- Salt (1/4 tsp)
- For the Red Velvet Cheesecake Layer:
- Cream cheese (8 oz, 225g), softened – using Philadelphia brand gives a smooth texture
- Granulated sugar (1/4 cup, 50g)
- Large egg (1), room temperature
- Red food coloring (1 tbsp) – gel-based for vibrant color without thinning batter
- Vanilla extract (1 tsp)
- All-purpose flour (1 tbsp, 8g) – helps the cheesecake layer hold shape
- Sour cream (2 tbsp, 30g) – keeps cheesecake moist and adds tang; can substitute with Greek yogurt
If you want to make this gluten-free, swapping all-purpose flour for almond flour in the brownie base works well but be mindful it will change the texture slightly. Also, if dairy is a concern, use dairy-free cream cheese and butter alternatives—just expect a slight difference in creaminess.
Equipment Needed
- 8×8-inch (20×20 cm) square baking pan – the brownie thickness depends on this size
- Mixing bowls – at least two, one for brownie batter and one for cheesecake layer
- Electric mixer or hand mixer – helps get that creamy, lump-free cheesecake batter
- Rubber spatula – perfect for folding ingredients gently
- Whisk – for combining dry ingredients
- Measuring cups and spoons – precise measurements matter here
- Cooling rack – to let brownies cool evenly
If you don’t have a mixer, a sturdy whisk and a bit of elbow grease can do the trick, just expect the cheesecake layer to take a bit longer to get smooth. For budget-friendly options, kitchen gadgets from brands like OXO or Cuisinart deliver reliable performance without breaking the bank.
Preparation Method
- Preheat your oven to 325°F (163°C). Line your baking pan with parchment paper, leaving some overhang to easily lift brownies out later. This step saves cleanup time and helps get clean edges.
- Make the brownie base: In a medium bowl, whisk together 3/4 cup (95g) flour, 1/3 cup (35g) cocoa powder, and 1/4 tsp salt. In a separate large bowl, mix melted butter and 3/4 cup (150g) sugar until combined and glossy. Add 1 large egg and 1 tsp vanilla extract, mixing well. Gradually fold in the dry ingredients until just combined—don’t overmix or brownies might turn cakey. The batter should be thick and fudgy.
- Spread half of the brownie batter evenly into the prepared pan, smoothing it out with a spatula. This layer is your fudgy base, so don’t skip this step!
- Prepare the cheesecake layer: Using a mixer, beat 8 oz (225g) softened cream cheese until smooth. Add 1/4 cup (50g) sugar and continue mixing until creamy. Beat in 1 large egg, 1 tbsp red food coloring, and 1 tsp vanilla extract until fully combined. Add 1 tbsp (8g) flour and 2 tbsp (30g) sour cream, mixing until just smooth. Be careful not to overbeat or air bubbles could form.
- Pour the cheesecake layer over the brownie base and spread gently to cover. Then dollop the remaining brownie batter on top in spoonfuls.
- Create the swirl: Using a butter knife or skewer, gently swirl the top brownie batter into the cheesecake layer. Don’t overdo it—just enough to get those beautiful marbled patterns.
- Bake for 35-40 minutes until the cheesecake layer is set but still slightly jiggly in the center. A toothpick inserted into the brownie part should come out with a few moist crumbs but no raw batter. If it looks too wet, add 3-5 minutes more, watching carefully.
- Cool completely on a wire rack for at least 1 hour before slicing. This rest time lets the fudgy layers firm up and flavors meld.
Pro tip: If you want neat squares, chill the brownies in the fridge for 30 minutes before cutting. It makes slicing cleaner and less crumbly.
Cooking Tips & Techniques
Getting that perfect creamy red velvet cheesecake brownie with fudgy layers is all about balance and timing. Here are some tips I’ve learned through trial and error:
- Don’t overmix the brownie batter. You want fudgy, not cakey. As soon as the flour is incorporated, stop stirring.
- Softened cream cheese is key. If it’s too cold, you’ll get lumps in your cheesecake layer. Let it sit out for 30-60 minutes before mixing.
- Use gel food coloring. Liquid colors can thin the batter and affect texture. Gel gives that vibrant red without messing with consistency.
- Watch the baking time closely. Cheesecake can dry out or crack if baked too long. It should jiggle slightly when you take it out.
- Swirling technique: Use gentle, deliberate motions with a knife or skewer. Over-swapping the layers can blend the colors too much, losing that pretty contrast.
- Let the brownies cool completely. Rushing this step makes cutting messy and flavors less developed.
I once baked these too long and ended up with a dry cheesecake layer—lesson learned! Now I set a timer and peek at the texture at 35 minutes. Patience here really pays off.
Variations & Adaptations
You can customize this creamy red velvet cheesecake brownies recipe in quite a few ways depending on your taste or dietary needs:
- Nutty Twist: Add 1/2 cup chopped pecans or walnuts to the brownie batter for crunch.
- Vegan Version: Use dairy-free cream cheese and butter substitutes, flax eggs instead of regular eggs, and a vegan red velvet cake mix.
- Seasonal Flavors: Swap red food coloring with natural beet powder for a subtle earthy note and color.
- Spicy Kick: Add 1/2 tsp cinnamon and a pinch of cayenne to the brownie batter for warmth and depth.
- Chocolate Lover’s Dream: Stir in 1/2 cup mini chocolate chips into the cheesecake layer for bursts of melty chocolate.
One variation I adore is adding a thin layer of raspberry jam between the brownie and cheesecake layers—it adds a lovely tartness that cuts through the richness. Give it a try if you like a fruity contrast!
Serving & Storage Suggestions
These creamy red velvet cheesecake brownies with fudgy layers are best served at room temperature or slightly chilled. I like to let them sit out for 15-20 minutes before slicing to bring out the full flavors and soften the texture a bit.
They pair beautifully with a scoop of vanilla ice cream or a dollop of whipped cream, especially if you want to impress guests. For drinks, try a cup of rich coffee or a glass of cold milk—it’s classic for a reason!
Store leftover brownies tightly wrapped in plastic wrap or in an airtight container in the refrigerator for up to 5 days. They also freeze well—wrap individually and freeze; thaw overnight in the fridge before serving.
Reheating in the microwave for 10-15 seconds brings back some of that gooey warmth without melting the cheesecake layer too much.
Flavors actually deepen after a day, so if you can wait, these brownies taste even better the next day!
Nutritional Information & Benefits
Each serving (based on 16 squares) of these creamy red velvet cheesecake brownies contains approximately:
| Calories | 220 kcal |
|---|---|
| Fat | 14g |
| Carbohydrates | 22g |
| Protein | 3g |
| Sugar | 18g |
While these are indulgent treats, cream cheese adds some protein and calcium, and cocoa powder provides antioxidants. Using real butter and quality ingredients improves texture and flavor, making the dessert feel more satisfying and less artificial.
For gluten-free or dairy-free options, simple swaps let you enjoy this recipe with common dietary restrictions in mind.
Conclusion
This creamy red velvet cheesecake brownies recipe with fudgy layers is one of those rare treats that combines decadence with ease. It’s a dessert that feels special but comes together without drama, perfect for sharing or keeping all to yourself.
Feel free to tweak the flavors or add your favorite mix-ins—this recipe welcomes creativity and personal touches. For me, it’s the rich cream cheese layer dancing with the deep, fudgy brownie that keeps me coming back, bite after bite.
Give it a try and see how it fits into your dessert repertoire. I’d love to hear how you make it your own—drop a comment or share your twists! At the end of the day, it’s all about enjoying something delicious and a little bit comforting.
Frequently Asked Questions (FAQs)
Can I make these brownies ahead of time?
Absolutely! They taste even better after resting overnight in the fridge. Just store them covered and slice when ready.
What if I don’t have red food coloring?
You can use natural beet powder for color or omit it altogether—the brownies will be less vibrant but still tasty.
How do I get the cheesecake layer smooth and lump-free?
Make sure your cream cheese is fully softened before mixing and beat it well with sugar before adding other ingredients.
Can I freeze these brownies?
Yes! Wrap them tightly in plastic wrap and place in a freezer-safe container. Thaw in the fridge overnight before serving.
What’s the best way to cut these brownies cleanly?
Chill the brownies for at least 30 minutes before slicing, and use a sharp knife wiped clean between cuts for neat squares.
Pin This Recipe!
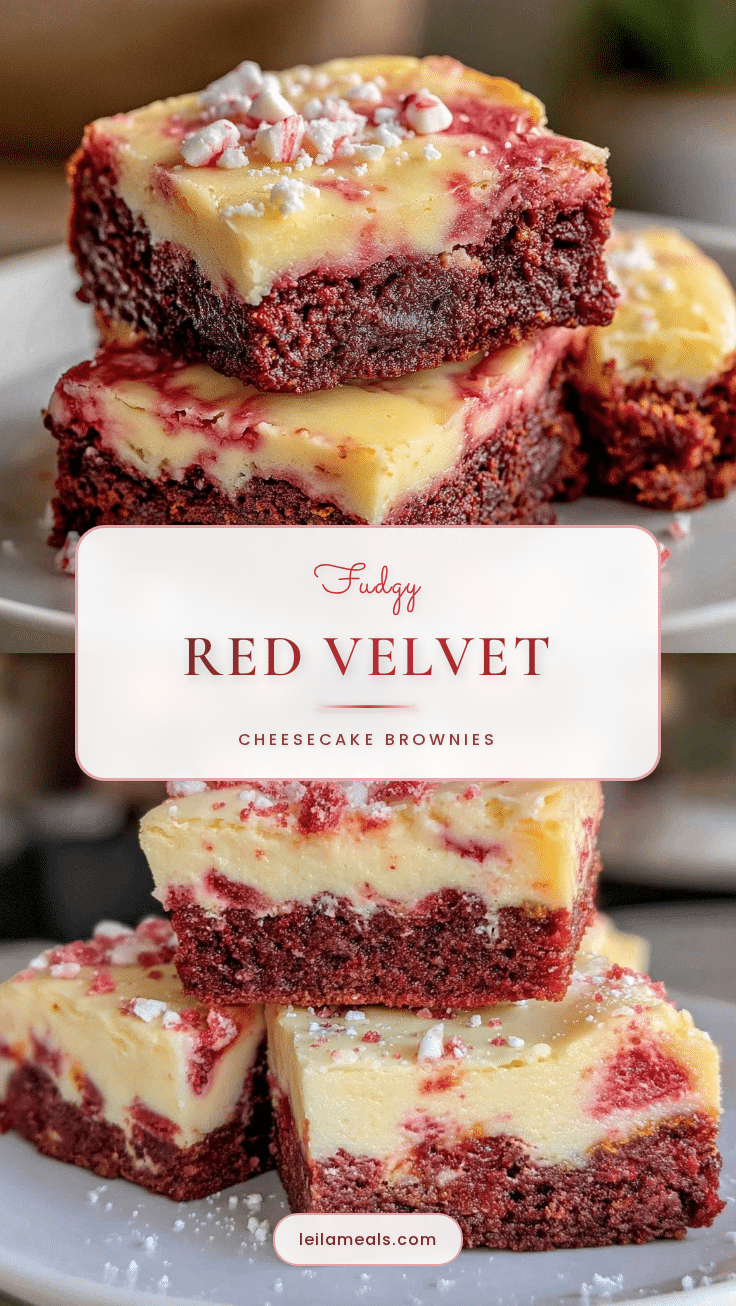
Creamy Red Velvet Cheesecake Brownies
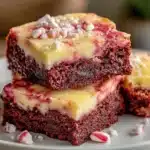
These creamy red velvet cheesecake brownies feature fudgy layers combining a rich chocolate brownie base with a tangy, smooth red velvet cheesecake swirl. Perfect for celebrations or a comforting treat.
- Prep Time: 15 minutes
- Cook Time: 40 minutes
- Total Time: 1 hour 55 minutes
- Yield: 16 servings 1x
- Category: Dessert
- Cuisine: American
Ingredients
- 1/3 cup unsweetened cocoa powder (about 35g)
- 3/4 cup all-purpose flour (95g)
- 3/4 cup granulated sugar (150g)
- 1/2 cup unsalted butter (113g), melted and slightly cooled
- 1 large egg, room temperature
- 1 tsp vanilla extract
- 1/4 tsp salt
- 8 oz cream cheese (225g), softened
- 1/4 cup granulated sugar (50g)
- 1 large egg, room temperature
- 1 tbsp red food coloring (gel-based)
- 1 tbsp all-purpose flour (8g)
- 2 tbsp sour cream (30g)
Instructions
- Preheat your oven to 325°F (163°C). Line an 8×8-inch baking pan with parchment paper, leaving some overhang for easy removal.
- Make the brownie base: In a medium bowl, whisk together flour, cocoa powder, and salt.
- In a separate large bowl, mix melted butter and sugar until combined and glossy. Add egg and vanilla extract, mixing well.
- Gradually fold in the dry ingredients until just combined; do not overmix.
- Spread half of the brownie batter evenly into the prepared pan.
- Prepare the cheesecake layer: Beat softened cream cheese until smooth. Add sugar and mix until creamy.
- Beat in egg, red food coloring, and vanilla extract until fully combined.
- Add flour and sour cream, mixing until just smooth; avoid overbeating.
- Pour the cheesecake layer over the brownie base and spread gently to cover.
- Dollop the remaining brownie batter on top in spoonfuls.
- Using a butter knife or skewer, gently swirl the top brownie batter into the cheesecake layer to create a marbled effect.
- Bake for 35-40 minutes until the cheesecake layer is set but slightly jiggly in the center. A toothpick inserted into the brownie part should come out with moist crumbs but no raw batter.
- Cool completely on a wire rack for at least 1 hour before slicing.
- Optional: Chill brownies in the fridge for 30 minutes before cutting for cleaner slices.
Notes
Do not overmix the brownie batter to keep it fudgy, not cakey. Use softened cream cheese for a smooth cheesecake layer. Gel food coloring is preferred for vibrant color without thinning the batter. Watch baking time closely to avoid drying out the cheesecake layer. Chill brownies before slicing for cleaner cuts.
Nutrition
- Serving Size: 1 brownie square (1/
- Calories: 220
- Sugar: 18
- Fat: 14
- Carbohydrates: 22
- Protein: 3
Keywords: red velvet cheesecake brownies, fudgy brownies, creamy cheesecake, easy dessert, Valentine’s Day dessert, layered brownies