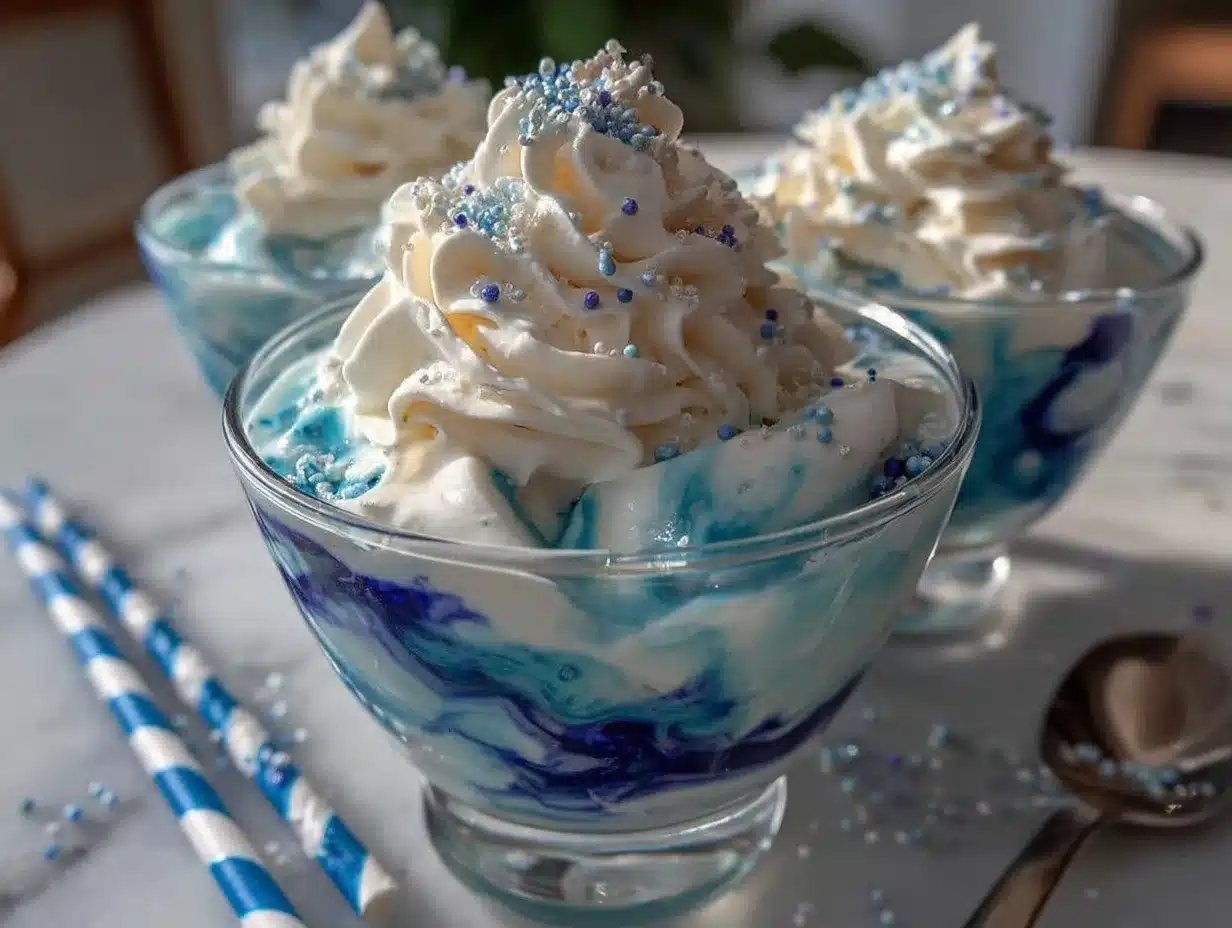
Let me paint you a picture: the first time I whipped up these Creamy Dr. Seuss Blue Swirl Pudding Cups, my kitchen filled with the sweet, milky aroma of homemade pudding and a pop of vibrant blue that would make the Cat in the Hat do a double take! There’s something magical about the way the vanilla pudding swirls with that electric blue color—honestly, it almost glows. The moment I spooned the first dreamy cup, I paused, grinning at the mesmerizing swirl (you know, the kind of moment where you pause, take a deep breath, and just smile because you know you’re onto something truly special).
These pudding cups bring me straight back to my childhood, when I was knee-high to a grasshopper and Dr. Seuss books ruled my world. It’s got that playful, nostalgic comfort that makes you want to gather your kids, friends, or even just yourself for a treat that’s as fun to make as it is to eat. I stumbled upon this idea during a rainy weekend—trying to jazz up a regular pudding snack for my little ones—and, let’s face it, I wish I’d thought of it sooner. If you’re searching for a whimsical dessert idea, this one’s a keeper!
My family couldn’t keep their hands off the cooling rack (okay, the fridge shelf), sneaking spoonfuls before I could even snap a photo for Pinterest. That’s how you know you’ve got a winner—when the dessert disappears faster than you can say “Thing One and Thing Two.” Creamy Dr. Seuss Blue Swirl Pudding Cups are perfect for birthday parties, classroom treats, or just brightening up a gloomy afternoon. Trust me, after testing this recipe about five times (all in the name of research, of course), it’s now a staple for family gatherings, gifting, and spontaneous dessert cravings. Feels like a warm hug with a splash of adventure—bookmark this one, because you’re going to want to make it again and again!
Why You’ll Love This Recipe
Let’s be honest—sometimes you just need a dessert that’s both show-stopping and super simple. Creamy Dr. Seuss Blue Swirl Pudding Cups tick all the boxes. Years of baking and taste-testing (with plenty of pudding mishaps along the way) have taught me what truly makes a recipe irresistible and reliable. Here’s why this whimsical dessert idea deserves a spot on your “must-try” list:
- Quick & Easy: Ready in under 30 minutes—no fuss, no fancy techniques. Perfect for busy parents or spontaneous sweet cravings.
- Simple Ingredients: No wild goose chase at the grocery store. Most ingredients are probably already in your pantry!
- Perfect for Parties: These pudding cups are a hit at kid’s birthdays, classroom celebrations, and fun family nights. They look like a Pinterest dream come true.
- Crowd-Pleaser: Seriously, both kids and adults go wild for these. I’ve watched more than a few grown-ups sneak seconds (and thirds) when they thought no one was looking.
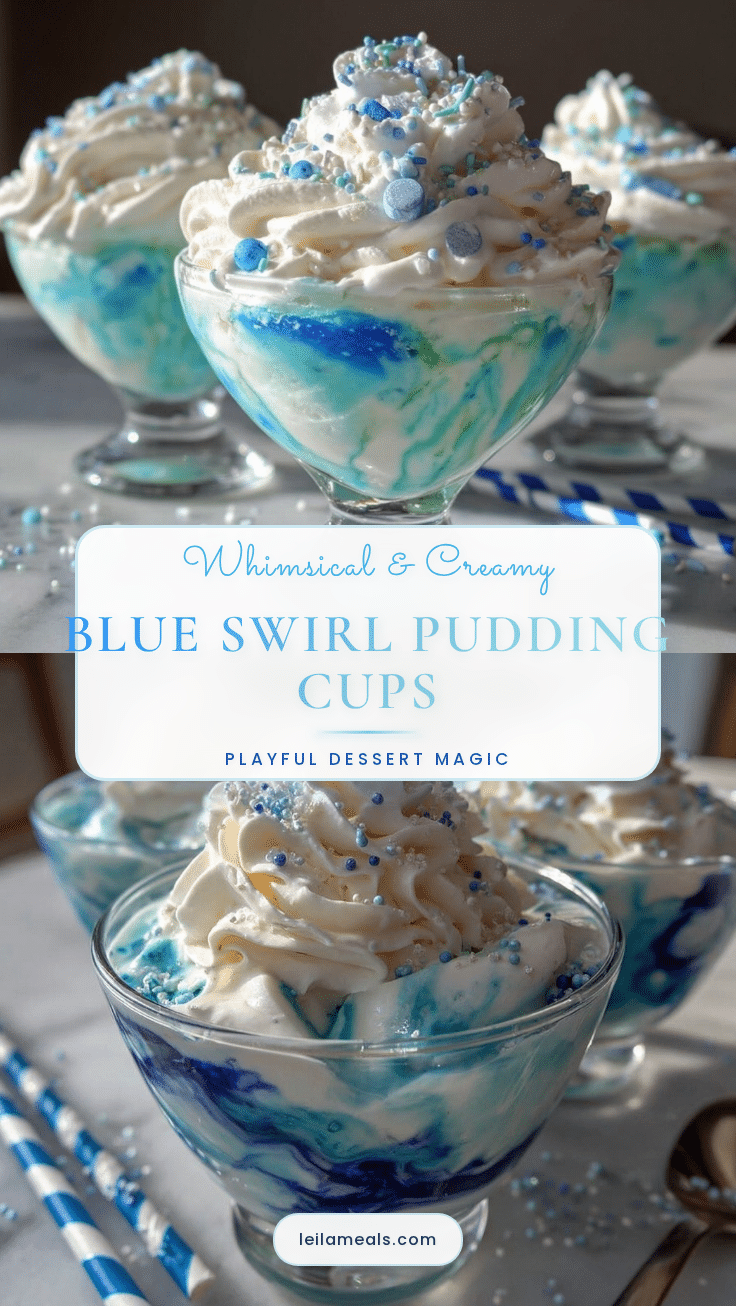
- Unbelievably Delicious: Creamy vanilla pudding meets a playful blue swirl—think soft, luscious texture with a burst of visual fun.
This recipe stands out because of its easy homemade pudding base and the swirling technique—it’s not just food coloring added to store-bought pudding. I blend in a touch of whipped cream for extra fluffiness (learned from a pastry chef friend) and use a simple swirl method that makes every cup look unique. Healthier than artificially flavored alternatives and infinitely more fun, these Creamy Dr. Seuss Blue Swirl Pudding Cups are comfort food with a twist—perfect for impressing guests or making any day extra special. The joy on a child’s face when they see that blue swirl? Priceless. The quiet moment when you savor a spoonful yourself? That’s the magic of homemade desserts.
What Ingredients You Will Need
This recipe uses simple, wholesome ingredients to deliver bold flavor and a satisfyingly creamy texture—no need to get fancy. Most are everyday staples, but the blue swirl brings all the fun. Here’s what you’ll need:
- For the pudding base:
- 2 cups (480 ml) whole milk (for the richest, creamiest pudding—use 2% if you prefer lighter)
- 1/2 cup (120 ml) heavy cream (adds silky texture)
- 1/2 cup (100 g) granulated sugar (I like Domino’s for consistent sweetness)
- 3 tablespoons (24 g) cornstarch (for thickening—Argo is my go-to)
- 1/4 teaspoon salt (balances the sweetness)
- 2 teaspoons pure vanilla extract (I recommend Nielsen-Massey for the best flavor)
- 2 large egg yolks (room temperature, for richness—pasteurized if you’re concerned about safety)
- For the blue swirl:
- 1/4 cup (60 ml) heavy whipping cream (whipped and folded in for extra fluffiness)
- Blue gel food coloring (Americolor “Sky Blue” or Wilton “Royal Blue”—you want a vibrant, Dr. Seuss-worthy color)
- Optional: 1/4 teaspoon almond extract (for a subtle, nutty twist—skip if you prefer classic vanilla)
- For serving:
- Mini marshmallows (for topping and extra whimsy)
- Sprinkles (blue, white, or rainbow—adds a festive touch)
- Clear cups or jars (so you can show off those beautiful swirls!)
Substitution tips:
- Swap whole milk with almond or oat milk for a dairy-free version (pudding will be a bit lighter)
- Use coconut cream instead of heavy cream if you want a tropical twist
- Try natural blue spirulina powder for coloring if you’re avoiding artificial dyes
- Replace egg yolks with 2 tablespoons cornstarch for an egg-free option—though pudding won’t be quite as rich
Most of these ingredients are pantry staples, but the blue food coloring is what transforms it from everyday pudding to a whimsical dessert idea worthy of a spot on your Pinterest board. If you’re making this in summer, fresh berries on top are fun, too. The best part? You can tweak the flavors and colors to match any party theme!
Equipment Needed
You won’t need anything fancy for Creamy Dr. Seuss Blue Swirl Pudding Cups, which is always a relief. Here’s what I grab every time:
- Medium saucepan (for cooking the pudding—nonstick is easier to clean if you ask me)
- Whisk (a sturdy silicone whisk helps prevent lumps; metal works, too)
- Heatproof spatula (for scraping down the sides and mixing in the swirl)
- Mixing bowl (glass or stainless steel—whatever you’ve got)
- Hand mixer or stand mixer (for whipping the cream; you can use a balloon whisk if you’re old-school or just feeling strong)
- Measuring cups and spoons (I once tried eyeballing, but let’s just say it wasn’t a Pinterest-worthy result)
- Clear cups, jars, or shot glasses (for serving and showing off the blue swirls)
- Piping bag or zip-top bag (optional—for cleaner swirls, though you can use a spoon and toothpick just fine)
If you don’t have a mixer, whipping cream by hand is great arm exercise—just chill your bowl and whisk first for better results. I’ve used mason jars in a pinch, and honestly, the pudding looks adorable in just about anything clear. Maintenance tip: soak your saucepan and whisk in warm water right after use to avoid sticky pudding residue. No need to break the bank—budget-friendly tools work perfectly here!
Preparation Method
Ready to make magic? Here’s how you create Creamy Dr. Seuss Blue Swirl Pudding Cups. I’ll break it down step by step for foolproof results:
- Combine dry ingredients: In a medium saucepan, whisk together 3 tablespoons (24 g) cornstarch, 1/2 cup (100 g) sugar, and 1/4 teaspoon salt. This helps prevent clumping later on.
- Add milk and cream: Slowly pour in 2 cups (480 ml) whole milk and 1/2 cup (120 ml) heavy cream, whisking constantly to dissolve the cornstarch. I do this over medium heat—don’t rush!
- Temper the egg yolks: In a separate bowl, lightly beat 2 large egg yolks. When the milk mixture starts to steam (but not boil), scoop out about 1/2 cup (120 ml) and slowly whisk it into the yolks. This keeps them from scrambling (trust me, I learned the hard way).
- Combine mixtures: Pour the tempered yolks back into the saucepan, whisking constantly. Continue cooking over medium heat until the pudding thickens—about 8-10 minutes. It should coat the back of a spoon and smell rich and creamy.
- Add vanilla: Remove from heat and stir in 2 teaspoons vanilla extract (and almond extract if using). Give it a taste—if you want it sweeter, add a touch more sugar while it’s warm.
- Cool the pudding: Transfer to a mixing bowl and cover with plastic wrap, pressing directly onto the surface to prevent skin from forming. Chill in the fridge for at least 30 minutes, or until just cool (but not fully set).
- Whip the cream: In a clean bowl, whip 1/4 cup (60 ml) heavy whipping cream to soft peaks. Fold gently into half the cooled pudding mixture for extra fluffiness.
- Color and swirl: In a small bowl, mix blue gel food coloring into the other half of the pudding until it’s a bright, Dr. Seuss blue. Add more coloring for deeper swirls—start with a toothpick’s worth so you don’t overdo it.
- Layer and swirl: Spoon alternating dollops of vanilla pudding and blue pudding into clear cups. Use a toothpick or skewer to gently swirl for a marbled effect. Don’t overmix—the more imperfect, the better!
- Chill and set: Refrigerate cups for 1 hour so the swirls set. Top with mini marshmallows and sprinkles right before serving.
Troubleshooting: If your pudding doesn’t thicken, keep cooking and whisking—it needs time. If lumps form, strain through a fine-mesh sieve before chilling. For extra smoothness, blend with a hand mixer for 30 seconds right after adding vanilla.
Efficiency tip: Prep your cups and toppings while the pudding cools. I usually set up a “swirl station” with spoons, toothpicks, and cups lined up for quick assembly. Trust me, kids love helping with the swirl part!
Cooking Tips & Techniques
I’ve made more pudding than I care to admit, and along the way, I’ve picked up tricks that keep these Creamy Dr. Seuss Blue Swirl Pudding Cups irresistibly creamy and fun. Here are my top tips:
- Use low heat for thickening: Don’t crank up the burner—slow and steady wins the race. Too much heat leads to burnt or curdled pudding (been there, done that).
- Temper eggs slowly: Pour the hot milk into the yolks bit by bit, whisking like your life depends on it. This keeps the pudding silky.
- Whip cream until just soft: Overwhipped cream can get grainy—stop at soft peaks for the best texture.
- Gel food coloring is a must: Liquid coloring waters down the pudding and makes swirls muddy. Gel delivers vibrant color with just a dot.
- Don’t over-swirl: A few gentle twists with a toothpick are enough. Too much mixing and you’ll lose the pretty marble effect.
- Chill before swirling: Slightly cooled pudding holds its shape better, so your swirls stay distinct.
- Multitasking: While the pudding cools, set up your topping station and get the cups ready—makes assembly a breeze.
- Consistency every time: Measure ingredients carefully and use the same brand of cornstarch or cream for repeat results. Small differences matter with pudding!
I’ve had my share of lumpy, runny, or overcooked puddings. The key is patience and a watchful eye—don’t walk away from the stove. And if you do get lumps, remember: straining fixes almost anything. The swirl technique is a fun activity for kids, just know it gets a bit messy (embrace it!).
Variations & Adaptations
One of my favorite things about these Creamy Dr. Seuss Blue Swirl Pudding Cups is how easy it is to adapt them. Here are a few fun twists:
- Dairy-Free Version: Use almond or oat milk and coconut cream. The pudding will be lighter, but still creamy and delicious. Blue spirulina powder makes a great natural color swap.
- Holiday Swirl: Switch blue food coloring for red or green—perfect for Christmas, Valentine’s Day, or St. Patrick’s Day parties.
- Berry Burst: Fold in mashed blueberries or blackberries for a fruity swirl. You get a natural blue-purple color and a burst of berry flavor.
- Chocolate Swirl: Add 2 tablespoons cocoa powder to half the pudding for a chocolate-and-blue effect (kids love this combo!).
- Gluten-Free: The recipe is naturally gluten-free, but always double-check your cornstarch and food coloring labels.
- Egg-Free: Skip egg yolks and increase cornstarch to 5 tablespoons (40 g). The pudding will be less rich, but still sets up beautifully.
Personal favorite? I once tried a rainbow swirl for my daughter’s birthday—using pink, yellow, and blue pudding layers. It was wild and so much fun to make! Customize colors for different party themes, swap flavors, or add crunchy toppings. These pudding cups are a blank canvas for your creative kitchen adventures.
Serving & Storage Suggestions
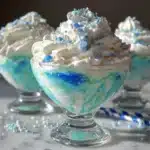
Creamy Dr. Seuss Blue Swirl Pudding Cups are best served chilled, straight from the fridge. That cool, creamy texture is pure comfort—especially on a warm day or after a busy afternoon. I love to present them in clear cups or jars, topped with mini marshmallows and a sprinkle of blue or rainbow sprinkles. They look like something straight out of a storybook!
Pair these whimsical pudding cups with fresh berries, shortbread cookies, or a tall glass of milk. For parties, add a few themed paper straws or fun toppers (think Dr. Seuss-style hats or mustaches). If you’re feeling extra, a dollop of whipped cream on top is always a winner.
Store leftovers in the refrigerator, covered tightly with plastic wrap or lids. They’ll stay fresh for up to 3 days—though let’s be real, they rarely last that long in my house. For longer storage, freeze pudding in airtight containers for up to 1 month. Thaw in the fridge overnight before serving, and give it a gentle stir to restore creaminess.
Reheating isn’t usually necessary, but if you want a warm pudding, zap in the microwave for 10-15 seconds (just don’t overheat or the swirl might fade). The flavors deepen as they chill, so sometimes day-old pudding cups taste even better!
Nutritional Information & Benefits
Each Creamy Dr. Seuss Blue Swirl Pudding Cup (about 1/2 cup serving) provides roughly:
- Calories: 200
- Fat: 10g
- Carbohydrates: 25g
- Protein: 3g
- Sugar: 18g
The recipe is naturally gluten-free, and you can easily adapt it to be dairy-free or egg-free. Using whole milk and cream offers calcium and a bit of protein, while homemade pudding has far less sodium and preservatives than boxed mixes. If you swap in almond milk or coconut cream, you’ll cut down on saturated fat—great for those watching cholesterol.
Blue food coloring is safe in small amounts, but if you prefer, natural spirulina or blueberry puree works too. Honestly, these pudding cups are a treat—enjoy mindfully and savor every spoonful. For allergy concerns, always check your food coloring and marshmallow labels for hidden gluten or dairy.
Conclusion
There’s a reason Creamy Dr. Seuss Blue Swirl Pudding Cups have become a staple in my kitchen. They’re easy, eye-catching, and totally delicious—the kind of whimsical dessert idea that brings out the kid in everyone. Whether you’re sprucing up a regular Tuesday or throwing an epic Pinterest-worthy party, these pudding cups deliver pure joy with every swirl.
Don’t be afraid to make them your own—mix up the colors, play with flavors, or let your kids help with the swirling. I love this recipe because it’s a creative blank slate with reliable results and endless possibilities. If you make these pudding cups, drop a comment below, share your creative twists, or tag me on social media—let’s inspire each other!
So here’s my final thought: dessert should be fun, and these Creamy Dr. Seuss Blue Swirl Pudding Cups are as playful as they are comforting. Give them a try—your tastebuds (and your inner child) will thank you!
FAQs
How do I get vibrant blue swirls without staining my hands?
Use gel food coloring and a toothpick for swirling. Gel is less messy, and you need only a tiny amount. Wash hands immediately after handling coloring for easy cleanup.
Can I make these pudding cups ahead of time?
Absolutely! You can prepare them up to 2 days in advance. Just store covered in the fridge and add toppings right before serving for the freshest look.
Are these pudding cups safe for gluten-free diets?
Yes, as long as you use certified gluten-free cornstarch and check labels on toppings like marshmallows or sprinkles. The recipe itself is naturally gluten-free.
Can I use boxed pudding mix instead of homemade?
You can, but homemade pudding has a creamier texture and richer flavor. If using boxed mix, fold in whipped cream and swirl with gel coloring for a similar effect.
How do I make these pudding cups dairy-free?
Swap whole milk and cream for almond milk and coconut cream. The pudding won’t be quite as rich but still delicious and allergy-friendly!
Pin This Recipe!
Creamy Dr. Seuss Blue Swirl Pudding Cups
A whimsical, creamy homemade vanilla pudding with a vibrant blue swirl, inspired by Dr. Seuss. This easy, kid-friendly dessert is perfect for parties, classroom treats, or a fun family snack.
- Prep Time: 15 minutes
- Cook Time: 10 minutes
- Total Time: 1 hour 30 minutes
- Yield: 6 servings 1x
- Category: Dessert
- Cuisine: American
Ingredients
- 2 cups whole milk
- 1/2 cup heavy cream
- 1/2 cup granulated sugar
- 3 tablespoons cornstarch
- 1/4 teaspoon salt
- 2 teaspoons pure vanilla extract
- 2 large egg yolks (room temperature)
- 1/4 cup heavy whipping cream (for blue swirl, whipped)
- Blue gel food coloring
- Optional: 1/4 teaspoon almond extract
- Mini marshmallows (for topping)
- Sprinkles (blue, white, or rainbow, for topping)
- Clear cups or jars (for serving)
Instructions
- In a medium saucepan, whisk together cornstarch, sugar, and salt.
- Slowly pour in whole milk and heavy cream, whisking constantly to dissolve the cornstarch. Heat over medium, stirring frequently.
- In a separate bowl, lightly beat the egg yolks. When the milk mixture starts to steam (but not boil), scoop out about 1/2 cup and slowly whisk it into the yolks to temper.
- Pour the tempered yolks back into the saucepan, whisking constantly. Continue cooking over medium heat until the pudding thickens (about 8-10 minutes), until it coats the back of a spoon.
- Remove from heat and stir in vanilla extract (and almond extract if using). Taste and adjust sweetness if desired.
- Transfer pudding to a mixing bowl and cover with plastic wrap pressed directly onto the surface. Chill in the fridge for at least 30 minutes, until just cool.
- In a clean bowl, whip 1/4 cup heavy whipping cream to soft peaks. Fold gently into half the cooled pudding.
- In a small bowl, mix blue gel food coloring into the other half of the pudding until bright blue.
- Spoon alternating dollops of vanilla and blue pudding into clear cups. Use a toothpick or skewer to gently swirl for a marbled effect.
- Refrigerate cups for 1 hour to set. Top with mini marshmallows and sprinkles before serving.
Notes
For best results, use gel food coloring for vibrant swirls. The recipe is naturally gluten-free and can be adapted for dairy-free or egg-free diets. Don’t over-swirl for a prettier marble effect. Prep toppings and cups while pudding cools for efficient assembly. Store covered in the fridge for up to 3 days.
Nutrition
- Serving Size: 1/2 cup (about 1 pud
- Calories: 200
- Sugar: 18
- Sodium: 100
- Fat: 10
- Saturated Fat: 6
- Carbohydrates: 25
- Protein: 3
Keywords: Dr. Seuss dessert, blue swirl pudding, kids party dessert, whimsical pudding cups, homemade vanilla pudding, easy pudding recipe, gluten-free dessert