Let me tell you, the scent of rich, melted chocolate mingling with warm vanilla and a hint of buttery crust wafting from my oven is enough to make anyone’s mouth water. The first time I baked this creamy chocolate classic pie with flaky rustic crust, I was instantly hooked. It was one of those rare moments where you pause, take a deep breath, and just smile because you know you’re onto something truly special. You know what? This pie reminds me of those cozy afternoons when I was knee-high to a grasshopper, watching my grandma whip up desserts that felt like pure, nostalgic comfort.
I stumbled upon this recipe on a rainy weekend years ago, trying to recreate the kind of pie my family always raved about during holidays. Honestly, my family couldn’t stop sneaking slices off the cooling rack (and I can’t really blame them). It’s dangerously easy to make, yet delivers that perfect balance of creamy and flaky that brightens up any table. Whether you’re looking to impress at potlucks, treat your kids to something sweet, or just brighten up your Pinterest cookie board with a classic twist, this creamy chocolate classic pie with flaky rustic crust is going to become your go-to.
After testing the recipe multiple times (in the name of research, of course), it’s become a staple for family gatherings, gifting, and those moments when you just need a warm hug in dessert form. Trust me, you’re going to want to bookmark this one.
Why You’ll Love This Recipe
Coming from someone who’s baked countless pies over the years, this creamy chocolate classic pie recipe stands out for several reasons:
- Quick & Easy: Comes together in under 45 minutes, perfect for busy weeknights or last-minute dessert cravings.
- Simple Ingredients: No fancy grocery trips needed; you likely already have everything in your pantry and fridge.
- Perfect for Any Occasion: Whether it’s a casual family dinner or a festive holiday spread, this pie fits right in.
- Crowd-Pleaser: Always gets rave reviews from kids and adults alike, with that irresistible creamy texture and flaky crust combo.
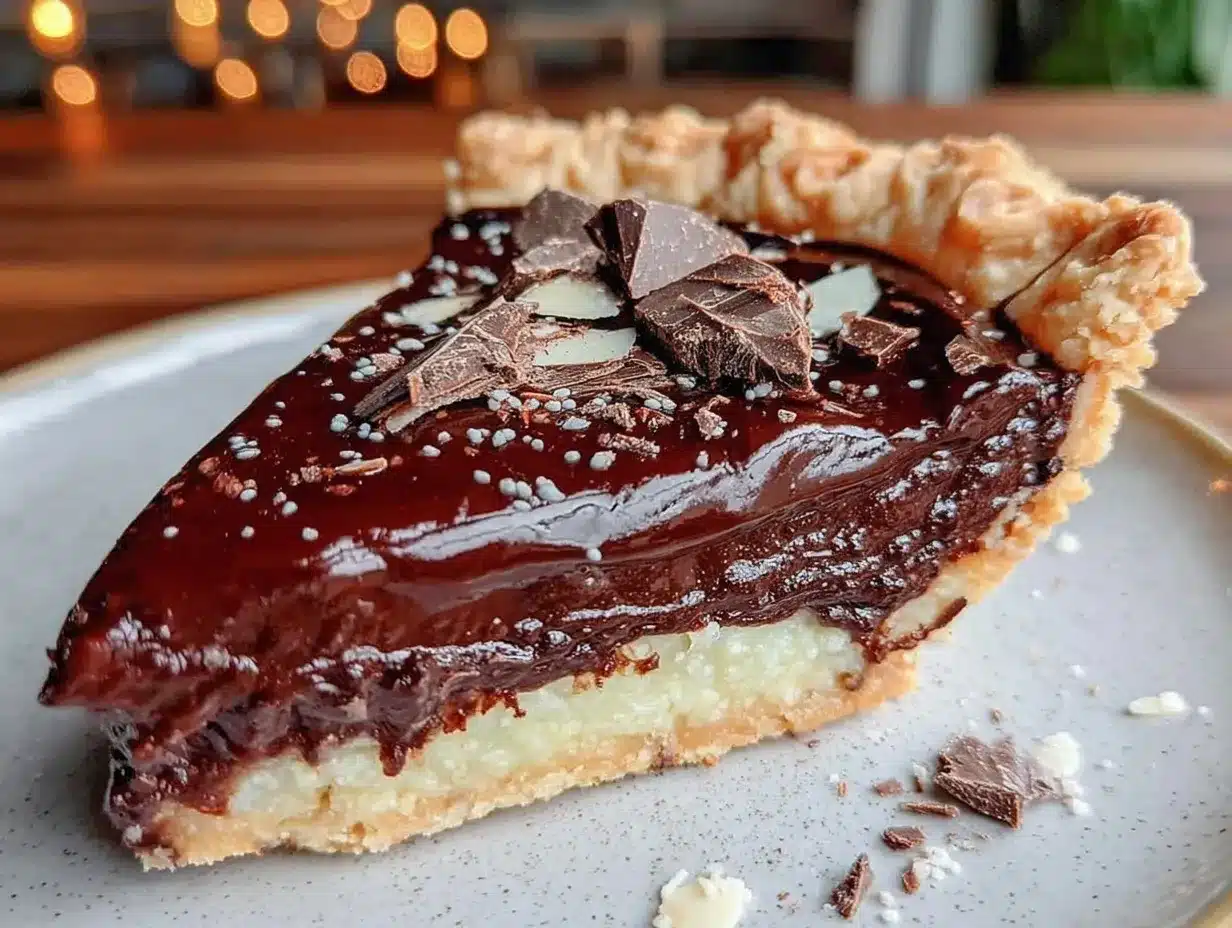
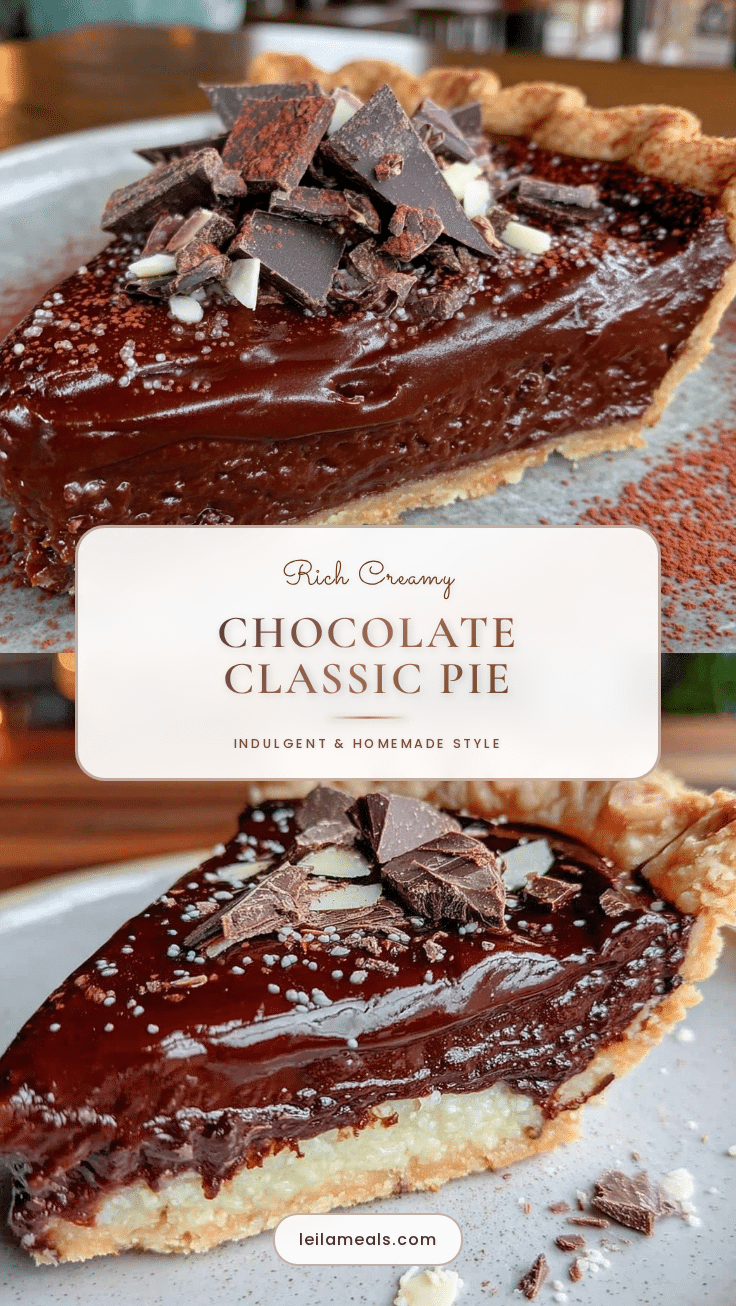
- Unbelievably Delicious: The silky chocolate filling paired with the buttery, flaky rustic crust is next-level comfort food.
What makes this recipe different? It’s the careful balance of a rustic crust that’s flaky without being fussy and a creamy chocolate filling that’s rich but never heavy. Instead of just melting chocolate, we gently infuse it with vanilla and a pinch of salt to bring out deep, nuanced flavors. Plus, the crust uses a simple technique that guarantees flakiness every time—no food processor needed! Honestly, this pie isn’t just good—it’s the kind of dessert that makes you close your eyes after the first bite and savor every moment.
What Ingredients You Will Need
This creamy chocolate classic pie uses simple, wholesome ingredients to deliver bold flavor and satisfying texture without the fuss. Most are pantry staples, and a few fresh touches make all the difference.
- For the Rustic Crust:
- All-purpose flour – 2 1/2 cups (310g); I prefer King Arthur brand for consistent results
- Unsalted butter – 1 cup (226g), chilled and cubed (adds richness and flakiness)
- Granulated sugar – 1 tablespoon (optional for slight sweetness)
- Salt – 1 teaspoon (balances the sweetness and enhances flavor)
- Ice-cold water – 6 to 8 tablespoons (for binding the dough without melting butter)
- For the Chocolate Filling:
- Bittersweet chocolate – 8 ounces (225g), chopped (quality matters here; Ghirardelli or Valrhona work beautifully)
- Whole milk – 1 1/2 cups (360ml)
- Heavy cream – 1 cup (240ml) (adds luscious creaminess)
- Granulated sugar – 3/4 cup (150g)
- Eggs – 4 large, room temperature (helps set the filling)
- Pure vanilla extract – 1 teaspoon (boosts flavor)
- Salt – 1/4 teaspoon (just a touch to deepen chocolate notes)
- Optional Toppings:
- Whipped cream (freshly whipped with a hint of vanilla)
- Chocolate shavings or cocoa powder for garnish
- Fresh berries (especially raspberries for a tart contrast)
If you want a gluten-free crust, swap the all-purpose flour with a high-quality gluten-free blend (I’ve had great luck with Bob’s Red Mill). For a dairy-free version, try coconut milk in place of cream and non-dairy butter substitutes in the crust.
Equipment Needed
- 9-inch (23 cm) pie dish: A classic ceramic or glass pie plate works best to hold that rustic crust shape.
- Mixing bowls: One large for the crust and another for the filling.
- Whisk and spatula: For mixing the filling and folding ingredients gently.
- Rolling pin: Essential for rolling out the rustic crust evenly; a silicone one is easier to clean.
- Double boiler or heatproof bowl & saucepan: For gently melting the chocolate without scorching.
- Measuring cups and spoons: Accuracy is key, especially for baking.
- Pastry cutter or two knives (optional): To cut butter into flour if you don’t have a pastry blender.
For budget-friendly options, a sturdy glass pie plate and a wooden rolling pin from most grocery stores will do just fine. If you don’t own a double boiler, just use a heatproof bowl set over simmering water to melt chocolate gently. I’ve found that using a silicone spatula makes scraping the bowl a breeze, minimizing waste.
Preparation Method
- Make the Rustic Pie Crust: In a large bowl, combine 2 1/2 cups (310g) all-purpose flour, 1 tablespoon sugar, and 1 teaspoon salt. Add 1 cup (226g) chilled, cubed unsalted butter. Using a pastry cutter or two knives, cut the butter into the flour mixture until it resembles coarse crumbs with pea-sized bits remaining. This is the secret to a flaky crust!
Tip: Keep your butter cold to prevent it from melting into the flour too early. - Add Ice-Cold Water: Gradually sprinkle 6 to 8 tablespoons of ice-cold water over the mixture, stirring gently with a fork until the dough just comes together. You want it to hold when pressed but not be sticky.
Note: Add water slowly to avoid overhydrating the dough. - Form the Dough: Gather the dough into two discs, wrap in plastic wrap, and refrigerate for at least 30 minutes. This resting period helps relax the gluten and keeps the butter firm.
- Roll Out the Dough: On a lightly floured surface, roll one disc into a 12-inch (30 cm) circle about 1/8 inch thick. Gently transfer it to your 9-inch (23 cm) pie dish. Trim edges, leaving about 1/2 inch overhang. Chill the crust while preparing the filling.
- Prepare the Chocolate Filling: Set a heatproof bowl over simmering water (double boiler). Add 8 ounces (225g) chopped bittersweet chocolate and stir gently until melted and smooth. Remove from heat.
- Warm the Dairy: In a separate saucepan, heat 1 1/2 cups (360ml) whole milk and 1 cup (240ml) heavy cream until steaming but not boiling.
- Mix Sugar and Eggs: In a large bowl, whisk together 3/4 cup (150g) granulated sugar and 4 large eggs until pale and slightly thickened (about 2 minutes). Slowly pour the warm milk and cream mixture into the eggs, whisking constantly to temper them. This prevents curdling.
- Combine Chocolate and Egg Mixture: Pour the tempered egg mixture into the melted chocolate, stirring until fully combined and silky smooth. Stir in 1 teaspoon vanilla extract and 1/4 teaspoon salt.
- Fill the Pie Crust: Pour the chocolate filling into the chilled pie crust. Smooth the top with a spatula.
- Bake the Pie: Preheat your oven to 350°F (175°C). Bake the pie for 40 to 45 minutes, or until the filling is mostly set but still slightly wobbly in the center. The edges should look firm and the crust golden.
Tip: To avoid a soggy bottom, bake on the lower rack of your oven. - Cool and Chill: Allow pie to cool on a wire rack for at least 2 hours, then refrigerate for a minimum of 4 hours or overnight. This chilling step sets the filling perfectly.
- Serve: Top with freshly whipped cream, chocolate shavings, or berries if desired. Slice with a hot knife for clean edges.
Cooking Tips & Techniques
One trick I’ve learned is to keep everything cold until just before baking. That flaky rustic crust depends on those tiny butter pockets staying solid, which puff up beautifully in the oven. Also, tempering the eggs by slowly adding warm cream and milk prevents scrambled eggs in your filling—trust me, I’ve been there.
Don’t rush the chilling phase after baking; the filling needs time to firm up or it will be too soft to slice nicely. If you notice your crust edges browning too fast, tent with foil halfway through baking. And, when rolling out the dough, flour your surface lightly but avoid over-flouring—it can dry out the crust.
If you don’t have a pastry cutter, two butter knives work okay (though a pastry blender is worth the investment). Multitask by prepping the filling while the dough chills—that way you save precious time without sacrificing quality.
Variations & Adaptations
Want to mix it up? Here are some ideas that I’ve tried and loved:
- Salted Caramel Twist: Drizzle homemade or store-bought salted caramel sauce over the chocolate filling before chilling. The sweet-salty combo is irresistible.
- Nutty Upgrade: Fold toasted chopped pecans or hazelnuts into the crust dough for added crunch and flavor.
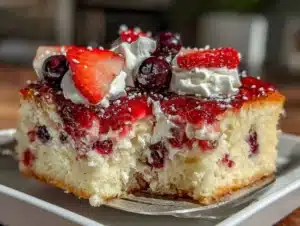
- Seasonal Fruits: Swap out whipped cream topping with fresh raspberries or sliced strawberries for a bright, fresh contrast.
- Gluten-Free Option: Use a gluten-free flour blend for the crust, adjusting water as needed to get the right dough consistency.
- Dairy-Free Version: Replace cream with full-fat coconut milk and use vegan butter in the crust. The texture shifts slightly but stays delicious.
I personally added a pinch of espresso powder to the filling once, which deepened the chocolate flavor beautifully without tasting like coffee. That’s a little secret I like to keep in my back pocket for special occasions.
Serving & Storage Suggestions
This creamy chocolate classic pie is best served chilled or at cool room temperature. It slices cleanly and pairs wonderfully with a dollop of whipped cream or a scoop of vanilla ice cream. For beverages, I like a rich coffee or a bold red wine to complement the chocolate’s depth.
Store leftover pie covered tightly in the refrigerator for up to 4 days. The flavors actually mellow and deepen after a day or two—if you can resist eating it all at once! For longer storage, wrap slices individually and freeze for up to 2 months. Thaw overnight in the fridge and gently warm slices in a low oven or microwave before serving.
When reheating, be gentle—too much heat can cause the filling to separate. A quick 15-second zap in the microwave or a 10-minute low-heat oven warming works wonders.
Nutritional Information & Benefits
Each slice of this creamy chocolate classic pie (assuming 8 slices) contains approximately:
| Calories | 350-400 kcal |
|---|---|
| Fat | 22g (mostly from butter and cream) |
| Carbohydrates | 35g (including sugars) |
| Protein | 5g (from eggs and dairy) |
Chocolate is packed with antioxidants and may boost mood thanks to compounds like flavonoids. Using real butter and cream adds richness but also provides fat-soluble vitamins. Of course, this pie is a treat best enjoyed in moderation. For those avoiding gluten, dairy, or sugar, the recipe adapts well with substitutions mentioned earlier.
Conclusion
In short, this creamy chocolate classic pie with flaky rustic crust is a winner for anyone craving a homemade dessert that’s both indulgent and approachable. It’s the kind of recipe that invites you to play—customize the crust, experiment with toppings, or even sneak in a personal twist. I love this pie because it feels like home, like those warm, happy moments around the family table.
Give it a try, tweak it to your liking, and don’t forget to share your experience. I’d love to hear how you make this recipe your own. Whether you’re a pie pro or a first-timer, this one’s got your back with creamy, chocolatey goodness that never disappoints.
Go ahead, bake it, enjoy it, and make some memories.
Frequently Asked Questions
Can I make the pie crust ahead of time?
Absolutely! You can prepare the pie dough up to 2 days in advance and keep it wrapped tightly in the fridge. Just let it sit at room temperature for 10 minutes before rolling out.
What type of chocolate is best for the filling?
Bittersweet chocolate with around 60-70% cocoa content works best. It offers a rich flavor without being overly bitter. High-quality brands like Ghirardelli or Valrhona are my personal favorites.
How do I prevent a soggy crust?
Baking the pie on the lower rack helps, and chilling the crust before filling keeps it firm. You can also brush the crust with a thin layer of egg white before adding filling to create a moisture barrier.
Can I use a store-bought pie crust?
You can, but the homemade rustic crust adds a flaky texture and buttery flavor that’s hard to match. If short on time, a good-quality store-bought crust will work in a pinch.
How long can I store leftovers?
Keep leftovers covered in the fridge for up to 4 days. The pie tastes great even after a couple of days as the flavors meld. For longer storage, freeze individual slices wrapped tightly for up to 2 months.
Pin This Recipe!
Creamy Chocolate Classic Pie Recipe Easy Homemade Rustic Crust Delight

A rich and creamy chocolate pie with a flaky rustic crust, perfect for any occasion and easy to make with simple pantry ingredients.
- Prep Time: 15 minutes
- Cook Time: 45 minutes
- Total Time: 6 hours (including chilling time)
- Yield: 8 servings 1x
- Category: Dessert
- Cuisine: American
Ingredients
- 2 1/2 cups (310g) all-purpose flour
- 1 cup (226g) unsalted butter, chilled and cubed
- 1 tablespoon granulated sugar (optional)
- 1 teaspoon salt
- 6 to 8 tablespoons ice-cold water
- 8 ounces (225g) bittersweet chocolate, chopped
- 1 1/2 cups (360ml) whole milk
- 1 cup (240ml) heavy cream
- 3/4 cup (150g) granulated sugar
- 4 large eggs, room temperature
- 1 teaspoon pure vanilla extract
- 1/4 teaspoon salt
- Optional toppings: whipped cream, chocolate shavings or cocoa powder, fresh berries (especially raspberries)
Instructions
- In a large bowl, combine 2 1/2 cups all-purpose flour, 1 tablespoon sugar, and 1 teaspoon salt. Add 1 cup chilled, cubed unsalted butter. Using a pastry cutter or two knives, cut the butter into the flour mixture until it resembles coarse crumbs with pea-sized bits remaining.
- Gradually sprinkle 6 to 8 tablespoons of ice-cold water over the mixture, stirring gently with a fork until the dough just comes together. The dough should hold when pressed but not be sticky.
- Gather the dough into two discs, wrap in plastic wrap, and refrigerate for at least 30 minutes.
- On a lightly floured surface, roll one disc into a 12-inch circle about 1/8 inch thick. Gently transfer it to a 9-inch pie dish. Trim edges, leaving about 1/2 inch overhang. Chill the crust while preparing the filling.
- Set a heatproof bowl over simmering water (double boiler). Add 8 ounces chopped bittersweet chocolate and stir gently until melted and smooth. Remove from heat.
- In a separate saucepan, heat 1 1/2 cups whole milk and 1 cup heavy cream until steaming but not boiling.
- In a large bowl, whisk together 3/4 cup granulated sugar and 4 large eggs until pale and slightly thickened (about 2 minutes). Slowly pour the warm milk and cream mixture into the eggs, whisking constantly to temper them.
- Pour the tempered egg mixture into the melted chocolate, stirring until fully combined and silky smooth. Stir in 1 teaspoon vanilla extract and 1/4 teaspoon salt.
- Pour the chocolate filling into the chilled pie crust. Smooth the top with a spatula.
- Preheat oven to 350°F (175°C). Bake the pie for 40 to 45 minutes, or until the filling is mostly set but still slightly wobbly in the center. The edges should look firm and the crust golden.
- Allow pie to cool on a wire rack for at least 2 hours, then refrigerate for a minimum of 4 hours or overnight to set the filling.
- Serve topped with freshly whipped cream, chocolate shavings, or berries if desired. Slice with a hot knife for clean edges.
Notes
Keep butter cold to ensure a flaky crust. Temper eggs by slowly adding warm milk and cream to prevent curdling. Bake on the lower rack to avoid soggy crust. Chill pie thoroughly before slicing for best results. Tent with foil if crust edges brown too fast. Use a hot knife to slice cleanly.
Nutrition
- Serving Size: 1 slice (1/8 of pie)
- Calories: 375
- Sugar: 25
- Sodium: 250
- Fat: 22
- Saturated Fat: 14
- Carbohydrates: 35
- Fiber: 3
- Protein: 5
Keywords: chocolate pie, creamy chocolate pie, rustic pie crust, homemade pie, easy dessert, chocolate dessert, flaky crust