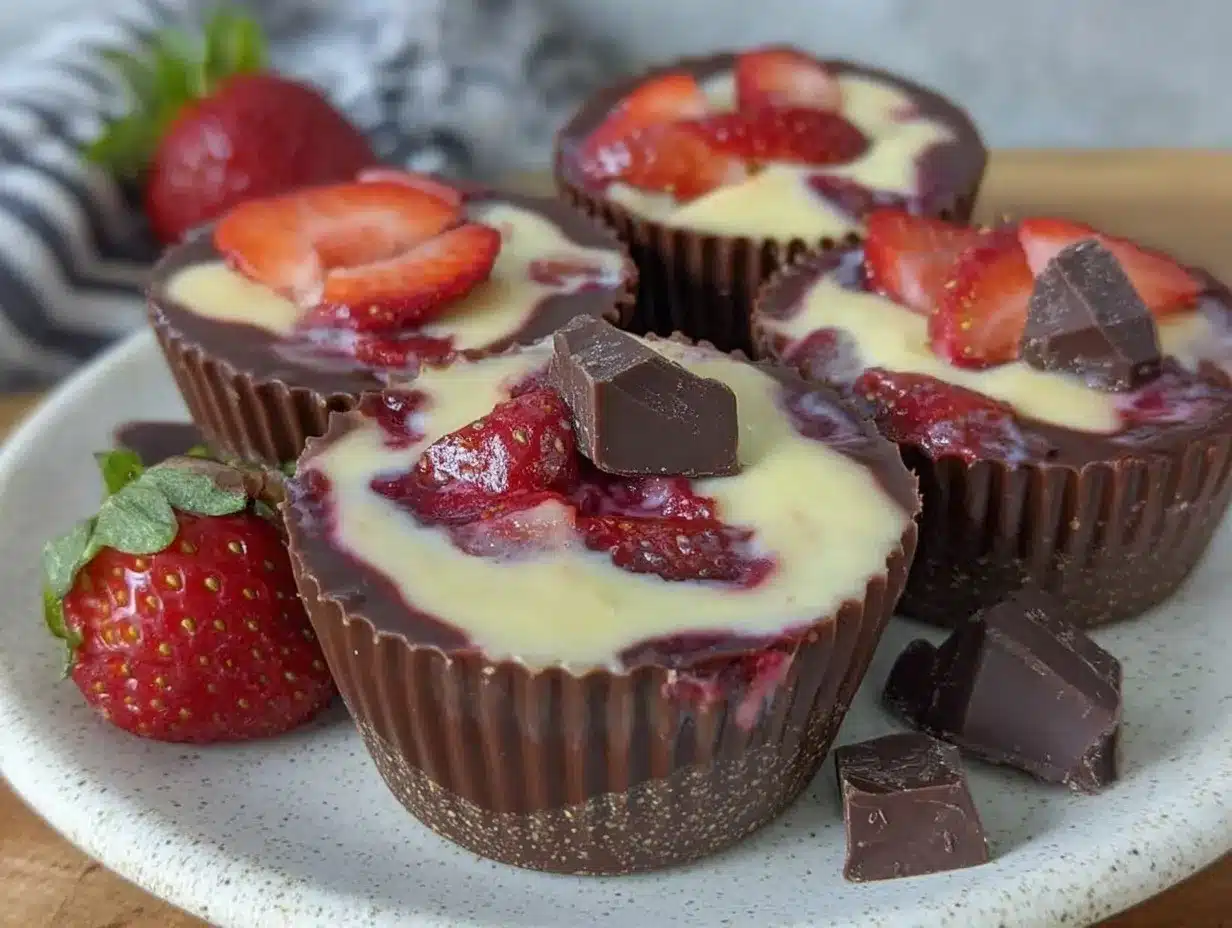
Imagine the scent of rich, melted chocolate swirling through your kitchen, mingling with the sweet, sun-ripened aroma of strawberries. The first time I whipped up these Chocolate-Covered Strawberry Yogurt Cups, I was instantly transported back to the county fair—standing by the chocolate fountain, eyes wide, strawberry in hand. The glossy chocolate shell cracks under your teeth, giving way to creamy, tangy yogurt and a burst of real strawberry flavor. It’s the kind of moment where you pause, take a deep breath, and think, “Okay, this is something special.”
When I was knee-high to a grasshopper, my grandma used to make chocolate-dipped strawberries for every birthday and holiday. Years later, trying to recreate that magic (but with a twist for busy weeknights and lunchbox treats), I stumbled on this dangerously easy recipe. Honestly, I wish I’d figured it out sooner—because my family couldn’t stop sneaking these yogurt cups off the tray before dinner (and, let’s face it, neither could I).
There’s just something about this sweet treat that screams “save me for a rainy day” or “bring me to the next potluck.” These Chocolate-Covered Strawberry Yogurt Cups are perfect for gifting, school snacks, or just brightening up your Pinterest dessert board. The best part? They’re so simple, you’ll find yourself making them again and again—“in the name of research,” of course. After multiple test batches and a few late-night taste tests, they’ve become a staple for family movie nights and easy entertaining. If you crave pure, nostalgic comfort with a fresh, modern twist, you’re going to want to bookmark this one. It’s a sweet treat that truly feels like a warm hug in every bite.
Why You’ll Love This Recipe
Chocolate-Covered Strawberry Yogurt Cups have become a favorite in my kitchen for a reason (and not just because they disappear quickly). From my years of recipe testing and family taste panels, I can confidently say this is the kind of sweet treat you’ll want to make on repeat. Here’s why these yogurt cups are a step above the rest:
- Quick & Easy: You only need about 15 minutes of hands-on time—no fancy equipment, no baking, no fuss. Perfect for when the sweet tooth strikes or you need a last-minute dessert.
- Simple Ingredients: Everything you need is probably already in your fridge or pantry. No wild goose chase for specialty ingredients—just chocolate, strawberries, yogurt, a touch of honey or maple syrup, and a pinch of salt.
- Perfect for Any Occasion: These travel well for picnics, brighten up lunchboxes, and look downright adorable on a dessert tray for parties or holidays. I’ve even packed them for road trips (with a cooler, of course!).
- Crowd-Pleaser: My kids and their friends beg for these yogurt cups after school. Adults love them too—especially with a cup of coffee or tea. There’s something for everyone.
- Unbelievably Delicious: The combo of silky chocolate, creamy yogurt, and juicy strawberries is pure bliss. It’s the best kind of comfort food—refreshing, just sweet enough, and a little bit fancy without trying too hard.
What makes this recipe different? I use Greek yogurt for a rich, creamy base that holds up under the chocolate shell. The strawberries are chopped tiny for bursts of fresh flavor in every bite (and no watery mess!). I’ve tried melting the chocolate with a splash of coconut oil—this keeps the shell snappy and glossy, just like your favorite chocolate bar. Honestly, it’s a game-changer.
This recipe isn’t just good—it’s the kind of treat that makes you close your eyes and sigh. It’s comfort food, but lighter and just a little bit healthy. You’ll impress your guests, satisfy picky eaters, and maybe even sneak a few for yourself before anyone else notices. Trust me, after a few rounds of testing (and a few chocolatey fingers), I can say with confidence: this is my best version yet.
What Ingredients You Will Need
This recipe uses simple, wholesome ingredients to deliver bold flavor and creamy texture without the fuss. Most of these are pantry or fridge staples—and I’ll share my favorite swaps if you’re in a pinch.
- For the Yogurt Filling:
- Greek yogurt (plain or vanilla; full-fat for the creamiest texture, about 1 cup / 240g)
- Strawberries (fresh, hulled and finely chopped, about 6 medium or 100g)
- Honey or pure maple syrup (1-2 tablespoons / 15-30ml, to taste; use agave for vegan)
- Pure vanilla extract (1/2 teaspoon / 2ml, optional, for extra depth)
- Pinch of salt (balances out the sweetness, trust me!)
- For the Chocolate Shell:
- Semi-sweet or dark chocolate chips (about 1 cup / 170g; I love Ghirardelli or Enjoy Life for dairy-free)
- Coconut oil (1 tablespoon / 15ml; helps the chocolate set with a nice snap)
- For Topping (Optional):
- Chopped freeze-dried strawberries (for a pretty garnish and extra strawberry punch)
- White chocolate drizzle (melt 1/4 cup / 40g white chocolate with 1/2 teaspoon / 2ml coconut oil)
Ingredient Tips & Swaps:
- For dairy-free: use coconut or almond yogurt and dairy-free chocolate chips.
- For a lower sugar version: use unsweetened yogurt and skip the sweetener, or use monk fruit syrup.
- In winter: thawed frozen strawberries (patted dry) work in a pinch, but fresh is best for texture.
- No coconut oil? A neutral oil like avocado oil works, though the shell may be a bit softer.
- Not a strawberry fan? Swap for raspberries, blueberries, or even diced peaches for a twist!
I recommend using the best chocolate you can find—since it’s the main flavor here, you’ll really taste the difference. If you want a lighter flavor, try milk chocolate chips instead of dark. For sprinkles, chopped nuts, or toasted coconut on top, go wild! The recipe is very forgiving and fun to play with.
Equipment Needed
You don’t need much to make these Chocolate-Covered Strawberry Yogurt Cups—one of the reasons I love this recipe for quick sweet treats!
- Mini muffin tin (12-cup or 24-cup; silicone is easiest for popping out the cups, but metal works too)
- Mini paper liners or silicone liners (prevents sticking and makes for easy clean up)
- Microwave-safe bowl (for melting chocolate; a sturdy glass bowl works great)
- Spoon or small spatula (for filling and smoothing yogurt mixture)
- Sharp knife and cutting board (for chopping strawberries tiny and evenly)
- Small freezer-safe tray or plate (if you want to chill the cups quickly outside the muffin pan)
Equipment Alternatives: No mini muffin tin? Use regular muffin tins for larger cups (just double the filling), or even silicone ice cube trays in a pinch. If you’re out of liners, a quick spritz of nonstick spray helps, but liners are worth it for easy removal. I’ve made these with both plastic and glass bowls, but glass heats more evenly (no burnt chocolate!).
My budget-friendly tip: silicone liners are reusable and last forever—plus, they make the cups look extra cute for gifting. To clean chocolate off bowls, let hot water soak for 10 minutes and it wipes right off (trust me, I’ve learned the hard way!).
Preparation Method
-
Prep the Muffin Tin (2 minutes):
Line your mini muffin tin with 12 mini paper or silicone liners. (If you’re using a regular muffin tin, you’ll make 6 larger cups—just double the filling per cup.) This is key for easy release later—trust me, I’ve lost a few to sticking in the past!
-
Make the Yogurt Filling (5 minutes):
In a medium mixing bowl, stir together 1 cup (240g) Greek yogurt, 1-2 tablespoons (15-30ml) honey or maple syrup (to taste), 1/2 teaspoon (2ml) vanilla (if using), and a pinch of salt. Fold in the chopped strawberries (about 100g). The mixture should look creamy, with lots of strawberry bits. If it’s too runny, add a spoonful more yogurt. Taste and adjust sweetness as you like.
-
Melt the Chocolate (3-4 minutes):
In a microwave-safe bowl, combine 1 cup (170g) chocolate chips with 1 tablespoon (15ml) coconut oil. Microwave in 20-second bursts, stirring well after each, until the chocolate is silky smooth. (Usually takes about 60-80 seconds total.) Don’t overheat—chocolate scorches fast. It should be glossy and pourable; if it thickens, microwave 10 seconds more.
-
Assemble the Cups (5-6 minutes):
Spoon about 1 teaspoon (5ml) melted chocolate into each muffin liner. Use the back of the spoon to spread the chocolate up the sides of the liner (doesn’t need to be perfect!). Place the muffin tin in the freezer for 5 minutes so the chocolate shell sets.
Once set, fill each cup with a heaping teaspoon of the yogurt-strawberry mix. Smooth the tops gently with a spoon. Top each with another teaspoon of melted chocolate, spreading to the edges to seal in the filling. Tap the tin gently on the counter to level the chocolate.
-
Chill and Decorate (10-15 minutes):
Freeze the assembled cups for at least 15 minutes, or until the chocolate is firm. For extra flair, drizzle melted white chocolate over the tops and sprinkle with chopped freeze-dried strawberries. (Kids love this part—and so do I.)
Once set, pop the cups out of the muffin tin (peel off liners if using paper). The shell should have a satisfying snap, and the filling should stay put. If they’re too soft, chill a bit longer.
Troubleshooting: If the chocolate cracks when removing, let the cups sit at room temp for 2-3 minutes before unmolding. If the filling oozes, try using a thicker Greek yogurt next time. And don’t worry—imperfect cups taste just as good (if not better)!
Personal Tip: I like to make a double batch and stash some in the freezer for snack emergencies. The texture is just as good, and you’ll always have a sweet treat ready to go.
Cooking Tips & Techniques
After a few rounds of trial and error (and a little kitchen chaos), I’ve picked up some tricks for perfect Chocolate-Covered Strawberry Yogurt Cups every time. Here’s what I’ve learned:
- Use Room Temperature Yogurt: Cold yogurt can make the chocolate shell set too quickly and crack. Let your yogurt sit out for 10 minutes while you prep the chocolate.
- Chop Strawberries Small: Big chunks will make your filling watery and messy. Aim for pea-sized bits or smaller—this keeps the texture creamy and prevents leaks.
- Don’t Overheat the Chocolate: I’ve burned more than one batch by microwaving too long. Stick to 20-second bursts, stir often, and stop when just melted. If you use a double boiler, even better—no risk of scorching.
- Seal the Edges Well: When topping with chocolate, make sure it covers the yogurt completely to “lock in” the filling. This keeps the cups neat and portable (and no sticky fingers later).
- Let Them Set Fully: I know it’s hard to wait, but chill the cups until the chocolate is completely firm before peeling the liners. Rushing this step leads to smushed cups (learned the hard way!).
- Batch Prep & Freezing: These freeze beautifully. I often make a double batch and freeze half in a zip-top bag. Let them thaw at room temp for 5-10 minutes before eating for the best texture.
- Clean as You Go: Melted chocolate gets everywhere! I’ve found that cleaning bowls and spoons right away makes life easier (and no dried chocolate cement to chip off later).
Common Mistakes: The most common issues are chocolate that’s too thick (add a bit more oil), watery filling (use thicker yogurt), or cups sticking to the pan (liners are your friend!). If you run into trouble, just remember—slightly messy treats still taste amazing.
With these tips, you’ll have consistent, Instagram-worthy yogurt cups every time. And if you end up with a few “ugly ducklings,” you know what? Call them chef’s snacks and enjoy!
Variations & Adaptations
The fun of Chocolate-Covered Strawberry Yogurt Cups is that they’re endlessly customizable. Here are three of my favorite ways to switch things up (plus a few allergy-friendly swaps):
- Low-Carb/Keto: Use unsweetened coconut yogurt and monk fruit sweetener instead of honey or maple syrup. Choose sugar-free chocolate chips (like Lily’s). Keep the strawberry pieces small to control carbs.
- Vegan/Dairy-Free: Swap Greek yogurt for a rich coconut or almond yogurt, and check your chocolate chips to make sure they’re dairy-free. Maple syrup or agave is a great plant-based sweetener.
- Other Flavors:
- Peanut Butter Banana: Use banana yogurt, chopped bananas, and top with a swirl of peanut butter before sealing with chocolate.
- Mixed Berry: Toss in blueberries, raspberries, or blackberries for a rainbow effect.
- Nutty Crunch: Add a sprinkle of toasted chopped pecans or almonds inside the filling for a surprise crunch.
Cooking Method Adaptations: No muffin tin? Use a silicone ice cube tray or even a mini loaf pan, then slice into squares. For a “bark” version, spread the yogurt mixture on a lined baking sheet, top with chocolate, and freeze until firm, then break into chunks.
Allergy Notes: For nut allergies, skip almond or peanut butters and use sunflower seed butter if you want extra richness. For gluten-free folks, these cups are naturally gluten-free—just double-check your chocolate chips.
My favorite personal twist? A layer of raspberry jam between the yogurt and chocolate for a tangy-sweet surprise. Give it a shot and let me know which variation you end up loving most!
Serving & Storage Suggestions
Chocolate-Covered Strawberry Yogurt Cups are best served cold, straight from the fridge or freezer. The chocolate shell will be perfectly snappy, and the filling creamy and refreshing—just right for a hot afternoon or as a cool ending to a cozy meal.
Presentation Tips: Arrange the yogurt cups on a pretty platter with a sprinkle of freeze-dried strawberries or a drizzle of melted white chocolate for a Pinterest-worthy display. For parties, I sometimes put them in mini cupcake liners for easy grabbing (and no sticky fingers).
Pairings: These pair beautifully with a fresh fruit salad, a cup of hot coffee, or a glass of chilled rosé for adults. For a fun dessert board, arrange with other chocolate-dipped fruit and a little bowl of whipped cream for dipping.
Storage: Store the cups in an airtight container in the fridge for up to 4 days, layered with parchment paper to prevent sticking. For longer storage, freeze for up to 2 months. Let them thaw for 5-10 minutes at room temp before eating for the best texture.
Reheating: No reheating needed—just enjoy straight from the fridge or freezer. If they’re too firm from the freezer, let them sit on the counter for a few minutes to soften up.
Fun fact: the flavors actually get better as they sit—the yogurt melds with the chocolate, and the strawberry flavor deepens. Don’t be surprised if they’re gone long before you get to test their shelf life!
Nutritional Information & Benefits
Each Chocolate-Covered Strawberry Yogurt Cup is a sweet treat you can feel good about, especially when made with Greek yogurt and fresh fruit. Here’s an estimate for one mini cup:
- Calories: 90-110
- Protein: 2-3g (thanks to Greek yogurt)
- Sugar: 6-7g (mostly from strawberries and a touch of honey)
- Fat: 5-6g (mostly from chocolate and coconut oil)
Health Benefits: Greek yogurt brings a dose of protein and calcium, while strawberries add vitamin C and antioxidants. Using dark chocolate means more heart-healthy flavonoids, too. You can easily adjust the sweetener or chocolate type for your dietary needs—these are naturally gluten-free and can be made nut- or dairy-free as needed.
My personal wellness tip: I love keeping these on hand for a portion-controlled dessert after dinner—satisfies the chocolate craving without overdoing it. Just be sure to check ingredient labels for allergies, especially if sharing with friends or kids.
Conclusion
Chocolate-Covered Strawberry Yogurt Cups are the kind of sweet treat that brings a little joy to any day—whether you’re making them for a special occasion or just because you need a pick-me-up. They’re easy, quick, and endlessly adaptable to whatever you have in your kitchen. Plus, they’re a guaranteed crowd-pleaser for both kids and adults (I speak from experience!).
Feel free to put your own spin on them—try different fruits, toppings, or even a surprise nut butter layer. That’s the fun of homemade treats. Personally, I love how these yogurt cups remind me of childhood chocolate-dipped strawberries, but with a modern, creamy twist that fits into my busy life.
If you try these, I’d love to hear how yours turned out! Leave a comment, share a photo, or tag me on Pinterest with your best creations. This is one sweet treat recipe you’ll want to make again and again. Happy snacking!
Frequently Asked Questions
How long do Chocolate-Covered Strawberry Yogurt Cups last in the fridge?
They’ll stay fresh for up to 4 days in an airtight container in the refrigerator. For best texture, layer them with parchment paper to prevent sticking.
Can I use frozen strawberries instead of fresh?
You can, but make sure to thaw and pat them dry thoroughly to avoid watery filling. Fresh strawberries give the best flavor and texture.
What kind of chocolate is best for this recipe?
I recommend semi-sweet or dark chocolate chips for a rich taste, but milk chocolate works if you prefer a sweeter flavor. Use high-quality chocolate for the best shell.
Are these yogurt cups gluten-free?
Yes, this recipe is naturally gluten-free—just double-check your chocolate chips to be sure.
Can I make these ahead for a party?
Absolutely! Make them a day or two ahead and store in the fridge or freezer. They’re great for prepping in advance and serving straight from the fridge.
Pin This Recipe!
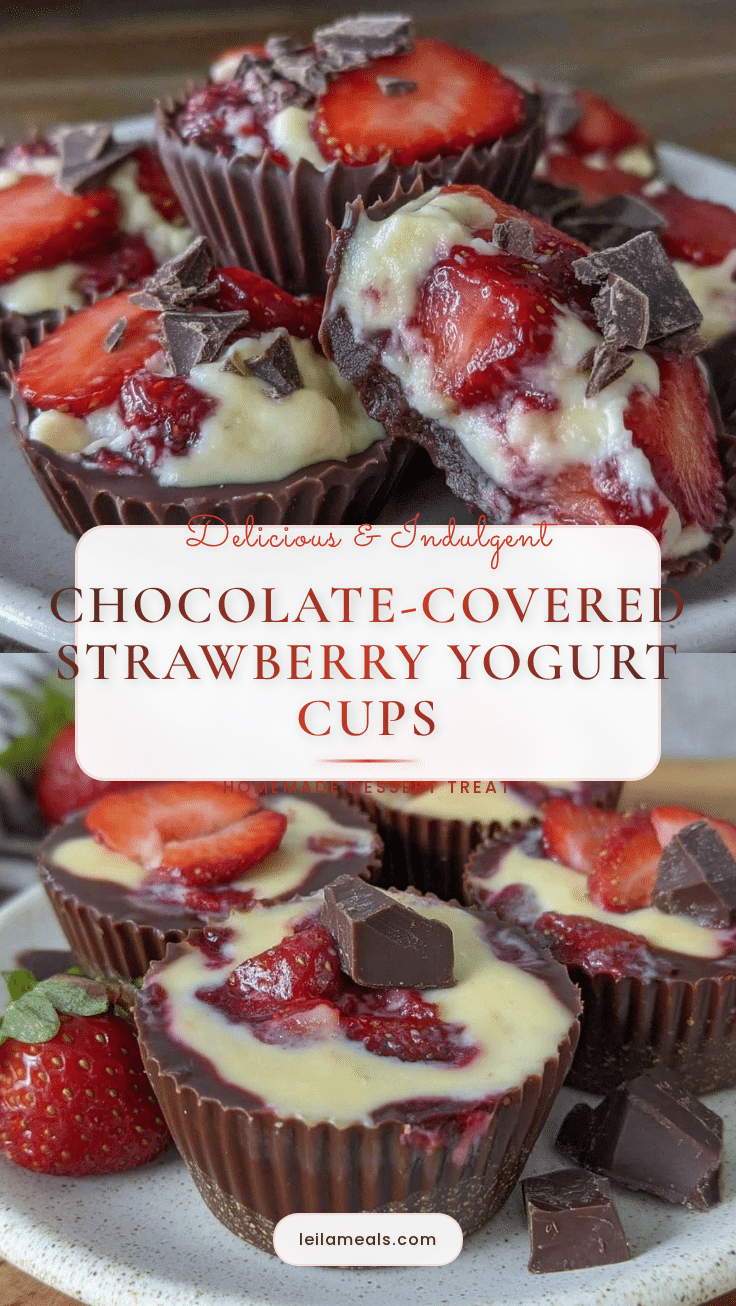
Chocolate-Covered Strawberry Yogurt Cups

These easy, no-bake Chocolate-Covered Strawberry Yogurt Cups feature a snappy chocolate shell, creamy Greek yogurt, and bursts of fresh strawberry. Perfect for gifting, parties, or a quick sweet snack.
- Prep Time: 15 minutes
- Cook Time: 0 minutes
- Total Time: 30 minutes
- Yield: 12 mini cups 1x
- Category: Dessert
- Cuisine: American
Ingredients
- 1 cup Greek yogurt (plain or vanilla, full-fat preferred)
- 6 medium fresh strawberries, hulled and finely chopped (about 3.5 oz / 100g)
- 1–2 tablespoons honey or pure maple syrup (to taste)
- 1/2 teaspoon pure vanilla extract (optional)
- Pinch of salt
- 1 cup semi-sweet or dark chocolate chips (about 6 oz / 170g)
- 1 tablespoon coconut oil
- Chopped freeze-dried strawberries (optional, for garnish)
- 1/4 cup white chocolate chips (optional, for drizzle)
- 1/2 teaspoon coconut oil (optional, for white chocolate drizzle)
Instructions
- Line a mini muffin tin with 12 mini paper or silicone liners.
- In a medium bowl, mix Greek yogurt, honey or maple syrup, vanilla extract (if using), and a pinch of salt. Fold in chopped strawberries.
- In a microwave-safe bowl, combine chocolate chips and coconut oil. Microwave in 20-second bursts, stirring after each, until melted and smooth (about 60-80 seconds total).
- Spoon about 1 teaspoon melted chocolate into each muffin liner and spread up the sides. Freeze for 5 minutes to set.
- Fill each cup with a heaping teaspoon of the yogurt-strawberry mixture. Smooth the tops. Top with another teaspoon of melted chocolate, spreading to seal the filling. Tap the tin gently to level.
- Freeze the assembled cups for at least 15 minutes, or until the chocolate is firm.
- Optional: Drizzle melted white chocolate over the tops and sprinkle with chopped freeze-dried strawberries.
- Remove cups from the tin and peel off liners before serving.
Notes
For dairy-free, use coconut or almond yogurt and dairy-free chocolate chips. Let yogurt come to room temperature before assembling to prevent chocolate shell cracking. Chop strawberries small for best texture. These cups freeze well for up to 2 months. For larger cups, use a regular muffin tin and double the filling per cup.
Nutrition
- Serving Size: 1 mini cup
- Calories: 100
- Sugar: 7
- Sodium: 30
- Fat: 6
- Saturated Fat: 4
- Carbohydrates: 10
- Fiber: 1
- Protein: 2.5
Keywords: chocolate, strawberry, yogurt cups, no-bake dessert, healthy treat, gluten-free, kid-friendly, party snack, easy recipe