“Mom, why can’t we have pizza Lunchables for lunch today?” my son asked one hectic Tuesday afternoon, just as I was scrambling to pull something together between Zoom meetings and homework checks. Honestly, I was tempted to grab the store-bought kind, but there was something about the idea of making a homemade version that felt worth the extra five minutes—and a chance to skip all the weird additives. That afternoon, I threw together this Easy Homemade Pizza Lunchables Snack, and it quickly became our go-to for busy days when a quick, fun lunch is non-negotiable.
The thing about this recipe is it’s not just for kids; it’s for anyone who’s ever stared into the fridge wondering how to make a snack feel a little more special without a ton of fuss. I remember feeling skeptical at first—could assembling mini pizzas without an oven really hit the spot? But as soon as my son took that first bite, cheese stretching and all, I knew this was going to be a lunchtime winner in our house. It’s simple, playful, and has that familiar, comforting pizza vibe that’s hard to resist.
What I love most is how this recipe invites creativity. You can swap toppings, change the bread, or even sneak in some veggies, and yet it always manages to come together like a little personal pizza party. It’s the kind of snack that feels homemade and thoughtful but doesn’t demand hours in the kitchen. Plus, there’s a quiet satisfaction in knowing exactly what goes into it, from the sauce to the cheese, without any mystery ingredients. This pizza Lunchables snack stuck with me because it’s honest food for busy moments, with just enough fun to make lunchtime feel like a treat.
Why You’ll Love This Recipe
Over the weeks of testing and retesting this Easy Homemade Pizza Lunchables Snack, I found a few reasons it quickly became a staple in our household. It’s a recipe that respects your time and your pantry, yet delivers that satisfying pizza flavor everyone craves.
- Quick & Easy: Comes together in under 15 minutes, perfect for those frantic lunch prep moments or after-school snacks.
- Simple Ingredients: No scavenging for specialty items—just basics like bread, cheese, and sauce you probably already have.
- Perfect for Kids’ Lunches: The fun, build-your-own style keeps kids engaged and happy, making it a win for picky eaters.
- Crowd-Pleaser: I’ve served this at playdates and even casual adult hangouts, and it always gets a thumbs-up.
- Unbelievably Delicious: The melty cheese paired with fresh toppings creates a neat little flavor explosion in every bite.
Unlike pre-packaged Lunchables that can feel a bit sterile or overly processed, this homemade version lets you control the ingredients and customize flavors. I like to use a smooth tomato sauce with a hint of garlic, and the secret is shredding fresh mozzarella for that perfect melt. You can even swap in a gluten-free flatbread or whole grain crackers for variety. Honestly, this snack has become my quiet little kitchen hack for keeping lunch interesting without fuss.
What Ingredients You Will Need
This recipe is built on simple, wholesome ingredients that come together effortlessly to create a fun pizza snack. They’re mostly pantry staples, so no need for special trips to the store unless you want to get creative.
- For the base:
- Mini pita breads or small round flatbreads (about 4-inch diameter) – these act as the pizza crust
- Optional: whole wheat or gluten-free flatbread for a healthier or allergy-friendly twist
- For the sauce:
- Tomato sauce (about ½ cup) – smooth and flavorful, I recommend Rao’s or your favorite brand with simple ingredients
- Garlic powder (a pinch) to boost flavor
- Italian seasoning (½ teaspoon) adds a classic herb touch
- For the cheese and toppings:
- Mozzarella cheese, shredded (1 cup) – fresh mozzarella shredded gives the best melt and texture
- Pepperoni slices (about 12) – use turkey pepperoni for a lighter option
- Black olives, sliced (optional, ¼ cup) adds a salty bite
- Mini bell peppers, thinly sliced (optional, ¼ cup) for a colorful crunch
- Extras:
- Parmesan cheese for sprinkling (optional)
- Fresh basil leaves or dried oregano for garnish
If you want to get creative, you can swap out pepperoni for diced cooked chicken or turkey sausage. For a dairy-free version, use vegan cheese options. The key is keeping the ingredients simple and fresh so the snack stays light but flavorful. I’ve also found that using mini pita breads keeps the snack perfectly sized for little hands, and it’s sturdy enough to hold toppings without getting soggy too quickly.
Equipment Needed
- Small mixing bowl – to mix the tomato sauce with seasonings
- Measuring spoons and cups – for precise seasoning and cheese amounts
- Sharp knife and cutting board – for slicing any fresh toppings like bell peppers or olives
- Baking sheet or microwave-safe plate – to warm or melt cheese if desired
- Optional: toaster oven or conventional oven – if you want to melt cheese on the snack before packing
Honestly, you don’t need fancy tools here. I often make this snack straight on a plate in the microwave when time is tight, but a quick warm-up in a toaster oven crisps the pita just enough and melts the cheese nicely. If you don’t have a toaster oven, a conventional oven preheated to 350°F (175°C) works great too. For quick prep, a good pair of kitchen scissors can speed up slicing pepperoni or veggies.
Preparation Method
- Prepare the sauce: In a small bowl, mix ½ cup of tomato sauce with a pinch of garlic powder and ½ teaspoon of Italian seasoning. Stir well to combine. This simple seasoning blend lifts the sauce without overpowering the snack. (Estimated time: 2 minutes)
- Assemble the base: Lay out 4 mini pitas or flatbreads on your work surface. If using pita, slice them in half horizontally for thinner rounds, or use as is for a thicker crust. (Estimated time: 1 minute)
- Spread the sauce: Use a small spoon or butter knife to evenly spread about 1 tablespoon of the seasoned tomato sauce on each pita. Don’t overload, or the bread will get soggy. (Estimated time: 2 minutes)
- Add cheese: Sprinkle about ¼ cup of shredded mozzarella over each sauced pita. Make sure the cheese covers the sauce evenly for a satisfying melt. (Estimated time: 2 minutes)
- Top with pepperoni and extras: Place 3 pepperoni slices on each pizza base. Add optional toppings like sliced black olives or bell peppers if you’re including them. (Estimated time: 3 minutes)
- Melt the cheese (optional): If you want melty cheese, place the assembled snacks on a baking sheet and heat in a toaster oven at 350°F (175°C) for 5-7 minutes, or microwave on medium power for 45 seconds to 1 minute. Watch closely to avoid overcooking. (Estimated time: 5-7 minutes)
- Garnish and pack: Sprinkle with a little parmesan or dried oregano and let cool slightly before packing these into lunch containers or snack boxes. Add fresh basil leaves for a pop of color if you have them. (Estimated time: 2 minutes)
Tips: If you’re prepping ahead, keep sauce and toppings separate and assemble right before serving. That keeps pita crisp and fresh. The portion size is perfect for little hands, but you can double or triple it for bigger appetites. Also, these snacks travel well in a cooler bag, making them ideal for picnics or school lunches. I tend to multitask by prepping toppings while the sauce mixes, saving precious minutes in the kitchen.
Cooking Tips & Techniques
Making this Easy Homemade Pizza Lunchables Snack feel just right is about a few little tricks I picked up along the way. First, don’t skip seasoning the tomato sauce—it makes all the difference. Adding a pinch of garlic powder and Italian herbs gives that authentic pizza flavor without needing a jar of pre-mixed sauce.
When spreading sauce, thin and even is key. Too much moisture will make the pita soggy fast, which kids hate. I learned this the hard way after one soggy lunchbox disaster. Also, shredding your own mozzarella, rather than pre-shredded, helps it melt smoother and taste fresher. It’s a minor step but honestly worth the extra second or two.
For melting, toaster ovens are my go-to—they crisp the edges slightly without drying out the toppings. Microwaves work in a pinch, but watch carefully so the cheese doesn’t bubble too much and get rubbery. If you’re short on time, assembling everything cold is totally fine and still delicious. The little pizzas still taste fresh, and kids love building their own snack.
Another tip: prepping toppings in advance speeds up assembly. I often slice pepperoni and veggies on Sunday, storing them in airtight containers for quick access during the week. This way, when the lunch crunch hits, I can pull everything together in no time. It’s a small kitchen hack that’s saved me more than once on busy days.
Variations & Adaptations
This recipe’s beauty is in its flexibility. Here are some ways to make it your own or suit different dietary needs:
- Gluten-free option: Use gluten-free mini flatbreads or crackers instead of pita. The texture changes a bit, but the flavors hold strong.
- Protein boost: Add diced cooked chicken, turkey sausage, or even crumbled tofu to the toppings for a heartier snack. I once added leftover creamy cajun chicken pieces for a spicy twist, which was a hit.
- Veggie-packed: Sneak in finely chopped spinach, mushrooms, or zucchini under the cheese. It melts right in and adds nutrition without fuss.
- Dairy-free: Swap mozzarella for plant-based cheese alternatives. There are some surprisingly good melts on the market now.
- Seasonal topping swaps: In summer, fresh cherry tomatoes or basil leaves freshen things up, while in winter, roasted red peppers or caramelized onions add depth.
Personally, I love switching out pepperoni for a combo of sun-dried tomatoes and artichoke hearts when I’m in a Mediterranean mood—kind of like the vibe in my easy Mediterranean chicken bowl. It’s a small change but makes the snack feel new and exciting without extra effort.
Serving & Storage Suggestions
Serve these pizza Lunchables snacks slightly warm for the best melty-cheese experience, but they’re equally tasty at room temperature—perfect for packing in lunchboxes. If you’re serving immediately, a sprinkle of fresh basil or a drizzle of olive oil adds a nice touch.
Pair them with crunchy carrot sticks, cucumber slices, or a small fruit cup to round out the meal. For drinks, a cold glass of milk or a sparkling water with lemon fits the bill nicely.
To store leftovers, wrap each snack individually in plastic wrap or place in airtight containers. They’ll keep in the fridge for up to 2 days but are best eaten fresh. You can reheat briefly in a toaster oven or microwave before serving.
Flavors tend to meld after a day, so if you pack these ahead, expect a slightly softer texture but a more developed tomato-cheese harmony. Just don’t forget to add fresh herbs or a pinch of extra cheese before serving to brighten things back up.
Nutritional Information & Benefits
Each serving of this Easy Homemade Pizza Lunchables Snack clocks in around 250–300 calories, depending on bread and toppings. It offers a balanced mix of carbohydrates from the pita, protein from the cheese and pepperoni, and healthy fats.
Tomato sauce brings lycopene, an antioxidant linked to heart health, while mozzarella provides calcium for bones. Using whole grain or gluten-free flatbreads can add fiber or accommodate dietary needs.
This snack is a gluten-friendly option if you choose your base wisely and can be adapted for dairy-free diets. It’s a far cry from processed store-bought Lunchables, offering more control over sodium and preservatives, which is a relief for health-conscious parents juggling busy schedules.
Conclusion
This Easy Homemade Pizza Lunchables Snack is a quiet little kitchen win for anyone juggling busy days and hungry kids. It’s simple, quick, and offers that familiar pizza joy without the hassle or mystery ingredients. What keeps me coming back is how easy it is to personalize—whether swapping toppings or adjusting for dietary needs, it always feels fresh.
Making lunch a little more fun and manageable doesn’t have to be complicated, and this snack proves it. I hope you find the same little joy in it as we have, and maybe even discover your own favorite twist. If you try it, I’d love to hear how you customize it or what toppings your family enjoys most. There’s something comforting about sharing recipes that bring a smile, one bite at a time.
FAQs About Easy Homemade Pizza Lunchables Snack
Can I make these pizza Lunchables ahead of time?
Yes! You can prepare toppings and sauce in advance and assemble just before serving to keep the pita from getting soggy. Fully assembled snacks can be stored in the fridge for up to 2 days.
What can I use if I don’t have mini pita bread?
Small round flatbreads, crackers, or even sliced bagels work well. Choose sturdy options that hold toppings without falling apart.
Is this recipe suitable for dairy-free diets?
Absolutely! Use plant-based cheese alternatives to keep it dairy-free. There are many good melting vegan cheeses available now.
Can I add vegetables to the snack?
Definitely! Finely chopped or thinly sliced veggies like bell peppers, olives, or spinach work great and add nutrition without changing the fun factor.
How do I reheat these snacks without making them soggy?
The best way is a toaster oven or conventional oven at 350°F (175°C) for 5-7 minutes. This crisps the base and melts the cheese nicely without sogginess. Microwaving works but can soften the bread.
Pin This Recipe!
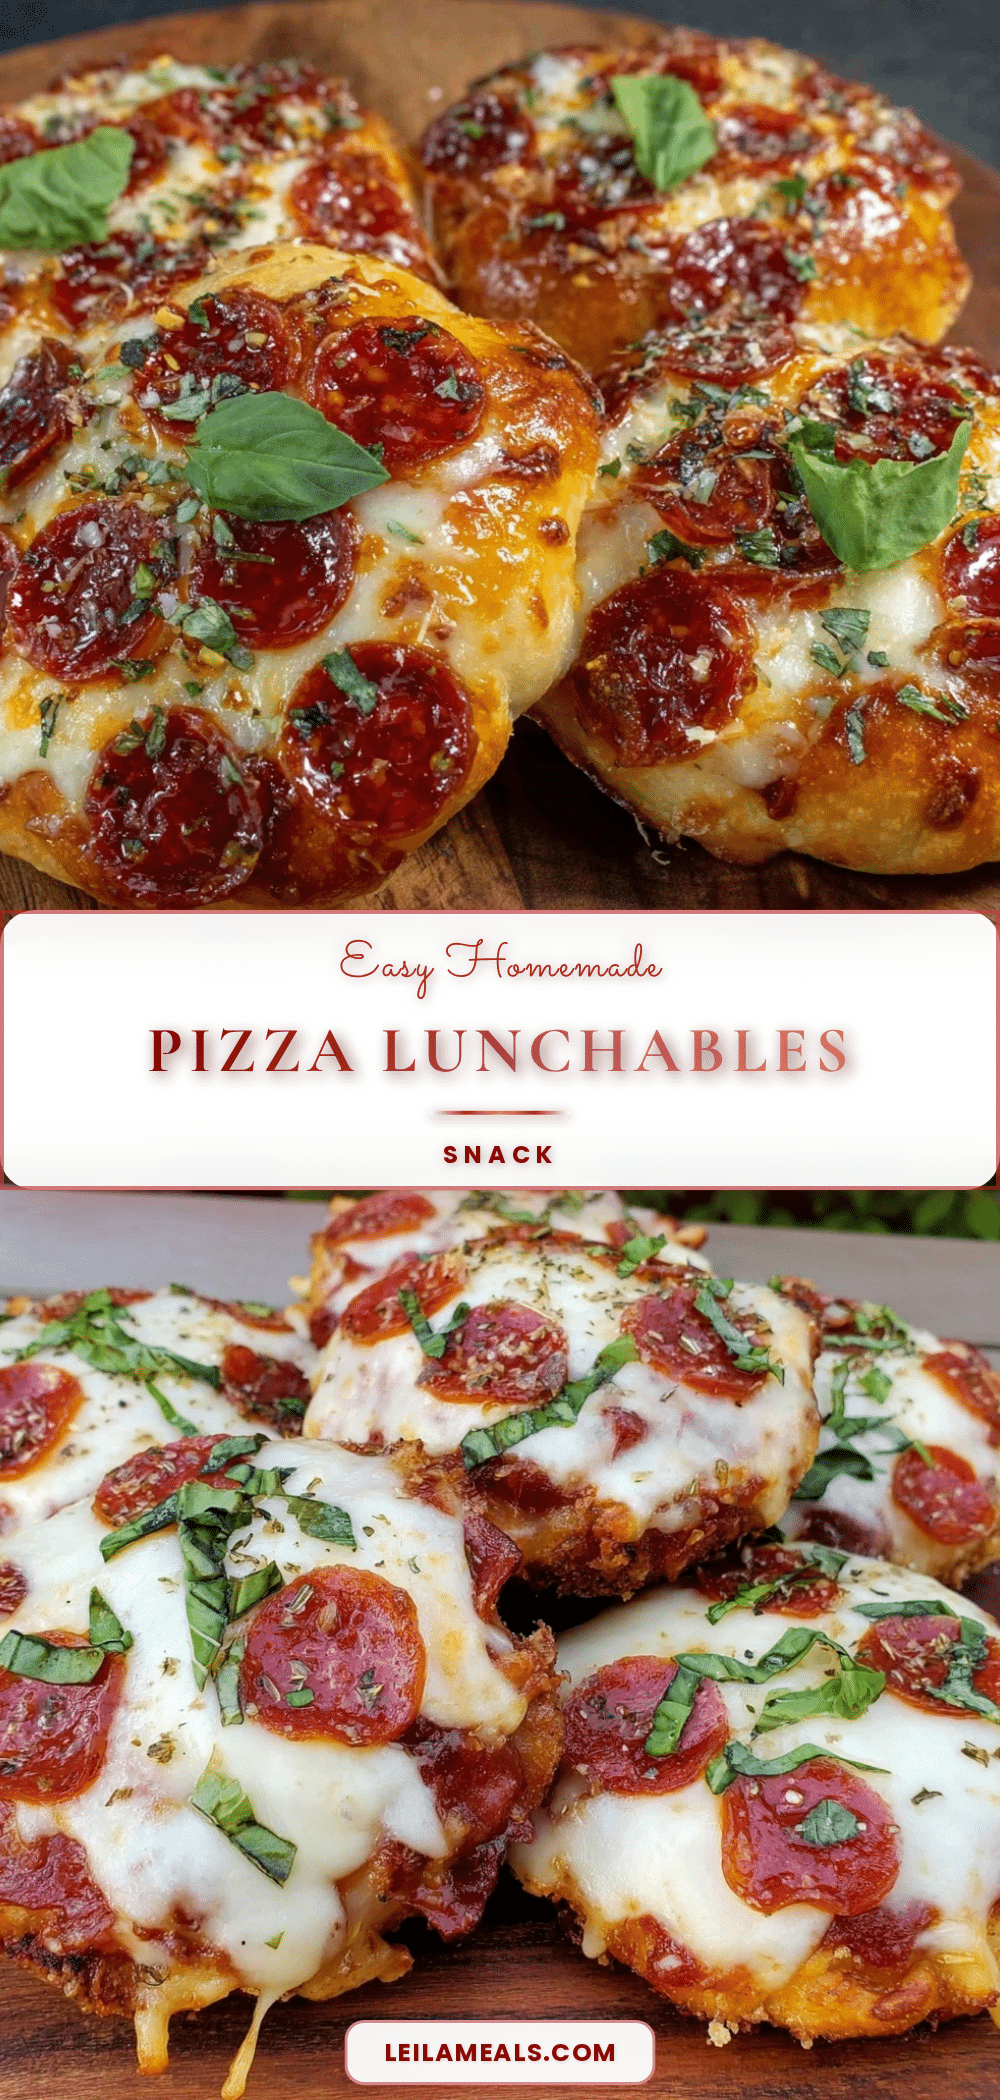
Easy Homemade Pizza Lunchables Snack Recipe for Quick Kids Lunches

A quick and easy homemade pizza Lunchables snack perfect for busy days, kids’ lunches, or a fun, customizable snack that requires no oven.
- Prep Time: 10 minutes
- Cook Time: 5-7 minutes (optional melting)
- Total Time: 15-17 minutes
- Yield: 4 servings 1x
- Category: Snack
- Cuisine: American
Ingredients
- 4 mini pita breads or small round flatbreads (about 4-inch diameter)
- ½ cup tomato sauce
- Pinch of garlic powder
- ½ teaspoon Italian seasoning
- 1 cup shredded mozzarella cheese
- 12 pepperoni slices (turkey pepperoni recommended)
- ¼ cup sliced black olives (optional)
- ¼ cup thinly sliced mini bell peppers (optional)
- Parmesan cheese for sprinkling (optional)
- Fresh basil leaves or dried oregano for garnish (optional)
Instructions
- In a small bowl, mix ½ cup of tomato sauce with a pinch of garlic powder and ½ teaspoon of Italian seasoning. Stir well to combine.
- Lay out 4 mini pitas or flatbreads on your work surface. If using pita, slice them in half horizontally for thinner rounds, or use as is for a thicker crust.
- Use a small spoon or butter knife to evenly spread about 1 tablespoon of the seasoned tomato sauce on each pita. Avoid overloading to prevent sogginess.
- Sprinkle about ¼ cup of shredded mozzarella over each sauced pita, covering the sauce evenly.
- Place 3 pepperoni slices on each pizza base. Add optional toppings like sliced black olives or bell peppers if desired.
- Optional: Melt the cheese by placing the assembled snacks on a baking sheet and heating in a toaster oven at 350°F for 5-7 minutes, or microwave on medium power for 45 seconds to 1 minute. Watch closely to avoid overcooking.
- Sprinkle with a little parmesan or dried oregano and let cool slightly before packing. Add fresh basil leaves for garnish if available.
Notes
Keep sauce and toppings separate if prepping ahead to avoid soggy pita. Use fresh shredded mozzarella for best melt. Toaster oven crisps edges without drying toppings; microwave works for quick melt but watch carefully. Snacks travel well in cooler bags and store up to 2 days refrigerated.
Nutrition
- Serving Size: 1 mini pizza snack (
- Calories: 275
- Sugar: 3
- Sodium: 550
- Fat: 15
- Saturated Fat: 7
- Carbohydrates: 22
- Fiber: 2
- Protein: 12
Keywords: pizza lunchables, homemade pizza snack, kids lunch, quick snack, easy pizza, no oven pizza, pizza lunchbox