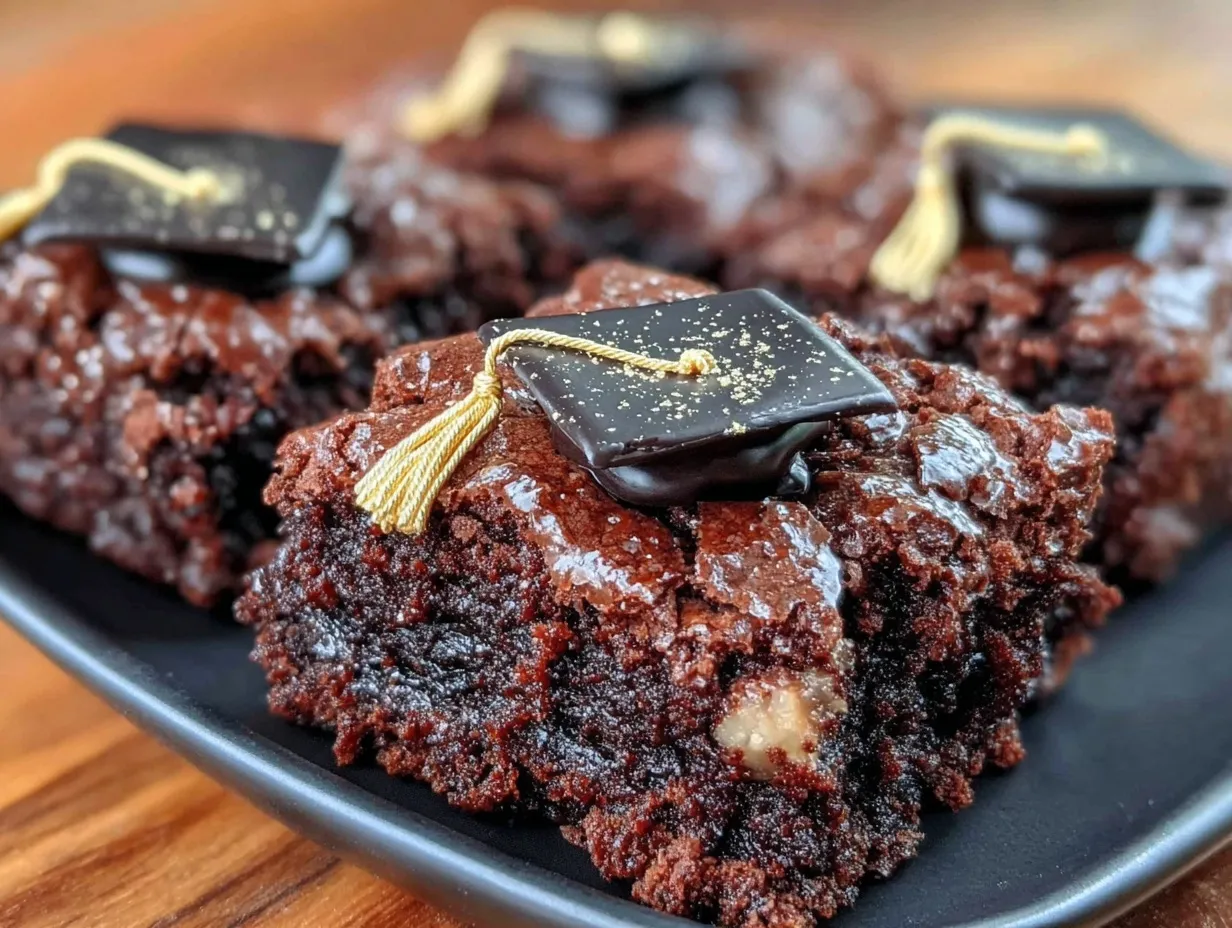
It was the kind of afternoon where the sun felt just right, and the kitchen was humming with the quiet buzz of last-minute party prep. I was elbow-deep in flour and cocoa powder, staring at a pile of cookie dough that stubbornly refused to roll out smoothly. Honestly, I wasn’t sure if these chocolate cookies would turn out to look anything like graduation caps—or if I’d even have time to pull it all together before guests arrived. But, you know, that’s the thing about these Perfect Graduation Cap Chocolate Cookies for celebrations: they started as a bit of a scramble, a hopeful experiment born out of a need to impress without stress.
My niece’s graduation was coming up, and she’s the kind of person who notices details, the little touches that make a party memorable. I wanted to bake something themed but easy, something that felt special without requiring me to be a professional decorator. After a couple of tries, some tweaks, and a surprising amount of chocolate smudges on my hands, these cookies became the star of the dessert table. The crisp edges, the rich chocolate flavor, and that unmistakable shape? They brought a quiet kind of celebration to the room, the kind that says “we did it” without shouting.
What stuck with me most wasn’t just the taste but the way these cookies made the day feel complete—like a small victory wrapped in frosting and fondant. So, if you’re looking for a treat that’s festive, approachable, and downright delicious, these chocolate cookies might just be your next go-to for graduation or any joyful milestone. It’s funny how a recipe born from a rushed afternoon has become a little tradition, quietly reminding me that the best celebrations sometimes come from the sweetest surprises.
Why You’ll Love This Recipe
- Quick & Easy: These cookies come together in under an hour, perfect for last-minute celebrations or busy schedules.
- Simple Ingredients: You likely have most of what’s needed in your pantry—no fancy or hard-to-find items required.
- Perfect for Celebrations: Whether it’s a graduation, milestone birthday, or any special occasion, these cookies fit right in.
- Crowd-Pleaser: Rich chocolate flavor with just the right amount of sweetness, pleasing both kids and adults alike.
- Creative & Fun: The graduation cap design adds a playful, themed touch without complicated decorating.
- Customizable: The recipe allows for easy swaps like dairy-free or gluten-free options, making it inclusive for guests.
What makes this recipe stand apart? It’s the balance between simplicity and charm. The way the cookie dough holds shape perfectly—courtesy of a little chilling trick—and the frosting that sets just right, giving you a smooth, matte finish that’s ideal for adding that iconic tassel detail. This isn’t just another chocolate cookie recipe; it’s the one you’ll want to pull out whenever you want to add a bit of ceremony without the fuss.
Honestly, after a few batches, I’ve come to appreciate how this recipe turns baking into a small celebration in itself—each cookie a little badge of achievement, ready to be shared and enjoyed.
What Ingredients You Will Need
This recipe uses simple, wholesome ingredients to deliver bold chocolate flavor and a festive finish without too much fuss. Most are pantry staples, easily accessible and adaptable.
- For the Chocolate Cookies:
- All-purpose flour (2 ¼ cups / 280g) – provides structure
- Unsweetened cocoa powder (¾ cup / 75g) – for that rich chocolate depth; I prefer Valrhona for a deep flavor
- Baking soda (1 tsp) – helps the cookies rise just right
- Salt (½ tsp) – balances sweetness
- Unsalted butter (1 cup / 227g), softened – adds richness and tenderness
- Granulated sugar (1 cup / 200g) – sweetness and crispness
- Brown sugar (½ cup / 110g), packed – for moisture and chewiness
- Large eggs (2), room temperature – binds the dough
- Pure vanilla extract (1 tsp) – enhances flavor
- For the Frosting & Decoration:
- Powdered sugar (2 cups / 240g) – for smooth, sweet frosting
- Unsalted butter (½ cup / 113g), softened – creamy base for frosting
- Milk or heavy cream (2-3 tbsp) – adjusts frosting consistency
- Black gel food coloring – for the cap color
- Yellow or gold icing gel – for tassel detail (optional)
- Miniature candy pearls or edible gold dust (optional) – add a little sparkle
You can swap all-purpose flour with a gluten-free blend if needed. For dairy-free options, try coconut oil in place of butter and use a non-dairy milk alternative for the frosting. It’s flexible, which makes it great for different dietary needs or preferences.
Equipment Needed
- Mixing bowls – a large one for dry ingredients and another for creaming butter and sugars
- Electric hand mixer or stand mixer – helps cream butter and sugar smoothly
- Measuring cups and spoons – accuracy matters for baking success
- Rubber spatula – perfect for scraping down bowl sides
- Rolling pin – to roll out dough evenly (or use your hands for a rustic touch)
- Graduation cap-shaped cookie cutter (about 3 inches / 7.5 cm) – the star of the show; if you don’t have one, a square cutter works fine with a little trimming
- Baking sheets lined with parchment paper – for even baking and easy cleanup
- Wire cooling rack – lets cookies cool completely without sogginess
- Small offset spatula or butter knife – for frosting application
- Fine piping tip or toothpick – to create tassel details
If you’re on a budget, you can improvise with a butter knife for spreading frosting and a clean, sharp knife to shape the caps. I’ve found that investing in a good-quality rolling pin and mixer really makes a difference in texture and ease, but you can absolutely make do with simpler tools.
Preparation Method
- Preheat and Prep: Preheat your oven to 350°F (175°C). Line two baking sheets with parchment paper. This step sets you up for smooth baking without sticking issues. (5 minutes)
- Mix Dry Ingredients: In a medium bowl, sift together 2 ¼ cups (280g) all-purpose flour, ¾ cup (75g) unsweetened cocoa powder, 1 tsp baking soda, and ½ tsp salt. Sifting helps avoid lumps and ensures even mixing. Set aside. (5 minutes)
- Cream Butter and Sugars: In a large bowl, use an electric mixer to cream 1 cup (227g) softened unsalted butter with 1 cup (200g) granulated sugar and ½ cup (110g) packed brown sugar until light and fluffy—about 3-4 minutes. This step is key for tender cookies. (7 minutes)
- Add Eggs and Vanilla: Beat in 2 large eggs, one at a time, followed by 1 tsp pure vanilla extract. The mixture should look smooth and glossy. (3 minutes)
- Combine Wet and Dry: Gradually add the dry ingredients into the wet mixture, mixing on low speed until just combined. Avoid overmixing to keep cookies tender. The dough will be thick and slightly sticky. (5 minutes)
- Chill the Dough: Wrap the dough in plastic wrap and chill for at least 1 hour (or up to overnight). Chilling firms the dough, which helps the cookies keep their graduation cap shape during baking. (1 hour or overnight)
- Roll and Cut: On a lightly floured surface, roll out the dough to about ¼ inch (6mm) thickness. Using a graduation cap-shaped cookie cutter (about 3 inches / 7.5 cm), cut out the cookies and transfer them to the prepared baking sheets, spacing about 2 inches (5 cm) apart. (10 minutes)
- Bake: Bake cookies in the preheated oven for 9-11 minutes. The edges should be set but not overly hard. If you notice spreading, chill the dough a bit longer next time. (9-11 minutes)
- Cool Completely: Allow cookies to cool on baking sheets for 5 minutes, then transfer to a wire rack to cool fully. This prevents sogginess when frosting. (15-20 minutes)
- Prepare Frosting: Beat ½ cup (113g) softened unsalted butter until creamy. Gradually add 2 cups (240g) powdered sugar, alternating with 2-3 tbsp milk or heavy cream, until you reach a spreadable consistency. Stir in black gel food coloring until the desired shade is achieved. (10 minutes)
- Frost and Decorate: Using a small offset spatula or butter knife, spread a thin layer of black frosting on each cookie to resemble the mortarboard. Use a fine piping tip or toothpick to add a yellow or gold icing tassel detail. Add candy pearls or edible dust if desired. Let set before serving. (15 minutes)
Pro tip: If your dough feels too sticky after chilling, dust your rolling surface lightly with flour but avoid adding too much or cookies will be dry. Also, keeping the frosting thin helps it dry faster and prevents smudging when stacking or packing.
Cooking Tips & Techniques
One of the keys to success with these Perfect Graduation Cap Chocolate Cookies is chilling the dough properly. I learned the hard way that skipping this step leads to cookies that spread too much and lose their shape. You know that moment when you open the oven door and your “cap” is more of a blob? Yeah, don’t let that happen.
When rolling the dough, keep the surface just lightly floured. Too much flour will dry out the dough, but too little and it sticks—find that happy medium. Also, roll from the center outwards to keep thickness even. Uneven dough means uneven baking, which can throw off the texture.
For frosting, I highly recommend using gel food coloring instead of liquid. It’s more concentrated, so you get that rich black without watering down the frosting. If you’re nervous about coloring, start with a small amount and add more gradually.
When decorating the tassels, patience is your friend. A toothpick works great for tiny details, and if you mess up, just scrape it off gently and try again after the frosting sets a bit. I’ve always found that letting the frosting set slightly before adding details leads to cleaner lines.
Lastly, multitask by prepping frosting while cookies bake and cool. That way, you’re ready to decorate as soon as they’re cool, which keeps things moving along smoothly.
Variations & Adaptations
There’s room to play with this recipe depending on your celebration vibe or dietary needs:
- Gluten-Free Option: Swap the all-purpose flour for a 1:1 gluten-free baking flour blend. Make sure it contains xanthan gum or add a pinch, so cookies hold together well.
- Vegan Version: Use coconut oil or vegan butter instead of butter, and a flax egg (1 tbsp ground flaxseed + 3 tbsp water) instead of eggs. For frosting, swap dairy milk with almond or oat milk.
- Flavor Twist: Add a teaspoon of espresso powder to the dough for a mocha kick that pairs amazingly with the chocolate.
- Decorating Fun: Instead of black frosting, try navy blue or your school colors to match the celebration theme. Use white or silver icing for the tassels to switch things up.
- Size Variations: Make mini versions by using a smaller cookie cutter, perfect for bite-sized party favors or dessert platters.
Personally, I once tried adding a sprinkle of sea salt on top before baking—total game changer for balancing the sweetness. It’s a little extra step but worth it if you like that salty-sweet combo.
Serving & Storage Suggestions
Serve these cookies at room temperature to enjoy the full chocolatey flavor and melt-in-your-mouth texture. They look fantastic arranged on a platter with some fresh flowers or alongside a cold glass of milk or hot coffee.
If you’re hosting a graduation party, these cookies pair nicely with berry punch or sparkling lemonade for a refreshing contrast. They also make great take-home gifts—wrap in clear cellophane with a ribbon for an easy, festive treat.
Store the cookies in an airtight container at room temperature for up to 5 days. If you want to keep them longer, freeze unfrosted cookies in a single layer, wrapped well in plastic wrap, up to 3 months. Thaw completely before frosting.
Once frosted, keep refrigerated if your environment is warm, but bring back to room temp before serving for best taste. The frosting texture improves after a little time out of the fridge, becoming silky and soft.
Nutritional Information & Benefits
Each cookie (based on 24 servings) contains approximately:
| Calories | 180 |
|---|---|
| Fat | 9g |
| Saturated Fat | 5g |
| Carbohydrates | 24g |
| Sugar | 15g |
| Protein | 2g |
| Fiber | 2g |
The unsweetened cocoa powder provides antioxidants, and using real butter adds richness without artificial ingredients. This recipe can be adapted for gluten-free or dairy-free diets, making it a versatile treat for many guests.
While these cookies are definitely an indulgence, pairing them with balanced meals and enjoying in moderation fits well with a realistic, joyful approach to eating.
Conclusion
These Perfect Graduation Cap Chocolate Cookies have become my go-to for celebrations because they strike a sweet spot between impressive and doable. The recipe is forgiving enough for bakers of all levels, yet the results look polished and festive. I love how these cookies bring a little extra joy to a milestone moment—like a small, edible trophy for all the hard work and excitement.
Feel free to tweak the decorations, swap ingredients to suit your needs, or adjust sizes to fit your party style. Baking these cookies gave me a quiet sense of accomplishment, and I hope they do the same for you. If you try them, I’d love to hear how you customized your caps or what celebration you baked them for—sharing those stories makes the recipe even sweeter.
Happy baking and congratulations to all the graduates out there!
FAQs
Can I make these cookies ahead of time?
Yes! You can bake the cookies and store them unfrosted for up to 3 days at room temperature. Frost them the day of your event for the best look and taste.
What if I don’t have a graduation cap cookie cutter?
No worries! Use a small square or diamond-shaped cutter and trim the edges with a knife to create the cap shape. It doesn’t have to be perfect to look charming.
How do I prevent the cookies from spreading too much?
Chilling the dough for at least an hour before cutting is key. Also, avoid over-creaming the butter and sugar, and make sure your oven is fully preheated.
Can I freeze these cookies after frosting?
It’s best to freeze them unfrosted. Frosted cookies can be frozen but may lose some decoration quality. Thaw completely before serving.
Is there a substitute for black gel food coloring?
You can mix blue and red gel colors to get black, but it’s tricky. Alternatively, use very dark cocoa powder in the frosting for a deep brown shade if you prefer natural coloring.
Pin This Recipe!
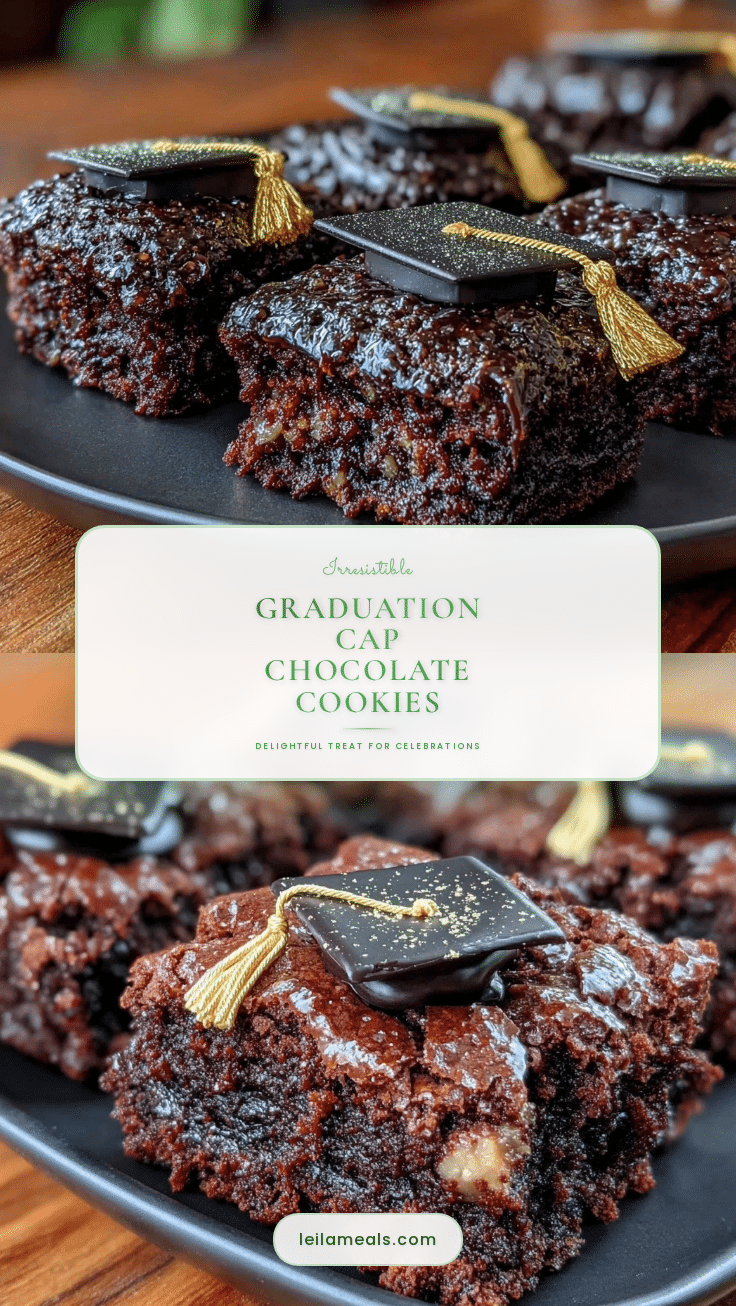
Perfect Graduation Cap Chocolate Cookies
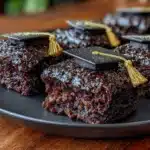
These chocolate cookies are easy to make, festive, and perfect for celebrations like graduations. They feature a rich chocolate flavor with a fun graduation cap design and customizable frosting.
- Prep Time: 25 minutes
- Cook Time: 10 minutes
- Total Time: 1 hour 35 minutes
- Yield: 24 servings 1x
- Category: Dessert
- Cuisine: American
Ingredients
- 2 ¼ cups (280g) all-purpose flour
- ¾ cup (75g) unsweetened cocoa powder
- 1 tsp baking soda
- ½ tsp salt
- 1 cup (227g) unsalted butter, softened
- 1 cup (200g) granulated sugar
- ½ cup (110g) packed brown sugar
- 2 large eggs, room temperature
- 1 tsp pure vanilla extract
- 2 cups (240g) powdered sugar
- ½ cup (113g) unsalted butter, softened (for frosting)
- 2–3 tbsp milk or heavy cream
- Black gel food coloring
- Yellow or gold icing gel (optional)
- Miniature candy pearls or edible gold dust (optional)
Instructions
- Preheat oven to 350°F (175°C). Line two baking sheets with parchment paper.
- In a medium bowl, sift together flour, cocoa powder, baking soda, and salt. Set aside.
- In a large bowl, cream softened butter with granulated sugar and brown sugar using an electric mixer until light and fluffy, about 3-4 minutes.
- Beat in eggs one at a time, then add vanilla extract until smooth and glossy.
- Gradually add dry ingredients to wet mixture on low speed until just combined. Dough will be thick and slightly sticky.
- Wrap dough in plastic wrap and chill for at least 1 hour or overnight.
- Roll dough on a lightly floured surface to about ¼ inch (6mm) thickness. Cut out cookies using a graduation cap-shaped cookie cutter (about 3 inches / 7.5 cm). Place cookies 2 inches apart on baking sheets.
- Bake for 9-11 minutes until edges are set but not hard. If cookies spread too much, chill dough longer next time.
- Cool cookies on baking sheets for 5 minutes, then transfer to wire rack to cool completely.
- Prepare frosting by beating softened butter until creamy. Gradually add powdered sugar alternating with milk or cream until spreadable. Stir in black gel food coloring until desired shade is reached.
- Spread a thin layer of black frosting on each cookie using an offset spatula or butter knife. Use a fine piping tip or toothpick to add yellow or gold icing tassel details. Add candy pearls or edible dust if desired. Let frosting set before serving.
Notes
Chill dough for at least 1 hour to prevent spreading and maintain shape. Use gel food coloring for vibrant frosting without thinning it. Lightly flour rolling surface to avoid sticking but avoid excess flour to keep cookies tender. Let frosting set slightly before adding tassel details for cleaner lines. Cookies can be stored unfrosted at room temperature for up to 3 days or frozen for up to 3 months. Frosted cookies should be refrigerated if warm and brought to room temperature before serving.
Nutrition
- Serving Size: 1 cookie
- Calories: 180
- Sugar: 15
- Fat: 9
- Saturated Fat: 5
- Carbohydrates: 24
- Fiber: 2
- Protein: 2
Keywords: graduation cookies, chocolate cookies, celebration treats, easy chocolate cookies, homemade cookies, festive cookies, graduation party dessert