There’s something quietly satisfying about those moments when you realize you’ve nailed a recipe that looks like it took hours, but honestly, you whipped it up between errands and a quick coffee break. The first time I made these perfect diploma sugar cookies with elegant royal icing was exactly that kind of day. I was scrambling to put together a little celebratory treat for a friend’s graduation party—nothing too fancy, but still something that felt special. I didn’t expect much; I mean, royal icing always intimidated me a bit, and sugar cookies can be hit or miss. But as I piped those delicate borders and stamped “Congrats” on each cookie, something clicked. The cookies turned out crisp yet tender, the icing smooth, glossy, and just the right amount of sweet—like they belonged on a fancy bakery platter.
What surprised me was how approachable the whole process really was, especially for a busy cook who isn’t about to spend all afternoon decorating. The recipe’s balance of simplicity and elegance stuck with me, and since then, I’ve found myself making these diploma sugar cookies for all sorts of celebrations—not just graduations. They’ve become my go-to when I want to impress without the stress.
There’s a quiet joy in seeing those little cookies lined up, each one uniquely decorated but perfectly polished. It’s the kind of recipe that invites you to slow down, focus on the details, and enjoy the moment—plus, it’s delicious enough that people keep asking for the recipe. Honestly, it’s the kind of baking that turns casual cooks into decorators without even realizing it.
Why You’ll Love This Recipe
- Quick & Easy: Ready from start to finish in about 90 minutes, perfect for last-minute celebrations or weekend baking bursts.
- Simple Ingredients: Pantry staples like butter, sugar, and eggs come together with basic baking essentials—no complicated shopping required.
- Perfect for Graduations and Celebrations: These diploma sugar cookies are tailor-made for marking milestones, yet adaptable for birthdays, holidays, or just because.
- Crowd-Pleaser: Kids and adults alike love the crisp texture and sweet, creamy royal icing that’s not overly sugary.
- Unbelievably Delicious: The cookie base is buttery and tender, while the royal icing dries to a smooth, elegant finish that feels special.
- What Makes It Different: Unlike other sugar cookie recipes, this one balances a firm edge with a soft center, ideal for holding detailed royal icing without cracking or spreading. The royal icing recipe is smooth and easy to pipe, with just the right dry-down time for layering intricate diploma-themed designs.
- It’s the kind of treat that makes you pause and savor the artistry—and the flavor—without fuss or frustration.
What Ingredients You Will Need
This recipe uses simple, wholesome ingredients to deliver bold flavor and satisfying texture without the fuss. Most are pantry staples, and a few can be swapped depending on your needs.
- For the Sugar Cookies:
- Unsalted butter, softened (adds richness and tenderness) – I prefer using Land O Lakes for consistent results
- Granulated sugar – for sweetness and slight crunch
- Large eggs, room temperature – helps with binding and moisture
- Pure vanilla extract – for classic flavor depth
- All-purpose flour – the base of the cookie; use King Arthur brand if available
- Baking powder – for a slight lift
- Salt – balances sweetness and enhances flavor
- For the Royal Icing:
- Powdered sugar, sifted – for smooth, lump-free icing
- Pasteurized egg whites or meringue powder – to achieve that glossy, stable finish
- Fresh lemon juice or vanilla extract – for flavor and slight acidity
- Water, as needed – to adjust consistency
- Gel food coloring (optional) – for decorating the diplomas in traditional or fun colors
Substitutions & Tips: For gluten-free options, almond flour works well but expect a slightly different texture. If you prefer dairy-free, swap butter with a firm coconut oil or vegan butter alternative. Meringue powder is a great stand-in for raw egg whites if you have safety concerns.
Equipment Needed
- Mixing bowls – a medium and a large one for separate tasks
- Electric hand mixer or stand mixer – crucial for smooth dough and perfect royal icing
- Measuring cups and spoons – precise measurements matter here
- Rolling pin – a classic wooden or silicone one works fine
- Cookie cutters shaped like diplomas or rectangles – if unavailable, a sharp knife for cutting shapes
- Parchment paper or silicone baking mats – prevents sticking and helps with even baking
- Cooling rack – for letting cookies cool evenly
- Piping bags and a variety of piping tips (small round tips recommended for fine details)
- Toothpicks or scribe tools – handy for smoothing icing or fixing tiny details
If you don’t have piping bags, small zip-top bags with a corner snipped off work surprisingly well. I’ve found that investing in a turntable for decorating speeds up the process and feels a bit more professional, but it’s totally optional.
Preparation Method
- Make the Cookie Dough (15 minutes): In a large bowl, cream together 1 cup (227g) softened unsalted butter and 1 cup (200g) granulated sugar using an electric mixer until light and fluffy—about 3-4 minutes. Beat in 1 large egg and 1 teaspoon pure vanilla extract until combined.
- Combine Dry Ingredients: In a separate bowl, whisk together 3 cups (375g) all-purpose flour, 1 teaspoon baking powder, and ½ teaspoon salt. Gradually add dry ingredients into the wet mixture, mixing on low speed until dough forms and pulls away from the sides.
- Chill the Dough (at least 1 hour): Shape dough into a disk, wrap in plastic wrap, and refrigerate. This step prevents spreading and helps the dough firm up for clean cookie shapes.
- Preheat Oven & Prepare Baking Sheets (10 minutes): Preheat your oven to 350°F (175°C). Line baking sheets with parchment paper or silicone mats.
- Roll and Cut the Dough (15 minutes): Lightly flour your surface and rolling pin. Roll dough to about ¼-inch (6mm) thickness. Cut out diploma shapes using cookie cutters or a knife. Transfer cookies gently to baking sheets, spacing about 1 inch (2.5 cm) apart.
- Bake the Cookies (10-12 minutes): Bake until edges are just golden—watch closely because they can go from perfect to overdone quickly. They should feel set but still soft to the touch.
- Cool Completely (15 minutes): Transfer cookies to a wire rack to cool thoroughly before decorating—this keeps the icing from melting and sliding off.
- Prepare Royal Icing (10 minutes): In a clean bowl, beat 3 cups (360g) sifted powdered sugar with 3 tablespoons meringue powder and 5-6 tablespoons water (or pasteurized egg whites). Add ½ teaspoon lemon juice or vanilla extract for flavor. Mix on medium-high until stiff peaks form—about 5-7 minutes. Adjust water to reach piping consistency (should hold its shape but still be smooth).
- Color and Fill Piping Bags: Divide icing into small bowls if using multiple colors. Add gel food coloring as desired and mix well. Transfer to piping bags fitted with small round tips.
- Decorate the Cookies: Start by outlining the diploma shape and flooding the center with thinner icing. Let this base dry for about 30 minutes. Then pipe the diploma details—borders, ribbons, and text like “Congrats” or the graduate’s name. Use toothpicks to smooth edges or fix small mistakes. Allow icing to dry completely for at least 2 hours before stacking or packaging.
Pro tip: When rolling dough, avoid over-flouring your surface to keep cookies tender. Also, if your dough gets too warm, pop it back in the fridge for 10 minutes before cutting. I learned that the hard way after a sticky disaster once!
Cooking Tips & Techniques
- Keep Dough Cool: Warm dough can spread too much. Chill it well before rolling and bake in small batches if your kitchen is warm.
- Use Room Temperature Ingredients: For the butter and eggs, room temp helps everything blend smoothly and evenly.
- Don’t Overmix: Overworking the dough develops gluten, making cookies tough. Mix just until combined.
- Test One Cookie First: Baking a single cookie first helps you check oven temperature and baking time—adjust accordingly.
- Royal Icing Consistency: Practice piping with different consistencies—outline icing should be thicker to hold shape, flood icing thinner to fill areas smoothly.
- Drying Time: Patience is key—letting the royal icing dry fully prevents smudges and cracking. Overnight drying is often best.
- Storage Tip: Store decorated cookies in an airtight container with parchment between layers to keep details intact.
- Personal Lesson: I once tried rushing the icing drying and ended up with fingerprints all over my diplomas. Not fun, but a good reminder to slow down!
Variations & Adaptations
- Gluten-Free Version: Swap all-purpose flour for a 1:1 gluten-free baking flour blend. Expect a slightly denser cookie but still delicious.
- Flavored Royal Icing: Add almond extract or citrus zest to the icing for a subtle twist that pairs beautifully with the buttery cookie.
- Vegan Adaptation: Use vegan butter and substitute egg with flax egg (1 tablespoon ground flaxseed + 3 tablespoons water) in the dough. Use aquafaba (chickpea water) whipped to stiff peaks instead of egg whites for royal icing.
- Seasonal Touch: For holiday graduations, try using red and green gel colors or gold shimmer dust on the icing for extra sparkle.
- Creative Shapes: If diploma shapes aren’t handy, cut cookies into scrolls or use rectangle cutters and decorate with scrollwork piping to mimic diplomas.
Personally, I once swapped lemon juice in the royal icing for a splash of fresh orange juice and it gave the cookies a subtle brightness that made them feel extra special at a springtime graduation.
Serving & Storage Suggestions
Serve your diploma sugar cookies at room temperature on a pretty platter. They pair wonderfully with a cup of tea, coffee, or even sparkling cider for celebrations. Presentation-wise, stacking them with parchment paper in between layers keeps the icing pristine.
To store, keep cookies in an airtight container at room temperature for up to 5 days. If you want to keep them longer, freezing is an option—place cookies on a baking sheet to freeze individually, then transfer to a freezer-safe container. Thaw at room temperature, still wrapped, to prevent condensation from damaging the icing.
Reheating isn’t really needed, but if you like, a gentle warm-up in a low oven (about 200°F/95°C for 5 minutes) can refresh the cookie’s texture without melting the icing.
Over time, the flavors meld nicely, and the royal icing hardens further, giving a satisfying snap when you bite into the cookies.
Nutritional Information & Benefits
Each cookie (assuming a standard 3-inch size) contains approximately 150-180 calories, with a balance of carbohydrates and fat primarily from butter and sugar. The recipe is naturally free from nuts unless you add flavorings, and can be made gluten-free with simple swaps.
The butter provides some vitamin A and essential fatty acids, while the egg contributes protein. Royal icing is mostly sugar, so moderation is key.
From a wellness perspective, these cookies are a treat to enjoy mindfully—perfect for marking special moments that bring joy and connection.
Conclusion
Perfect diploma sugar cookies with elegant royal icing are more than just pretty treats—they’re a way to celebrate milestones with style and sweetness. Whether you’re a casual baker or someone who loves adding that personal touch to parties, this recipe offers a satisfying blend of ease and sophistication.
Feel free to tweak the flavors, colors, and designs to fit your occasion or mood. I love how this recipe invites creativity without pressure—giving you a delicious canvas that always impresses.
Give it a try, and I’d love to hear how your diploma cookies turn out. There’s something truly rewarding about sharing these little edible certificates of celebration.
Happy baking—and here’s to many sweet successes ahead!
Frequently Asked Questions (FAQs)
Can I make the cookie dough ahead of time?
Yes! The dough can be wrapped tightly and refrigerated for up to 3 days or frozen for up to 1 month. Just thaw in the fridge before rolling out.
How do I fix royal icing that’s too runny or too thick?
If it’s too runny, add more powdered sugar a tablespoon at a time. If it’s too thick, add a few drops of water gradually until you reach the desired consistency.
Is it safe to use raw egg whites in royal icing?
Using pasteurized egg whites or meringue powder is recommended for safety. Raw egg whites carry a small risk of salmonella.
Can I store decorated cookies for several days?
Yes, store them in an airtight container at room temperature. Avoid refrigerating as it can cause moisture to affect the icing.
What’s the best way to get smooth edges on my cookies?
Chilling the dough well, rolling evenly, and using sharp cookie cutters help. Also, avoid over-flouring the surface to keep edges clean and crisp.
Pin This Recipe!
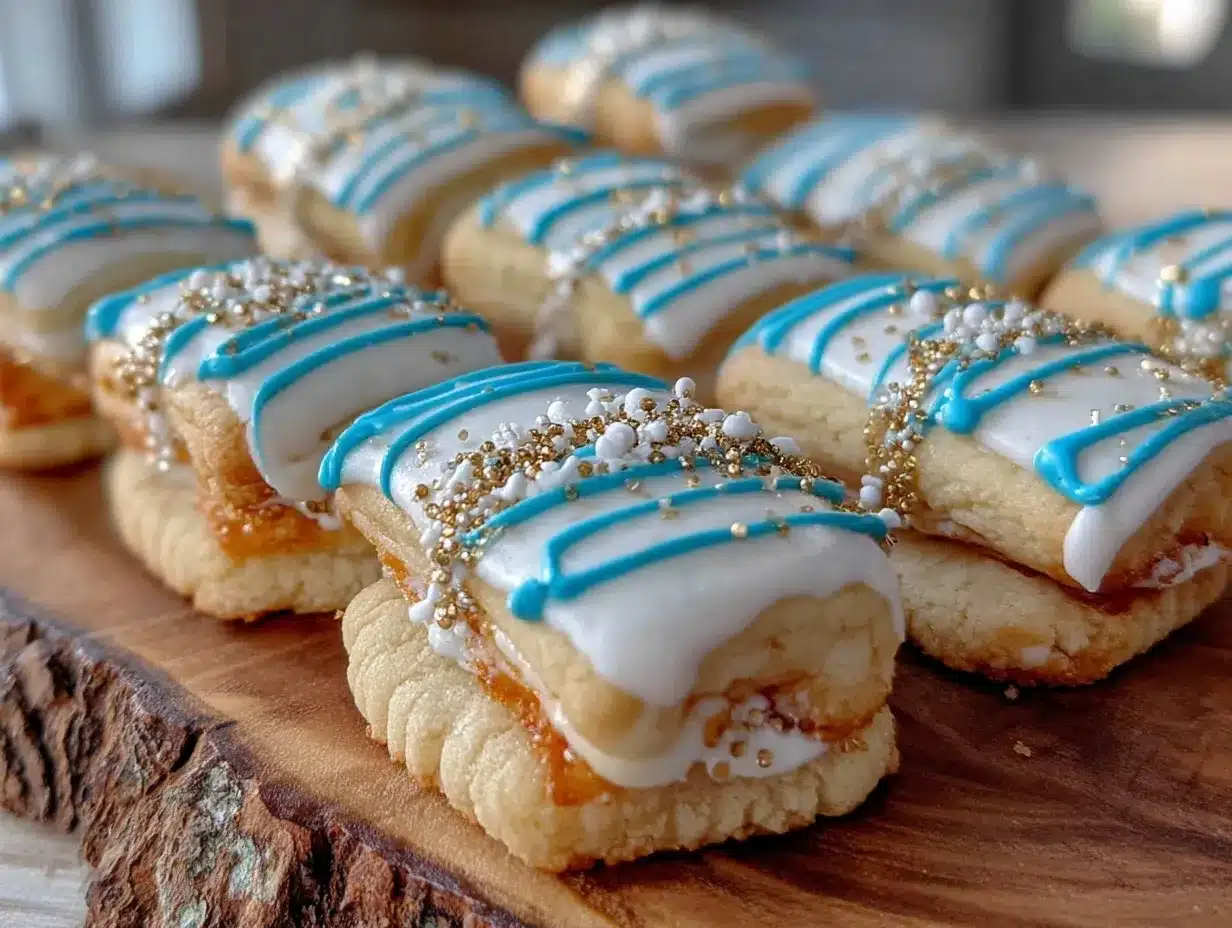
Perfect Diploma Sugar Cookies Recipe Easy Homemade Elegant Royal Icing Tutorial
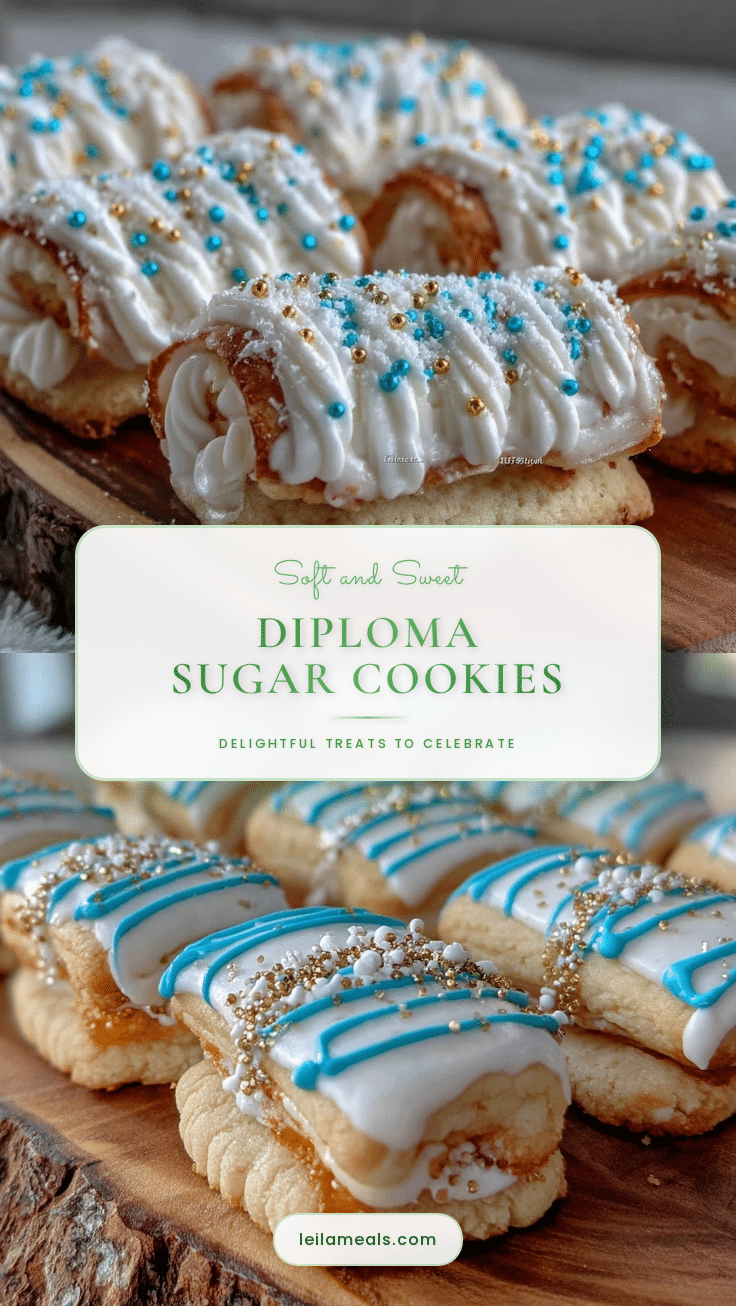
These diploma sugar cookies feature a crisp yet tender texture with smooth, glossy royal icing, perfect for celebrations like graduations. The recipe balances simplicity and elegance, making it approachable for busy bakers.
- Prep Time: 30 minutes
- Cook Time: 12 minutes
- Total Time: 90 minutes
- Yield: 24 cookies 1x
- Category: Dessert
- Cuisine: American
Ingredients
- 1 cup (227g) unsalted butter, softened
- 1 cup (200g) granulated sugar
- 1 large egg, room temperature
- 1 teaspoon pure vanilla extract
- 3 cups (375g) all-purpose flour
- 1 teaspoon baking powder
- ½ teaspoon salt
- 3 cups (360g) powdered sugar, sifted
- 3 tablespoons meringue powder or pasteurized egg whites
- 5–6 tablespoons water (adjust for consistency)
- ½ teaspoon fresh lemon juice or vanilla extract
- Gel food coloring (optional)
Instructions
- In a large bowl, cream together softened unsalted butter and granulated sugar using an electric mixer until light and fluffy, about 3-4 minutes.
- Beat in the large egg and pure vanilla extract until combined.
- In a separate bowl, whisk together all-purpose flour, baking powder, and salt.
- Gradually add dry ingredients into the wet mixture, mixing on low speed until dough forms and pulls away from the sides.
- Shape dough into a disk, wrap in plastic wrap, and refrigerate for at least 1 hour.
- Preheat oven to 350°F (175°C). Line baking sheets with parchment paper or silicone mats.
- Lightly flour your surface and rolling pin. Roll dough to about ¼-inch (6mm) thickness.
- Cut out diploma shapes using cookie cutters or a knife. Transfer cookies gently to baking sheets, spacing about 1 inch apart.
- Bake for 10-12 minutes until edges are just golden and cookies feel set but still soft to the touch.
- Transfer cookies to a wire rack to cool completely before decorating, about 15 minutes.
- Prepare royal icing by beating powdered sugar, meringue powder, and water (or pasteurized egg whites) on medium-high until stiff peaks form, about 5-7 minutes. Add lemon juice or vanilla extract for flavor. Adjust water to reach piping consistency.
- Divide icing into small bowls if using multiple colors. Add gel food coloring as desired and mix well. Transfer to piping bags fitted with small round tips.
- Decorate cookies by outlining the diploma shape and flooding the center with thinner icing. Let dry for about 30 minutes.
- Pipe diploma details such as borders, ribbons, and text. Use toothpicks to smooth edges or fix small mistakes.
- Allow icing to dry completely for at least 2 hours before stacking or packaging.
Notes
Keep dough cool to prevent spreading. Use room temperature ingredients for best results. Avoid overmixing dough to keep cookies tender. Let royal icing dry fully to prevent smudges and cracking. Store decorated cookies in airtight containers with parchment paper between layers. Dough can be refrigerated up to 3 days or frozen up to 1 month. Use pasteurized egg whites or meringue powder for safety.
Nutrition
- Serving Size: 1 cookie (approximat
- Calories: 165
- Sugar: 16
- Sodium: 90
- Fat: 7
- Saturated Fat: 4.5
- Carbohydrates: 25
- Fiber: 0.5
- Protein: 2
Keywords: sugar cookies, royal icing, diploma cookies, graduation cookies, easy sugar cookies, homemade cookies, celebration treats