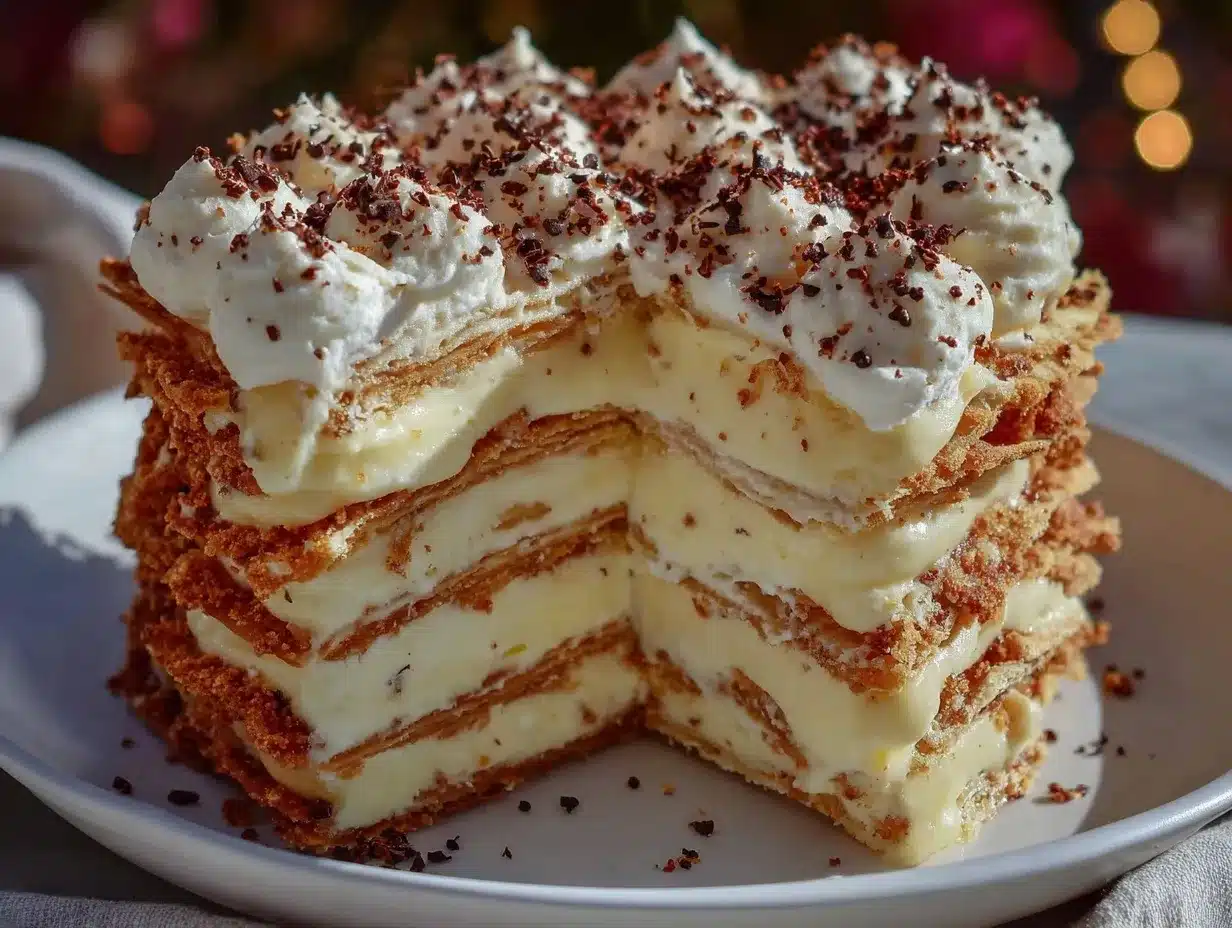
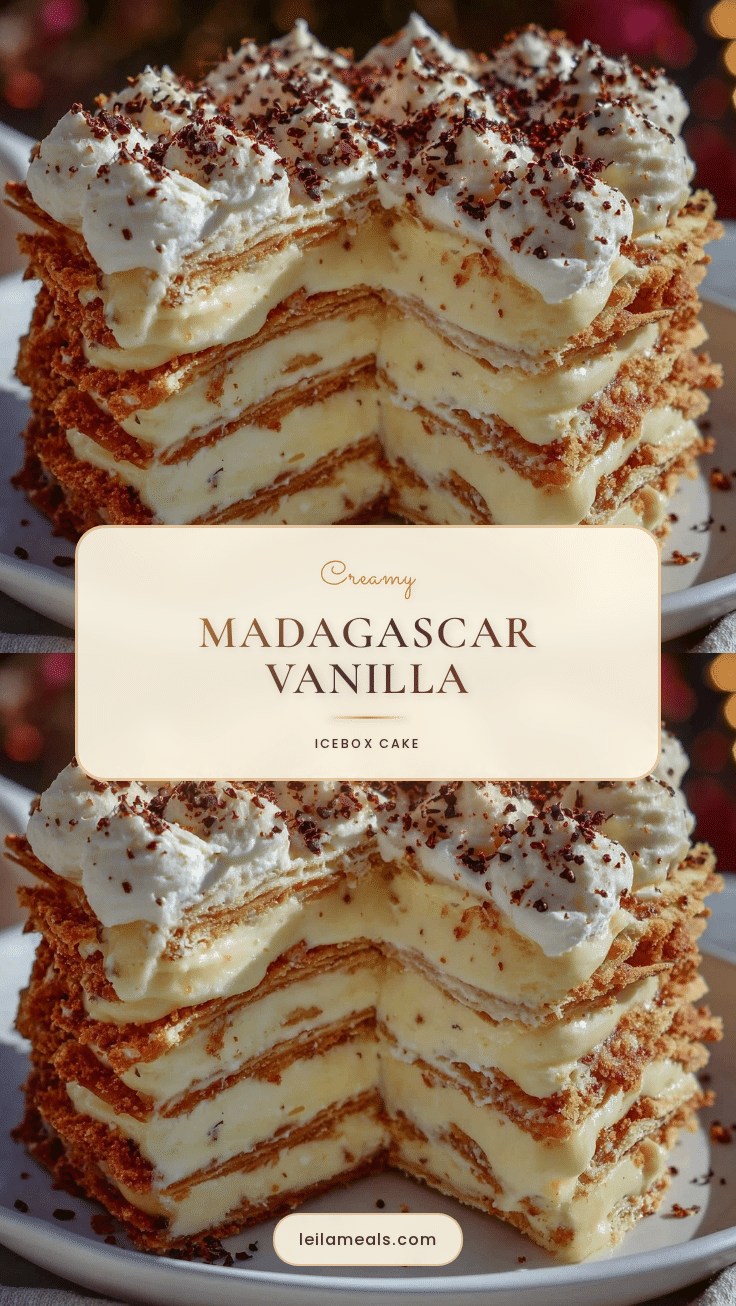
Let me tell you, the scent of Madagascar vanilla swirling through a chilled cake is enough to make anybody’s mouth water. The first time I whipped up this Creamy Madagascar Vanilla Icebox Cake, I was instantly hooked—there’s just something about those layers of silky cream and delicate cookies that create the kind of moment where you pause, take a deep breath, and just smile because you know you’re onto something truly special. When I was knee-high to a grasshopper, my grandma used to make a similar no-bake dessert, but this recipe adds a modern twist with the rich, aromatic vanilla from Madagascar, making it even more irresistible.
Honestly, my family couldn’t stop sneaking pieces off the cooling rack (and I can’t really blame them). It’s dangerously easy to put together, yet the creamy texture and layered delight feel like pure, nostalgic comfort. You know what’s great? This icebox cake is perfect for potlucks, a sweet treat for your kids after school, or just a way to brighten up your Pinterest cookie board with something a bit more elegant and unexpected.
I’ve tested this recipe more times than I can count—in the name of research, of course—and it’s become a staple for family gatherings, gifting, and those moments when you want dessert that feels like a warm hug. You’re going to want to bookmark this one, trust me.
Why You’ll Love This Creamy Madagascar Vanilla Icebox Cake Recipe
Having spent years tweaking chilled desserts, I can say this icebox cake stands out for several reasons. It’s not just another layered cake—it’s a showstopper that’s surprisingly simple to make.
- Quick & Easy: Comes together in under 30 minutes, perfect for busy weeknights or last-minute dessert cravings.
- Simple Ingredients: No fancy grocery trips needed; you likely have most of these pantry staples hiding in your kitchen.
- Perfect for Any Occasion: Whether it’s a summer BBQ, holiday party, or casual afternoon coffee, this dessert fits right in.
- Crowd-Pleaser: The creamy vanilla layers paired with crisp cookies always get rave reviews from kids and adults alike.
- Unbelievably Delicious: The texture combo is next-level comfort food—silky, crunchy, and sweet in perfect harmony.
What sets this apart is the use of pure Madagascar vanilla extract, which lends a deep, floral aroma you won’t find in ordinary vanilla. Plus, the layering technique ensures every bite has just the right balance of creaminess and cookie crunch. This recipe isn’t just good—it’s the kind that makes you close your eyes after the first bite and sigh with happiness. It’s comfort food reimagined—fresher, faster, but with the same soul-soothing satisfaction that feels just right.
What Ingredients You Will Need
This Creamy Madagascar Vanilla Icebox Cake uses simple, wholesome ingredients to deliver bold flavor and a satisfying texture without any fuss. Most are pantry staples, and substitutions are easy if you need to tweak things.
- For the Cream Layers:
- 2 cups (480 ml) heavy whipping cream (cold for best whipping)
- 1/2 cup (100 g) granulated sugar
- 1 tablespoon pure Madagascar vanilla extract (the star of the show!)
- 8 oz (225 g) cream cheese, softened (adds richness and body)
- For the Cookies:
- 1 package (about 12 oz / 340 g) graham crackers or thin vanilla wafers (I recommend Nabisco Honey Maid for best texture)
- Optional Toppings:
- Fresh berries (strawberries, blueberries, or raspberries) for a pop of color and tartness
- Toasted sliced almonds for crunch
- Drizzle of honey or caramel sauce
If you want to make this dairy-free, swap the heavy cream for coconut cream and use a dairy-free cream cheese alternative. For gluten-free, almond flour cookies or gluten-free wafers work beautifully. Fresh seasonal fruit can replace the optional toppings depending on what’s ripe and ready where you live.
Equipment Needed
- Large mixing bowl – for whipping the cream and mixing the cream cheese
- Electric mixer or stand mixer – honestly, it’s a huge time saver to get those stiff peaks for the cream
- Spatula – for folding the layers gently without deflating the cream
- 9×13 inch (23×33 cm) rectangular glass or ceramic baking dish – perfect for layering the cake
- Measuring cups and spoons – precision matters for sugar and vanilla
- Plastic wrap or airtight lid – to cover the cake while it chills in the fridge
If you don’t have an electric mixer, a hand whisk will work, but be prepared for a bit of an arm workout! I’ve also made this in smaller dishes for individual servings, which is great if you want to impress guests with a personal touch. Budget-wise, you can find simple mixers under $30 that do the job well.
Preparation Method
- Chill Your Equipment: Place your mixing bowl and beaters in the freezer for about 15 minutes before you start. Cold tools help the cream whip faster and hold better. (Time: 15 minutes)
- Whip the Cream: Pour 2 cups (480 ml) of cold heavy cream into the chilled bowl. Beat on medium-high speed until soft peaks form, about 3-5 minutes. (Look for the cream to hold its shape but still be smooth.)
- Combine Sugar and Cream Cheese: In another bowl, beat the softened 8 oz (225 g) cream cheese with 1/2 cup (100 g) sugar and 1 tablespoon Madagascar vanilla extract until smooth and creamy. This gives your cream layers a slight tang and body.
- Fold Cream into Cream Cheese Mix: Gently fold the whipped cream into the cream cheese mixture in batches, using a spatula. Be careful not to overmix; you want to keep that airy texture. (Tip: Fold by scraping the sides and turning the bowl rather than stirring aggressively.)
- Prepare the Cookies: Lay out a single layer of graham crackers or vanilla wafers in your 9×13 inch (23×33 cm) dish. If needed, break cookies to fit snugly without gaps.
- Layering: Spread a generous layer of the creamy mixture over the cookie base, smoothing it evenly. Repeat layering cookies and cream mixture until you have about 3-4 layers, ending with cream on top. (If you want extra flair, add a sprinkle of toasted almonds or a few berries between layers.)
- Chill the Cake: Cover the dish tightly with plastic wrap and refrigerate for at least 6 hours, preferably overnight. This resting time lets the cookies soften and soak up that luscious cream flavor.
- Serving: Before serving, garnish with fresh berries or a light drizzle of honey for an extra touch. Slice with a sharp knife dipped in hot water to get clean cuts.
Common pitfall: If the cream isn’t whipped stiff enough, the cake might be too runny. If overwhipped, it can turn grainy—so keep an eye on those peaks! Also, don’t rush the chilling; the magic happens as the cake sets.
Cooking Tips & Techniques
Whipping cream is an art, and honestly, it took me a few tries to get it just right. Always start with cold cream and chilled tools—warm cream just won’t hold its structure. When folding the whipped cream into the cream cheese, be gentle; overmixing can deflate your airy base and lead to a dense filling.
For the cookies, I’ve learned that the type you choose makes a big difference. Graham crackers absorb the cream beautifully, turning soft but still with a touch of bite. Vanilla wafers are thinner and create a more delicate texture. If you want a little crunch, you can partially dip cookies in melted chocolate before layering.
Timing wise, prepping this dessert a day ahead is a lifesaver. It frees you up on the day of your event and gives the flavors time to meld. I like to whip up the cream and cream cheese mixture first, then assemble the layers quickly to avoid soggy cookies too early.
One trick? When slicing the cake, warm your knife under hot water and wipe it dry between cuts—this helps you get neat, Instagram-worthy slices every time.
Variations & Adaptations
- Chocolate Lover’s Version: Add cocoa powder to the cream cheese mixture or layer in some chocolate ganache between layers.
- Berry Swirl: Fold in a berry compote or fresh mashed berries into the cream for a fruity twist.
- Dairy-Free Adaptation: Use coconut cream whipped until fluffy and a vegan cream cheese alternative; swap cookies for gluten-free or nut-based biscuits.
- Alcohol-Infused: For adults, a splash of rum or coffee liqueur in the cream mixture adds a sophisticated note.
- Seasonal Spice: Stir in a pinch of cinnamon or cardamom for a cozy fall-inspired flavor.
I once tried layering crushed pistachios between layers for a nutty surprise—totally worth it! Feel free to get creative and make this recipe your own.
Serving & Storage Suggestions
This icebox cake is best served chilled, straight from the refrigerator. It looks stunning on a glass platter, especially topped with a scattering of fresh berries or edible flowers. Pair it with a cup of strong coffee or a chilled glass of Moscato for an elegant touch.
Store leftovers tightly covered in the fridge for up to 3 days. The flavors actually develop and deepen after a day, making it even tastier. If you want to keep it longer, this cake freezes well—wrap tightly in plastic and foil, then thaw overnight in the fridge before serving.
When reheating (if you must), avoid the microwave—it’ll ruin that creamy texture. Instead, let it sit at room temperature for 15-20 minutes to soften slightly for easier slicing.
Nutritional Information & Benefits
This Creamy Madagascar Vanilla Icebox Cake is a treat, but with some wholesome ingredients. One serving (about 1/12th of the cake) contains approximately:
| Calories | 280 kcal |
|---|---|
| Fat | 18 g |
| Carbohydrates | 25 g |
| Protein | 3 g |
Madagascar vanilla is known for its antioxidant properties, and using real vanilla extract means you’re getting a natural flavor boost without artificial additives. Heavy cream and cream cheese provide calcium and vitamin A, though this cake is definitely a dessert to enjoy in moderation. For those watching gluten, switching to gluten-free cookies makes this accessible, and dairy-free versions are easy to create as well.
Conclusion
If you’ve been searching for a dessert that’s creamy, dreamy, and packed with that unmistakable Madagascar vanilla charm, this icebox cake is your golden ticket. It’s quick to whip together, uses simple ingredients, and brings a layered delight that’s impossible to resist. I love this recipe because it feels like a celebration in every bite, yet it’s so relaxed to make (no oven fussing!).
Give it a try, tweak it to your taste, and don’t forget to share how it goes—I’m always curious about your personal twists! Trust me, once you’ve had this silky, vanilla-scented treat, you’ll be reaching for it again and again.
FAQs About Creamy Madagascar Vanilla Icebox Cake
How long should I chill the icebox cake before serving?
Ideally, chill it for at least 6 hours or overnight. This lets the cookies soften and flavors meld perfectly.
Can I make this cake ahead of time?
Absolutely! It’s actually better made a day ahead—just cover and keep refrigerated until ready to serve.
What can I substitute if I don’t have Madagascar vanilla?
Pure vanilla extract works fine, but Madagascar vanilla has a deeper, more floral aroma. If unavailable, make sure to use high-quality vanilla for best flavor.
Can I use different cookies instead of graham crackers?
Yes! Thin vanilla wafers, digestive biscuits, or gluten-free cookies all work well depending on your preference.
Is this recipe suitable for freezing?
Yes, you can freeze the cake wrapped tightly. Thaw overnight in the fridge before serving for best texture.
Pin This Recipe!
Creamy Madagascar Vanilla Icebox Cake Recipe Easy Layered Delight

A no-bake, layered icebox cake featuring silky cream and delicate cookies infused with pure Madagascar vanilla extract. Perfect for potlucks, family gatherings, or a sweet treat any time.
- Prep Time: 20 minutes
- Cook Time: 0 minutes
- Total Time: 6 hours 20 minutes
- Yield: 12 servings 1x
- Category: Dessert
- Cuisine: American
Ingredients
- 2 cups (480 ml) heavy whipping cream (cold for best whipping)
- 1/2 cup (100 g) granulated sugar
- 1 tablespoon pure Madagascar vanilla extract
- 8 oz (225 g) cream cheese, softened
- 1 package (about 12 oz / 340 g) graham crackers or thin vanilla wafers
- Optional toppings: fresh berries (strawberries, blueberries, or raspberries)
- Optional toppings: toasted sliced almonds
- Optional toppings: drizzle of honey or caramel sauce
Instructions
- Chill your mixing bowl and beaters in the freezer for about 15 minutes before starting.
- Pour 2 cups of cold heavy cream into the chilled bowl and beat on medium-high speed until soft peaks form, about 3-5 minutes.
- In another bowl, beat the softened 8 oz cream cheese with 1/2 cup sugar and 1 tablespoon Madagascar vanilla extract until smooth and creamy.
- Gently fold the whipped cream into the cream cheese mixture in batches using a spatula, being careful not to overmix.
- Lay out a single layer of graham crackers or vanilla wafers in a 9×13 inch dish, breaking cookies if needed to fit snugly.
- Spread a generous layer of the creamy mixture over the cookie base, smoothing evenly. Repeat layering cookies and cream mixture for 3-4 layers, ending with cream on top. Optionally add toasted almonds or berries between layers.
- Cover the dish tightly with plastic wrap and refrigerate for at least 6 hours, preferably overnight.
- Before serving, garnish with fresh berries or a drizzle of honey. Slice with a sharp knife dipped in hot water for clean cuts.
Notes
Use cold cream and chilled tools for best whipping results. Fold whipped cream gently into cream cheese mixture to keep airy texture. Chill cake at least 6 hours or overnight for best flavor and texture. Warm knife under hot water before slicing for clean cuts. Substitute coconut cream and dairy-free cream cheese for dairy-free version; use gluten-free cookies for gluten-free option.
Nutrition
- Serving Size: 1 slice (1/12th of c
- Calories: 280
- Fat: 18
- Carbohydrates: 25
- Protein: 3
Keywords: icebox cake, vanilla dessert, no-bake cake, Madagascar vanilla, layered cake, creamy dessert, easy dessert, graham cracker cake